Conversion of the Telemaster 40 to Electric Power – Part 3

When is the 300th flight a maiden?  Telemaster 40 returns to flight once more!

Since the last update about 6 months ago, I finished up the covering job on the Telemaster and got all the servos and radio gear back in the old Telemaster 40.  The usual challenges of hindging, recovering and getting control horns back in place kept me avoiding these somewhat onerous tasks but once I got past some of that and got close enough to see the finish line I quickly finished her up and it was time to put her back in the air.

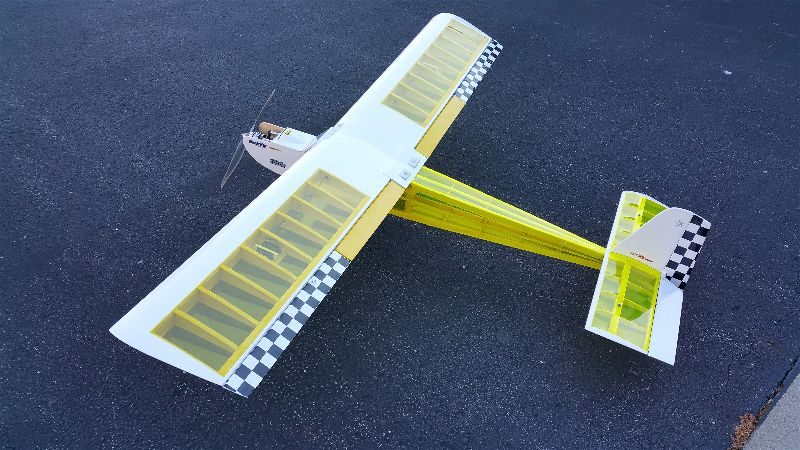
Here it is after the final decals were applied, screws tightened and radio system installed.

2016-05-15 19.38.37-opt

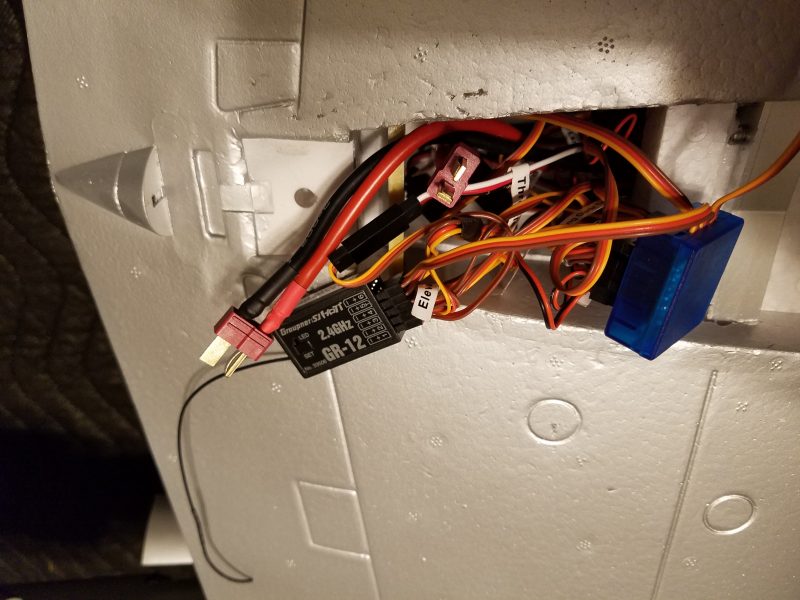
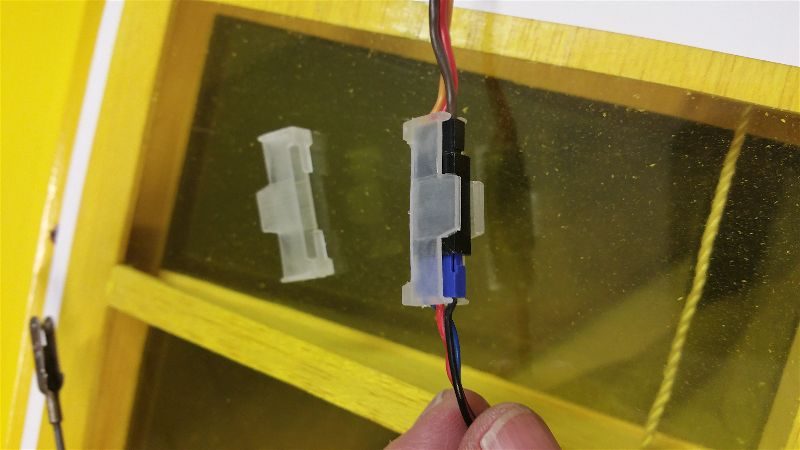
One of the common tasks I ran into when I went to reinstall the servos was to rerun the servo wires out into the wing bays.  Of course I should have run those when I had the covering off but of course that thought didn’t occur to me.  First, I applied the servo clips (how can you attach extensions to servo wires without those?) to insure the wires stay together.

2016-05-14 20.31.50-opt

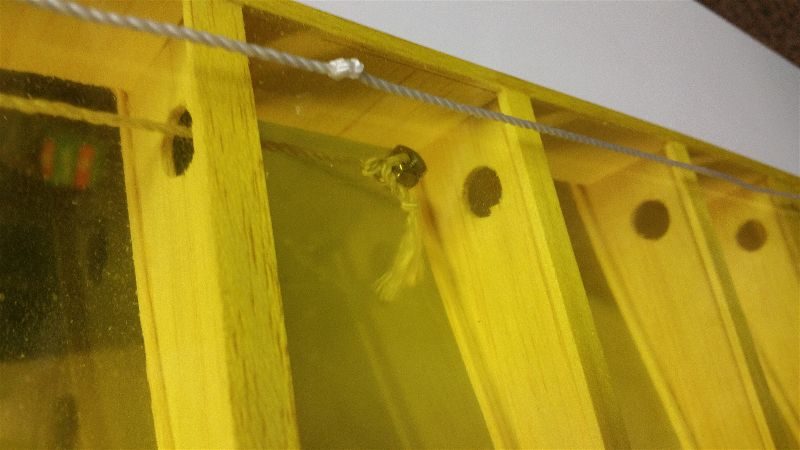
Then I grabbed my custom servo wire guiding tool (patent pending) and thread the wires back in there…  This tool is quite complicated (a string and a nut) and customizable by picking out a longer string or a smaller or larger nut!  Here it is in action.

2016-05-14 20.30.27-opt

Tie your servo lead to the end of the string, fish the nut down through the wing and pull the wire though… presto!

With the 3700 6S on board the plane now weighs approximately 7lbs.  Figuring the original 5.5lb weight (approximately) and adding the on board fuel weight (maybe 3/4 of a lb) means it has gained maybe 3/4 of a lb flying weight.  This is a bit more than I wanted but this plane flew so light that I think an extra couple pounds would leave a flyable airplane but I admit I would like to keep it as light as possible.  I fully expect the power system to be able to handle up to about a 9lb airplane to at least “hover” if not “pull straight out of hover” levels so it may be that the extra weight won’t cause a problem.

So, with all that in mind, off to the field to meet up with several of my flying buddies and see how it goes.  This is the third covering scheme on this aircraft.  It started off base white with some red and green highlights and then after I needed to do some maintenance that caused much of the red and green to exit, I decided over a white bread sandwich that red, yellow and blue polka dots were the answer.  Now along with the conversion to electric power, I went to a combination of transparent yellow, white and checkerboard black/white.  While all had their appeal, the new scheme is my favorite.

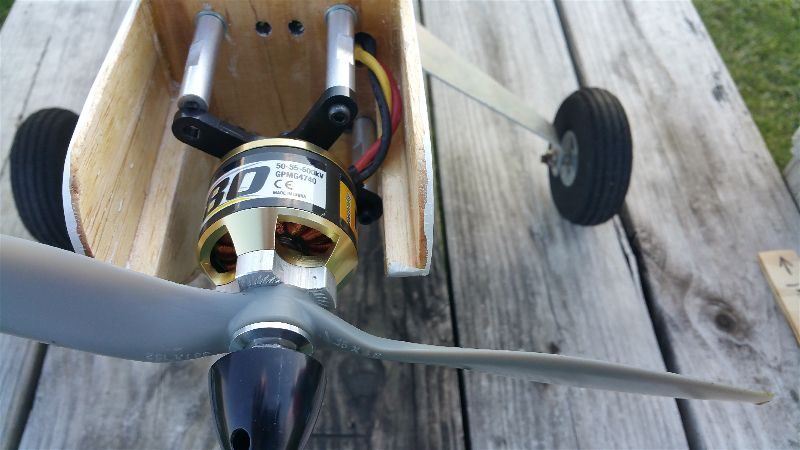
The first flight session went remarkably well.  The new hatch gives ample access to the battery area and there is plenty of room to shift the battery to achieve any desired balance point.  In addition it appears to allow for plenty of air flow and the magnet (which I had been concerned about) is keeping the hatch in place nicely.  After the last flight of the first day, I noticed the engine had started to move.  Upon further investigation I realized just how loose it was!  Here’s a shot showing some of the issue.

2016-05-18 19.55.52-opt

Not one of the mounts is still tight!  Two of the back screws are completely lo0se inside the body and one of the front mount screws is missing!  Yikes!  In the back of my head, as I looked it over I remembered thinking I would go back later and apply thread locker and re-tighten these mount screws.  Such is the danger of spreading out a job like this over close to a year span.  Later never quite arrived… until after these first few flights.  I got lucky that no damage resulted.

Once home, I pulled all the bolts and added some thread lock before re-tightening and she was ready to go again.  Next trip proved that the airplane still flies as well as ever.  The added weight doesn’t seem to hurt, maybe even helping in somewhat breezy conditions.  It seems to fly well with anything from my smallest to largest 6S batteries, from 3200 to 4500mah.  The 32/3300 packs give me a safe 5 minute or more flight with the 4500 netting an easy 15 minute flight.  Short takeoffs with flaps are easily doable with slow lazy flight being the real forte of this old but dependable platform.  The plane will pull straight up indefinitely with any of the packs as well so float flying, glider tow and carrying my RC jumper all seem doable.  This is a great start.

The 300th flight… or just the latest maiden flight.  Anyway you look at it, the Telemaster continues to perform well.  When I opened that box of sticks ~15 years ago… who would have guessed!

JL Products RotoFlow – failure and replacement

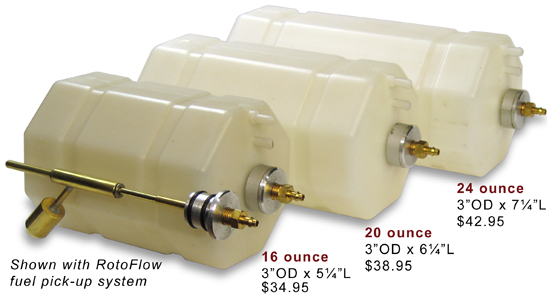
A few years ago, I picked up a JL Products RotoFlow 24 ounce fuel tank.  I installed it first into my WildHare Slick 540 and the tank performed admirably but during an effort to lighten up that bird it was swapped out for one of the “water bottle” type tanks and the RotoFlow was transplanted into my (at that time new) Mustang where it has continued to work great.  Based on that success, a second RotoFlow tank was purchased and placed into my buddy Kelly’s 50cc P-40.

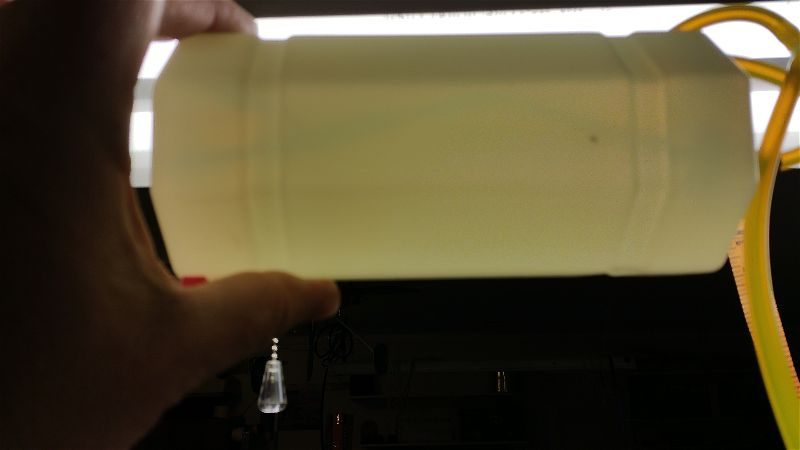
The P-40 is a beautiful bird but it has had its share of vibration induced problems (single cylinder gassers just vibrate more than most other engines) and during a recent repair session on that airplane we pulled the tank to get to the motor mounting bolts more easily and noticed something odd.  The clunk wasn’t rotating!  Holding it up to light showed something that looked a bit alarming….

2016-04-23 20.38.36-opt

It may be a bit hard to see here but that shadow should normally be straight if the tank is built according to this view from the JL Products web site…

rotoFlow

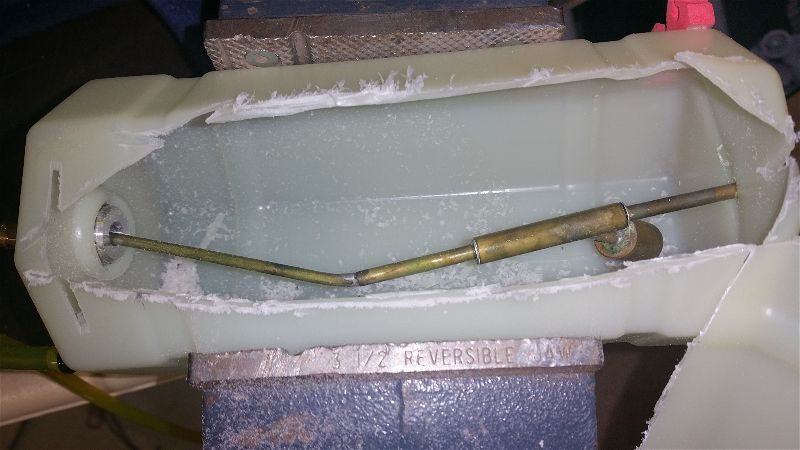
The good news is that after a quick email to these guys, a new tank was on it’s way.  They did not ask for the old tank back so we were able to slice into the tank and get a better look.

2016-04-27 18.55.48-opt

There are no loose solder joints… no obvious slippage of parts… and that outer case is thick, fairly rigid and very tough!  It was a bit mind bending (no pun intended) to understand how this brass tubing got in this shape.  At first we thought “The aircraft has not crashed and that tubing is pretty stiff!”  Based on this I had to assume this was a manufacturing defect.   Thinking back over the weeks since, we realized this tank was in the P40 that preceded this one and it did crash… hard… mostly on the nose!  That impact has to have been transmitted back to the nose of the tank and caused this bending… even though the outer part of the tank looked perfectly normal… I suspect there was a brief collapsing of the tank that caused this and then a spring back to shape that hid it!  It has been flown quite a bit since then without issue but probably not inverted for any time and never down past about half a tank so the clunk being stuck but still drawing fuel was good enough.

The folks at JL Products have gone above and beyond and sent an immediate replacement without question.  Not only without hassle but even with apologies.  Of course, at the time we thought it hadn’t been crashed so felt that this was excellent service and a fair deal.  Good customer service is not dead.  I’ll keep buying from the good folks at JL and the new tank is in place and the P40 good to go once again.

Carbon Z T-28 Recommended modification

As I may have previously mentioned, my flying buddy Kelly has one of the big E-Flite Carbon-Z T-28s.  He has trouble wiping the smile off his face when he’s doing one of his usual low speed, flaps down, no bounce, land like a butterfly with sore feet touchdowns.  With the AS3X keeping things even more stable on breezy days, this thing is just smoooooooooooooooth.

We initially had some nose gear issues (replaced) plus we added some Multiconnex and there was an issue with the flap hinge cracking (the flap/wing surface is the hinge) which was rectified with some Blenderm style wound tape/hinge tape.  As I recall, when we applied the tape we also replaced the wing control linkages.  Everything about them is undersized for this big aircraft and some folks have had small issues… others not so small.

So after an early spring flight recently, I guess we shouldn’t have been surprised when the rudder linkage lost it’s center pin.  Funny thing is we bought the additional parts way back then but never installed them.  It’s funny because it wasn’t the elevator that quit working!!  Kelly was able to get the airplane safely back on the ground and I have just finished manufacturing the replacements for both the rudder and elevator.

2016-04-30 18.07.39-opt

As you can see the original is just plain scrawny looking and our replacement is only 2-56 rod.  I consider even that small for this size plane but since they are so short (kudos for that E-Flite) 2-56 is sturdy enough I suppose.

The moral of the story however is if you are going to buy the big T-28, I would highly recommend you just go ahead and buy the hardware and replace all the flight linkages (6 short rods and your favorite clevises) before it even leaves the ground.  One less thing to worry about!

While you’re at it, order the Multiconnex (see that post here) and really make it easy on yourself!

P-51 Redtail… Wing repair.

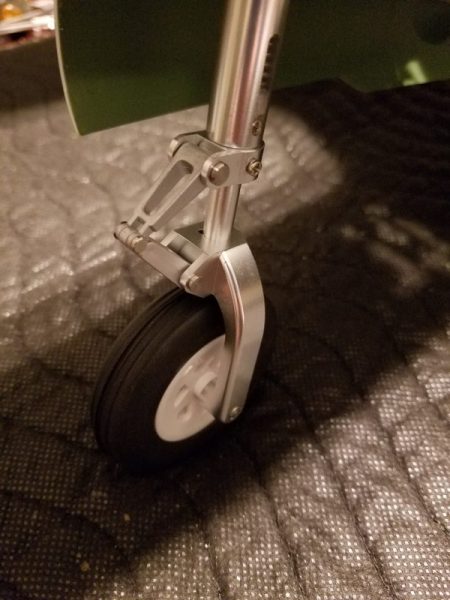
The last big repair task before the P-51 is ready to soar again is to get the starboard side landing gear mounting area rebuilt and get the fixed gear back in place.  The downside of course is “no retracts” but on the upside no “heavy” retracts and no need to spend another 100+ on a replacement/repair!  Pulling these is going to drop a full half pound and since I’m giving up the pretty gear, I’m going to replace the Robart spoked aluminum wheels with the Dubro light treaded wheels.  This will save another 6 ounces or so.  Those Robarts are 8 spoke anyway and everyone knows a Mustang has 10 spoke rims… so these weren’t really correct anyway…  right?

Anyway to give you an idea what had to be done… check out these photos

Here, I’m fitting some new wood at the top of the inboard rib to give it some meat to mount the gear into!  What was there previously is a shredded mess.

2016-03-19 14.04.58-opt

You can see that not only is the rail gone on the outboard side but the underlying wood was split and pulled away as well.

2016-03-19 14.04.53-opt

After fitting that, I had to do some similar work on the outboard side.  This time just scabbing in some additional wood to provide a good base for the rails there.  Needed to use some temporary braces to hold it in place while the glue dries.

2016-03-19 16.03.54-opt

A bit later with all the rails in place and with careful alignment and drilling… the gear is in place.

2016-03-20 18.00.59-opt

Next I had to piece in the sheeting around those wheel wells.  I actually made markings to cut the curved sections by pressing the balsa sheeting down over the edges and letting the fiberglass cut/mark the wood enough to then use my Xacto to finish cutting the outline.


2016-03-20 19.51.20-opt

Then just drop it in place and wick in a little CA and we are back in business… well close anyway!

2016-03-20 19.52.41-opt

Here you can see some of the railing that needed to be replaced as well as the scabbing for some of the ribs that were a bit… crushed…

2016-03-20 18.23.13-opt

Here’s another piece fitting into place…

2016-03-20 19.58.19-opt

Here it is with all the parts in place…

2016-03-20 20.14.19-opt

Next, had to re-cover and drill new holes to mount the landing gear cover.

2016-03-24 20.51.06-opt

After a little covering, the wing looks… well, good enough!  I could have spent more time and made this look better but this part of the airplane is only seen as it is flying by at 50′ and 50 miles per hour.

2016-04-08 21.09.40-opt

I am just not willing to invest the time at this point in an airplane that is unlikely to see much flight time.  I’m more interested in fun, and this bird looks cool but just isn’t my cup of tea.

I’m looking now at putting some new batteries in (and losing a bit more weight in the process).  The present pair of 2300mah A123s are 6 years old I believe and really larger than they need to be.  If I get some good high quality A123 1100s I would have plenty of capacity to get in half a dozen flights between charges, and still save another 4-6 ounces.  With that I should be getting closer to 1-1.5 lbs lighter.  I have great hopes this will positively affect the overall flight characteristics.

I’ll try to post an update or two later in the summer when I get a few flights in.

Hangar 9 F4U-1D Corsair ARF build – The Evolution 77cc radial arrives!

Today my flying buddy Gary stopped by to give me a taste of his latest acquisition… the Hangar 9 F4U-1D 60cc ARF.  Gary has only been flying a couple years, but one plane has always caught his eye more than any other… the Vought F4U Corsair.  The distinctive WWII war bird is instantly recognizable to most and a favorite to many.

Gary stopped by today with just a few of the many parts and pieces required to get this big beautiful bird in the air.  First and foremost is the power plant.  Gary had the opportunity to see this engine at the Horizon booth when we attended and I think that pretty much sealed the deal.

The Evolution 77cc 7 cylinder glow 4 stroke is a piece of art.  It comes complete with a glow wiring harness and integrated mount.  But if you thought your wallet was done taking a beating when you bought the engine… probably not so much.  Most will want the collector ring (at additional cost of course) and an on board glow system as suggested in the engine manual (now that wallet can take a deserved short break).   Here are a couple shots from when we unpacked it today in my shop.

Here’s the money shot… This thing is just B-E-A-Utiful!

2016-04-09 14.48.13-opt

Even the mount is beautiful in an elegantly functional way.  Having the choke and throttle linkage thought out a bit for you is a nice touch as well.

2016-04-09 14.48.40-opt

There are some interesting little notes in the manual about oiling the push rods before each day of flying, adjusting valve lash when needed and inserting after run oil after every flying session by pulling a push rod and cam follower to add after run oil…  That all sounds pretty reasonable until you remember this thing will be hiding under a cowl, possibly with air baffling around the cylinders (again, a recommendation from Evolution) so maintenance is going to be a chore that no one with this kind of money invested is likely to be skipping I guess!  Ah, large fuel powered war birds…  They do enjoy being lovingly maintained!  What have you gotten yourself into Gary?  Of course it will all be worth it when we here the dulcimer tones that will be issuing from the exhaust!!  Oh, and watch out for hydro-locks in those bottom 2 cylinders!  I wonder if storage of the airplane “nose up” would minimize that possibility??

There are also some interesting recommendations on fuel mixes…  I don’t recall seeing 0% nitro with 10% oil on the shelf at the local hobby shop (for break in) nor 5/7 for later use…  Hmmm…  Better start looking for some pure methanol so we can mix up some custom fuel!!  This is where the modeling part comes in I guess.  I ‘m actually looking forward to seeing Gary in his “mad chemist” outfit with a bubbling cauldron… 🙂

All that aside, I really think it will be worth it all when that big bird lifts off.  This engine is going to demand some respect and loving attention for sure though.

Also in hand when Gary visited were his main retracts.  You have to admire the engineering behind these as well.  Not only are you raising and lowering the wheels whilst providing some nicely spring loaded struts… but they have to rotate 90 degrees as well!!  These are Robart units with the electric actuator so I expect smooth action and simple setup… at least for retracts!

2016-04-09 14.50.20-opt

We didn’t get around to plugging together a receiver and the control board so we could cycle these… I’m looking forward to that as well.

Gary promised pictures and some commentary as he gets started  building so I’ll try to post occasionally on how it is going.  Especially on anything interesting, troublesome or particularly cool.  We are already talking about ways to avoid the 2lbs of nose weight they claim we will need!  I hate lead in an airplane.

More as Gary progresses.

BD-5B first flight… and almost last!

Let me just start out stating… when you get to the part of the manual where Aeroworks tells you to balance the BD-5B… and even tells you definitively “Do not skip this step! ”  I highly recommend you just move on and leave that ’till after the first flight.  This way you will have a much more exciting first flight and it certainly is more likely that you will be able to more easily transport the aircraft back home… I doubt you’ll need a very big garbage bag to carry what’s left.  Unless you really want to fly it twice without repairs?  I guess that’s one way to go, but if you are a thrill seeker not-balancing is a great way to go!  Ask me how I know.

Ok, so maybe you should balance the plane…  I opted out of that part so let me tell you a bit about my maiden flight.

It was a nice Sunday morning with the temperature approaching 60 degrees at noon.  The wind was a bit brisk for an airplane this small and light (8-12mph) but it was pretty close to being down the runway so not terrible.  After loading up and securing a 3S 2200, I dutifully checked all control surfaces which responded appropriately.  Thinking back I recalled that I had checked the throws against the recommended and dialing in my usual (fairly aggressive) exponential settings.  I even made sure I was in low rates as I expected that at speed this little ship would probably be a bit more sensitive that most that I fly.  All looked good so after a quick taxi out on our Geo-textile runway I lined up into the wind and started rolling.

It took a bit longer to rotate and a bit more elevator too (note to self… maybe check to make sure the nose isn’t pointed down slightly??) but then it jumped into the sky and with a little down elevator it… dove for the ground!!  Yikes, pull back up and it’s climbing like crazy again… After letting it gain some altitude it became a constant battle to maintain altitude and herd the plane around while constantly trying to find a mix of throttle, elevator and attitude that would smooth out the roller coaster ride.  After trying several combinations, and barely recovering from several stalls and one trip to the far reaches of my visual range, I realized it was time to admit that there was nothing that was going to keep this plane flying level and try to figure out a way to get it back down in one piece… or at least a minimum number!  Having used every trick that 20 years of RC flying experience has taught me to get to this point… it was time to just line it up, react and hope for the best.

On approach now and trying to outguess the roller coaster ride.  Keep in some throttle to avoid any stalls until about 3 feet off the ground and here comes the seemingly inevitable plunge…  A last second drop of throttle and simultaneous full up elevator just as it hits the grass with only a little bit of nose first down angle.  Holding my breath but it looks like nothing too serious.  The structure is apparently intact with only the nose gear pointing back a bit more than when it left the ground.  All in all, I wasn’t unhappy with the end result.  Just with the mistake that made this such a fight!

Here, you can tell where the wheel contacted the bottom of the body!

2016-03-28 19.47.08-opt

And this is back of the nose gear mount… You can see the wood split and allowed the landing gear “bearing” to rotate back

2016-03-28 19.48.23-opt

You may also be able to see that there is a groove that looks like there may have been a retainer of some sort but if it was ever there… it’s long gone now.  So I created one using a washer and after re-gluing and clamping the wood to restore it to perhaps stronger than original, here is the result.

2016-03-28 20.09.06-opt (1)

When I reinstalled it, it seemed as good as new.

Finally, I put the airplane with battery installed up on the stand and not at all surprisingly it took 3 ounces of extra weight were the battery sits… which is far forward… to get it to balance as recommended.  No wonder it was such a handful!  That equates to about an inch behind the recommended balance point.  So the lesson, in case I had any remaining doubts, is “Always double check the balance!“.

To correct this, I can either throw some lead in there or drop in some extra milliamps…  Normally, I would go for more battery capacity but I have no use for 2500-3000 3S batteries so I will likely just secure some lead and give it another try.  At this point I am lucky to have a plane to fly a second time so I don’t have much to lose.  I used all the skill I had and then got just plain lucky to get it down in one piece.  Looking forward to a much less frantic flight!

P-51 Redtail… Patching the fuselage… getting closer!

I’ve been rolling right along working on the restoration of the P-51 Redtail to flight status.  Today I worked on some minor dings and one big hole that was inflicted during the “off-airport landing” that occurred last year.  Yep, I landed a bit short, not crashed!!  Never that…

So this method of covering up the boo-boos originated with another war bird that belongs to my flying buddy Kelly.  During the construction of his P-40, as I was finishing up one night in the shop, I picked up the wing I had just finished some work on.  I believe it was the final item on that wing… probably some servo linkage… that I had just finished and I just needed to sit the perfect wing in the corner so I could clear the bench for another part of the project.

As I swung the wing around the very sharp corner of the bench jumped up in front of the top wingtip surface on one end… maybe 2 or 3 inches in from the tip.  It made a really nice divot in the wing and I began to… recite the rosary… that seems right… I know there were some words directed at a deity.  That I’m sure of!  Anyway, as I unsuccessfully tried to smooth out the damage I thought of the hours of filling/sanding/recovering I’d have to do in order to even come close to restoring this area to it’s original state, I realized that war birds are never this perfect…. Why should this one be?  I looked at a few pictures of patched up old birds in real military service and thought I could approximate that look (riveted on bare metal patch).  I found a role of aluminum foil/metal duct tape, cut out a square and carefully applied over the ding.  Not bad but then I snuck over to my wife’s craft table and found a tool that looked like someone stabbed a BB with an ice pic! Eureka!!  A little application of that tool around the edges and my patch job had rivets… or at least close enough for me.  After a year or two of flying, that original application is still in place.

So for the Mustang and a few assorted dents and dings….  Here are a couple examples.

This is one to cover the crack that continued from the bottom of the elevator surface back almost to the trailing edge of the fixed portion of the tail.  A little glue in the crack and add the “riveted patch”!

2016-03-13 18.32.10-opt

This one is right out in the open on the side of the body below the cockpit… Any patch I put here is going to be visible so why not make it look “natural”?

2016-03-13 18.32.02-opt

Then comes this monster!

2016-03-13 18.17.50-opt

This is just behind the cowl and right where my hand and/or any cradle I might put the plane on tends to rest… plus it is hard to get to the back of this without pulling the fuel tank, which involves pulling the receiver, etc..  I’d normally add at least some sheeting from behind but with that being such a pain…  I decided to try a bit of reinforcing before I used the “metallic duct tape” trick.  Looking around for some reinforcing I came across some small plastic drinking cups and went to work.  The first task was cutting out an appropriate size and shape to cover the damage.  The curvature of the cup worked to my advantage on this curved section.

2016-03-13 20.02.03-opt

With some more Gorilla glue and a little masking tape, I attached the plastic reinforcement and left it to dry for a few hours.  Just in case you don’t find this easily in your local store… here is a link to it on Amazon.  Gorilla Glue

2016-03-13 18.20.48-opt

Then finally I carefully peeled the masking tape and applied the metal tape.

The tape seems to be the ideal thickness and seems to be quite permanent so I’ll post a link to it here.  I’m sure there must be other equivalents out there but this is what I use.

So that’s about it for now.  I need to get back to doing a little covering work on the wing and I’ll be getting very close to another “maiden” flight.


P-51 Redtail… More progress. Wing repairs progress.

Further work is occurring on my quest to reassemble the Redtail without spending significant dollars and simultaneously lightening it up a bit in the hopes of improved flying traits.

The latest is around the port side (that’s left if you were to sit in the cockpit of the P-51 facing forward) main landing gear mounting area and wheel well.  That area took significant damage during the abrupt meeting between the retracts and beans at about 35mph!  Yep, that is about stall speed… or at least is was that day.

Here is a sequence of pictures showing the progress.  Most of this was simply measuring, cutting, fitting and a fair injection of TLAR engineering methods to try to get something put back together that will stand the strain.  TLAR… you know… “That Looks About Right”!

After cutting out the sheeting and getting rid of the various splinters and unidentifiable fragments here is what I was left with.


2016-03-19 14.04.53-opt

I cut away even a bit more before adding back a bit of structure…  Rebuilding the rails so that the screws have something solid to bite into required some temporary bracing…

2016-03-19 16.03.54-opt

Then I started building the actual rail structure and piecing them together with an eye toward making sure there was some interlock to help add some strength.  This rail notches into the rib and creates a lip for the rear rail to rest on.

2016-03-19 14.04.58-opt

Here, all the rails are in place and all of the mounting screws have been drilled and put in place… lots of advanced TLAR to get the placement right (I hope).


2016-03-20 18.01.08-opt

Then came the puzzle of re-sheeting around the fiberglass wheel wells.  I cut the existing sheeting back to expose a bit of the top of the spar and then pressed the sheeting down over the fiberglass to give me a cut line.  This created shapes like this ones.

2016-03-20 19.51.20-opt


Then I added some small “railing” to catch the sheeting and give me some glue surface for the larger span of this piece of sheeting.  There was also some reinforcing and rebuilding of the ribs that contact the wheel well that had to be done.

2016-03-20 18.23.13-opt

Here are the pieces going into place.

2016-03-20 19.58.19-opt

And the final bits of woodwork are glued in.

2016-03-20 20.14.19-opt

From here is will just be some recovering work, though I have considered adding a bit of light fiberglass reinforcing underneath the landing gear mount area…  We’ll see.

Next up is finishing up the covering and the last of the repair work on the fuselage.

P-51 Redtail… Broken but progress is underway

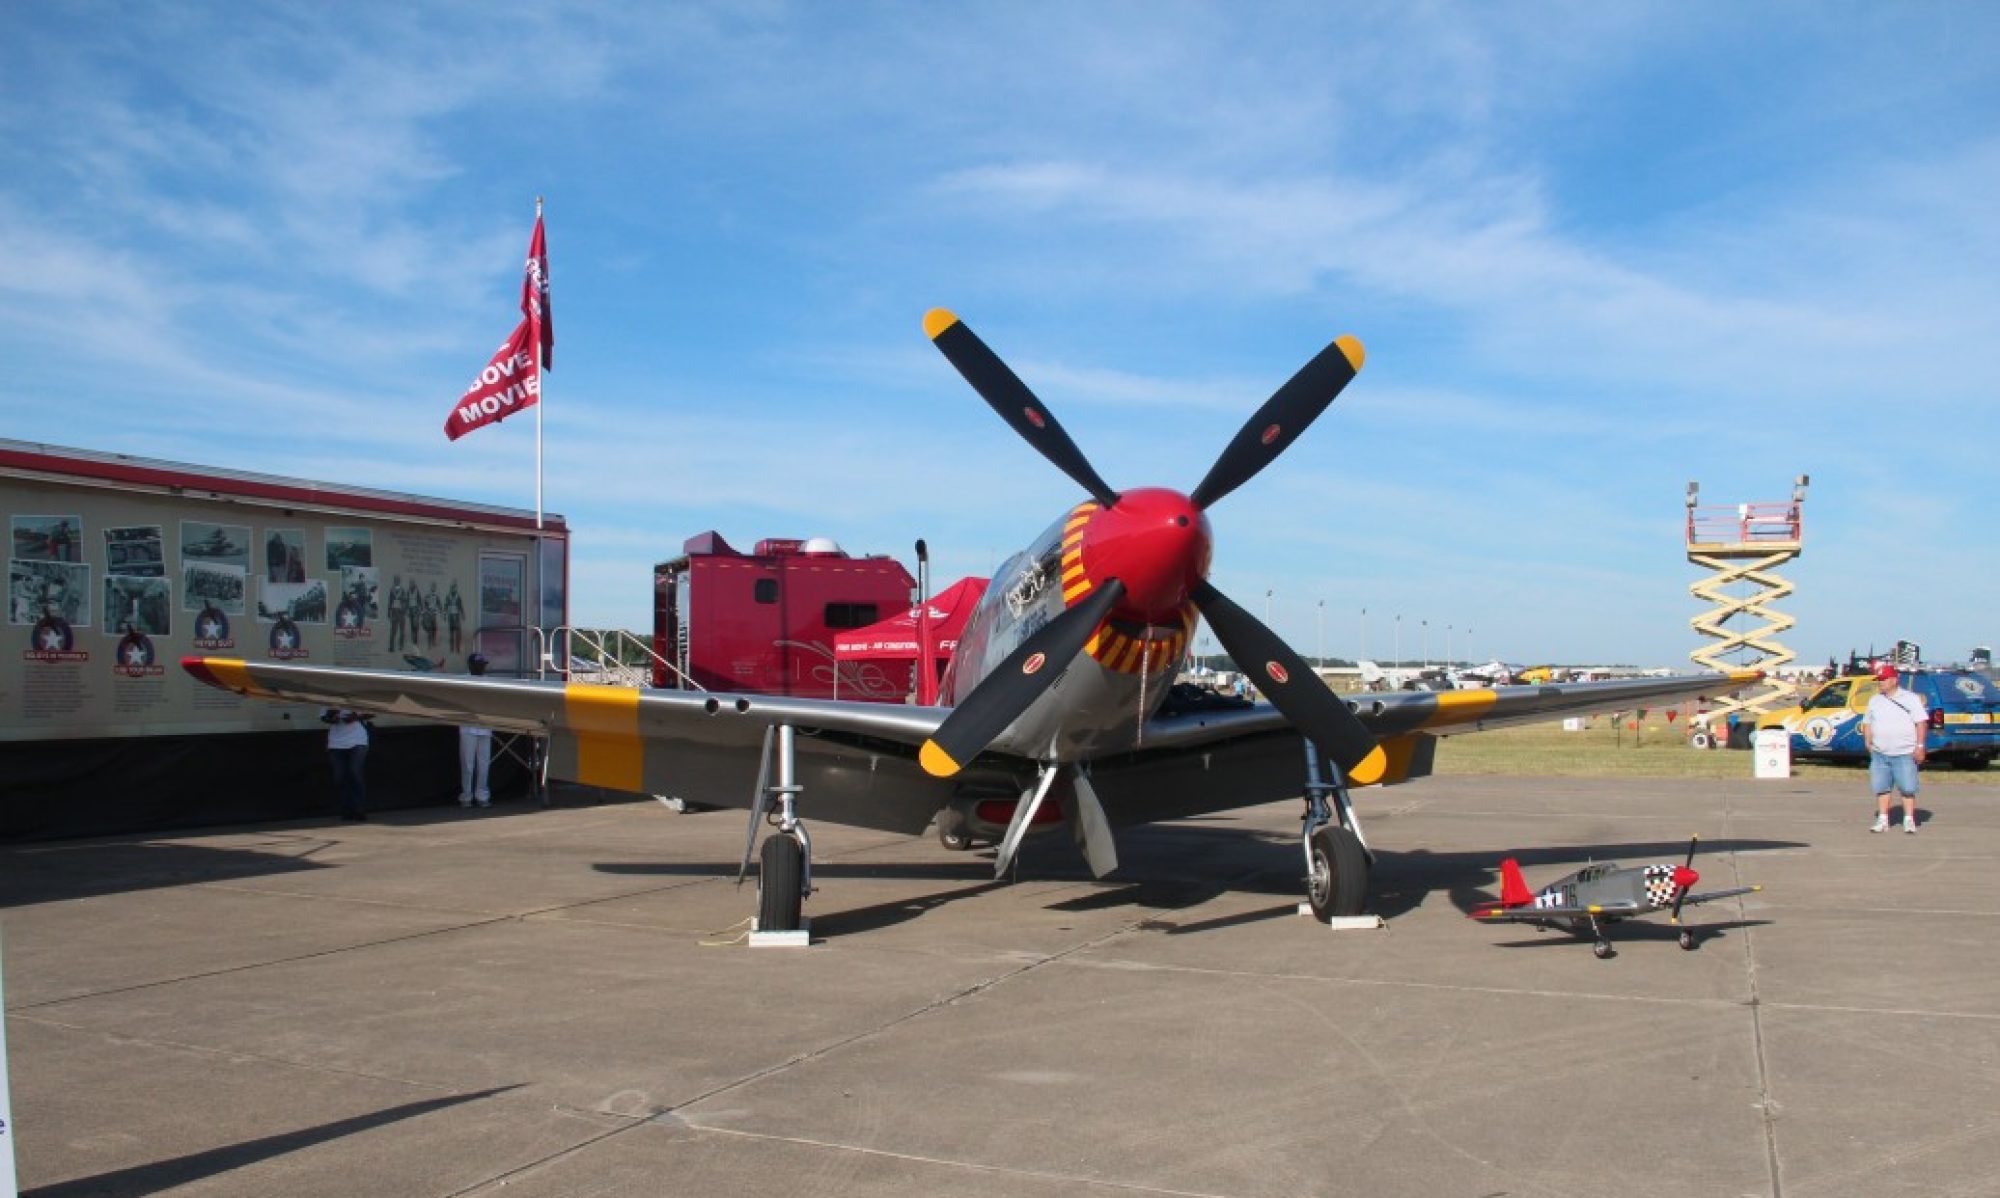
I’ve been the owner of a 1/5th Scale Top Flite P-51 made up in “Redtail” colors for several years now.  If you want to see more on it there are several posts on it, just do a search for redtail or p-51 and you’ll find pictures and information on it.

Last year during a club outing I took her out for a flight or two and managed to stall it just feet from the runway.  The straight ahead stall from 4 feet or so caused the landing gear to catch the beans at the approach end of the runway and a fairly violent tail over nose tumble resulted.  Another main retract bending extraction from the wing, a punch in the bottom of the body just behind the cowl, along with the horizontal stab breaking loose on one side and cracking across the top of the tail was the result.  It was not pretty and it was just a case of not enough airspeed on approach… which I should know well but is easy to forget when you fly so many lighter, easier landing aircraft!

I was truly disgusted and tired of pouring money into this airplane.  It has not been a particularly fun or inexpensive airplane to fly and I began to wonder why I continued with it.  I can’t say I’ve ever gotten a great amount of enjoyment in flying it… It has pretty much zero of my top 3 most enjoyable attributes when it comes to RC aircraft.  It isn’t by any means an impressive flyer as far as it’s aerobatic capabilities, it isn’t easy to get flying or haul around, and it certainly isn’t low cost to fly either.  In fairness, I never expected it to be much more than what it is…  A complex, heavy, fast, expensive, nice looking and perhaps even impressive war bird!

I talked myself into putting it together and flying it partly just for the varied experience of doing so (check), as a nod to my flying buddy Tim (check), and just to have something that would be both impressive and welcome at war bird and giant scale meets (check).  The problem is that I just never really enjoy the way it flies… heavy and fast just aren’t my thing.  When I do fly it, I get simultaneously bored with the way it flies and apprehensive since it never flies for long without something needing fixing, adjusted, etc… and often the cost of those repairs just isn’t top of my list so flights are to far apart to ever get totally comfortable with it.

So after the last crash I wasn’t sure I was ever going to get it flying again.  It sat over on the side bench for months without my giving it more than a glance and a frown.  Several times I had decided to just part it out and or maybe just clean out the expensive bits and do some work to make into a display only airplane with a dummy engine, etc…  Finally, I started thinking (maybe it’s just loss of memory and old age) that maybe I could make it fly a bit better and take some of the complexity out of it to make it a bit more reliable??  There are still occasional events I’d like to take it to.  Of course that means making it flyable again… without breaking the bank either!

So here is the plan.  First, I’ve started working on repairing the damage to the tail and done at least a little cleanup and analysis of the landing gear mounting area.  I expect to be able to patch it up with a moderate effort and very little expense.  Here are some shots of the repairs in process.  Gorilla glue is wonderful thing.

This is the bottom of the horizontal which had separated from the body along the glue line.

Tail1_opt

This is the point where the wood cracked and broke across the top of the tail…  It was one continuous crack/break from that bottom area above all the way across.  This allowed the horizontal to “flex” approximately 2″ up at the tip of the horizontal/elevator!!

2016-03-15 21_opt

In addition, one of the main landing gears is toast…  Apparently ripping the retract assembly out of the wing, tearing out chunks of wood, shearing the self tapping screws and bending the assembly followed by attempting to pull the retract controller (which is roughly the size of deck of cards) by the wires out of the wing via a quarter size hole… is a bit hard on the electric motor in the retract!!  For some reason it doesn’t work anymore!!  I guess Robart just doesn’t expect that sort of thing when they build these… go figure.  So there will be no more retracts!

So if I get out of the retract business and patch together the wing damage, I can avoid spending about $300 and shave off some ounces.  Leaving the controller and both the main retracts behind looks like it will save me about half a pound.  While I’m at it, I’m going to pull all of the telemetry.  I have enough info from the flights I’ve made that I know pretty much everything I wanted to about how it flies.  I may even spend a few dollars to go to two smaller main flight packs (I can reuse the larger packs that are in this airplane elsewhere).  If I can manage to trim a full pound out of this bird I wonder just how much better it might fly!?

Here are the completed repairs at the tail with it all buttoned back up.

2016-03-18 20_opt (1)

2016-03-18 20_opt

It seems strong enough.  More to come as this is getting done a bit faster than I first supposed.

Email outage… resolved. Some progress on several projects.

Hi all,

Just a quick note to mention that my website was recently moved to a new host and as a result, email to my flyrc.info email addresses was being lost.  This was the case for the majority of February so if you used the link to contact me on this website during that time…  I did NOT get your message.  That small technical issue has been resolved as of today so that anything sent will not reach me!  Sorry if I missed your message in the interim.

Some progress has been made on both the Telemaster and the Super Cub.  I have even started looking at what it will take to revive the redtail Mustang… No promises but hopefully I will have more to write on all of those pretty soon.  Thanks for visiting.