
I’ve been rolling right along working on the restoration of the P-51 Redtail to flight status. Today I worked on some minor dings and one big hole that was inflicted during the “off-airport landing” that occurred last year. Yep, I landed a bit short, not crashed!! Never that…
So this method of covering up the boo-boos originated with another war bird that belongs to my flying buddy Kelly. During the construction of his P-40, as I was finishing up one night in the shop, I picked up the wing I had just finished some work on. I believe it was the final item on that wing… probably some servo linkage… that I had just finished and I just needed to sit the perfect wing in the corner so I could clear the bench for another part of the project.
As I swung the wing around the very sharp corner of the bench jumped up in front of the top wingtip surface on one end… maybe 2 or 3 inches in from the tip. It made a really nice divot in the wing and I began to… recite the rosary… that seems right… I know there were some words directed at a deity. That I’m sure of! Anyway, as I unsuccessfully tried to smooth out the damage I thought of the hours of filling/sanding/recovering I’d have to do in order to even come close to restoring this area to it’s original state, I realized that war birds are never this perfect…. Why should this one be? I looked at a few pictures of patched up old birds in real military service and thought I could approximate that look (riveted on bare metal patch). I found a role of aluminum foil/metal duct tape, cut out a square and carefully applied over the ding. Not bad but then I snuck over to my wife’s craft table and found a tool that looked like someone stabbed a BB with an ice pic! Eureka!! A little application of that tool around the edges and my patch job had rivets… or at least close enough for me. After a year or two of flying, that original application is still in place.
So for the Mustang and a few assorted dents and dings…. Here are a couple examples.
This is one to cover the crack that continued from the bottom of the elevator surface back almost to the trailing edge of the fixed portion of the tail. A little glue in the crack and add the “riveted patch”!

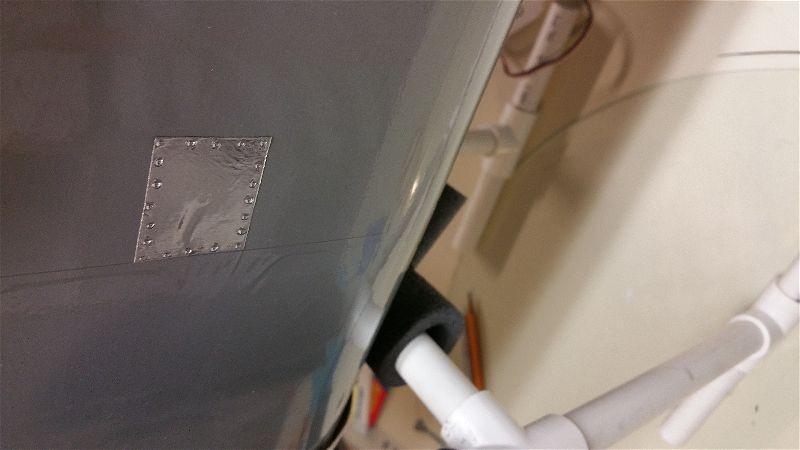
This one is right out in the open on the side of the body below the cockpit… Any patch I put here is going to be visible so why not make it look “natural”?
Then comes this monster!
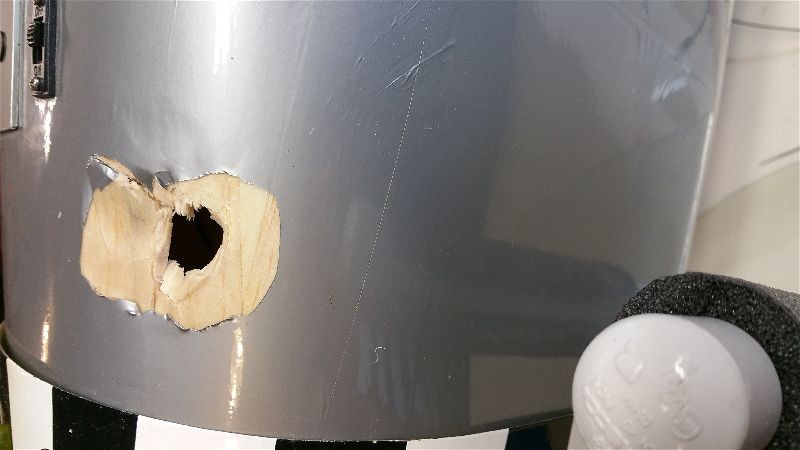
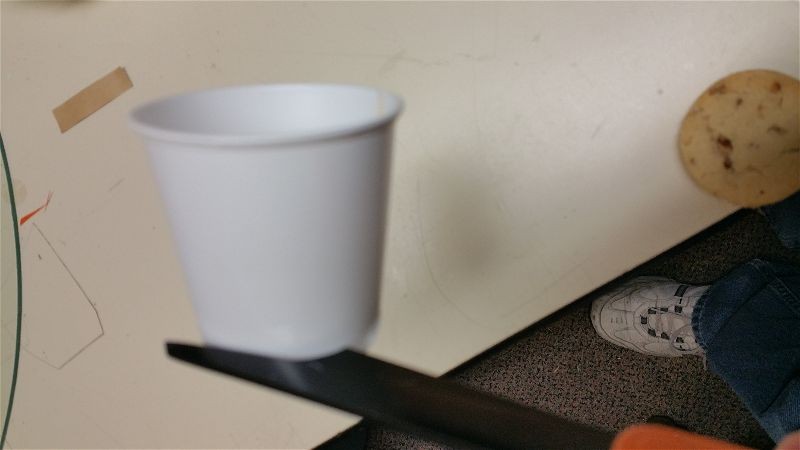
This is just behind the cowl and right where my hand and/or any cradle I might put the plane on tends to rest… plus it is hard to get to the back of this without pulling the fuel tank, which involves pulling the receiver, etc.. I’d normally add at least some sheeting from behind but with that being such a pain… I decided to try a bit of reinforcing before I used the “metallic duct tape” trick. Looking around for some reinforcing I came across some small plastic drinking cups and went to work. The first task was cutting out an appropriate size and shape to cover the damage. The curvature of the cup worked to my advantage on this curved section.
With some more Gorilla glue and a little masking tape, I attached the plastic reinforcement and left it to dry for a few hours. Just in case you don’t find this easily in your local store… here is a link to it on Amazon. Gorilla Glue
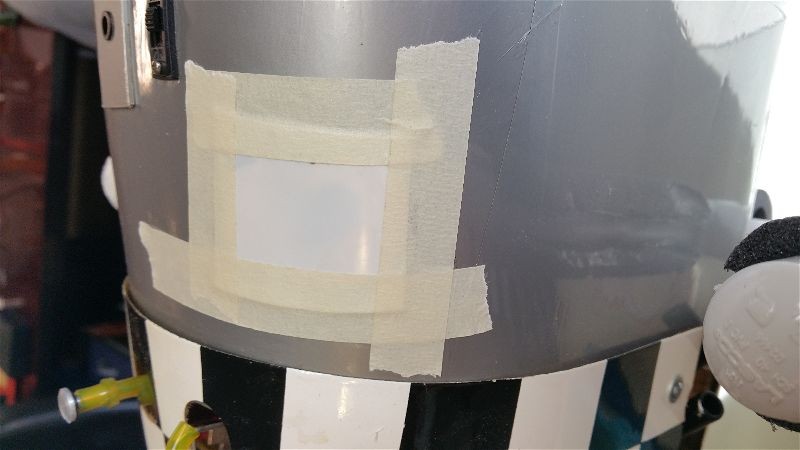
Then finally I carefully peeled the masking tape and applied the metal tape.
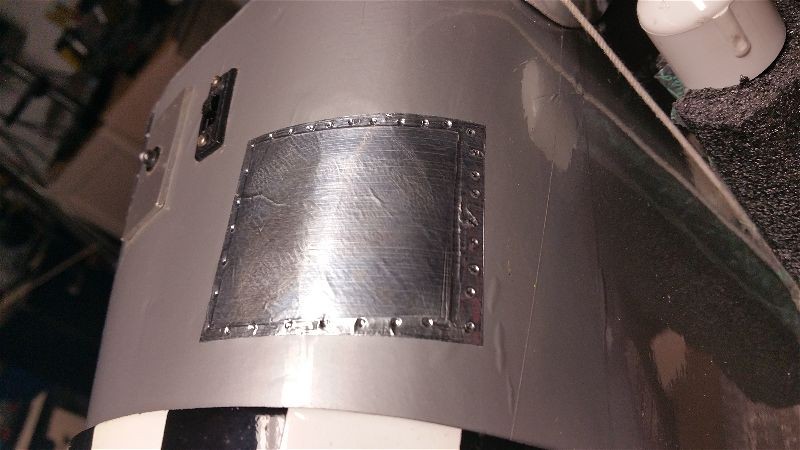
The tape seems to be the ideal thickness and seems to be quite permanent so I’ll post a link to it here. I’m sure there must be other equivalents out there but this is what I use.
So that’s about it for now. I need to get back to doing a little covering work on the wing and I’ll be getting very close to another “maiden” flight.