Timber makes first flight of 2018

Like many clubs, ours has an annual January 1st get together so that we can all get a “first flight of the year”.  This year featured cold temperatures, 3 inches of snow… and did I mention REALLY COLD!

When I got to the field, Mr Steve Kessler was already waiting for another member to arrive so that he would have witness to his first flight… it was about 7:30AM and sunrise was set for about 8:15 so it was just starting to get light.

After we thawed out the lock on the door to the shelter, we fired up the generator, lit the heater and then went out to get in some early morning flying in.

Here’s a compilation of some video from Steve watching me arrive and noting the chilly temp (check out that dash display showing negative temps).  That’s my Timber on the left with the orange wing tip stripes.  Steve had his plane sitting out side while we got the shelter ready and one of his ailerons simply froze up…  So our first flight became a solo.

Flying into the rising sun while it is still just below the horizon is a lot of fun.  As are the floats on the snow.  Better than skis in these soft and fluffy conditions.  

Later on that same day I got out the Traxxas Fiesta AWD and mounted the camera on top for some more video.

It was a bit chilly (what’s -14 when you’re having fun?) but we started the day with a beautiful sunrise and proceeded to enjoy some hot chocolate, cinnamon rolls and a nice warm shelter for between flights!  Later in the day we feasted on some brats and burgers along with baked beans and some tasty baked goods for good measure.  All in all, a great start to the year.  Here’s hoping 2018 ends as well as it began!
 

Second E-Ducted Fan… The Phase III Squall

When it rains it pours I guess…  After never having owned a ducted fan of any sort, I now find I have two of them!  I was at a swap meet recently and ran across this gorgeous little plane.

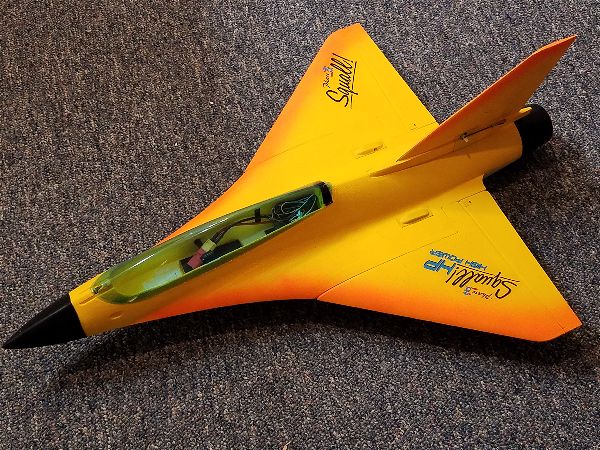
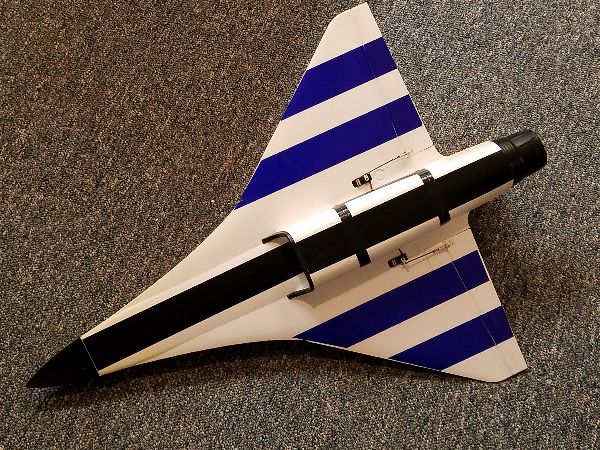
This is the Phase 3 Squall.  This one is the HP version so is ready for a 4 cell LiPo.  With a 3400KV motor and 45A speed control I expect some fairly high speed passes are possible.  I’ve also seen some fairly high alpha passes with the HP on video, probably due to that swept wing and the extra oomph.   They call for 4S 2500mah pack but since I already own some 3300s, you can guess what I’ll fly with for the maiden.

The paint job really caught my eye and I haven’t seen another like it… once I saw the price I was hooked.

I was warned to be cautious with the throws so I followed the manual precisely and put elevator, aileron and rudder on triple rate switches with the low rates being no higher than what is recommended for normal, an in-between step and then the recommended high rates.  I was also generous with the expo as is my standard operating procedure.

I’m hoping for good weather on the 1st when we have our “freeze fly” so I can get a maiden on it… I just got it ready to go today (about a week before) and of course the warm(ish) weather is departing tonight so we’ll have to wait and see.

Update to my Dumas Windy air boat is underway… kicking the glow habit.

A couple weeks ago, my only glow powered airplane lost its battle with gravity.  “The Pig” as we called it had seen better days and we think the wing (which had a couple of weak spots) may have just made one to many 8G turns…  It dove hard into the ground and shattered the forward third of the body.  The wing was in 3 pieces as well so not much left to work with.  Nor was I particularly interested in spending a lot of time and money on a truly major rebuild anyway.  There are lots of old beaters around to chase gliders with (it’s main occupation the last several years).  RIP “Pig”. 

Whatever the cause, it meant that I had only one glow powered craft left… my Dumas Windy air boat.  That meant I was now in striking distance of finally getting completely out of the glow business.  No more messy oil coating every surface, eating finishes, staining shoes, etc… etc…  No more obsessively tweaking the needle for that little extra kick.  No more disappointment when the glow driver battery was dead.  No more little slices on my fingers from flipping those insanely sharp composite props.  I can do it!  I can be free!!  Maybe I could even find some poor soul who hasn’t yet tried to kick the habit to unload the remnants of my stash?  Someone who is still completely in the grasp of that cruelest of mistresses…

Glow motor addiction! 

Yep, I recall when I was hooked.  The smell of warm castor and the ear piecing shriek of a 2 stroke at 15,000+ rpm was what I craved.  When I tried to escape I was simply lured in deeper by the mellow tone of a 4 stroke purring away at an idle so low you can practically count the RPMs.  And the price just kept getting higher.  10/15 wasn’t good enough anymore, now I needed 20/20 or better.  The “dealers” kept pushing harder with gold plated (literally) and chromed editions that I simply had to have.

But I’m almost free now.  If I can find a replacement power system for the LA-15 (blue edition of course… I could never stand the cheap stuff…) I could be free.

I quickly realized I already had a possible alternative.  I had recently purchased the remnants of a E-Flite Timber.  The electronics and power system were all intact to all appearances.  So the plan was hatched.  I would transplant the BL10 from the old Timber onto the Windy.

First I stripped the LA-15 from the boat and placed it into my swap meet box.  I only took a quick sniff from the muffler as I polished it up a bit for display… (Don’t judge if you haven’t been there).  Twice it occurred to me how reliable the 15 had been and how well it would pull the half finished little mustang that lay just across the shop but I summoned up my will and closed the lid on the swap meet box firmly.

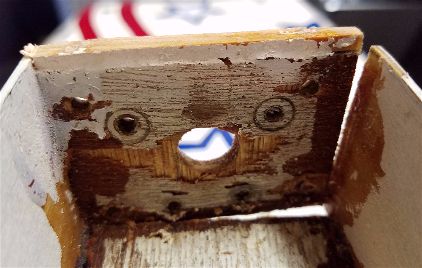
Once past this job I quickly stripped the on board battery, throttle servo and fuel tank.  After gathering a few supplies at the hardware store I managed to space out the BL10 motor with some nylon spacers, threaded rod (hacked to length) a few washers and some nylon insert nuts.  The firewall looked like it was about ready to give up the fight:

Some medium CA and kicker was employed to solve that issue.

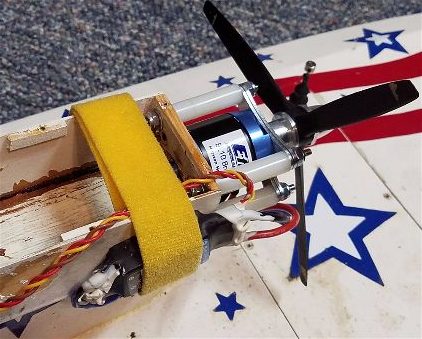
I kept the little 7×4 3 blade prop.  At least for now.  There just isn’t clearance to go to a higher diameter prop and  I haven’t found much else that looks like a good fit, so for now this is it.

A bit of temporary Velcro strapping to temporarily hold the speed controller in place and thing were looking pretty good.

Time for a quick test.  Using a 3S 2700 I measured about 11A and 130W of power draw from the battery.  A quick test on grass confirmed that this is just not the same level of power as the old 15.  I tamped down the temptation to re-install it (I get stronger ever day but the temptation never seems to die!) and did a bit of research .

A couple days later I recalled that some Timber owners had run this motor and speed controller on 4S packs… and with very little difference in prop size they had reported continued health of the power system.  So I decided why not.  This time with a 4S installed the meter showed 270W and 18A of draw!!  I was running this test on carpet and the boat took off across the room when I released it and without even reaching full throttle.  This combination looks good.  This alternative to glow for this boat seems great, no side effects apparent… I might make just make it!

During a final test… just for fun.  I noticed a brief stutter on startup and then again at a higher throttle… I thought the motor was going to shake apart.. what the heck??  Oh well, I guess there are always slips along the way…  Guess I better start researching this new issue…

First ever ducted fan electric for me… Alfa F-16C

The RC community is a great resource with worldwide reach and it is fantastic what you can learn and the support you can get just for the asking.  It has always been my hope that something I write here will help out someone else… beyond just entertaining.  Sort of my way of passing it on.  In this case though I got some excellent help from a member of the community who I found on another web site.

Thanks to a posting on the RCGroups web site and a quick response from a gentleman over in England, I now know that what I have here is an Alfa Models F-16C.  Alfa Models appears to be based over in the Czech Republic and available only directly from them at this point.

Someone wanted this one bad enough to order and pay some substantial shipping or perhaps a US vendor carried them for some time??  In any case I now have access to the instructions so I have information on the power systems that are recommended, though I can’t tell whether this one has one of the “stock” options or something else, plus some idea of what size battery to run, where it should be balanced etc…

As I move forward on the build and fly, I will post more here.

First ever ducted fan electric for me… whatever it is!

An F-16 finds it way to my hangar

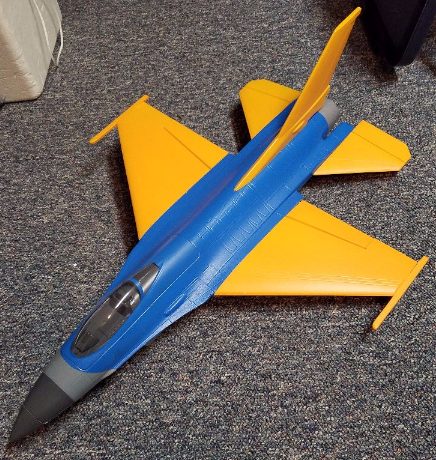
Went to a swap meet on Sunday and along with a few little odds and ends I ended up with this:

I’ve searched on line and can find no mention or image of this little foamy.  I’ve been wanting to try my hand with something a bit faster… If for no other reason than I’ve never flown anything with much speed and my assumption is this will likely fit the bill.  Also, I’ve never flown a ducted fan either so maybe get a couple of firsts in one!

At first glance I thought this would be a pretty plug and play, throw it in the air and go option… but after getting the plane home I’ve found a bit more of a project.

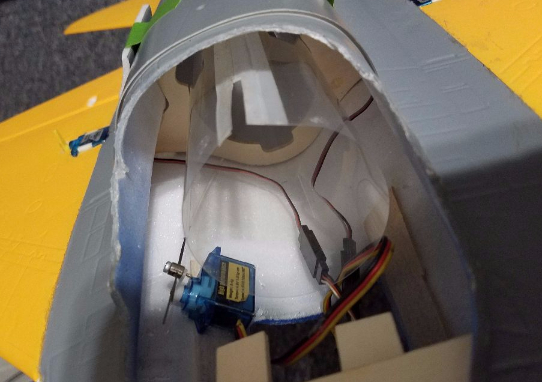
First, I was trying to get the speed controller out where I could get a good look.  Since I can’t find any info on the airplane or it’s power train, I have no way to know what battery it should use, what current it will pull, etc…  I was hoping the speed controller would give me some idea what kind of “not to exceed” numbers to look at.  Here is where the speed controller is buried.

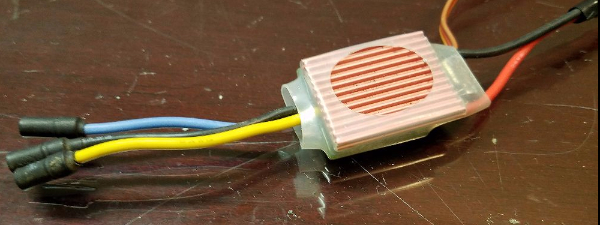
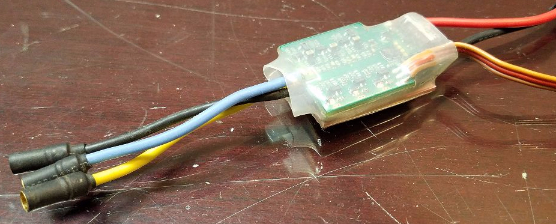
Yep, that’s it way up there in an almost invisible location… sigh.  After pulling one nylon screw to pull out the “scoop” I was able to remove the controller, motor and inadvertently the thrust tube that guides the air stream smoothly  out the tail.   Here’s the speed controller with nary a part number, label or any other identifying mark in sight!

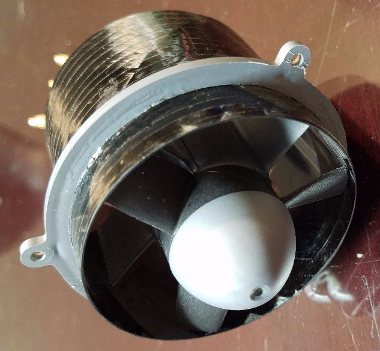
That being no help I looked over the motor and ducted fan unit hoping for some help but as you can see it was not much more illuminating.

I eventually took out the guide tube as well…

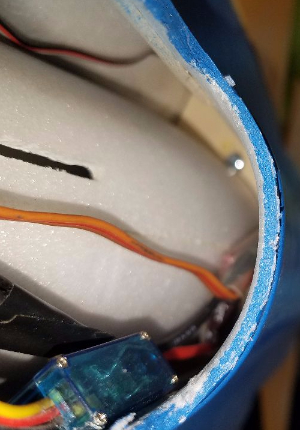
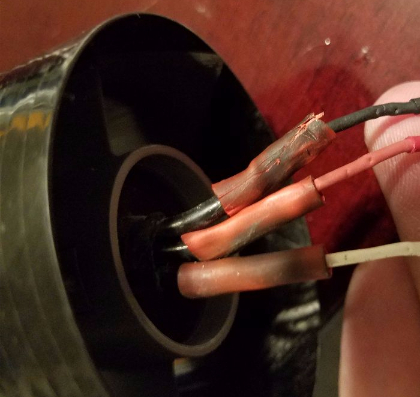
…and cleaned up all the parts, scraping off excess glue in some areas, re-gluing others etc…  In the process I found some suspect wiring that I intend to replace and clean up, extending some wiring a bit so that the speed controller is bit more accessible!

Here’s the wiring that needs some work.

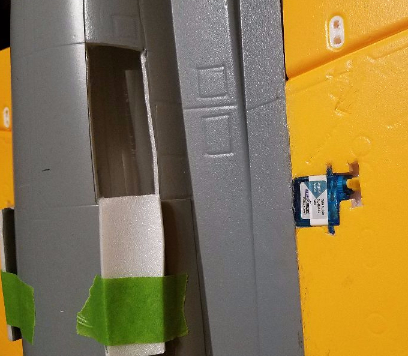
Here you can see the access points I had to open up to get the thrust tube back in place.  You can also see the one issue I had known about… the aileron control horns seem to be missing!


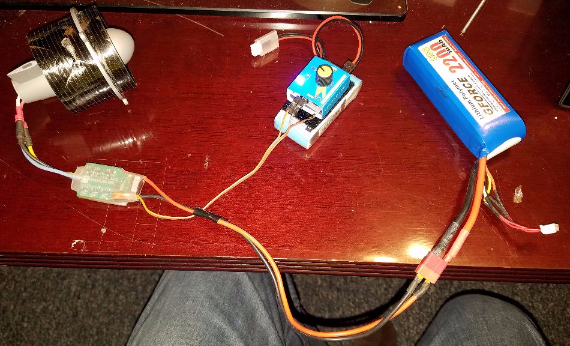
After all that I decided to do a test run just based on size and best guesses so I tossed a 3S on the speed controller, pulled the power pin from the ESC to the servo tester and laid it out on the table top…

The initial run was promising with ear splitting, vacuum cleaner on crack sounding rpms.   That IS what an electric ducted fan is supposed to sound like, right?

After I rework that wiring a bit, next on the hit parade is to put my meter in line and measure current draw at full throttle as another data point toward picking the right battery.  Then I can get back to reassembly and installing some replacement control surface horns.

Then maybe estimating some sort of balance point/CG and installing a receiver and radio setup… This thing is practically bind and fly, right?

Telemaster 40 becomes glider tug

I recently installed a glider tow release into my Telemaster 40.  Partly I did this because I could and partly it was because I have a couple of fellow RC club members who own gliders that I have towed up before and I sold the old tow plane (the Carbon Cub) so felt like I needed to have a replacement.  The Telemaster sports an Electrifly .80 motor along with a Talon 90 speed controller.  This combo, powered by a 6S battery (usually a 4000 but now frequently a 4500mah) has a lot of pull to spare.  The Telemaster only weighs about 5.5 lbs ready to fly so pulling a couple pounds of glider is fairly effortless.

I found a nice release to use and with a little surgery it was firmly ensconced in my airplane.  Here are a few pics of the install.  

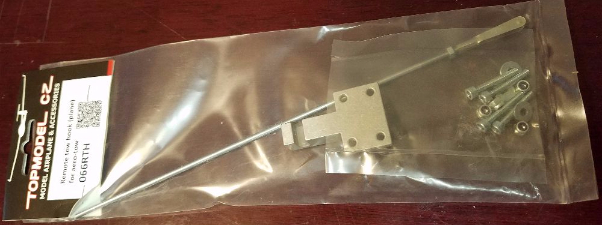
Here’s the unit I purchased.  This one is made by TopModel and is very stout but not extremely heavy.

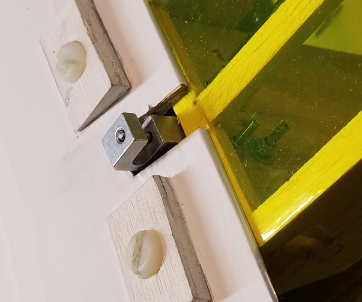
I want to install it just ahead of this bulkhead near the trailing edge of the wing

To do that requires access to the other side so cut open the bottom…

Mounting it requires getting  a good grip on the nuts on the far side so forceps to the rescue!


And the construction of a tray for the servo to run the thing.

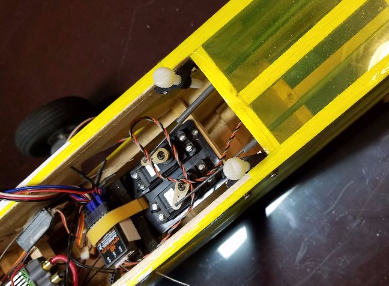
In my case I mounted this tray across the body with the servo shaft pointed toward the rear of the plane to give a nice straight up shot through the release.

Once the release is mounted, install the servo “tray” and cut the rod to length.

With a little radio magic, assigning a channel to a switch, setting endpoints etc… and you are all set.

Aside from getting access to mount it, nothing really difficult about the process.  It was easier to mount it just forward of the bulkhead near the trailing edge of the wing than to build out a bunch of new structure so that’s what I did.  It did necessitate notching into the trailing wing edge right at the root, but on this aircraft that is simple enough.   I was a bit concerned about whether it would hold up but based on this video it looks like we are in business.


https://youtu.be/fWAyZZC7gTA


As you can see, no all glider tows go smoothly.  One of the two KA-8s I was towing had some pretty nasty habits when in tow.  We are investigating but we are pretty sure either the wing or tail incidence is off or even variable due to damaged mounting hardware at the back of the wing.  It does make for some “exciting” flights for all concerned!!

I’m looking forward to more glider towing.  Using an electric plane makes this even easier as the preparation between flights is simple and while you are hooking up etc… you are burning very little “fuel” so more tows between “fuel stops”.  All in all this has been a success so far and I’m hoping for better tows in the future as both I and the glider pilots get more experience.  The tow release is working like a charm so far and I would certainly recommend it to anyone who wants to get into this facet of the hobby.

Flying the E-Flite Timber

I have been putting the majority of my flights lately on my E-Flite Timber.  It’s a rare trip to the field where I don’t run 4 or 5 batteries through it and some days I may do 10… especially on days when I just want to relax and not spend a lot of time assembling or hauling out the larger/more complicated stuff.

The airplane is just fun if you enjoy STOL and just slow relaxed flight as well as being a fair platform for basic loops, rolls, and other basic aerobatic maneuvers.  Since I added the multi-connex (see this article for details on those) to make it a two plug operation to connect the wing, getting it up and running is quick and easy.

Here is a video compilation of Timber flights to give you an idea of the flight envelope.  This includes looking forward/backward and out over the starboard wing over the course of several flights.

I have read thousands of posts outlining all the things that are “wrong” with the Timber and warning of dire consequences if you don’t “fix” the aircraft immediately upon assembling it.  For the most part, in my experience (we have 5 of these at our club right now) if you simply follow directions and assemble the plane according to directions it will fly wonderfully!  Even the battery tray favored by some, I find to be unnecessary and possibly even inconvenient/limiting as the battery compartment isn’t overly large to start with and this just uses up more room!  Loved that same concept in my Carbon Cub but not for me on this one.

There are a very few things that I would recommend doing to make things easier or avoid issues…  

  1.  The only critical issue I’d be concerned with is to check the prop balance.  Most will never have an issue if they don’t do this but I’m sure there are some that the prop is so badly out of balance that the airplane will destroy itself due to vibration.  If you run the motor and hear a lot of vibration noises… balance the prop.
  2. Do something (lots of choices) to make taking the wings on and off a bit easier like the connectors I mentioned earlier.  Some folks keep the wires attached and build holders that allow for easy transport in that mode.  Some don’t mind the wires as is.
  3. I did a wax job on my plane using floor wax.  This is excellent for keeping the plane clean and protecting the finish.  Not a necessity but helps with longevity.  I have an article on this here.
  4. Take the screws for the float pull-pull connections and hide them somewhere as soon as you find them.  They have a habit of disappearing, especially if stored on the airplane when not being used!
  5. Finally, I did not even try using the floats with the standard rudder linkage.   I had a similar setup on a previous plane and found both the “fishing line” pull system and the spring return to be problematic at best.  I removed one rudder and rigged the other for pull-pull using standard pull-pull braided cable just as I did on the previous plane.  If you want to read about that modification on the other plane you can find it here.

That’s about it. 

I fly mine without the optional slats right now… though I may add them later and really wish they were removable (sigh).  Reports vary widely but on a good 2200mah 3S, I average about 6 minute flights with 30-40% left in the battery at landing.  You can burn up a battery in 4 minutes on lots of throttle or you can coax it closer to 8 minutes if you are gentle… I’m measuring time spent above 20% throttle so actual flight time is usually a couple minutes longer.

In closing, this is quickly becoming my go to flyer for quick and easy flight.  It has a fairly wide flight envelope, is easy to assemble and transport and with the lights and floats, very versatile.  It may take the place of my Parkzone T28 as my “gotta have one” foamy.  Get one soon!

I will do another article soon on the SAFE and AS3X modes of this airplane and its included receiver.  For now I wouldn’t let that get in the way if you are interested in this airplane.  It won’t hurt you and it may be just what you’ve been looking for.  If you want to put your own receiver in it or turn all that off, that is possible as well and the plane flies well without it too!


Extreme Flight Laser 200 – Prop choices… Solved

After considering my options for  awhile I finally decided that I was not willing to continue to run my Laser’s power system with the Castle speed controller reporting the FET hitting 180 degrees or so and the total wattage showing peaks near 4100 watts from a system designed for 3500.  Castle advised that the speed controller might shut down around the 210 degree point so I have a little margin to work with but pulling a bit less power would hopefully cool things down, plus bring that top wattage down a bit which would hopefully also translate to a little more flight time and less strain on the batteries so…

First step was to hopefully reroute and improve airflow a bit.  The motor box in the Laser is as much open space as structure so there is a lot of air passing through over the batteries directly from the cowl openings to each side of the nose cone… but below where the speed controller sits may not be getting as much since it is not “in line” with those openings.  To help with this I taped off  the side openings of the motor box to hopefully force more air to pass underneath and over the heat sink of the speed controller.  I also re-routed my battery tie downs (Velcro strips) so that they were not covering any of the fins.

This seemed to have negligible impact so I decided the next logical step was to reduce prop load slightly.  The 22×8 flew awesome but the 20×8 dropped the speed controller temp by 50 degrees or so and the bird still had good power and dropped the battery draw markedly.  But of course I wanted more power!  The only place to go was in between and having already bought 4 props I decided it was time to do some “custom” trimming.

I first marked the tips of the 22×8 about a half inch off of each and then powered up the desktop sander and started making the new 21×8 custom Xoar prop.  I tried to maintain the basic tip shape and hand sanded the last bits to round edges and smooth things up.  I then applied some clear finger nail polish a sealer to the bare wood.

After a little drying time, I put the prop on the balancer and did a quick balance job and then bolted it back on.  Here is a before and after sample of flight data showing wattage, amps and temperature of the speed controller.  First the 22×8 stock prop.

You can see the temp of the FET nears 180 degrees (the gray line) and the wattage peaks over 4100 watts (the red line).  Note the current at almost 96 amps.

And now with the modified prop…

In this graph the temp peaks at just over 155 degrees Fahrenheit (gray) and the wattage now peaks at about 3800 very briefly (the red line).   Amps drawn peak around 86 (in yellow).

Even dropping back on power a bit, the plane has huge power… straight up snaps?  No problem.  Knife edge loops?  Sure!  Straight up out of a hover?  Piece of cake.  So I think this is it.  The prop of choice will be a Xoar 21×8, either cut down from a 22×8 or direct from the factory.

Now I can concentrate on airplane setup including battery position for best balance, mixing needed, etc…  Now I just need about 50 flights !

Extreme Flight Laser 200 – Prop choices… still searching

How much is to much???

After a dozen flights on the EF Laser 200 and I was a bit unsure where to go next.  Don’t get me wrong, this is a really nice flying plane and the power system is outrageous…  3600 to 4100 watts peak depending on prop is just plane silly… and I love it!  The problem is that the manufacturer recommends the motor for 3500 watts and that only for short bursts.  I don’t want to abuse the motor so I need to keep a close eye on this.  Generally I’d say I need to stay with the smaller of the two props I have run (the 20×10) but of course there’s a compromise to be made.

When I went to purchase a prop I picked up a couple of the recommended sized (a 20×10 and 21×10) and bolted on the 20×10 for the early test flights.  After flying the 20×10 for a few flights I was unhappy with the prop due to excess speed and lack of braking.  What I needed was a larger diameter prop with less pitch.  I had the 21×10, but I’m pretty sure it would still be fast and even though larger diameter props typically add more drag when you decrease throttle I expect it wouldn’t be hugely better.  What I really needed was lower pitch.  According to my calculations a 22×8 is 3 or 4% less loading than the 21×10 and that big diameter would make a much better brake so I picked up one of those.

Testing with the new prop was very encouraging from a flight perspective.  The plane has much better in down line braking with unlimited vertical and reduced top speed.  Just what the pilot ordered!  Unfortunately, the peak amps hit something around 90A instead of 80 and 4000 plus watts instead of 3600 which means increased risk of frying the motor and less flight time as the battery has to provide more current when you reach for all that pull.  At least that’s the expectation based on the telemetry I have from a couple short flights.  Now it may be that the short bursts of power won’t really hurt the motor since I will rarely even push it that hard and if I stay out of the throttle the flight times may not be as bad as I think… but it may be wiser to give up a little power (no problem) and probably some of the braking and drop to a 21×8 or maybe even a 20×8.

Now the question becomes, just how much is too much and which Prop to try??? Each time I pick up another Xoar prop it’s a $25-$30 investment and if I swap for cheaper brand prop it may change the whole formula.  All props are NOT created equal and the shape and thickness varies between manufacturers so sticking with the Xoar is safest.  Besides, I have always enjoyed the Xoar propellers.  They seem to perform well and the quality of the wood and finish is top notch.  So what to do next??

What I’ve decided is to go back to the 22×8 and fly some more flights paying strict attention to battery life and trying to moderate my throttle through a set flight routine.  Probably will go up and fly the basic IMAC routine through two sequences and try to use only the throttle necessary to present the maneuvers properly.  Then I’ll land and check the battery levels and watch my temps on the speed controller and battery.  After a couple flights I should have an idea whether the prop will work or if I need to move down a little… or a lot!  As long as I don’t let the smoke out it should give me the info to pick the right alternative.

Another thought… If I do decide that I need to downsize a bit I could always order a 20×8 and simply trim the 22×8 down to a 21×8!!!  Then I could compare both options.  I’ve done a prop “trim” like this before to get the exact prop I want and with a little care and proper balancing it can work out well.

I once had a gas motor that really needed a 17×6 wide blade APC to perform the way I wanted.  Unfortunately they only made 16×6 and 18×6 in wide blades so… a bit of grinding and voila.. the worlds only APC 17×6 wide blade.  I ran that prop for a couple seasons and it was exactly what I wanted on that plane.  

If I go that way and the 21×8 “special” works well I can always order a 21×8 PJN factory standard with some confidence and just keep the special as a spare.  If it’s still a bit to much I can just move on to the 20×8 which is even less load than the 20×10 I’m currently running so I’m sure will give me longer flight times and protect the motor and speed controller… At least I’d only be buying one additional prop!

Wish me luck.  Hoping to get the test flights in tomorrow on the 22×8.  Praying for smoke free day!!

Re-Programming the AR636a in the E-Flite Timber (Part II)

Part I of this post is here.

When I reconfigured my Spektrum AR636A and reloaded code to make it into (essentially) a standard AR636 receiver and used it as a non-AS3X model by setting all the gains to zero… all was well.  But when I then decided to add back in some AS3X functionality in certain flight modes I overlooked one important plot point.  Luckily while reading some forum posts on the subject of the Timber in general one comment about reversing the servo direction got me thinking.  So I ran up to the shop and checked and guess what?  My elevator and aileron were responding exactly the opposite of what I would want when I tested the AS3X reaction to uncommanded roll and pitch movements!!  This could have been disastrous had I flown in this mode.

Here’s the problem.  When I went back to what I’m calling “standard” receiver mode with no gains so no AS3X functionality at all, I decided to treat this just like every other receiver.  I relied on my transmitter to make all servo adjustments including centering, movement direction and speed, expo etc…. That’s great in standard mode.  The problem comes when I decided to re-institute a switchable AS3X mode.  With the servos all set to standard (not reversed) and the servos reversed as needed (Aileron and Elevator) in the transmitter the stick command work fine.  But, when the AS3X is on and sees an un-commanded pitch change it command the elevator in the opposite direction.  Unfortunately since it does not know the transmitter is acting in reverse it command what it thinks is the opposite direction from the pitch but (the way these servos are connected and linkage attached) is simply more of the same!!  This would result in a sudden increase in whatever uncommanded pitch occurred.  I’m guessing the plane would try to loop… continuously.  For the ailerons a constant roll would likely have occurred and in my case both would have happened and things might have gotten ugly from there.  Of course I could have overridden those command but as soon as I neutralized the sticks it would have just reoccurred and we would have been off to the races again.

Honestly my only shot to control the plane might have been if I could have reached the switch to shut off the AS3X function in time.  Since this likely would have occurred quickly after launch… I imagine there would have been some unscheduled contact with the earth and a lot of cursing and gnashing of teeth!

Lucky for me I have been reading a lot of posts and so this came to mind before an ugly incident forced me to learn the hard way!  So lessons… 

  1.  When working with the AS3X receivers, servo reversing is best done “on board”
  2. Make sure you have a known good working flight mode to use when changing these things.  Take off in that mode and test up high in the air so you have time to switch back to the known good mode if anything seems amiss.
  3. Don’t trust anything you read or are told if the person telling you has not flight tested his tweek/update or whatever!

OK, so quit wasting your time reading on line and go fly!!  ðŸ™‚