Update to my Dumas Windy air boat is underway… kicking the glow habit.

A couple weeks ago, my only glow powered airplane lost its battle with gravity.  “The Pig” as we called it had seen better days and we think the wing (which had a couple of weak spots) may have just made one to many 8G turns…  It dove hard into the ground and shattered the forward third of the body.  The wing was in 3 pieces as well so not much left to work with.  Nor was I particularly interested in spending a lot of time and money on a truly major rebuild anyway.  There are lots of old beaters around to chase gliders with (it’s main occupation the last several years).  RIP “Pig”. 

Whatever the cause, it meant that I had only one glow powered craft left… my Dumas Windy air boat.  That meant I was now in striking distance of finally getting completely out of the glow business.  No more messy oil coating every surface, eating finishes, staining shoes, etc… etc…  No more obsessively tweaking the needle for that little extra kick.  No more disappointment when the glow driver battery was dead.  No more little slices on my fingers from flipping those insanely sharp composite props.  I can do it!  I can be free!!  Maybe I could even find some poor soul who hasn’t yet tried to kick the habit to unload the remnants of my stash?  Someone who is still completely in the grasp of that cruelest of mistresses…

Glow motor addiction! 

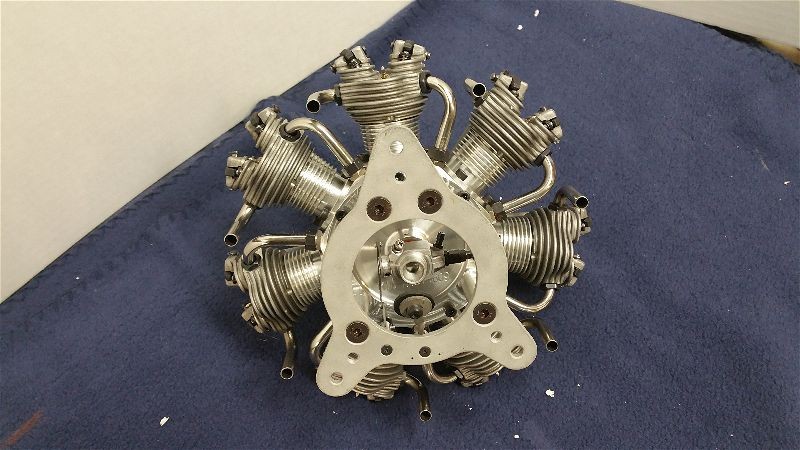
Yep, I recall when I was hooked.  The smell of warm castor and the ear piecing shriek of a 2 stroke at 15,000+ rpm was what I craved.  When I tried to escape I was simply lured in deeper by the mellow tone of a 4 stroke purring away at an idle so low you can practically count the RPMs.  And the price just kept getting higher.  10/15 wasn’t good enough anymore, now I needed 20/20 or better.  The “dealers” kept pushing harder with gold plated (literally) and chromed editions that I simply had to have.

But I’m almost free now.  If I can find a replacement power system for the LA-15 (blue edition of course… I could never stand the cheap stuff…) I could be free.

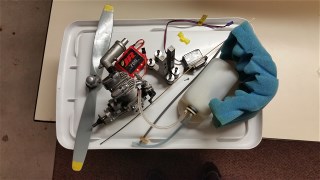
I quickly realized I already had a possible alternative.  I had recently purchased the remnants of a E-Flite Timber.  The electronics and power system were all intact to all appearances.  So the plan was hatched.  I would transplant the BL10 from the old Timber onto the Windy.

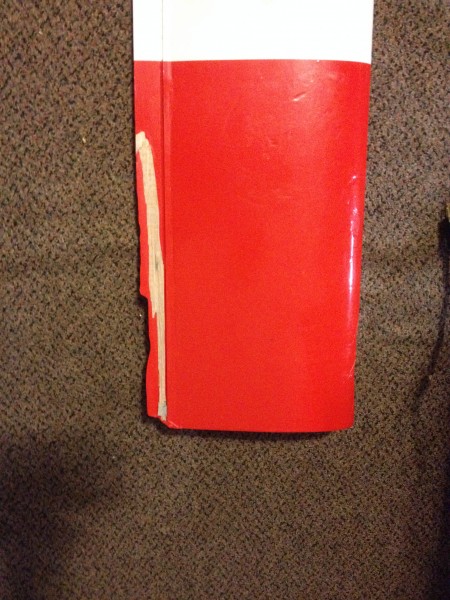
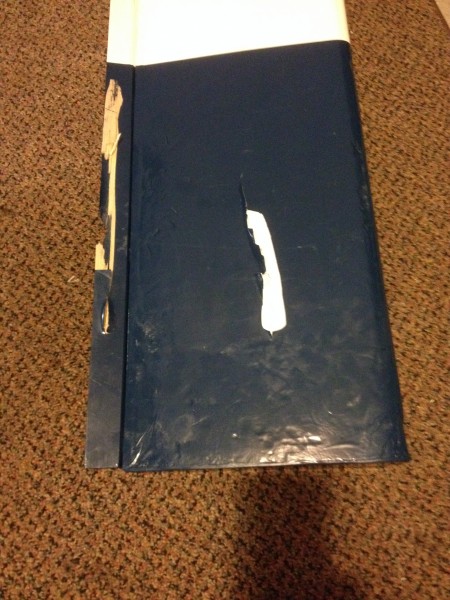
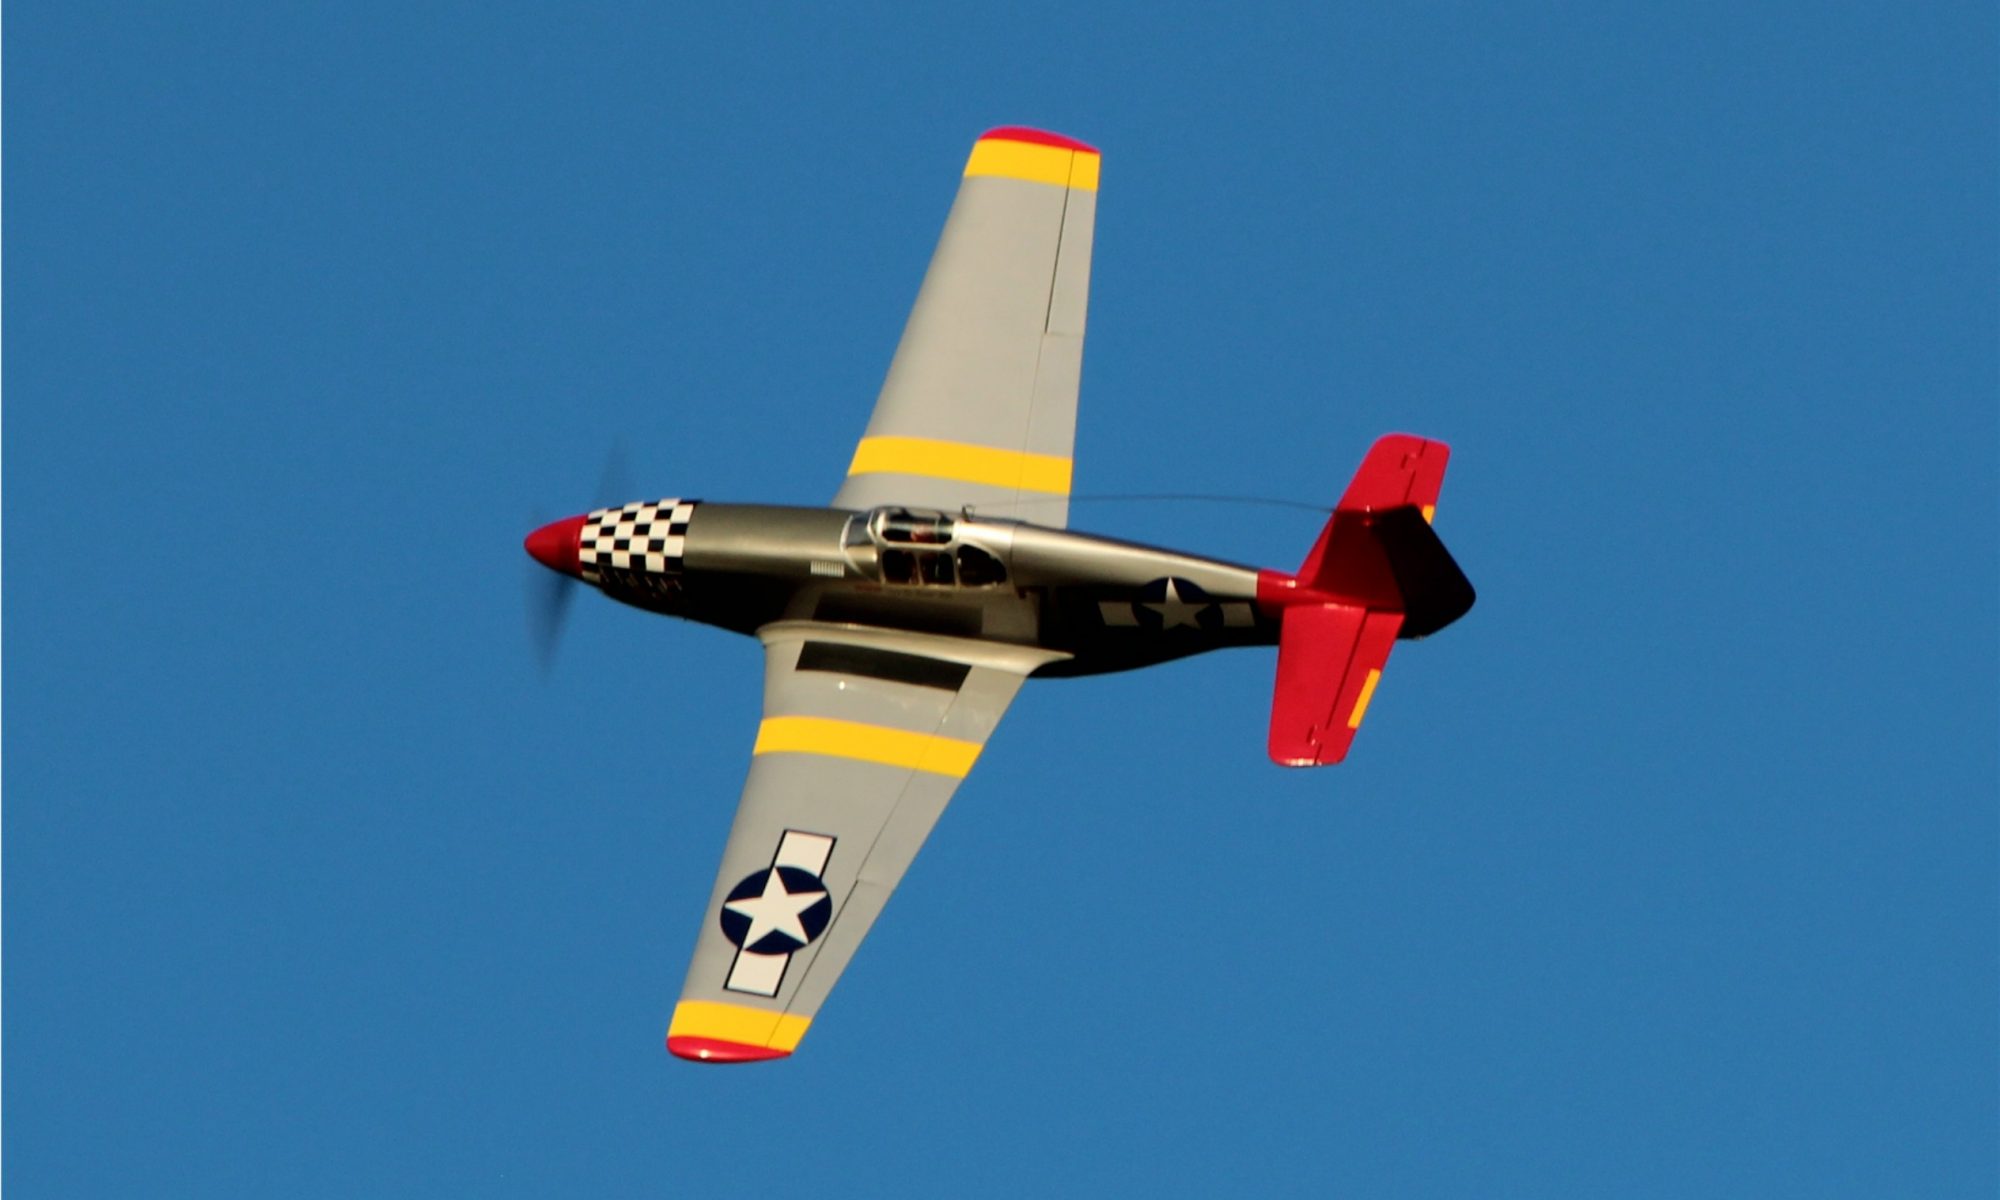
First I stripped the LA-15 from the boat and placed it into my swap meet box.  I only took a quick sniff from the muffler as I polished it up a bit for display… (Don’t judge if you haven’t been there).  Twice it occurred to me how reliable the 15 had been and how well it would pull the half finished little mustang that lay just across the shop but I summoned up my will and closed the lid on the swap meet box firmly.

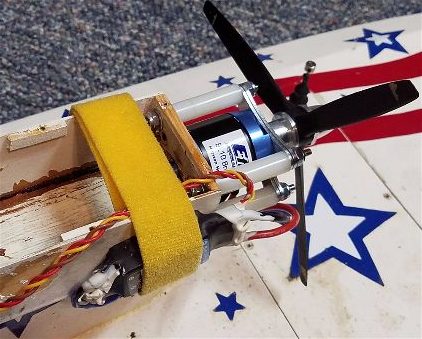
Once past this job I quickly stripped the on board battery, throttle servo and fuel tank.  After gathering a few supplies at the hardware store I managed to space out the BL10 motor with some nylon spacers, threaded rod (hacked to length) a few washers and some nylon insert nuts.  The firewall looked like it was about ready to give up the fight:

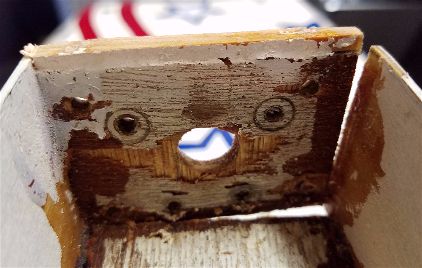
Some medium CA and kicker was employed to solve that issue.

I kept the little 7×4 3 blade prop.  At least for now.  There just isn’t clearance to go to a higher diameter prop and  I haven’t found much else that looks like a good fit, so for now this is it.

A bit of temporary Velcro strapping to temporarily hold the speed controller in place and thing were looking pretty good.

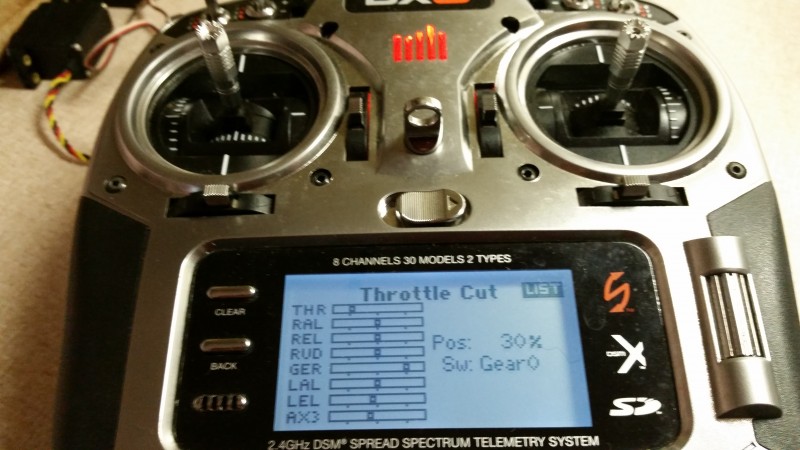
Time for a quick test.  Using a 3S 2700 I measured about 11A and 130W of power draw from the battery.  A quick test on grass confirmed that this is just not the same level of power as the old 15.  I tamped down the temptation to re-install it (I get stronger ever day but the temptation never seems to die!) and did a bit of research .

A couple days later I recalled that some Timber owners had run this motor and speed controller on 4S packs… and with very little difference in prop size they had reported continued health of the power system.  So I decided why not.  This time with a 4S installed the meter showed 270W and 18A of draw!!  I was running this test on carpet and the boat took off across the room when I released it and without even reaching full throttle.  This combination looks good.  This alternative to glow for this boat seems great, no side effects apparent… I might make just make it!

During a final test… just for fun.  I noticed a brief stutter on startup and then again at a higher throttle… I thought the motor was going to shake apart.. what the heck??  Oh well, I guess there are always slips along the way…  Guess I better start researching this new issue…

Gary’s Hangar Nine Corsair with Evolution 777

Recently visited one of the “Garys'” to make a stab at getting his Evolution 777 4 stroke, radial, 7 cylinder motor to run at other than 20-35% throttle settings.  Previously that was the “best” we could get.

But today, here is what we got to…


https://youtu.be/G79xyCGJb-M


This is a much superior result.  So what was holding it back?  On the previous runs we had been running some older fuel and also been advised that we needed to open up the high speed needle a bit… but undoubtedly the key factor had to be the replacement of all 7 glow plugs!

A bit of overthinking (perhaps) had led someone to decide that the brand new plugs in the motor needed replaced before the first test run.  And someone else advised that the OS #8 was the best plug for ALL glow motors!  Perhaps that statement might have been a bit… overstated!?

While I agree that the OS#8 has long been one of the best all around plugs for a large majority of smaller displacement 2 stroke glow motors, there are also reasons that manufacturers recommend hotter plugs, colder plugs and very pertinent here… specialized 4 stroke plugs for some motors.  So by moving back to the provided 4 stroke plugs, fresh mixed fuel and some judicious tweaking of the needles per instructions from the support folks at Horizon Hobby… and we are now officially into the break-in process!

This Corsair might actually get off the ground… eventually!

Hangar 9 F4U-1D Corsair ARF build – The Evolution 77cc radial arrives!

Today my flying buddy Gary stopped by to give me a taste of his latest acquisition… the Hangar 9 F4U-1D 60cc ARF.  Gary has only been flying a couple years, but one plane has always caught his eye more than any other… the Vought F4U Corsair.  The distinctive WWII war bird is instantly recognizable to most and a favorite to many.

Gary stopped by today with just a few of the many parts and pieces required to get this big beautiful bird in the air.  First and foremost is the power plant.  Gary had the opportunity to see this engine at the Horizon booth when we attended and I think that pretty much sealed the deal.

The Evolution 77cc 7 cylinder glow 4 stroke is a piece of art.  It comes complete with a glow wiring harness and integrated mount.  But if you thought your wallet was done taking a beating when you bought the engine… probably not so much.  Most will want the collector ring (at additional cost of course) and an on board glow system as suggested in the engine manual (now that wallet can take a deserved short break).   Here are a couple shots from when we unpacked it today in my shop.

Here’s the money shot… This thing is just B-E-A-Utiful!

2016-04-09 14.48.13-opt

Even the mount is beautiful in an elegantly functional way.  Having the choke and throttle linkage thought out a bit for you is a nice touch as well.

2016-04-09 14.48.40-opt

There are some interesting little notes in the manual about oiling the push rods before each day of flying, adjusting valve lash when needed and inserting after run oil after every flying session by pulling a push rod and cam follower to add after run oil…  That all sounds pretty reasonable until you remember this thing will be hiding under a cowl, possibly with air baffling around the cylinders (again, a recommendation from Evolution) so maintenance is going to be a chore that no one with this kind of money invested is likely to be skipping I guess!  Ah, large fuel powered war birds…  They do enjoy being lovingly maintained!  What have you gotten yourself into Gary?  Of course it will all be worth it when we here the dulcimer tones that will be issuing from the exhaust!!  Oh, and watch out for hydro-locks in those bottom 2 cylinders!  I wonder if storage of the airplane “nose up” would minimize that possibility??

There are also some interesting recommendations on fuel mixes…  I don’t recall seeing 0% nitro with 10% oil on the shelf at the local hobby shop (for break in) nor 5/7 for later use…  Hmmm…  Better start looking for some pure methanol so we can mix up some custom fuel!!  This is where the modeling part comes in I guess.  I ‘m actually looking forward to seeing Gary in his “mad chemist” outfit with a bubbling cauldron… 🙂

All that aside, I really think it will be worth it all when that big bird lifts off.  This engine is going to demand some respect and loving attention for sure though.

Also in hand when Gary visited were his main retracts.  You have to admire the engineering behind these as well.  Not only are you raising and lowering the wheels whilst providing some nicely spring loaded struts… but they have to rotate 90 degrees as well!!  These are Robart units with the electric actuator so I expect smooth action and simple setup… at least for retracts!

2016-04-09 14.50.20-opt

We didn’t get around to plugging together a receiver and the control board so we could cycle these… I’m looking forward to that as well.

Gary promised pictures and some commentary as he gets started  building so I’ll try to post occasionally on how it is going.  Especially on anything interesting, troublesome or particularly cool.  We are already talking about ways to avoid the 2lbs of nose weight they claim we will need!  I hate lead in an airplane.

More as Gary progresses.

Glow Carburetor Adjustment

Just a note to let folks know I just unearthed a little gem of an article on how to adjust your glow engine carburetor.  I believe this was originally posted to RCU back in 2004 but couldn’t find it when I needed it.  Now that I found a copy I did manage to locate it on RCU as well but I decided I would just post it here to my articles page just to insure I could always find it when I want it.  You can click on Articles above or you can just click this link to pull up the article directly.

Tim Mills Carburetor tuning 101

This was originally written by my late friend Tim Mills who passed on February 20, 2011.  Tim had an amazing touch with engines from Motorcycles to Airplanes… Gas or Glow, 2 or 4 Stroke.  Tim always said that you just had to listen to what the engine was telling you but he was one of the most fluent in that language that I have ever known.  I’m happy to share just a bit of his wisdom on the subject.


Throttle lock/Kill Switch programming on the DX8

A couple years ago I was taxiing back toward the pits with one of my smaller gas powered planes and had stopped to observer another flyer doing a nice touch and go… My plane was sitting by my feet at a sedate idle during this distraction.  When I turned back, I returned my left hand to my radio and inadvertently slid the throttle stick to full!!  Luckily I was pointed at the pit chain link fence 6 feet away with no other obstructions… like people… so as I grabbed the stick and returned the throttle to idle the plane made a dash for the fence and quit as a result of the impact and the prop breaking into several pieces.  It did no real harm to anything except the prop and my pride… but it woke me up and from then on I have been much more attentive to my models while they are running.  When I am idleing, my thumb is hooked across the top of the throttle stick so that it cannot easily be moved upward.  As well, I now have a kill switch on every fuel powered airplane and it is always in the same position on the radio so I don’t have to hunt for it!  With gas planes I have a mechanism hooked into the ignition circuit that kills power to the ignition.  Depending on the type of engine and ignition system it may work a bit differently but each disables the ignition which kills a gas motor immediately.

With the advent of more electrics in my fleet this became even more problematic.  Electrics, once the battery is connected, should be considered to be “running” in all cases and therefore treated with the respect that would be due any idling engine.  Since you can forget the battery is plugged in at times, I try to be especially careful to restrain my electric powered aircraft whenever I’m not holding on to them and a battery is installed.  I have also setup a throttle cut switch that limits the throttle channel output to zero or as close as possible.  In some radios this is simpler than others.  In my Spektrum DX-8 there are two ways to accomplish this… maybe more… but I’ll show one of them here that I use most.  (I believe the 7s, 9 and 18 all do it similarly)

Note: You can do all of the following without the plane even being present and certainly don’t want to play with this with the plane powered up!  I highly recommend you test after you finish however with the plane well restrained or the prop removed.

First, the DX-8 has a throttle cut option in the setup menu.  If you go into that menu and change the inhibit to a switch label (I tend to use Gear0 as I’ll show below) you get a screen that looks like this.

2015-10-29 20.03.02

You’ll notice that the switch is set to Gear0 (that’s a zero).  I use this setting as I tend to setup my radio so that starting point for all airplanes when I fuel up or attach a battery is with all switches pushed away from me.  It really doesn’t matter which way you do it.  I’ve worked with computers and electronics so long and the way I was taught logic you generally consider 0 to be off and 1 to be on…. I guess position 2 is “really on” in the case of a 3 position switch!

With my radio set this way the throttle is locked so it cannot inadvertently start up without moving both the throttle stick and moving the gear switch out of its starting “safe” position.  The other thing you may notice is that the position reads 30%.  I played with this and came upon this setting by trial and error.  I believe this has to be done because of two factors.  First, the designers created this for (I believe) primarily fuel powered aircraft where the stop/kill position is significantly different from the idle/standard starting position.  In an electric aircraft you generally don’t want an “idle” with the prop moving when you pull back to the lowest position on your stick.  You want a full stop.  Second, most speed controllers in my experience will look at the throttle setting on power up (as long as it’s at least somewhere near one end of travel or the other) to be the zero/stop point.  That’s fine until you combine with point 1.

So imagine you plug in the battery with the throttle 30% lower than “idle”… which is what the throttle position would be if you left that setting at zero and had the switch pushed forward/off when you plugged it in.  All seems fine… Your speed controller makes its little tunes and if you move the throttle stick nothing happens but your servos are energized (this may vary by manufacturer of the speed control).  Great, you are ready to taxi and you flip the switch to the armed/on position and immediately the prop spins to a “high idle” setting!!!  That’s not convenient, nor especially safe.  This is because with the kill switch in the forward/off position the throttle was at a point 30% or so below the idle point and when you plugged in the controller reset that to be “zero”.  By testing I have found 30% to be about the right point to avoid this issue.  Now the kill switch doesn’t really change the position of the throttle at all and acts more like a throttle hold then a cut.  Ideal for what we want when dealing with electrics.

There are other ways and other radios do it differently.  On my DX-18 which I fly more than anything else I use the F switch instead of gear because I use the gear for other things… like retractable gears!  But whichever switch you use, I suggest you keep it consistent.  This way your routine on each plane is the same at least as regards to a safe “startup” and also because occasionally you may want to hit it in a hurry and not having to think about which switch it is can make a big difference in response time.

I’ll try to post on a different method in the near future.  Hope this is helpful.  Fly safe!


Conversion of the Telemaster 40 to Electric Power – Part 1

I’ve been saying for a couple years that I would eventually like to do away with all of my glow power in favor of either Electric or Gas.  With gasoline being so much more affordable than glow fuel and more and more gas powered options becoming available in smaller displacements, I started divesting myself of all my 1.20 and up glow engines and installing DLE-20s or something similar.  For the smaller stuff, economical options for electric power in the smaller aircraft have also become available as battery technology particularly seems to have jumped forward.  For me the sweet spot for glow power had shrunk to .46-.90 size engines only.  Anything else and I was looking for Electric or Gas power options for sure.

Recently I bought the Carbon Z Cub and after a few flights I realized that it might be time to once again look at what electric options were available for my remaining glow fleet.  It’s power system is pulling an 8 lb airplane with enough power to provide unlimited vertical (1250+ Watts when running at the absolute max) and since I was going to be buying a few 6S LiPo packs in support of that aircraft anyway I thought if I could find a good alternative using those same packs it might be time to replace a few more glow power plants.

One of my old reliables in my glow fleet is my Telemaster 40.  My Telemaster is probably 10 years old and has gone through 2 or 3 engine swaps and 2 different covering schemes.  It is currently configured as a tail dragger with a Saito .82 four stroke for power which would seem to be in the same category of power as the Carbon Cub and is far lighter (~5.5lbs), even with floats attached(~7lbs).  This aircraft with the Saito makes a great float plane, drop box hauler, glider carrier and sometimes just fun to fly light weight trainer.  It is currently covered in Wonder Bread inspired white with colored spots and is always a big hit with the kids as a result.

The Telemaster’s horizontal stabilizer is a full airfoil design which makes it quite different to fly from most other trainers, handling much more like a cub than a trainer when it comes to takeoffs, landings and turns (rudder coordination is highly recommended).  I like to think it is my skilled craftsmanship (she started out as a box of sticks, two plan sheets and 4 pages or so of small print) that makes this thing such a versatile and fun aircraft to fly but I’ve seen the ARF version and it flies great too!

After a bit of research I decided that is should be possible to swap out the Saito for a new motor and speed controller without spending a whole lot of money (assuming I can sell the Saito to offset some of the cost) and losing little or nothing as far as performance goes.  In fact, most of the power options using the 6 cell LiPo batteries are likely going to be on the high side of what the .82 produces based on the research I did.  It also looks like the weight of the aircraft should remain nearly constant if I keep the battery capacity in the 3000-3500mah range.

To start with I did a ton of reading, comparing specs and calculating to find out which motor and speed controller combinations made sense.  I also looked for something that might be a good fit for my .90 size AeroWorks Extra 260 while I was at it.  The Telemaster needs a healthy power plant to handle all the “extras” I ask of it… so something with just a bit more capability than the CZ Cub has (besides I’d like to have a bit more headroom as the cub can actually draw the rated max from the provided speed controller) maybe 1400 watts or so would be a nice target… Hopefully I can continue to enjoy nice long flights when I’m just poking around but still have plenty of authority when pulling up off the pond or hauling my skydiver up for another drop.  Just a bit higher would even be enough to pull the Extra 260.  It’s in the 7-7.5lb range so I’d like to have 1600 watts or so on it.  With the right choices maybe I could share batteries and run a similar speed controller even if I have to upscale a bit on the motor itself.

Keeping in mind that I wanted to use my 6 cell batteries (My battery selection right now skips from about 2200mah 3S batteries to 6S 3200s!) and limiting myself to mostly what I can get through my local hobby stores, I came up with a couple of interesting options and decided to look at the Rimfire .80.  My Saito turns a 14×7 with a lot of torque up to just under 8000 RPM if I recall correctly and the Rimfire calls for something in the 15×6,14×8,15×7,15×8 range and at 500KV on 6S I would expect something in the same range of RPMs… so it shouldn’t be any less capable with the new power system.  Also, per the wattage, KV and Prop specifications, this appears like it will be a close match to what the Carbon Z power system does and with only a bit less wing and quite a bit less weight I would again expect to have some fairly “peppy” performance on the Telemaster.  Checking weight, etc… and everything looked to be in the ballpark so I had the hobby shop order the motor and speed controller and started to work on the air frame.

Getting started involved pulling the motor, fuel tank and all the rest from the Telemaster and getting an idea how much weight I was stripping out.  If things worked out well, I could install the new power system without adding much weight.  The last thing I wanted was to end up with a porky Telemaster.

Here is a selection of the items that will no longer be needed.

Web 2015-01-31 16.18.59

All told this stuff weighed in at 2 and 1/4lbs and I have since found a few other odds and ends I will no longer need.  Even with a fairly hefty/large capacity battery I think I can keep the overall weight close which bodes well for the project.  While I’m at it, I’m stripping her down to make it easy to install the new gear and make the necessary mods to install the electric power plant.  I’ll post some more as the project progresses.


Putting the Telemaster on Floats

This weekend is a float fly so I have been in the shop lately swapping out the wheels on several of my airplanes for floats.  I’ve been flying off floats whenever the opportunity arrives for a number of years now and I thought I’d try to share both the attachment method I use on my Telemaster and some of the tips and pitfalls for float attachment and float flying that I’ve learned over that time.

Here are a few quick float sizing/attachment guidelines that I have found will greatly increase your chances for success.

  • Floats should be mounted in such a way that the “step” on the bottom of the floats is in line with the balance point of the airplane.
  • Floats should extend beyond the nose of the airplane.  This seems to help to minimize the chance of the airplane flipping during a “to steep” landing and during takeoff if the tail rises to quickly.
  • A water rudder is a necessity for most aircraft.  Without this feature, you are very much at the mercy of the winds and will have trouble making turns during taxi maneuvers on the water.

Here are the floats I use on my Telemaster 40.

IMG_1677[1]

As you can see, I use a second aluminum landing gear as a secondary support, and Ernst water rudder and a separate water rudder servo.

Below you can see the rear mounting holes (there are blind nuts inside the body) that the rear landing gear mounts to.  Right behind that is the battery hatch.

IMG_1678[1]

Below is the “on float” servo that drives the water rudder.  This servo has been specifically water proofed but is otherwise a standard servo.  While some espouse dual water rudders, I have seen very little need.

IMG_1680[1]

The attachment to the floats is shown here (both front and back look similar).  The slack between the two wheel collars allows for a bit of telescoping action during landings to absorb some shock when the floats hit the water a  bit harder than planned.  For instance when a sudden burst of gravity interferes with an otherwise perfect approach.

IMG_1681[1]

That about covers the most important plot points.  I run my water rudder on a separate channel and then just mix it with the rudder so I can easily center it and adjust the travel independent of the main rudder.

Hopefully this has given you some useful ideas about how to get your own airplane on floats and ready to fly.  It can be a bit challenging to get everything set up correctly  but it is worth the effort.


Glider Carry for the Telemaster 40 – Pt. 2

Just a quick update that the glider carry worked well… but not for George’s glider.  While the carriage worked great and the release system worked flawlessly for the Radian, what I hadn’t foreseen was the length of George’s glider would bring the glider’s rudder into contact with the Telemaster vertical stab.  So back to the drawing board…  I was not happy with the saddle on the bottom of the carriage not properly fitting the Telemaster wing anyway so when I can get back to it I think I’ll be extending the bottom of the unit with new side supports that will raise the whole unit by about 4 inches as well as being cut to fit the wing surface better.

When I get some new parts built and tested I will post again.  In the meantime I’d love to hear from anyone else who has done this.  Feel free to share your experiences.

Hangar 9 Alpha 40 Trainer… Experiences good and bad.

At my local RC Club we have had several of the Alpha 40 RTF trainers (the orange model) used by students while learning to fly.  In general, these have been excellent flying airplanes.  Stable and well behaved with the included Evolution engine providing more than adequate power.  We usually ended up swapping the three blade prop for a 2 blade, especially if the 3 blade got broken.  Two blades are more efficient and much more widely available.  We would often eventually remove some of the limiters on the motor (needle valve collars) to get more power out of the engine as well.  After all, to much power is almost enough!  Generally these planes have been pretty trouble free and fly well.

Given all of this, when one of our younger members lost his Alpha to a battery problem another was purchased and the job of assembly was mine.  We presumed the new ARF would fly similar to the old RTF… especially using the same motor, servos etc…  Pretty much everything except the battery, switch and one of the servos survived and was moved to the new plane.  As I was building the new airplane I noticed they had redesigned the firewall and added a bottom hatch (surely a side effect of adding an electric power option, which I applaud).

Unfortunately I also noticed a few issues I was not particularly happy about.  First, the throttle rod routing is not ideal.  This is not the first plane I’ve seen with this problem so I did a bit of creative warping and rigged up something that was workable.  I’d recommend skipping installing the rod and substituting a cable type linkage to make the throttle linkage work with much less binding.  Likewise, the nose steering rod binds.  For this one it appears to be a problem with the routing of the rod combined with the flat ground on the steering strut and the straight steering arm.  As the arm rotates back toward the firewall, the wire binds against the edge of the guide and puts a lot of stress on the rudder servo.  If you position everything perfectly and limit the end points during your radio setup you can get a workable setup.  Luckily, there really isn’t much travel needed on either the rudder or the nose wheel so I managed but this seems like a poor design to expect a beginner to be able to successfully handle.

Another of our members suggested the use of an offset steering arm might accomplish the relief of this stress and allow for more travel.  I think it is certainly worth trying.  In the meantime we had a workable arrangement if not ideal.  Onward to the test flights.

A bit of tweaking, a balance check and the usual post build checks and we made a few test flights.  At that point, we started to notice a pattern of difficult takeoffs followed by lots of trim inputs, etc…  This was not good.  We couldn’t hand this ill behaving plane to our young member and expect good results.  He was still just getting comfortable flying without an instructor and not ready to handle this ill behaved ship.

It took a lot of left rudder to keep the plane flying straight down the runway and if it was trimmed for straight takeoff rolls the plane would constantly turn in the air and had to be re-trimmed for straight and level flight.  We tried many different adjustments, re-aligning the front wheel and rudder several times, trying various landing gear bends, insuring the wing was centered etc… but we could not keep the plane from at least often, if not always, veering sharply right when it was near rotation speed.  We also tried to add some lead to the left wingtip after noticing the right main wheel often stayed on the ground longer than anything else which seemed to help.

At that point we tried another Alpha wing which did NOT resolve the issue entirely even though after it was removed it was proven the first wing was very off balance… being heavy on the right wingtip.  This is an ongoing investigation at this point but after spending 3 hours working with 2 other RC pilots with probably 50 years RC experience between us… it makes me wonder what would cause this plane to act so oddly during takeoff.  I don’t believe the new Alpha ARF has this problem generically… it’s just this particular model that is vexing us I’m sure.  Once we figure it out… or get tired of this and just move on to another trainer… I’ll post an update.

For now, I can honestly say the Alpha 40 ARF doesn’t seem to be quite as good as the predecessor RTF model but is still a pretty good deal for the price and the only downsides should be readily avoidable if you know what to watch out for and spend just a few extra dollars on a throttle cable and a different steering arm!  Hopefully with these tweaks you can assemble a good flying airplane suitable for a beginner and still enjoyed by those of who have been flying for 15 years or more.


Two mid-airs in one flight… what fun!!

This last Sunday… July 27th… was our club airshow.  We’ve been doing a public airshow as a way to make money for the club for about 7 or 8 years now.  Our acts vary but there are usually group flights from various eras or types like WWI, WWII, electric foamy, etc… as well as a buddy box session or two, some scale helicopter, 3D helicopters, giant scale aerobatics and of course 3D airplanes.  This year we even had a 3D act that mixed a 3D heli and a 3D giant scale aircraft.  The two pilots even swapped transmitters during the middle of that one!  Its a ton of work to put on but we have some fun too.  One of the acts that is a perennial favorite is the glider chase and this year was a good one.

Our glider chase is just what it sounds like.  We have a trainer plane that carries an RC glider (really just a large foam glider converted to rudder and elevator only) up several hundred feet and then several of us with whatever we have that is disposable will go and try to crash into the defenseless glider.  The crowd loves it and participating in it is always a blast.  There are few rules other than keeping the “battle” out away from the crowd, and no attacking the carrier plane.  This year we had, I think, 6 chasers out on the flight line and more chasers always makes for more excitement.  The usual result is that the glider gets away cleanly (even though the glider pilot is generally not trying to get away!) and the chase pilots often aren’t so lucky.  One of the first things you figure out is that making your plane hit another in flight when you intend it is much harder than when you aren’t trying!!  Another is that you can’t begin to keep everyone else in sight so you are forced to watch your plane and the target plane… there just is no way to watch everyone else at the same time.  It helps to have a spotter as well to get you in the neighborhood of the glider when you overshoot and aren’t sure which plane is the target!

The more common scenario is that the chase planes collide while trying to get close to the glider as all the planes try to occupy the same small box of airspace.  I always tell folks that if you fly a plane in this event and land it without damage you have just received the gift of a free plane!  You have to write off your plane on takeoff and just hope to find the wreckage to recover your electronics.  Anything more is a gift.  Of course the high level of attrition is why the crowd loves it.  Here’s my experience during one such flight last Sunday.

I took off immediately after the carrier plane and circled up slowly to try to stay in the same altitude range as the glider and preserve fuel.  The Duraplane I fly for this has a small tank and sometimes the glider stays up a while and most of the action is at high throttle so fuel preservation is key.  I stayed a good distance away from the carrier plane in order to not endanger it.  When the release was called out on the PA my spotter directed me toward the glider.  Shortly that area of the sky got crowded with planes darting in and out of my vision field.  My rule is never pull away from other planes as I attack.  If they get between me and the target they are going down!  After a couple passes I had dropped below the glider and pulled up toward the target just as another plane dove past.  An audible “pop” occurred as he passed and I saw a strip of something fall away from the right wing.  After a near miss with the glider I circled once to check controls and all seemed OK so I turned back into the fray.  I was (apparently) unharmed.  Probably just a slapped wing and a little lost covering.  Since my wing is mostly foam I figured it was OK.  I could tell it was my right wing that had been hit but apparently nothing serious.


Here is the actual damage that occurred on the first mid-air:2014-07-31 14.47.03

This is the right 1/3rd of my wing and you can see the strip of aileron that is missing is about 1/3rd of the total on that side.  Looks like a prop got into it and did some carving.  I saw something fall away but couldn’t tell it was part of my airplane and the plane seemed to handle OK.

A few minutes later the glider is down to about 50 feet and the announcer calls “knock it off” as we are getting close to the crowd and the runway.  One plane has already gone into the Corn when he failed to pull up quite quick enough after a vertical dive at the glider.  As I pull out and turn down the runway I see another plane coming head on at high throttle… about 6 feet away!!!   There was no time to react.  A loud thud and lots of pieces go flying but my engine is still running.  I have a vague recollection of seeing “the other guy” dropping away into the corn and then I realize I may have an issue of my own.  Ailerons are totally non-responsive…  rudder is working and there is some dihedral in the wing so turns are possible but sluggish.  I call out that I have no ailerons and ask for a clear field.  The landing is fairly uneventful and I taxi back to look at the plane.  Now the wing has a bit more damage.

Here is the other wingtip:

2014-07-31 14.48.03

That white gash in the wing goes all the way through where the prop of the 25 size glow plane cut through it.  The other end of the prop came down on the right aileron and now it is pretty much trash as well.  The servo and linkage for the ailerons sits atop the wing and the wingtip of the other plane (after hitting my prop  I expect) hit that and broke the servo arm causing the linkage to depart and leaving no control at all over my ailerons.  His wingtip was pretty much mulch for several inches.

There was quite the buzz in the crowd when this occurred and both I and the other pilot knew what we were getting into.  No harm, no foul.  In fact, it was a lot of fun and a real crowd pleaser.  I was amazed to have had two midairs in one flight and even more so that I landed the airplane successfully and with as little damage as it has.

Drat that glider… I’ll get my revenge… next year.