Spektrum NX10 failure analysis and repair

In a previous post I reported on the demise of one of my favorite airplanes.  The Top Flight P47 60-90 size ARF.  The cause of that crash was that my Spektrum NX10 powered off mid-flight.  This is disappointing as I have run the NX for several months and been extremely happy with it.  The radio link to all of the planes as I  flew them has always been rock solid… well at least while the radio was on!

After the crash, there was no doubt the radio had turned off unexpectedly.  So began the investigation.  I posted online about the failure and found just two folks who had claimed to have something similar occur and none had an occurrence during flight. 

Thinking back, I honestly believe I may have seen it happen once on the bench shortly after first receiving the radio but at the time I was on very early code and was still learning to use the thing.  As it happened I was working on a setup of an airplane and turned away for a few seconds to check something else behind me… an email arriving on my computer or whatever… and when I turned back the radio was off.  I was so uncertain at the time as to the sequence of events that I passed it off as “perhaps I turned it off without thinking or realizing it when I got distracted”.  I really couldn’t believe the radio turned itself off and I never saw it again through setting up 20 or so airplanes on it, multiple upgrades, template creations and many flights on many airplanes later I hadn’t seen it again so had forgotten about it and moved on… until it did it again and my plane crashed.

Online I got the usual advice and questions… folks trying to helpful asking about battery state, shake tests, testing the on/off switch, etc… and I did as many of them as I could justify or understand to no avail.  I tried to jiggle the battery and connector particularly looking for an intermittent connection from the battery but it stayed on solid through all the shaking, wire twisting, switch tapping etc… that I could figure a way to inflict on it.  In a few days I acceded to inevitable and sent it off for repair with fingers crossed.  I spent years troubleshooting network for a living so I understand troubleshooting software and hardware systems like this when there is no no repeatable test case and no apparent error (other than a pile of wreckage) to be seen is an extremely trying task so I held little hope.

Now on the forums there are several very respected folks who monitor and comment on things and one is a gentleman who actually works on the software team for the NX series radios.  Andy, like others, recommended sending it in and contacting them to discuss it.  After the radio had been in their hands for a few days I reached out to him to try to figure out the easiest way to reach whomever was testing my radio.  I knew that the best chance of getting a fix was to give them as much information as possible and the online form only allows so many characters so I gave Andy a complete description of the issue and asked for his advice on how to get this to the correct people.  I also tried to impress on Andy that I really wanted a resolution beyond “no problem found” as I would never commit another airplane to flight with that radio unless we could determine a cause and apply an appropriate fix.  I also explained that I have been a pretty loyal Spektrum user for many years now and have purchased many Spektrum radios and spend a fair amount of time helping my fellow club members get the most from their Spektrum radios.  I really didn’t want this story to end with “…and that is why I have a $500 radio that sits in the corner and gathers dust”.  Returning it to me in that state would be a waste of postage.  Unsaleable and unusable…

Just a day later I got the notice that Horizon had sent me a shipment.  I feared the worst… then came the invoice for $0 and a note that they had decided to simply replace my NX10 under warranty!  Is this the best of all outcomes… no.  It is however the best response that I think Horizon had available to them and I commend them for excellent service once again.  I’m sure they tested my radio and had no way to recreate my issue.  I ran it for months and only saw it happen (maybe) twice and the circumstances of each were different.  I’m sure both Horizon and I are hoping it was simply a one in a million intermittent hardware issue and neither of us will ever hear anything like it again.

Horizon even went so far as to transfer all my models over to the new radio and upgrade the software to the very latest version.  They also sent me a complete new kit… radio, battery, strap, etc… all the stuff that comes with a new in the box system…. even though I had only sent them my bare radio minus batteries etc…  Of course they cannot replace my airplane.  That is simply asking to much and lets face it; if you can’t handle an occasional loss of an airplane you probably need to get out of the hobby.  They did more than I think is reasonable to expect in a bad situation and I appreciate that they are electing to take care of a loyal customer such as myself.  I have experienced much less satisfactory service from companies who have gotten a lot more of my money but Horizon seems to get it right more often than not so I will continue to support them and spend my money with them as often as I can.  Thanks to Andy and the rest of the team there.  You guys do it right.  Thanks again.

So I now have a brand new NX10 and am starting to get my planes bound to it and ready to go.  My Timber X is back on the NX10 and flew well on the first couple of test flights…. It may be a bit before I put the 12S powered Aerobat or the 1/4 scale cub back in the sky with the new radio, but as my confidence in the radio recovers, I’ll be moving everything back over.  Fingers crossed this will be the final chapter in this saga.

Top Flite 60-90 size P47 ARF… Final flight. Spektrum NX10 failure investigation begins.

My Top Flite P47 was a super flying airplane with a great power system and has been performing flawlessly.  I have been testing out some different props to determine best mix of power, speed and flight times attainable.  Have broken a few props but otherwise she was running great.

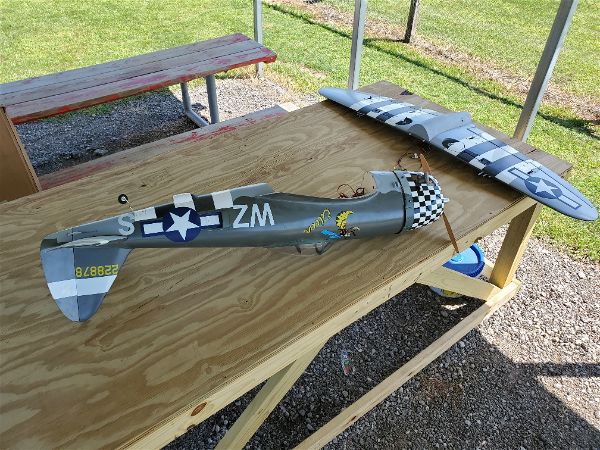
Unfortunately all good things must end and a couple weeks ago she ended a flight looking like this.

No photo description available.

Here’s how it went.  On takeoff, I started a nice steady climb and flipped both the landing gear up and flaps up switch.  As you can tell in this photo, the gear cycled all the way up successfully and I’m confident the flaps did as well from the way the it was flying.  I then made a left turn and was nearly in knife edge when I suddenly realized I was no longer in control of the airplane.  The plane was sliding on its wingtip toward the ground and nothing I could do with the sticks had any effect.  Being electric and a good way out I heard nothing other than a sickening crunch after it disappeared below the corn stalks…

In disgust I dropped my gaze to my radio and was surprised to discover there was no display and no lights whatsoever!  I removed my sun glasses to be sure and verified the radio was indeed off.  After walking back to a seating area (I needed to sit down) I turned the radio back on and it powered up normally and showed the battery was at 4.0 volts which is in the range of 80-90% of it’s full charge state… i.e. the transmitter battery is not dead or even low.  I then tried to figure out if my neck strap, clip or some placement of my hands could have turned the radio off and I cannot imagine how to make that happen while going through the maneuvers that I performed.  It takes a good 4-5 seconds of steady pressure on the power button to turn off the radio and in that time period before the plane stopped flying I had flipped two switches and moved both sticks to adjust throttle and perform my turn.  Try that and tell me if you can do it, even if you try!

After a long walk in the corn locating the “remains” I started reclaiming all the parts and considering the wingtip and nose in a near knife edge collision to the ground, the components aside from the airframe faired as well as could be expected.  The speed controller had a fan mounted on it… That plastic frame did not survive but the replacement is $10 and the speed controller itself has tested out to be in good condition so far and does not have a mark on it otherwise.  The receiver is likewise undamaged and tests good as do all the servos.  The motor had the worst result, being a bit dirt caked and the main shaft turned out to be bent.  I’ll post on that separately.  The retracts, as you can see in the photo were safely retracted before the loss of signal occurred and also seem to be unscathed.  Even the two batteries (a 6S 5000 and a 2S 5000 run in series) look in good shape and still charge as before.  As I said, things survived pretty well aside from the air frame.  It is a total loss with only the tail surfaces seemingly intact.

As you can imagine, this started a serious investigation into why the radio shut down.  I’ll post a new entry about that soon.

So ends my favorite war bird to date.  There will be a replacement of some sort soon!  Here’s hoping your flights are more successful than this one was.


New Radio – Spektrum NX10

NX10 Arrives

NX10 10-Channel Transmitter Only

Since February 2018, I’ve been primarily flying using the Spektrum iX12 transmitter.  I’ve certainly developed a love/hate relationship with the iX12 over the past 3 years.  I’m not overly fond of a touch screen  interface on a screen this small, the slow power up can occasionally be annoying and if you try to rush it you frequently run into disconcerting delays and seeming instability that requires a fresh shut down and restart.  Additionally, running anything more than the basic Airware app on the radio seems to be asking for trouble as the platform is just barely adequate to run it… let alone adding anything else into the mix.  On the other hand, the text to speech option really makes spoken prompts far more useful and the display is sharp.  Additionally, the built in WiFi and Bluetooth on the iX give you have capabilities that no other radio in the Spektrum line can match.  Wireless headset use, keyboard and mouse connection, direct download of updates, etc… Bottom line, while I can work with the iX12 and it has its strengths, it occasionally frustrates me so I decided when the NX line came out I’d grab a possible replacement and give it a try.

So in November 2020, I ordered an NX10 from my local hobby store.  As usual they gave me a great price and didn’t ask for any deposit or credit card to get my radio on order.  While I waited for it to arrive (first predicted to be in by mid-December) I read up on the discussion groups, watched videos about the NX line and weighed my options on which radio I would get rid of to pay for the NX when it arrived.  I had both an iX12 and a black addition DX9.  I’ve always liked that DX9 but 90% of my airplanes were setup and working on the iX12 so I started out by taking the DX to a couple of swap meets and it found a new home quickly.  In fact it paid for a majority of my NX10 purchase as that radio is still very popular and I had the charger, manual, original strap and pretty much all of the original accessories it came with along with the case.

In February, the NX10 arrived and it is pretty much as advertised.  It feels good in the hands, especially to those who like a bit lighter radio, even with the large 6000mah 1S LiIo battery on board.  The weight is a big point of contention on line in the forums but I find it a nice balance between the heft of a DX18 and the almost disconcerting lightness of a DXe for instance.  I like the dark, mostly matte finish of the radio and I hope we never go back to radios with all the chrome on the front… at least not as long as that chrome is applied to a plastic base!  That is the worst of both worlds.  Easy to damage, flake off, etc… while also being shiny enough to blind you if the sun hits it just right while you are trying to look at the front panel for whatever reason.  The NX display is a bit sharper (higher res) than the DX line though not quite up to par with the iX and the added colors of the NX versus the DX are pleasing though you have to be careful to avoid color combinations that work great indoors but are totally washed out and nearly invisible in the light of day!  Not up to the iX12 standards with the capability to show pictures, etc… but still an improvement over the DX monochrome display.

The sliders on the back of the radio are a disappointment to some and I can definitely attest that they are not smooth by any stretch of the term but for me they simply don’t matter as I have never found a real use for them anyway.  If you are a fan of sliders and expect a smooth control akin to a volume control slider on an audio mixing board, you have come to the wrong place!  Of course they work.  They just don’t have high end feel to my fingers… I suspect these are the same as what the DX had and I don’t recall the iX being distinctly better either but then again I just don’t use them.  Maybe someone who does can comment with a better comparison.

The gimbals feel fine and they have all the usual adjustments which are all reachable via front panel access to the various trim screws.  That front panel access is a nice change from many previous radios which require taking off covers etc…  If you tend to just live with the feel of the sticks the way the radio comes out of the box you will have no throttle ratchet and the throttle seems a bit “grabby” to me… not very smooth and this is again something that a vocal minority on the forums have brought out as a flaw with various solutions put forth.  For the vast majority of aircraft fliers I suspect a quick adjustment to enable the ratchet and adjust spring tensions to suit your preferred feel will be in order and will result in a good experience for the vast majority of aircraft fliers.

The NX10 has the hall sensors versus standard pots.  I haven’t noticed an different feel but I know the hall effect are considered higher end/more reliable so they may prove themselves over time but don’t expect to be able to tell a real difference just from pushing the sticks around.

The best and worst of the comparison between the NX10 versus my iX12… as far as what matters to ME are as follows:

I continue to miss the flexibility of the text to voice capabilities of the iX12.  Having to use canned responses that aren’t intuitive to me or sound too much the same so that I have to actually concentrate on what the radio is saying are just not even half as useful to me.  Someday we have been told they will upgrade the sound editor that was available for the DX radios and that will fill a big part of the gap for me but until then, this will be the biggest drawback.  Assigning them can be a bit tedious as well… having to scroll through long lists of prompts or build your own list but its not something I do that often so its not a critical shortcoming.

Otherwise there are many things I like much better. 

First, I have no need and do not enjoy using the touch screen on the iX12.  It’s to small for my big hands, though very sharp to look at.  The radio can also lag behind when trying to quickly move through menus and make adjustments and takes far to long to boot up.  I’ve heard all the excuses as to why, all the workarounds to try to make it better etc… and I just feel like they really missed the boat by handicapping the 12 with such an underpowered platform.  I can boot up the NX10 and configure a new airplane by the time the iX12 boots up and becomes stable!  OK, maybe that’s an exaggeration but not much of one.

Also, the battery life on the NX10 with the shipped battery seems to be much better than the iX12 which has to remain on, albeit in standby mode, the whole time I’m at the field unless I want to wait 5 minutes to boot it every time I fly.  By comparison the NX10 is ready to go in seconds.  You can buy an aftermarket battery for the iX12, which I did, but that makes it a bit heavier and is another expense for something that they could have done out of the box.

The use of WiFi in both radios is great.  Comparing to the iX12 they are a close run thing but I actually prefer the NX as the WiFi setup is all inside the user interface versus having to go out to android and connect to WiFi and then jump back into Airware and do what you want to do and then back out to disable, etc…  This allows easy registration and upgrading which is great.  The lack of Bluetooth in the NX is a small disappointment but not huge as the interface of the NX (very DX like) only rarely would benefit from having a keyboard/mouse connected and there are Bluetooth converters available if you really want to have headphone connectivity.  Again an aftermarket expense but understandable in this case as the Bluetooth in the iX was available largely due to the Android platform.

There are other things I could discuss but I’ll end with this one.  The NX allows for easy USB connectivity to a computer.  This enables simple connectivity to some flight sims and games and also gives access to the internal storage area of the radio where models and templates are stored etc…  That means there is another simple avenue for backing up or uploading airplane configurations, etc… 

After a few months of using the NX10 I moved forward with my conversion and sold my iX12 as well.  I had found I could do all I needed to do with the NX10 and had come to enjoy using it while the iX became a fixture sitting in a corner of the shop, unused.  I took that money and bought a “backup” NX8 which after registration and loading of my existing model setups, sits in the case waiting for the day I need a “backup”.  Occasionally getting use as a buddy box or loaner radio to my friends in need.

One final note.  Getting from an iX or DX radio to an NX platform is easy as the iX can read iSPM (iX format), NSPM (NX format) and SPM (DX Format) files and write either iSPM or SPM format.  The NX can read all three types  but only writes NSPM format files so going back from an NX to a DX is not quite so quick and easy as a DX files are SPM format only.

In summary, I’m all NX now and just waiting for improvements to the sound capabilities down the road.  There have been a few bug fixes that have come through for some small annoying things like scratchy sounds and little roller glitches but since upgrading is so easy and none of the other fixes have really much affected me I just stay fairly current and keep flying.  If I ever hit the lottery I might be tempted to go to an iX20 but it isn’t something I see happening anytime soon as the value just isn’t there for me and the NX has been such a good experience so far.

Comparison – Night Vapor versus UMX Night Vapor

I have owned a Parkzone Night Vapor since not long after they first shipped.

ParkZone Night Vapor RTF [PKZU1100] | Airplanes - AMain ...

I’m not saying I’ve only owned one in all that time… I’m guessing 3-5 have passed through my hands.  One tried to fly just a little higher than a hovering helicopter, another had an unfortunate incident getting hung up in the net of an indoor soccer field and was heavily damaged during retrieval…  And one just  eventually had so much tape and added glue on it that it just flew like a brick.  Parts of that one still survive in my parts drawer to this day.

The Night Vapor was a fun, super floater that almost anyone could fly or even learn how to fly on.  A year or two into my run of Night Vapors (that doesn’t sound fun??) we discovered that the motor from the Parkzone Cub fit into this airplane and gave it a nice boost in power allowing for prop hangs, awesome slow high alpha and great climb rates with only a minor penalty in flight duration…. so that is the setup I’ve been flying ever since.  The only drawback to this seemed to be that you could stress the airframe enough to make it twist and become a bit erratic if you used to much speed/power… especially in a dive.  That is a very minor issue and easily avoided.

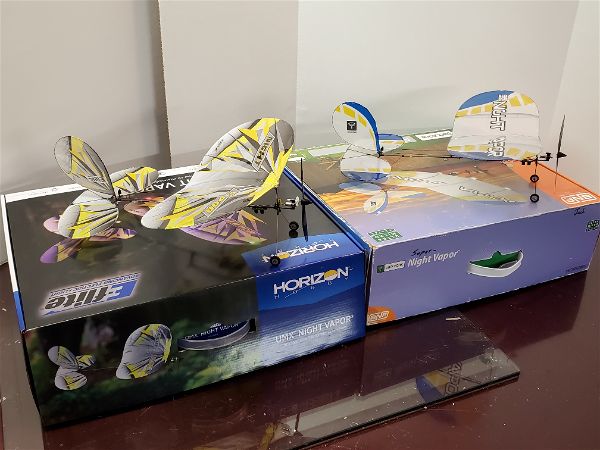
My current iteration of the Night Vapor is less than a year old but when I found out that Horizon had decide to do a “respin” on the Night Vapor I quickly decided I had to get one.  Here they are on my bench side by side.

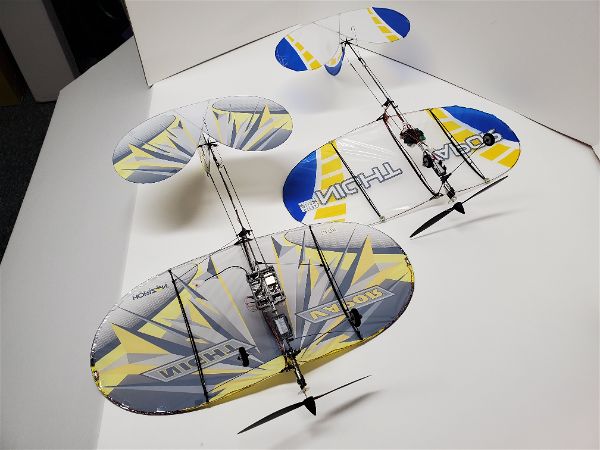
  So here are the differences in the two in a static comparison.

  1.  The new NV is obviously done up in a different color scheme.  As far as covering material, wing area, tail area, etc… they appear to be sized and constructed identically aside from the color and frame differences noted below.
  2. The frame of each is identical with the following exceptions.  Most of the parts look to be interchangeable.
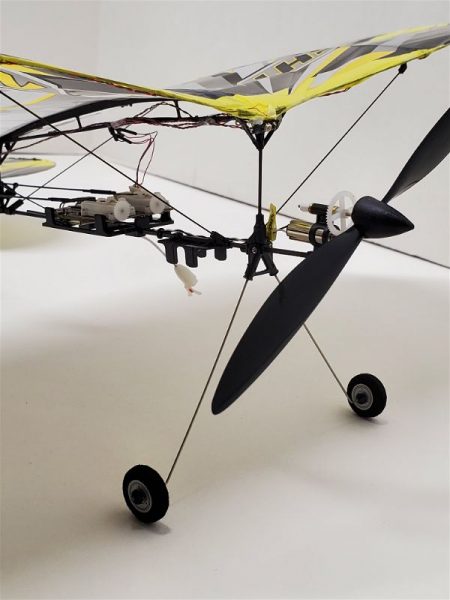
    1. The new UMX has wire main landing gear legs instead of the CF on the old.
    2. The new UMX has additional bracing from the body to the first rib on each side, near both the leading edge and trailing edge of the wing.  You can see these here.
    3. There is a larger frame/plate to hold the new receiver/servo “brick” in the UMX
    4. The new aircraft weighs .73 ounces versus the old aircraft at .57

Other differences of note:

The old PZ had 6 LEDs.  3 on the front of the wing, two on the back and one further back on the bottom of the tail boom area.  The new UMX NV has one in front, two wing tip lights and one on the tail boom.  The LEDs on the new airplane allows for some programming of the lights for different color combinations (White, Red, Purple, Blue, Green or Yellow) on the front and back lights, each independent of the other.  You can also have each solid on or a slow strobing affect.   This is easily accomplished from your transmitter.  The wing tip lights are green starboard and red to port with no adjustment available.  They are synchronized in a blink-blink-off pattern which also is not adjustable.

Flight wise the new airplane does fly just a bit heavier than the old plane.  To me it is noticeable but not offensive.  All up with a battery the difference is around 20-25% heavier for the new plane so it makes sense that it would be but the new plane is still very much a floater and the AS3X definitely helps around those pesky air vents, prop wash from other airplanes, etc…  and the extra wing bracing helps limit twist and flex in the wing when you stress the airframe a bit with those high power dives or speed bursts that are bound to happen!

I like the new landing gear as well.  The wire springs back nicely and doesn’t have a tendency to shatter like I’ve seen happen often (only once to me) and having the front and back lights be customizable is a nice touch.

In my opinion AS3X and SAFE are obviously a bit of overkill on an airplane like this but the telemetry feedback is really nice to have and has me wondering how many less batteries I might purchase over the next couple years if I actually pay attention to the warnings I have programmed!  Not sure how likely that is though as I never want to land this airplane except to show off my hand catch skills (don’t tell AMA) so I will probably continue to run most of my batteries to exhaustion.

The plane does do some pulsing of the motor as you fly the battery down to around 3.3V so you don’t have to rely on telemetry warnings.  Shut down comes at around 3.1V and once it has occured there is no restarting the motor until the battery is unplugged and replaced (presumably with a charged specimen!) .

After flying it stock a few flights I have now swapped in the motor from my old NV which is really the old cub motor I mentioned earlier.   I hope it will do for this new UMX NV what it did for the old one.  My worry is that these are brushed motors and I wonder how much longer it will last.  Horizon is not typically forthcoming on specs on their electric motors especially these micros so I have little hope I’d ever be able to replace this motor when it’s time has come as the motor for the old cub is no longer available either…  That will be a sad day.

So my feelings on the new NV are mixed… but weighing toward the positive.  I wish they had given it something equivalent to the cub motor to start with, especially with the increased weight but it sill flies crazy lite so it’s not a big issue and the added features are nice additions.  I have no qualms about giving up my old NV… I think this will be a worthy successor.


Pilot for the Top Flite P47 and the Extreme Laser

I have always liked a nice pilot figure in the cockpit of (particularly) scale airplanes but I won’t put one in if I think the airplane isn’t a good flyer already or if I think the additional weight will negatively affect the aircraft. 

I also don’t like to spend a lot of money for something that isn’t going to make the plane fly better.  As a result, few of my airplanes sport a pilot bust of any sort.  However…

With the outcome of my recent conversion of a Top Flite P47 to electric power being successful beyond my expectations I felt like I might want to find something to fit my new favorite warbird!

I did a lot of looking around and eventually I was getting the usual deluge of ads in Facebook, on email and in my browser for every size and type of pilot bust imaginable and in every price range from custom full body figures costing hundreds of dollars to plastic profiles barely recognizable as pilots for a couple dollars.

Finally I ran across an ad from one of the vendors that I’d done some business with in the past and started looking at the Benchcraft line of pilot busts.  They are very reasonably priced and come in something like 14 varieties ranging is size and type (jet pilot, WWII pilot, civil, etc…).  I found a couple of likely options and then saw a few others that might find homes in some of my other planes so I ordered a half dozen different figures including two likely options for the Thunderbolt.  I could do this because these are mostly priced in the range of $3-$6!

Here are some examples.

The lady and the guy in the red hat are both pretty decent figures for adding that little something to your airplane if you aren’t going into competition!  These aren’t masterpieces of scale modeling by any means but really pretty nice for the super low price and you can always dress them up a little with your own custom paint job if you so desire.  OK, I don’t know what the logo on the front of his red cap is supposed to be… hy? ky? ny?  No idea.  And yes, there are a couple of errant blue dots on his hat but again, the price is right and they are nice and lite weight.  I may try my hand at some painting some snowy day to see how good I can make one of these look but I’ve seen much worse in some ARFs I’ve bought.

The WWII British pilot bust leaves me a bit mystified I’ll admit.  every bit of him except his eyeballs is either the natural “light brown” color of the material he is molded out of or the dark brown that I would presume would make sense as his jacket color… and you can clearly see that there is little rhyme or reason to which is which.  The mold is OK but the paint job looks like it was done blindfolded.  In defense of Motion RC where I purchased these, it exactly matches the picture on the web site so you are getting what you should be expecting!

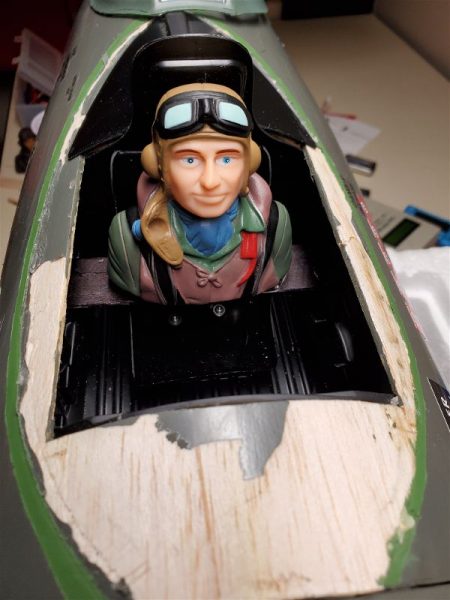
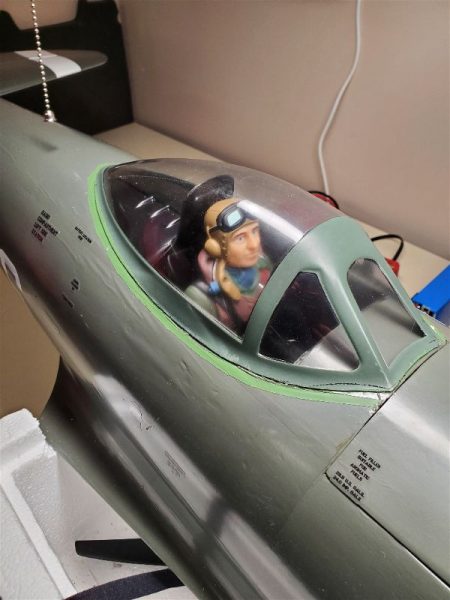
I chose the BenchCraft American WWII pilot bust for my P47 and so cut away the canopy glue (luckily Zap canopy glue is what was used so this was possible without crazy amounts of effort as it stays pliable) to allow access to the cockpit.  I lost a bit of covering and had to add a little cross brace to mount to in order to get the pilot situated in the proper position.  Here he is ensconced in his new home.

Next came some covering patchwork inside the canopy area and then a reapplication of canopy glue and the Jug is ready to fly again!


As you can see, this figure has a much higher quality paint job than his British counterpart and I didn’t feel the need to do any touchup on him.

Similarly I added a figure to my 74″ Extreme Flight Laser and I may yet install a couple of these others into some other planes down the road.  If your looking for something inexpensive and lite weight to make your cockpit look a bit more realistic, take a look at this option.

Hangar 9 Carbon Cub 15cc ARF … Part 3

In part 2 of my commentary and running monologue on the Hangar 9 Carbon Cub, I mentioned that I would cover the bottom vent that I added and some other mods so I will show you a couple of those here as well as try to relate my sense of how she flies.  First the build and modifications update.

Bottom Vent

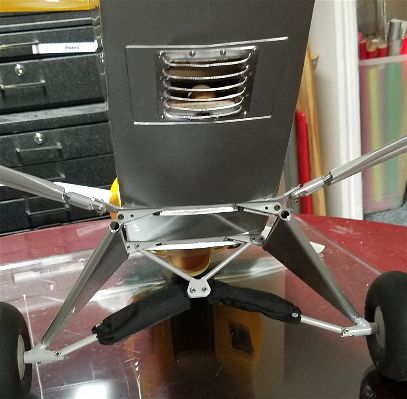
Looking at the cub I realized there is not a lot of accommodation for air flow and even if it isn’t much I’d like to have at least a modicum of air passing over my batteries inside the cockpit area.  So without just cutting open a whole section between formers/bulkheads in the bottom of the tail I needed another solution.  What I came up with was to cut open a section in the only solid area behind the cockpit, which is the hatch for servo access.  I happened to have some louvers laying around that I picked up at a swap meet so I cut an appropriate sized hole and drilled a few holes for button head #2 screws and created a nice louvered exhaust vent.  It’s very nice looking (even if not quite scale!) and looks like it belongs there.  Was it enough exit area…  well read on.

Top Hatch blows off!

Taxiing out for the first flight on the airplane, everything seemed great.  I had done a balance check, the prop seemed to be well balanced, producing a minimum of vibration, all the surfaces were moving in the proper direction and with the proper authority…  Nothing left to do but fly.  Unfortunately upon reaching about half throttle, about 10 feet into the takeoff roll the top hatch that I had created decided to eject.  Testing a second time showed the same issue.  It hadn’t been jolted loose on a bump either it was simply being swept up by some combination of the air moving over the top of the wing and the air pressure forming inside the plane as the motor forced air into the various openings in the firewall.  While the louvers I had installed on the bottom of the plane might insure a good vacuum to pull some air past the batteries once she was in flight, they didn’t do enough while the plane was just starting to roll to avoid the top hatch getting popped open.  For the day, I simply applied some box tape along the front and rear edge of the hatch and things were fine from that point on.  For future flights I had to do something to make the latch mechanism a bit stronger.  Clearly the magnets I had in place were insufficient.

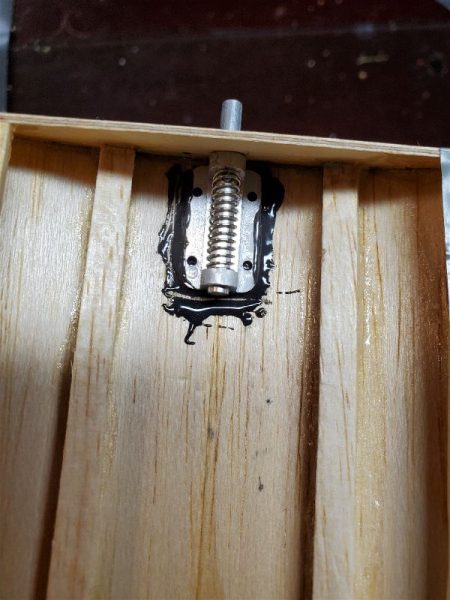
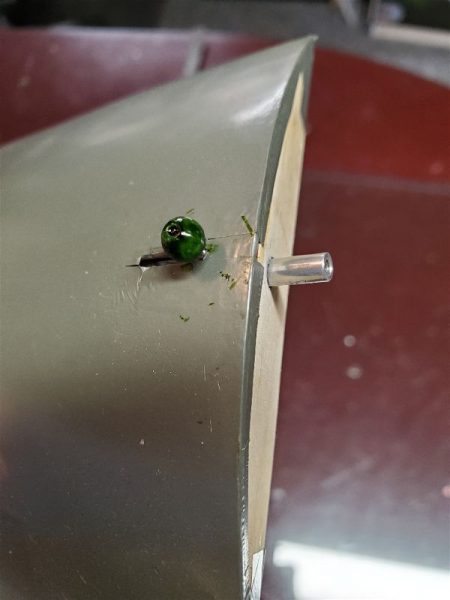
Before the next flight I eliminated the magnet and screw head that I had used to secure the hatch and cut a groove in the wood and created a tab using a servo horn to form a rotating latch that would insure the hatch stayed in place.  Ten or so flights later, this seems to work well.

Servo arm loose on rudder!

The final lesson re-learned on the second or third flight of maiden day for the Carbon Cub was that you should always tighten all the screws and check all of your servo arms, linkages, etc… before flying.  The rudder and elevator servos are under that bottom hatch and so not observable without unscrewing and removing the bottom hatch.  Apparently, when I was setting up the plane, adjusting throws and linkages and such I had neglected to make sure all of these were tight.  The servo arms are metal and are a decent fit but slightly loose on the servo shaft.  If the teeth are engaged there is zero slop but if you don’t tighten up the servo shaft screw the arm will slip off and rotate out of place… especially when sitting in the trailer, bouncing down the road under the force of gravity I imagine?

So 2 or 3 flights in was doing some stall turns and I was getting adjusted to just the right inputs to get an acceptable looking maneuver when it flopped out of one of my attempts.  Since I was low on battery I decided to come down and check out my throws and see if I could improve on the next flight.  When I landed,  my plane was crabbing slightly toward the pit area so as soon as the tail dropped down to join the mains on the runway I started to feed in just a touch of rudder to straighten the roll out… It wasn’t enough so I pushed in more but nothing occurred.  I was far to close to the pilot line and rolling fairly slowly so throttling up without being able to change heading was not an option, especially with a plane I had only a couple flights on and knowing someone was occupying the flight station I was quickly approaching.  Instead I hit throttle kill and watched it roll up and bump the flight station.   Other than a startled fellow pilot, no harm was done.  He maintained focus and control of his airplane and I went down and apologetically retrieved my errant bird.

Of course as soon as I saw the rudder “freely” swinging in the breeze I dug in and found the culprit quickly.  I applied just a small amount of nail polish (thread locker is known to attack some of the “plastics” used in servos… Hitec Karbonite in particular but others as well… so I largely avoid it around my servos) and tightened the screw and have had no further issues with this connection since.

Flying with the Power 60 on 6S

The Hangar 9 team recommends the Power 60 for the Carbon Cub if you are going electric and I think they have a pretty good combo here.  With my 6S 5000mah packs I believe the plane is capable of handling about anything the real world plane can do, and perhaps a bit more.  This does NOT include an unlimited vertical climb with out assistance from the wings but it is not far from it. 

My impression is the plane flies just a little “heavy” on the wing and thus requires a bit more speed than I would like, but keep in mind I fly mostly very light, overpowered aircraft like my EF Laser on an Xpwer 35 and 12S, the Timber X on 4S, the Uproar on 4S, etc…  For a war bird guy, this thing would probably feel lighter on the wing than most and most scale pilots I suspect would see it as being “about right”.  You have to remember that while it has “Cub” in the name it is NOT the ubiquitous yellow J-3.  It is not a floater that is hard to get on the ground but it is predictable and smooth.  If you incorporate the flaps into your landings (as you should), the plane will land at a very manageable moderate speed with only a little time spent with the tail still flying after touchdown.  It’s not a total kitten either in the air or on the ground but in return it is a very capable flyer and a beautiful airplane both close up and in the air.

Top Flite 60-90 size P47 ARF… Gas to Electric P4: Flying the P47 with Electric Power!

After completing the power conversion of the Top Flite P47 to electric power it was not long before I had the opportunity to put some flight time on the bird.  In the course of a couple weeks I put around 10 flights on the Jug.  I’ll relate some of the issues and fixes, impressions and performance information in this article.  I don’t recall exactly in what order all this occurred or was measured so I’ll just hit the various topics without trying for any sort of linear time line… my memory just isn’t that good!

First, I’ll draw a comparison to my “outgoing” Thunderbolt, the FMS 1500mm P47.  While I’ve always enjoyed flying the FMS aircraft and would recommend it as a smooth and good flying airplane, I prefer the Top Flite in the air. 

While just a few inches larger in wingspan and several pounds heavier, it just seems to fly more like a warbird… in only the best ways. 

Neither are hard to land.  The FMS can land slower due to wing loading but also due to just being a lighter aircraft it tends to bounce around a bit more.  The Top Flite likes to land a bit hotter, even with flaps but it settles in nice and rarely wants to bounce.  The FMS may be a bit more aerobatic, but either can do anything a real jug can do plus more and the Top Flite seems to just track better and slice through the wind better.  Everything it does is smooth where the FMS can occasionally be a bit more twitchy.  Not terribly so, but noticeable if you fly them back to back.

Of course it may not be a fair comparison considering the power system differences but my Top Flite is certainly faster and looks it even though it is a bit larger (my experience is larger planes actually look slower).  I always thought the FMS looked a bit slow in the air considering it’s a fighter plane.  It certainly flies well even at slower speeds which is nice on approach but without making some changes it was never going to keep up with the Top Flite.

The other big difference between the two is flight time.  Unexpectedly the bigger Top Flite can loiter much longer than the FMS.  I figured using an 8S system would give me higher speed but at the cost of weight (the Top Flite is heavier even if it was only running a 6S) which would balance out and result in the same 6 minutes or so down to about 30% in the packs that the FMS typically did.  I’m running the same 5000mah capacity, just more cells.  Instead, as I recall, I landed at 6 minutes and had 60% left in the batteries on the first couple flights!!  Now on those first couple flights, I probably wasn’t pushing it quite as much as I normally do the FMS but the flights since have convinced me to up my timer to 7 minutes and even with some more aggressive flying I am landing with 45% or more of the battery capacity remaining… I’m not really sure why I get such great efficiency but I’m going to try bumping up the prop size a bit to get a bit more punch and see how it affects things.  Nothing is getting overly hot as is so I’m hoping for even more power and still having a 7 minute flight to 35% on the batteries…. we’ll see.

Aside from the flying characteristics I have made a few other changes/repairs on the Top Flite P47.  After these changes it has completely replaced the FMS which I recently sold to another pilot. 

First of all, I noticed that one of the flaps on the Top Flite could only extend to perhaps half of the recommended travel so I had to setup with that as the max flap throw.  On the first flap assisted takeoff (with about 65% of available travel), all seemed OK but on landing with full extension I was disappointed with the effect.  Other flap equipped planes I’ve flown certainly slowed up and assumed a nice sink rate where the P47 did not slow as much as I was hoping with the available travel.  On closer examination it certainly appeared whomever had glued in the hinges had gotten them a bit to tight, which was causing the push point hinges to push against parts of the wing trailing edge.  With some judicious trimming I got closer to 75% of recommended travel but no more.  It was all I could get without cutting the hinges and starting over.  Happily, it was enough that on the next landing the Jug slowed up significantly and dropped in a bit slower.  I wouldn’t mind a bit more flap but it’s now very manageable on landing.  It likes to land a bit fast, but that is very typical warbird like flying.

I still land a bit faster than I really have to as I’m really still just getting familiar with the way it flies and particularly how it lands.  At one point that certainly bit me.  We have a nice Geotex runway at our field about 250′ long and I love to land on it when I can.  Partly, I just like to control the plane and land it where I choose versus just letting it land.  I also feel like the landing gear is less stressed when it doesn’t have to drag through the grass.  Putting the plane down “on target” is a good skill to perfect as it can come in very handy when conditions are less than ideal or when landing at facilities that don’t boast our 700′ well manicured grass runway with almost unlimited approaches!  On the particular landing in question, I came down a bit fast due to some crosswinds (it’s easier to bring it down fast and maintain control all the way to the ground) and I was rolling tail high, holding a bit of rudder to offset the wind when I rolled across the one flaw in our Geotex runway… a little ridge where the grass edge of the runway used to be.  This popped the plane back up in the air just long enough to carry the plane into the grass.  Once in the grass I tried to let it settle in but the sudden transition from tail high rolling on grass to the same in the grass caused a quick nose down rotation as the wheels touched back down and she did a flip over on her back…. just hard enough to snap the top couple inches off the rudder!  In retrospect I should probably have juiced it a bit and slowed my decent or even gone around but all in all it was ugly and embarrassing but  it was a fairly clean break and an easy repair.  It also broke the prop which was more expensive to fix but otherwise she was unhurt.

The other occurrence during these first flights was when the battery hatch decided to do its own “off field landing”.  I was not a fan of having magnets in the front of the hatch and pins in the rear as this was built but I decided to give it a try.  In order to keep the hatch in place I took the liberty of attaching a couple more magnets inside the body to increase the pull of the existing setup.  This certainly seemed to help it really snap into place, but apparently that was not enough as around flight number 4 I landed with no hatch in sight!  The really odd part was that I didn’t get unusually high or far away and at least 2 other people will swear they never looked away during the flight, yet all agreed the hatch was attached on takeoff and no one saw it come off but it surely was not on the plane on landing!  Again, I was frustrated as the hatch was such a nice feature and creating a proper curved replacement was not something I really wanted to spend a lot of time on but I had no real choice.  The new hatch now has this latch centered on the leading edge and I don’t believe it is going to part ways quite so easily in the future.

With that taken care of there are a few “clean-up” items I want to address.  The cowl is a bit hacked up as it was cut to allow for the DLE-20 and of course you can’t buy a spare for a plane that hasn’t been produced in a number of years…  I’ll have to figure out if I can find something available that fits, or if I will try to repair what I have.

A second item is that the cockpit is empty and I would love to find a nice pilot figure that looks appropriate in size and style.  I’m eyeing some “Benchcraft” warbird busts from Motion RC.  At the price, I will probably order 1 or 2 and see what looks good. 

In the meantime this is simply an excellent flying airplane and a great power setup that I’m really enjoying.  I’m very happy that the stars seemed to have aligned on this airplane.

Top Flite 60-90 size P47 ARF… Gas to Electric P3: Motors, Speed Controllers and Batteries

This is part 3 on my journey of converting this aircraft to Electric power.  To see the previous post on the topic, click here.  

As I have mentioned previously, I had picked up a nice Hacker motor from a flying club member and it seemed like it might work out as a power plant for this aircraft.  I needed to get that mounted and also figure out what sort of ESC might be appropriate as well as selecting an appropriate battery and then figure out placement and mounting for all of that.  So here was my process.

First I researched the airplane, including expected weight, wing area and ground clearance.  I also read a bit on any balance issues folks reported to see if I was likely to need nose weight or tail weight and the weight of the suggested power plants.  Armed with that I logged into ECalc and filled in the blanks with the wing area, weight and the motor type I had on hand.  I then started plugging in appropriate speed controllers, props and battery combinations to see what I was going to need to get a good power to weight ratio.  Something in the 1.2:1 or higher range seemed like a good goal for a fighter aircraft like the P47!

I like to keep the voltage high and amperage low in an RC aircraft power system.  Higher amperage is hard to accommodate as most of our common connectors are not rated for it.  If you overtax them, they get hot and waste power and eventually this causes a catastrophic failure.  For similar reasons, our LiPo batteries will fail quicker when you run demand high current rates from them, plus they cost and weigh more as you try to accomplish this with batteries that have a higher “C” rating. 

A little rant about LiPo C ratings…   Feel free to skip the next two paragraphs if you like.

In general, C ratings are useful only in that a higher C rating within a manufacturer battery line indicates the ability to supply more current without damage to the battery than the batteries with lower C ratings.  Beyond that they are deceptive at best and almost useless for comparison between manufacturers.  Feel free to disagree but I am convinced that this is the state of things at this time and don’t expect it to change anytime soon so don’t put to much faith in C ratings.

So, while my large aircraft could (according to the manufacturer C rating) run on 20C cells, typically 40C cells get pretty hot and therefore fail sooner rather than later.  The 50-60C packs simply perform better, don’t get as hot and outlast the lower C ratings… at least in the brands I most commonly run.  I don’t bother to purchase from companies who advertise 100C and better as they are pure fiction in my opinion.  A continuous draw at the advertised C rating is almost always a recipe for battery destruction in very short order and in the case of larger capacity packs is likely going to result in batteries dying from internally generated heat and wires/connectors or something similar failing anyway as the system quite literally “melts down”!  It’s a joke to say you have a 4000mah 100C pack (that equates to 400A draw) and then putting a connector on it that is rated to handle, maybe 100A for short periods before it literally “melts down”!   The cells in these packs might handle 150A draw with perfect ventilation but I doubt it.  OK, rant over.

Back to sizing the system I came to the conclusion that running an 8S system with a 16×10 prop would be a good starting point with a predicted 1.3:1 thrust ratio.  Partly this choice was based on the power I wanted and partly due to available speed controllers.  Spektrum had just released a line of Avian speed controllers and one of them was capable of 8S (which I estimated was close to the biggest packs I could likely get into the airplane) and was rated at 80A continuous with 100A peaks which was as much as I really wanted to run through the EC5 connectors anyway!  It was also far less expensive than the Castle Creations options in this same range and had Telemetry built in that I was going to want.  I can do that with Castle Creations and most other speed controllers as well, but with even more expense.  This setup also allowed me to prop up a bit for additional power if I later decided I needed to, which is always a nice option to have.  The tradeoff if I did was that a 16×10 would likely give me 7 minutes or more in the air with a 5000mah pack while a 17×10 or 18×10 would start to cut into that as they would draw more amps.

In order to take advantage of the telemetry capabilities I wanted to access from the Avian speed controller I also would have to acquire a new receiver.  I settled on a new AR6610T.  That wouldn’t be a terrible expense as I had a project that needed a simple receiver like what was currently installed in the P47 so one way or another I was going to be buying one soon anyway.

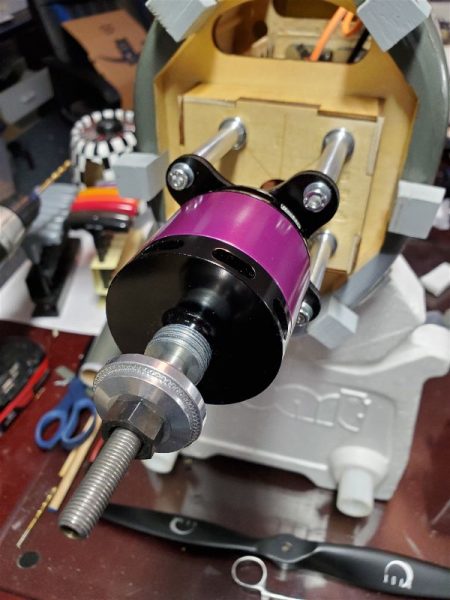
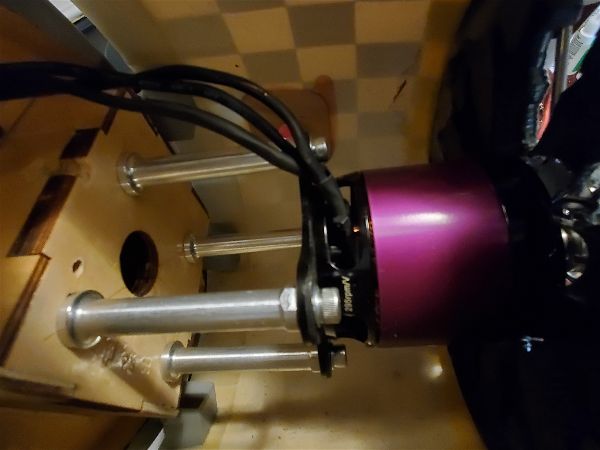
Decisions made, I placed some orders and started looking to mount the motor.   This came down to simply finding the right size spacers and then a hole for the wires to get through the firewall and some judicious trimming of the dummy engine.  

The spacer length I needed turned out to be the same as some readily available standoffs for a DLE 30, which simplified things a bit.  

Then to allow the prop to clear the cowl I added a couple washers behind the prop collet assembly.

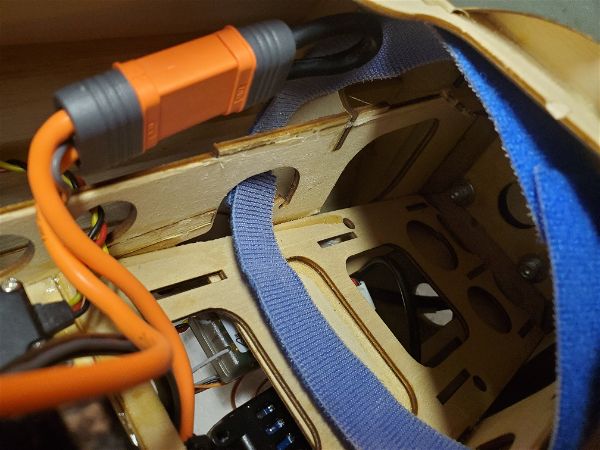
Accommodating an already existing 6S 5000mah pack plus a 2 cell pack of equal size and rating in series (which the speed controller accommodates simply as it already has a series harness attached!) was a bit tricky as the tray exposed under that hatch was simply too shallow for this setup and I didn’t want to buy several batteries for which I would have no other use.  Here’s the original space.

So, I did some cutting and regluing to create a “ramp” that allowed for easy insertion of some of the packs I had.  I had already determined that having the batteries up against the back of the firewall was appropriate to get the balance where I wanted it and while it was a bit tricky to cut out, the existing structure, thusly relocated, works well for the new battery compartment “floor”.

I needed some 2S “booster” packs (as I think of them) to add to my 6S packs in order to run an 8S system so I started looking for something appropriate.  I ended up with some APower branded 5000mah, 60C rated packs I picked up from RCBatteriesusa based in Arizona.  I had read an article about the company recently and decided to give them a try.  They are not the cheapest place to buy packs, but not at the very high end either and offer a good warranty as well as being reputed to have top notch service.  The folks there were as good as advertised in taking care of what I wanted, including the fitting of my requested EC-5 connector even though that was not an option on the web site when I first started shopping.  At no additional cost I might add.  After unpacking, examination and a few cycles they appear to be high quality.

That about covers the power system… I think.  Next time I’ll try to run down my experiences and impressions of the first dozen or so flights.

Top Flite 60-90 size P47 ARF… Gas to Electric P2: The Hidden Battery Hatch

For Part 1 of this article, click here.

It was the wee hours of the morning before I really made the firm commitment in my mind that the P47 had to make the conversion to Electric.  At the next opportunity I started the process.

First order of business was to pull all the gas accoutrements from the airplane.  First, I pulled the prop and cowl and started stripping out the gas motor mount, ignition and the supporting switch, battery etc…  I knew a guy who was looking for a  DLE-20 so I made him a deal on the engine to help finance the needed items to complete the conversion.  I had the motor but needed a speed controller and maybe some additional lipo packs.

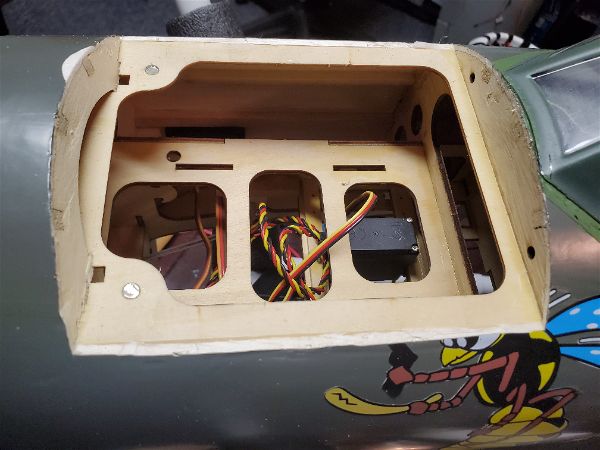
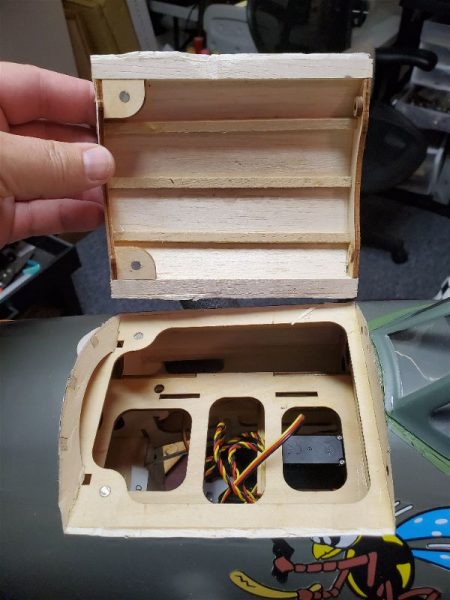
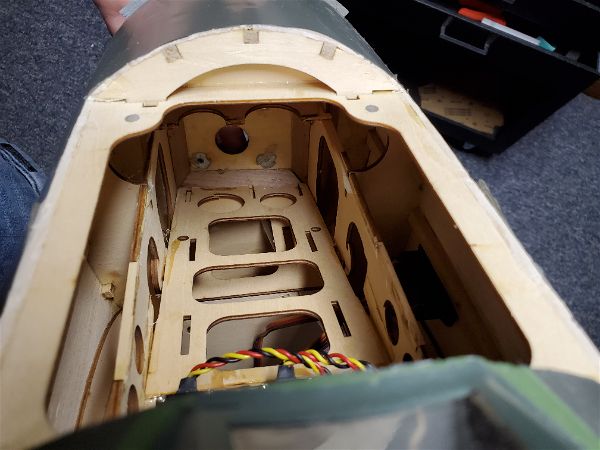
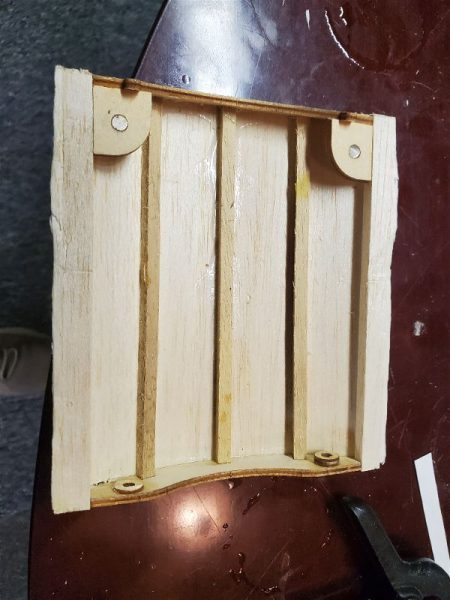
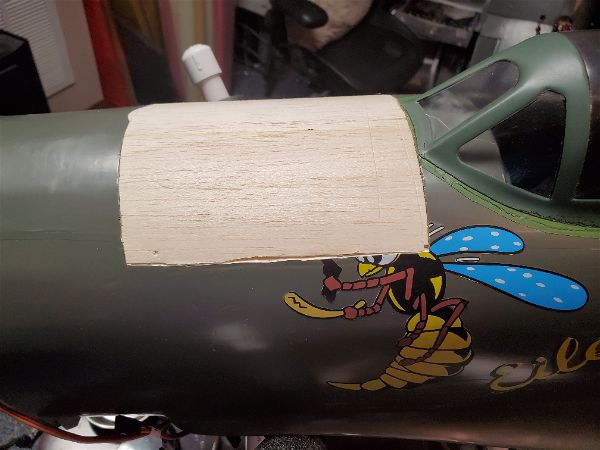
As soon as all that was out of the way it was time to explore the “hidden hatch”.  For reasons that are beyond my comprehension, Top Flite built a hatch into the top of the P47 (and other models in this line of ARF warbirds).  They framed it out in ply, put magnets in place along with pins to hold it in place… and then put a solid balsa sheet skin over the entire nose (including the hatch) and covered it with no markings or indication that it existed.  Nor is it documented in any way in the manual!

With no guidance it became quite the task to figure out how to outline and cut the hatch free.  What I eventually settled on was to take a pair of forceps with an extremely sharp needle locked in it’s jaws and reach down into the wing saddle and force it up between the two plywood plates at each end and side of the hatch until it emerged through the covering.  By doing this repeatedly, working my way around the hatch perimeter I outlined the hatch on the covering.  Then while holding my breath, holding my head at just the right angle and sending up prayers to the modeling gods (a more fickle lot I have yet to meet) I took an Xacto knife and inserted it into one of the pin holes and slid it by feel between the plywood plates.  Working my way around the perimeter of the hatch, I managed to slice my way through the vast majority of the sheeting.  With the judicious use of my razor saw, I got the hatch loose with only one problem… I managed to cut through the pins at the aft most part of the hatch! 

Don’t worry about the wasp decal… I was planning on ordering replacement graphics anyway!

As you can see it wasn’t a perfect cut but it came out well enough!


Luckily, I had on hand an appropriate sized dowel and replacement of the pins proved to be a fairly minor task.  I would later go on to add a hatch latch on the leading edge of the hatch… or at least on the new one I had to build after I found out the hard way that those magnets just aren’t strong enough!

Next time I’ll discuss the power system choices I made and how that is working out.

To see the next post on this topic click here.


Top Flite 60-90 size P47 ARF… Gas to Electric P1: Decisions

I already posted a bit here about this airplane with the focus on the retracts I used.  You can see that post here.  This post will focus more on the Electric conversion process and the results of that.  Note that I never flew the plane with the DLE 20 that was on it when I acquired it so can’t compare to that… I can only tell you about my conversion process and the results I got.

Acquiring the airplane

I have a flying buddy that has been in and out of the hobby for the past several years named Martin.  Martin called me after not having heard from him for a bit (maybe a year or more) and reminded me of a P47 that we had worked together to get ready to fly.  It was a 60-90 size Top Flite ARF and we had gotten it pretty close to flyable with a DLE 20 installed, servos and linkage all installed and even radio gear all in place.  For whatever reason it had just never made it into the sky.

Martin asked if I was interested in the airplane.  If you look back at my previous posts you will see that I already own a nice FMS 1500mm P47 that flies very well on 6S.  While I have a particular affinity for the P47 (my grandfather helped build them in Evansville, Indiana during the war) I was hesitant because this airplane is only slightly larger than the foamy I have and I wasn’t sure I really needed two P47s in a very similar size… plus I’d have to consider whether to convert it which might be quite a job.  Add in that I really didn’t have any room in the RC budget at that moment for another airplane and I explained to Martin that I really couldn’t give him nearly what it was worth.  Martin however, explained that he simply wanted to get out of the larger airplanes like this and since I had spent so much time working with him on it, he was simply offering to give it to me!  I offered to at least pay something but Martin insisted that if I had an interest that it was mine.  He even offered to deliver to the field in a couple days when I was planning to fly.  What could I say?  Of course I accepted.

Here’s what she looked like just after delivery.


Modifications and Decisions

After a lite cleaning and a thorough inspection I made a couple decisions on things I wanted to change/upgrade or just tinker with a bit before I’d fly it.  A couple were easy decisions. 

First, I wanted to order a new set of graphics as the decals the came with the plane I knew would never last.  In my experience if you want good looking and long lasting graphics with few/no wrinkles or bubbles you buy vinyl… typically from Callie Graphics.  Callie is inexpensive, willing to work with you on any request and provides a great product.  I had a set of markings on a 50cc size Mustang for 3 or 4 seasons.  Many days the plane sat out in the sun all day and the vinyl never bubbled or faded.  I even had to peel the stars and bars from the wing and reapply them when I crashed the bird and bought a new wing.  They still looked like new when I sold the plane a few years ago.

Second, I knew I wanted to replace the landing gear, which I’ve already discussed.

The third issue was much more of a question and it took a couple weeks to come to a conclusion.  What to use for power?  Obviously leaving the DLE 20 in place would have been easy.  I knew the history of the engine and that it ran well before it came to be installed in this bird and it would certainly be an adequate power plant.  However, every other plane I currently own is electric and I had what I thought might be an excellent motor for the purpose.  In fact I had been looking for something to put the motor in ever since I acquired it.

Thus began several days of reading and research.  First I looked on various discussion groups about the airplane and what others had done.  90% plus had run gas engines… a few 2 stroke glow and a few 4 strokes rounded out the vast majority.  What intrigued was the 2 guys who mentioned they were running electrics.  Eureka!  Until I realized that there was just no easy place to put a battery hatch into the P47… at least not that I wanted to tackle.  the plane is pretty much all curves and being an ARF, access is limited unless you want to recover and rebuild extensively.  This didn’t seem promising.

While I mulled on that, I started to look into the electric motor I had and tried to figure out if it would be enough power for the P47.  The motor is a Hacker A60-5S-V2 and while the Hacker site has a fair amount of info there was only a bit of corroborating information that I could find.   It looked like it might be just a bit on the small side if you believed the Hacker site information.  Encouragingly, the actual users reported fairly uniformly that they were running this motor (and most Hackers it seemed) at the maximum ratings and even significantly above with no problem at all.  I picked up this motor at a swap meet NIB from a trusted source at about half the price of a new one… I could never bring myself to pay the full price when there were a lot of quality motors available at much lower prices… Could the Hackers really be that much better??  This was my chance to find out, right? 

With 90% of my previous electric setups I was always able to find a dozen examples of similar planes and power plants to compare to.  In this case, only a couple examples were out there… so lacking enough information to confidently pick a proper propeller and speed controller I decided to revisit an old standby… eCalc.  I won’t go into great details, but based on what it showed me I decided that the Hacker could “hack it” on the P47.   I might need to use 8S batteries (which I have none of) and the flights might be a bit shorter than I’d ideally like (6-7 minutes predicted) but I really wanted to try out this motor. 

So that issue aside I was back to the problem of a battery hatch…  I went back to all the groups and started reading again and after several hours of reading and making the firm decision to just keep the DLE-20 in place, I read a few more posts and one of the guys who was running electric power mentioned the hidden hatch… WHAT!?  I read on for hours and found nothing but then I saw reference that the hatch existed on this entire series of warbirds??  It was only 1AM by this point and I had to get up at least by 6 but this was important, right?  As I continued my research, I found a description of where the hatch was located and how to open it up on the sister warbird, the Mustang.  A quick trip to the shop and I confirmed the hatch did actually exist on my P47 as well… sort of… and the decision was made.  I had to try.

To see the next post on this subject click here.