
I’ve had a 3D printer now for a couple years and printing some add on accessories for my RC aircraft was the main reason I purchased it. Cockpit details, air scoops, replacement plastic parts for broken scale details like antennas and the like have all been projects I have tackled successfully using my 3D printer.
My particular printer is an Ender 3 with the only functional modifications being a v4.2.7 motherboard, a glass build plate and some updated build plate springs. The base unit can be bought several places and I recommend it as a beginner hobbyist platform. From what I have seen, it is widely accepted as a great device in this role. Here is my link to purchasing the current version of this printer from the Creality Store via Amazon.
At the time I purchased it, I was not particularly interested in or really aware there were very many options for printing a full RC airplane. What I had seen were overweight, ugly airplanes that seemed to just barely fly. After a time I heard about a new material that made it more feasible to print something that might actually approach a reasonable level of functionality… something called Light Weight PLA. Here is a link to what I purchased. There are other brands out there but eSun seems to be a well accepted as a quality product and I don’t have enough experience to accept the challenge of sorting out more factors than I needed to when I was embarking on a new adventure so I went with what seems to be a premium material. Here’s a link to that:
So of course I purchased a roll of filament and quickly decided it was going to be to complicated to set up my printer to work with it. Also my printer had such a small print surface that I surely couldn’t print anything of any size… so the filament went up on shelf to gather dust. The reality was somewhat different, but I wasn’t wrong that with my level of knowledge at the time, I probably wouldn’t have had good results.
Fast forward a year (or maybe 2??) and I happened on a YouTube video showing a really nice looking airplane that was 3D printed! This got me thinking, maybe it was time to revisit the idea. I had learned a bit more about 3D printing and felt I was ready to take the plunge.
So for a week or so, most of my recreational video watching was of 3D printed airplanes and fair amount of web research turned up some interesting information. There were quite a few sites that espoused particular parameters and setups to get successful prints for LW-PLA and there were a number of free designs around. What finally made me open the box was when I came across a free download from Eclipson.
The 3D printed aircraft designs on their site are exceptionally nice looking… rivalying the available ARFs on the market from even the top tier companies using more traditional techniques. They do charge for these files, but the prices seem very reasonable for the level of quality they appear to represent. Their website is very well built and presents their product very nicely with lots of pictures and available information.
Time out for a rant… feel free to skip to the next paragraph. The only thing I wish for, and I may be completely alone here, is a nice manual to help me build. They do a one page sheet that has a lot of information packed into it that is very helpful, and there is a good build video but for me personally, I hate build videos. Especially videos with no narration or discussion like this one. This one is as good as any I’ve seen, but I would much prefer a well illustrated and written step by step assembly book. I’d even pay for one in addition to what is available if it was well done. I find it hard to keep stopping and starting a video… finding a way to backup and find that one part I’m looking for… stopping at just the right point to see what I want to see… Its all just a PITA for me. I know some folks would rather have the video… I’m NOT one of those. OK, rant ended.
Best of all, by all reports, the Eclipson aircraft fly very well. What really got me out of the starting blocks was that they even provided ready made Gcode for their models, preset to work on my exact printer! Its like just feeding in the files and hit print and out pops an airplane! Ok, well maybe not quite that easy but it does get you around having to learn all the parameters necessary to print good quality aircraft parts using this material. Certainly tweeking their settings a bit could make the parts even a bit better, but what I found was using their exact settings produced parts good enough to actually function. Or at least it appears so to me. I don’t mind learning about all the parameters and figuring out how to dial in my printer to produce my own good LW-PLA parts, but I like it even better if I can do that while another perfecty usable part is being produced! Icing on the cake, they have one airplane you can get the files for simply by signing up! This airplane is the Wolf. This RC design is based on a german glider design first produced in 1935 and motorized for RC use. So I signed up and downloaded the files.

I began printing parts from the supplied Gcode and occaisionally I’d tinker with my profile and try printing my own part just so I’d have that ability in the future and because in one or two cases I realized I could print the part just a bit better if I tuned the settings for my particular printer and material. For instance, my eSun White PLA (that I used to print a few parts that needed more strength… per the instructions) happens to print better at 5 or 10c higher temp than the supplied Gcode is setup for. So I pulled up the STL file provided and used my profiles I generally use for PLA+ and printed out those few parts with my own Gcode. I suprised myself with how well those parts printed out.
Here’s some obligatory “parts being printed” photos.. All of these are using the eSun LW-PLA+.
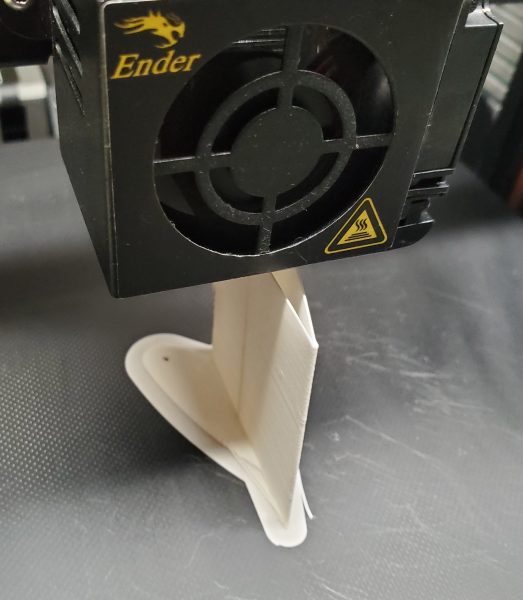
First section of the port side aileron getting underway…
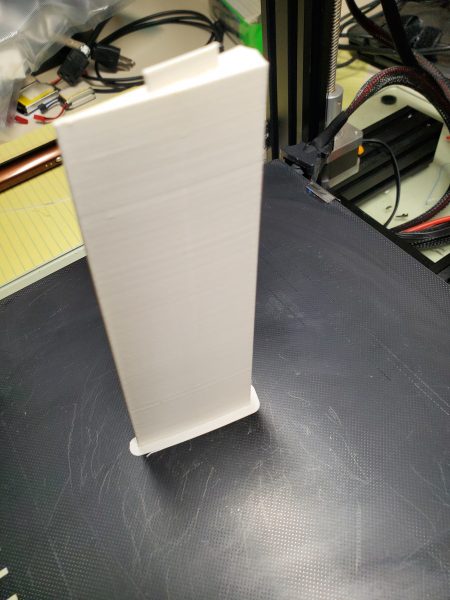
Here’s another section of the aileron
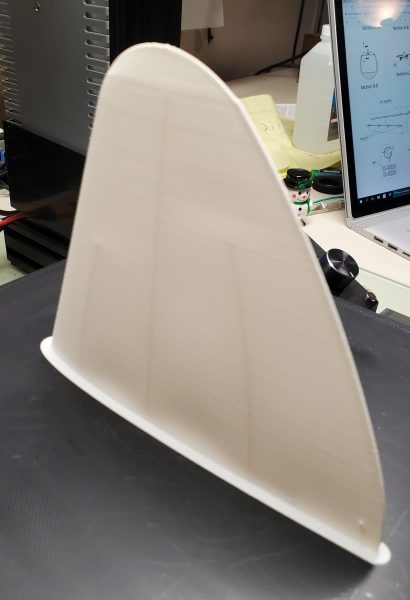
And this is obviously the vertical fin. An exceptionally nice print if I do say so myself.
Up to this point, I had only printed some of the smaller parts of the airplane. But if I want to have an airplane I have to tackle the big parts next and in my experience, big parts take a lot of time to 3D print.
I’m not typically impatient when building an airplane. I don’t mind if a project is sitting on my bench for a while waiting for some necessary parts to ship in or whatever. I can always find another project or a different aspect of this project to keep me busy. I will admit however that I was a bit troubled by the thought of how long it was going to take to print all these parts. I have done some moderatly large parts on my printer before that took 14 hours or more! Looking at the airplane I was afraid weeks of printing overnight would be involved. Luckily, once I tried it, nothing could be further from the truth. I quickly realized that because of the way you print these, there is very little or no supports needed/desired and not much infill either. This results in parts printing much faster that I expected. I printed the first dozen or so small parts over a weekend and I think I got all of the LW-PLA pieces (by far the largest part of the airplane) done during a single week of just part time printing while working on other things. Honestly think I could print all the parts in 3 days now if I really tried.
The final piece or two I needed to print, was the tire and hinges. These pieces need to be printed from something a bit more flexible and in the 3D hobbyist world that means TPU. TPU is about the closest thing to rubber that we can print on a 3D printer and it demands yet another totally different set of printer settings. After reading a bit on the proper settings, different brands and types of TPU available, etc… I decided to give it a try. I had gained a little confidence through the process of printing the LW-PLA so I made the leap. Another order to Amazon and the very next day I had a fresh role of eSun TPU95A in gloss black.
With my very first try, aided by the suggested settings from eSun and a small tweak or two based on articles and videos on line, I had my very first TPU print… a test piece based on a video from a youtuber named CHEP. It looked great and did point out one small wall adhesion issue so I tweaked one more setting and tried printing my tire. It worked well enough on the very first try.
As I went through and “post processed” the prints, removing some skirt material and sanding a couple of spots, etc… I did manage to damage a part or two and had to reprint a couple as a result. The parts aren’t perfect and I have some ideas about what I might try to do differently if I do another airplane down the road, but I think it might actually fly some day!
After assembling the needed RC gear and a few other necessary supplies (more on that in a follow on article) I had this pile of parts sitting on my bench… time for assembly!