Pilot for the Top Flite P47 and the Extreme Laser

I have always liked a nice pilot figure in the cockpit of (particularly) scale airplanes but I won’t put one in if I think the airplane isn’t a good flyer already or if I think the additional weight will negatively affect the aircraft. 

I also don’t like to spend a lot of money for something that isn’t going to make the plane fly better.  As a result, few of my airplanes sport a pilot bust of any sort.  However…

With the outcome of my recent conversion of a Top Flite P47 to electric power being successful beyond my expectations I felt like I might want to find something to fit my new favorite warbird!

I did a lot of looking around and eventually I was getting the usual deluge of ads in Facebook, on email and in my browser for every size and type of pilot bust imaginable and in every price range from custom full body figures costing hundreds of dollars to plastic profiles barely recognizable as pilots for a couple dollars.

Finally I ran across an ad from one of the vendors that I’d done some business with in the past and started looking at the Benchcraft line of pilot busts.  They are very reasonably priced and come in something like 14 varieties ranging is size and type (jet pilot, WWII pilot, civil, etc…).  I found a couple of likely options and then saw a few others that might find homes in some of my other planes so I ordered a half dozen different figures including two likely options for the Thunderbolt.  I could do this because these are mostly priced in the range of $3-$6!

Here are some examples.

The lady and the guy in the red hat are both pretty decent figures for adding that little something to your airplane if you aren’t going into competition!  These aren’t masterpieces of scale modeling by any means but really pretty nice for the super low price and you can always dress them up a little with your own custom paint job if you so desire.  OK, I don’t know what the logo on the front of his red cap is supposed to be… hy? ky? ny?  No idea.  And yes, there are a couple of errant blue dots on his hat but again, the price is right and they are nice and lite weight.  I may try my hand at some painting some snowy day to see how good I can make one of these look but I’ve seen much worse in some ARFs I’ve bought.

The WWII British pilot bust leaves me a bit mystified I’ll admit.  every bit of him except his eyeballs is either the natural “light brown” color of the material he is molded out of or the dark brown that I would presume would make sense as his jacket color… and you can clearly see that there is little rhyme or reason to which is which.  The mold is OK but the paint job looks like it was done blindfolded.  In defense of Motion RC where I purchased these, it exactly matches the picture on the web site so you are getting what you should be expecting!

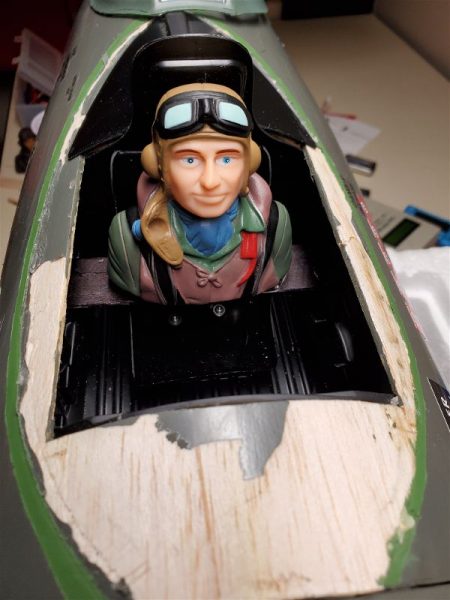
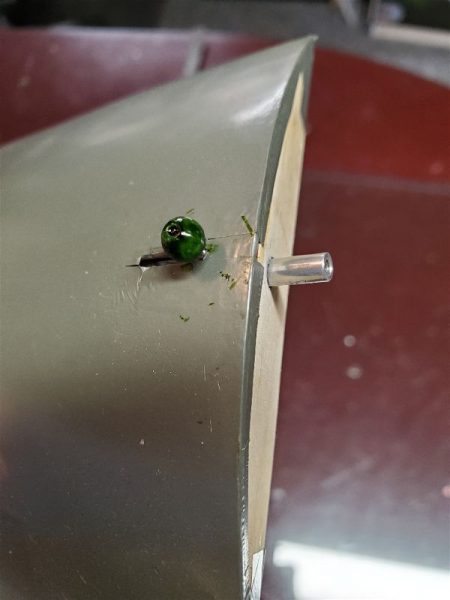
I chose the BenchCraft American WWII pilot bust for my P47 and so cut away the canopy glue (luckily Zap canopy glue is what was used so this was possible without crazy amounts of effort as it stays pliable) to allow access to the cockpit.  I lost a bit of covering and had to add a little cross brace to mount to in order to get the pilot situated in the proper position.  Here he is ensconced in his new home.

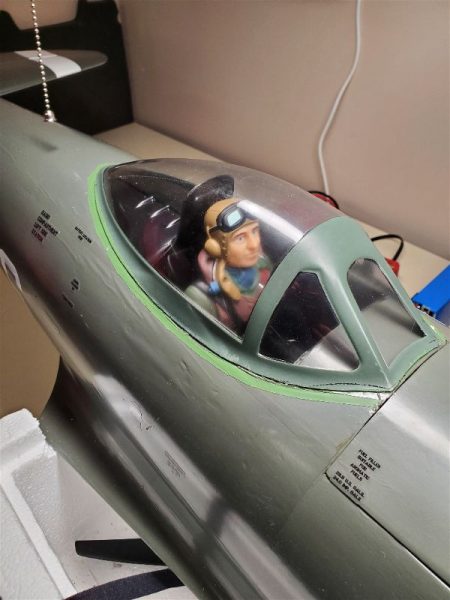
Next came some covering patchwork inside the canopy area and then a reapplication of canopy glue and the Jug is ready to fly again!


As you can see, this figure has a much higher quality paint job than his British counterpart and I didn’t feel the need to do any touchup on him.

Similarly I added a figure to my 74″ Extreme Flight Laser and I may yet install a couple of these others into some other planes down the road.  If your looking for something inexpensive and lite weight to make your cockpit look a bit more realistic, take a look at this option.
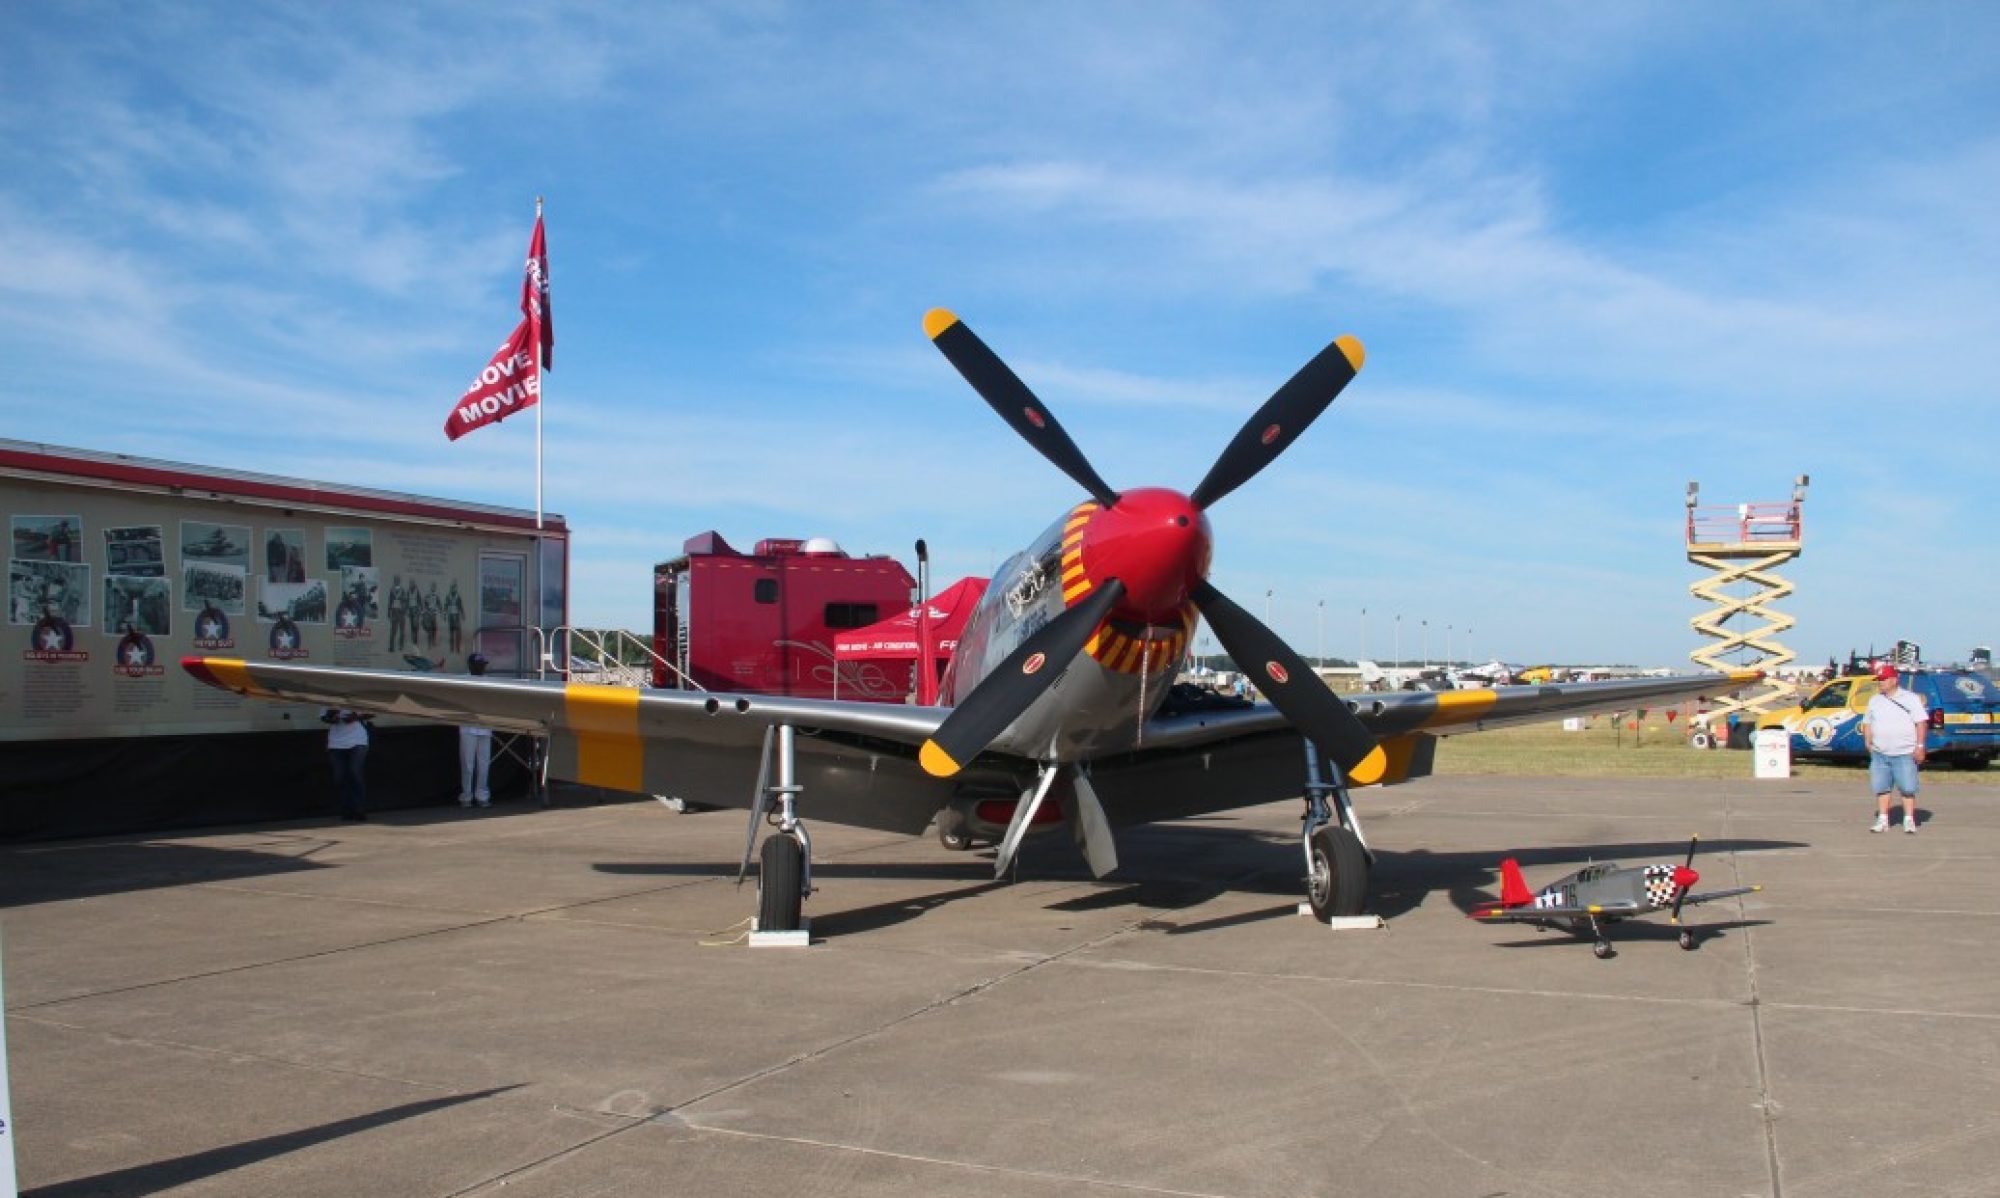
Hangar 9 Carbon Cub 15cc ARF … Part 3

In part 2 of my commentary and running monologue on the Hangar 9 Carbon Cub, I mentioned that I would cover the bottom vent that I added and some other mods so I will show you a couple of those here as well as try to relate my sense of how she flies.  First the build and modifications update.

Bottom Vent

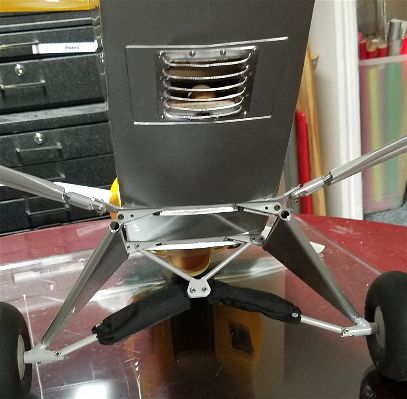
Looking at the cub I realized there is not a lot of accommodation for air flow and even if it isn’t much I’d like to have at least a modicum of air passing over my batteries inside the cockpit area.  So without just cutting open a whole section between formers/bulkheads in the bottom of the tail I needed another solution.  What I came up with was to cut open a section in the only solid area behind the cockpit, which is the hatch for servo access.  I happened to have some louvers laying around that I picked up at a swap meet so I cut an appropriate sized hole and drilled a few holes for button head #2 screws and created a nice louvered exhaust vent.  It’s very nice looking (even if not quite scale!) and looks like it belongs there.  Was it enough exit area…  well read on.

Top Hatch blows off!

Taxiing out for the first flight on the airplane, everything seemed great.  I had done a balance check, the prop seemed to be well balanced, producing a minimum of vibration, all the surfaces were moving in the proper direction and with the proper authority…  Nothing left to do but fly.  Unfortunately upon reaching about half throttle, about 10 feet into the takeoff roll the top hatch that I had created decided to eject.  Testing a second time showed the same issue.  It hadn’t been jolted loose on a bump either it was simply being swept up by some combination of the air moving over the top of the wing and the air pressure forming inside the plane as the motor forced air into the various openings in the firewall.  While the louvers I had installed on the bottom of the plane might insure a good vacuum to pull some air past the batteries once she was in flight, they didn’t do enough while the plane was just starting to roll to avoid the top hatch getting popped open.  For the day, I simply applied some box tape along the front and rear edge of the hatch and things were fine from that point on.  For future flights I had to do something to make the latch mechanism a bit stronger.  Clearly the magnets I had in place were insufficient.

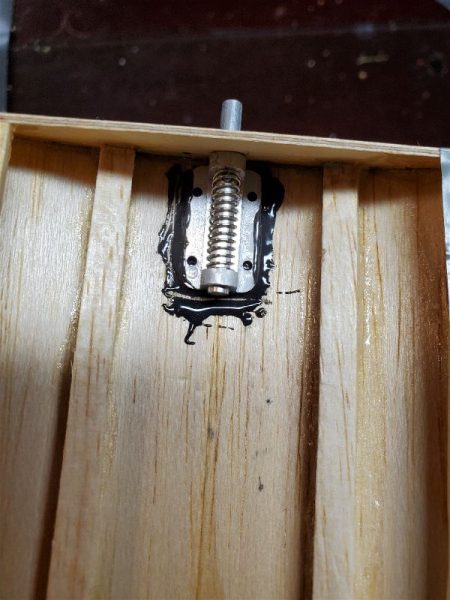
Before the next flight I eliminated the magnet and screw head that I had used to secure the hatch and cut a groove in the wood and created a tab using a servo horn to form a rotating latch that would insure the hatch stayed in place.  Ten or so flights later, this seems to work well.

Servo arm loose on rudder!

The final lesson re-learned on the second or third flight of maiden day for the Carbon Cub was that you should always tighten all the screws and check all of your servo arms, linkages, etc… before flying.  The rudder and elevator servos are under that bottom hatch and so not observable without unscrewing and removing the bottom hatch.  Apparently, when I was setting up the plane, adjusting throws and linkages and such I had neglected to make sure all of these were tight.  The servo arms are metal and are a decent fit but slightly loose on the servo shaft.  If the teeth are engaged there is zero slop but if you don’t tighten up the servo shaft screw the arm will slip off and rotate out of place… especially when sitting in the trailer, bouncing down the road under the force of gravity I imagine?

So 2 or 3 flights in was doing some stall turns and I was getting adjusted to just the right inputs to get an acceptable looking maneuver when it flopped out of one of my attempts.  Since I was low on battery I decided to come down and check out my throws and see if I could improve on the next flight.  When I landed,  my plane was crabbing slightly toward the pit area so as soon as the tail dropped down to join the mains on the runway I started to feed in just a touch of rudder to straighten the roll out… It wasn’t enough so I pushed in more but nothing occurred.  I was far to close to the pilot line and rolling fairly slowly so throttling up without being able to change heading was not an option, especially with a plane I had only a couple flights on and knowing someone was occupying the flight station I was quickly approaching.  Instead I hit throttle kill and watched it roll up and bump the flight station.   Other than a startled fellow pilot, no harm was done.  He maintained focus and control of his airplane and I went down and apologetically retrieved my errant bird.

Of course as soon as I saw the rudder “freely” swinging in the breeze I dug in and found the culprit quickly.  I applied just a small amount of nail polish (thread locker is known to attack some of the “plastics” used in servos… Hitec Karbonite in particular but others as well… so I largely avoid it around my servos) and tightened the screw and have had no further issues with this connection since.

Flying with the Power 60 on 6S

The Hangar 9 team recommends the Power 60 for the Carbon Cub if you are going electric and I think they have a pretty good combo here.  With my 6S 5000mah packs I believe the plane is capable of handling about anything the real world plane can do, and perhaps a bit more.  This does NOT include an unlimited vertical climb with out assistance from the wings but it is not far from it. 

My impression is the plane flies just a little “heavy” on the wing and thus requires a bit more speed than I would like, but keep in mind I fly mostly very light, overpowered aircraft like my EF Laser on an Xpwer 35 and 12S, the Timber X on 4S, the Uproar on 4S, etc…  For a war bird guy, this thing would probably feel lighter on the wing than most and most scale pilots I suspect would see it as being “about right”.  You have to remember that while it has “Cub” in the name it is NOT the ubiquitous yellow J-3.  It is not a floater that is hard to get on the ground but it is predictable and smooth.  If you incorporate the flaps into your landings (as you should), the plane will land at a very manageable moderate speed with only a little time spent with the tail still flying after touchdown.  It’s not a total kitten either in the air or on the ground but in return it is a very capable flyer and a beautiful airplane both close up and in the air.

Top Flite 60-90 size P47 ARF… Gas to Electric P4: Flying the P47 with Electric Power!

After completing the power conversion of the Top Flite P47 to electric power it was not long before I had the opportunity to put some flight time on the bird.  In the course of a couple weeks I put around 10 flights on the Jug.  I’ll relate some of the issues and fixes, impressions and performance information in this article.  I don’t recall exactly in what order all this occurred or was measured so I’ll just hit the various topics without trying for any sort of linear time line… my memory just isn’t that good!

First, I’ll draw a comparison to my “outgoing” Thunderbolt, the FMS 1500mm P47.  While I’ve always enjoyed flying the FMS aircraft and would recommend it as a smooth and good flying airplane, I prefer the Top Flite in the air. 

While just a few inches larger in wingspan and several pounds heavier, it just seems to fly more like a warbird… in only the best ways. 

Neither are hard to land.  The FMS can land slower due to wing loading but also due to just being a lighter aircraft it tends to bounce around a bit more.  The Top Flite likes to land a bit hotter, even with flaps but it settles in nice and rarely wants to bounce.  The FMS may be a bit more aerobatic, but either can do anything a real jug can do plus more and the Top Flite seems to just track better and slice through the wind better.  Everything it does is smooth where the FMS can occasionally be a bit more twitchy.  Not terribly so, but noticeable if you fly them back to back.

Of course it may not be a fair comparison considering the power system differences but my Top Flite is certainly faster and looks it even though it is a bit larger (my experience is larger planes actually look slower).  I always thought the FMS looked a bit slow in the air considering it’s a fighter plane.  It certainly flies well even at slower speeds which is nice on approach but without making some changes it was never going to keep up with the Top Flite.

The other big difference between the two is flight time.  Unexpectedly the bigger Top Flite can loiter much longer than the FMS.  I figured using an 8S system would give me higher speed but at the cost of weight (the Top Flite is heavier even if it was only running a 6S) which would balance out and result in the same 6 minutes or so down to about 30% in the packs that the FMS typically did.  I’m running the same 5000mah capacity, just more cells.  Instead, as I recall, I landed at 6 minutes and had 60% left in the batteries on the first couple flights!!  Now on those first couple flights, I probably wasn’t pushing it quite as much as I normally do the FMS but the flights since have convinced me to up my timer to 7 minutes and even with some more aggressive flying I am landing with 45% or more of the battery capacity remaining… I’m not really sure why I get such great efficiency but I’m going to try bumping up the prop size a bit to get a bit more punch and see how it affects things.  Nothing is getting overly hot as is so I’m hoping for even more power and still having a 7 minute flight to 35% on the batteries…. we’ll see.

Aside from the flying characteristics I have made a few other changes/repairs on the Top Flite P47.  After these changes it has completely replaced the FMS which I recently sold to another pilot. 

First of all, I noticed that one of the flaps on the Top Flite could only extend to perhaps half of the recommended travel so I had to setup with that as the max flap throw.  On the first flap assisted takeoff (with about 65% of available travel), all seemed OK but on landing with full extension I was disappointed with the effect.  Other flap equipped planes I’ve flown certainly slowed up and assumed a nice sink rate where the P47 did not slow as much as I was hoping with the available travel.  On closer examination it certainly appeared whomever had glued in the hinges had gotten them a bit to tight, which was causing the push point hinges to push against parts of the wing trailing edge.  With some judicious trimming I got closer to 75% of recommended travel but no more.  It was all I could get without cutting the hinges and starting over.  Happily, it was enough that on the next landing the Jug slowed up significantly and dropped in a bit slower.  I wouldn’t mind a bit more flap but it’s now very manageable on landing.  It likes to land a bit fast, but that is very typical warbird like flying.

I still land a bit faster than I really have to as I’m really still just getting familiar with the way it flies and particularly how it lands.  At one point that certainly bit me.  We have a nice Geotex runway at our field about 250′ long and I love to land on it when I can.  Partly, I just like to control the plane and land it where I choose versus just letting it land.  I also feel like the landing gear is less stressed when it doesn’t have to drag through the grass.  Putting the plane down “on target” is a good skill to perfect as it can come in very handy when conditions are less than ideal or when landing at facilities that don’t boast our 700′ well manicured grass runway with almost unlimited approaches!  On the particular landing in question, I came down a bit fast due to some crosswinds (it’s easier to bring it down fast and maintain control all the way to the ground) and I was rolling tail high, holding a bit of rudder to offset the wind when I rolled across the one flaw in our Geotex runway… a little ridge where the grass edge of the runway used to be.  This popped the plane back up in the air just long enough to carry the plane into the grass.  Once in the grass I tried to let it settle in but the sudden transition from tail high rolling on grass to the same in the grass caused a quick nose down rotation as the wheels touched back down and she did a flip over on her back…. just hard enough to snap the top couple inches off the rudder!  In retrospect I should probably have juiced it a bit and slowed my decent or even gone around but all in all it was ugly and embarrassing but  it was a fairly clean break and an easy repair.  It also broke the prop which was more expensive to fix but otherwise she was unhurt.

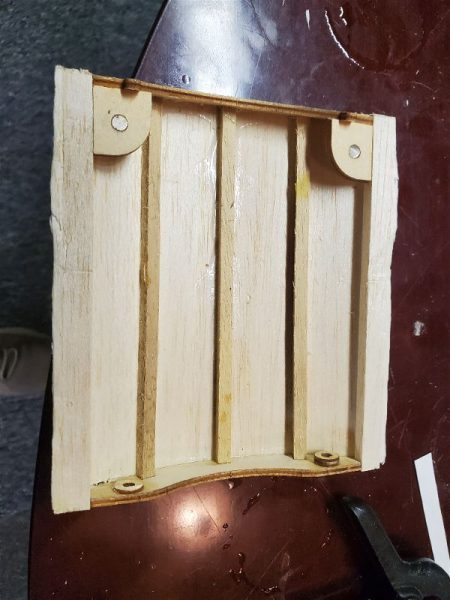
The other occurrence during these first flights was when the battery hatch decided to do its own “off field landing”.  I was not a fan of having magnets in the front of the hatch and pins in the rear as this was built but I decided to give it a try.  In order to keep the hatch in place I took the liberty of attaching a couple more magnets inside the body to increase the pull of the existing setup.  This certainly seemed to help it really snap into place, but apparently that was not enough as around flight number 4 I landed with no hatch in sight!  The really odd part was that I didn’t get unusually high or far away and at least 2 other people will swear they never looked away during the flight, yet all agreed the hatch was attached on takeoff and no one saw it come off but it surely was not on the plane on landing!  Again, I was frustrated as the hatch was such a nice feature and creating a proper curved replacement was not something I really wanted to spend a lot of time on but I had no real choice.  The new hatch now has this latch centered on the leading edge and I don’t believe it is going to part ways quite so easily in the future.

With that taken care of there are a few “clean-up” items I want to address.  The cowl is a bit hacked up as it was cut to allow for the DLE-20 and of course you can’t buy a spare for a plane that hasn’t been produced in a number of years…  I’ll have to figure out if I can find something available that fits, or if I will try to repair what I have.

A second item is that the cockpit is empty and I would love to find a nice pilot figure that looks appropriate in size and style.  I’m eyeing some “Benchcraft” warbird busts from Motion RC.  At the price, I will probably order 1 or 2 and see what looks good. 

In the meantime this is simply an excellent flying airplane and a great power setup that I’m really enjoying.  I’m very happy that the stars seemed to have aligned on this airplane.

Top Flite 60-90 size P47 ARF… Gas to Electric P3: Motors, Speed Controllers and Batteries

This is part 3 on my journey of converting this aircraft to Electric power.  To see the previous post on the topic, click here.  

As I have mentioned previously, I had picked up a nice Hacker motor from a flying club member and it seemed like it might work out as a power plant for this aircraft.  I needed to get that mounted and also figure out what sort of ESC might be appropriate as well as selecting an appropriate battery and then figure out placement and mounting for all of that.  So here was my process.

First I researched the airplane, including expected weight, wing area and ground clearance.  I also read a bit on any balance issues folks reported to see if I was likely to need nose weight or tail weight and the weight of the suggested power plants.  Armed with that I logged into ECalc and filled in the blanks with the wing area, weight and the motor type I had on hand.  I then started plugging in appropriate speed controllers, props and battery combinations to see what I was going to need to get a good power to weight ratio.  Something in the 1.2:1 or higher range seemed like a good goal for a fighter aircraft like the P47!

I like to keep the voltage high and amperage low in an RC aircraft power system.  Higher amperage is hard to accommodate as most of our common connectors are not rated for it.  If you overtax them, they get hot and waste power and eventually this causes a catastrophic failure.  For similar reasons, our LiPo batteries will fail quicker when you run demand high current rates from them, plus they cost and weigh more as you try to accomplish this with batteries that have a higher “C” rating. 

A little rant about LiPo C ratings…   Feel free to skip the next two paragraphs if you like.

In general, C ratings are useful only in that a higher C rating within a manufacturer battery line indicates the ability to supply more current without damage to the battery than the batteries with lower C ratings.  Beyond that they are deceptive at best and almost useless for comparison between manufacturers.  Feel free to disagree but I am convinced that this is the state of things at this time and don’t expect it to change anytime soon so don’t put to much faith in C ratings.

So, while my large aircraft could (according to the manufacturer C rating) run on 20C cells, typically 40C cells get pretty hot and therefore fail sooner rather than later.  The 50-60C packs simply perform better, don’t get as hot and outlast the lower C ratings… at least in the brands I most commonly run.  I don’t bother to purchase from companies who advertise 100C and better as they are pure fiction in my opinion.  A continuous draw at the advertised C rating is almost always a recipe for battery destruction in very short order and in the case of larger capacity packs is likely going to result in batteries dying from internally generated heat and wires/connectors or something similar failing anyway as the system quite literally “melts down”!  It’s a joke to say you have a 4000mah 100C pack (that equates to 400A draw) and then putting a connector on it that is rated to handle, maybe 100A for short periods before it literally “melts down”!   The cells in these packs might handle 150A draw with perfect ventilation but I doubt it.  OK, rant over.

Back to sizing the system I came to the conclusion that running an 8S system with a 16×10 prop would be a good starting point with a predicted 1.3:1 thrust ratio.  Partly this choice was based on the power I wanted and partly due to available speed controllers.  Spektrum had just released a line of Avian speed controllers and one of them was capable of 8S (which I estimated was close to the biggest packs I could likely get into the airplane) and was rated at 80A continuous with 100A peaks which was as much as I really wanted to run through the EC5 connectors anyway!  It was also far less expensive than the Castle Creations options in this same range and had Telemetry built in that I was going to want.  I can do that with Castle Creations and most other speed controllers as well, but with even more expense.  This setup also allowed me to prop up a bit for additional power if I later decided I needed to, which is always a nice option to have.  The tradeoff if I did was that a 16×10 would likely give me 7 minutes or more in the air with a 5000mah pack while a 17×10 or 18×10 would start to cut into that as they would draw more amps.

In order to take advantage of the telemetry capabilities I wanted to access from the Avian speed controller I also would have to acquire a new receiver.  I settled on a new AR6610T.  That wouldn’t be a terrible expense as I had a project that needed a simple receiver like what was currently installed in the P47 so one way or another I was going to be buying one soon anyway.

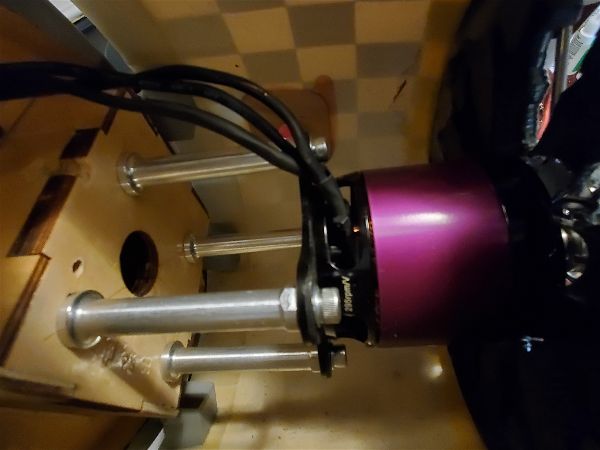
Decisions made, I placed some orders and started looking to mount the motor.   This came down to simply finding the right size spacers and then a hole for the wires to get through the firewall and some judicious trimming of the dummy engine.  

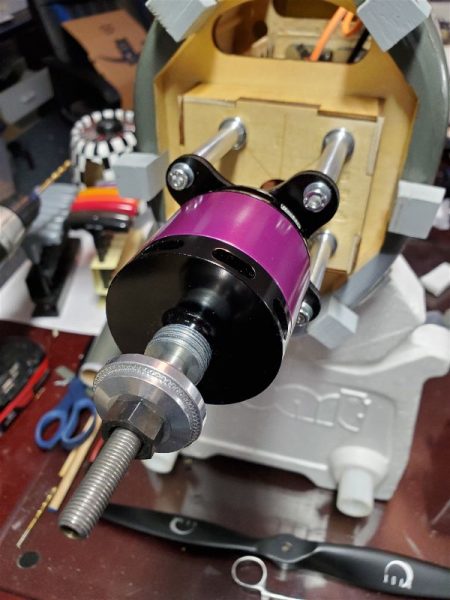
The spacer length I needed turned out to be the same as some readily available standoffs for a DLE 30, which simplified things a bit.  

Then to allow the prop to clear the cowl I added a couple washers behind the prop collet assembly.

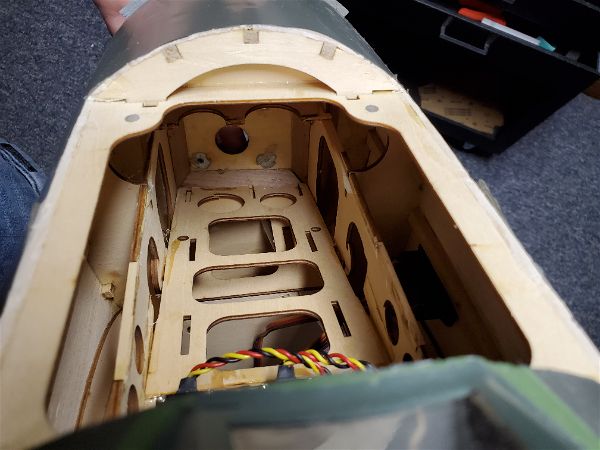
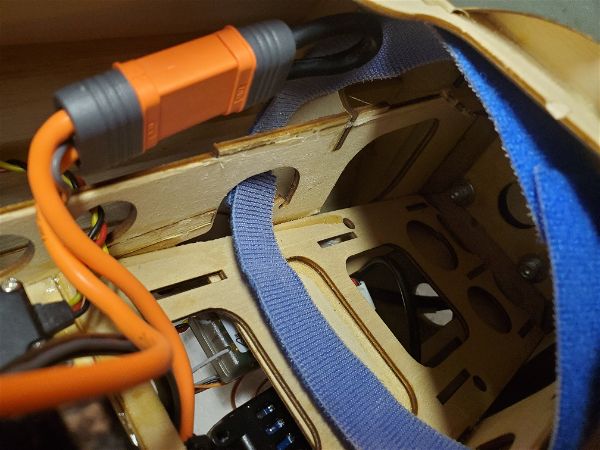
Accommodating an already existing 6S 5000mah pack plus a 2 cell pack of equal size and rating in series (which the speed controller accommodates simply as it already has a series harness attached!) was a bit tricky as the tray exposed under that hatch was simply too shallow for this setup and I didn’t want to buy several batteries for which I would have no other use.  Here’s the original space.

So, I did some cutting and regluing to create a “ramp” that allowed for easy insertion of some of the packs I had.  I had already determined that having the batteries up against the back of the firewall was appropriate to get the balance where I wanted it and while it was a bit tricky to cut out, the existing structure, thusly relocated, works well for the new battery compartment “floor”.

I needed some 2S “booster” packs (as I think of them) to add to my 6S packs in order to run an 8S system so I started looking for something appropriate.  I ended up with some APower branded 5000mah, 60C rated packs I picked up from RCBatteriesusa based in Arizona.  I had read an article about the company recently and decided to give them a try.  They are not the cheapest place to buy packs, but not at the very high end either and offer a good warranty as well as being reputed to have top notch service.  The folks there were as good as advertised in taking care of what I wanted, including the fitting of my requested EC-5 connector even though that was not an option on the web site when I first started shopping.  At no additional cost I might add.  After unpacking, examination and a few cycles they appear to be high quality.

That about covers the power system… I think.  Next time I’ll try to run down my experiences and impressions of the first dozen or so flights.

Top Flite 60-90 size P47 ARF… Gas to Electric P2: The Hidden Battery Hatch

For Part 1 of this article, click here.

It was the wee hours of the morning before I really made the firm commitment in my mind that the P47 had to make the conversion to Electric.  At the next opportunity I started the process.

First order of business was to pull all the gas accoutrements from the airplane.  First, I pulled the prop and cowl and started stripping out the gas motor mount, ignition and the supporting switch, battery etc…  I knew a guy who was looking for a  DLE-20 so I made him a deal on the engine to help finance the needed items to complete the conversion.  I had the motor but needed a speed controller and maybe some additional lipo packs.

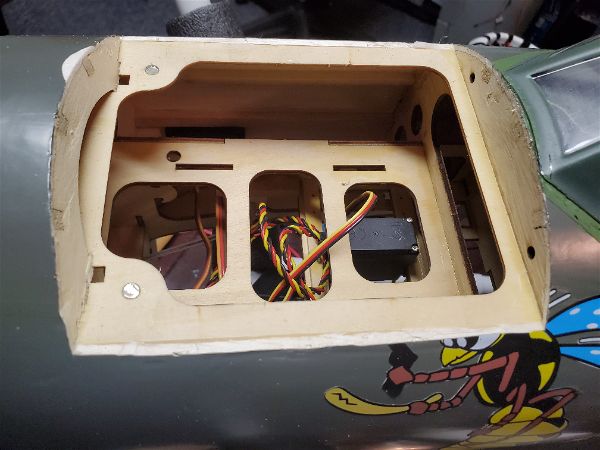
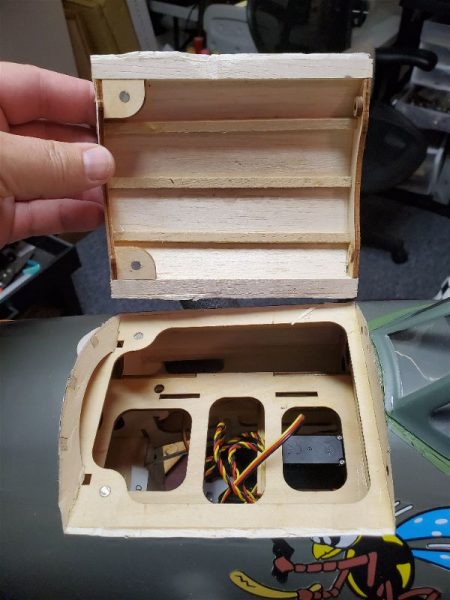
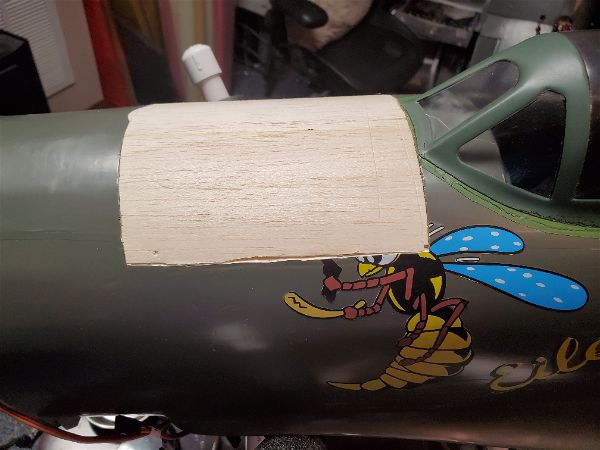
As soon as all that was out of the way it was time to explore the “hidden hatch”.  For reasons that are beyond my comprehension, Top Flite built a hatch into the top of the P47 (and other models in this line of ARF warbirds).  They framed it out in ply, put magnets in place along with pins to hold it in place… and then put a solid balsa sheet skin over the entire nose (including the hatch) and covered it with no markings or indication that it existed.  Nor is it documented in any way in the manual!

With no guidance it became quite the task to figure out how to outline and cut the hatch free.  What I eventually settled on was to take a pair of forceps with an extremely sharp needle locked in it’s jaws and reach down into the wing saddle and force it up between the two plywood plates at each end and side of the hatch until it emerged through the covering.  By doing this repeatedly, working my way around the hatch perimeter I outlined the hatch on the covering.  Then while holding my breath, holding my head at just the right angle and sending up prayers to the modeling gods (a more fickle lot I have yet to meet) I took an Xacto knife and inserted it into one of the pin holes and slid it by feel between the plywood plates.  Working my way around the perimeter of the hatch, I managed to slice my way through the vast majority of the sheeting.  With the judicious use of my razor saw, I got the hatch loose with only one problem… I managed to cut through the pins at the aft most part of the hatch! 

Don’t worry about the wasp decal… I was planning on ordering replacement graphics anyway!

As you can see it wasn’t a perfect cut but it came out well enough!


Luckily, I had on hand an appropriate sized dowel and replacement of the pins proved to be a fairly minor task.  I would later go on to add a hatch latch on the leading edge of the hatch… or at least on the new one I had to build after I found out the hard way that those magnets just aren’t strong enough!

Next time I’ll discuss the power system choices I made and how that is working out.

To see the next post on this topic click here.


Top Flite 60-90 size P47 ARF… Gas to Electric P1: Decisions

I already posted a bit here about this airplane with the focus on the retracts I used.  You can see that post here.  This post will focus more on the Electric conversion process and the results of that.  Note that I never flew the plane with the DLE 20 that was on it when I acquired it so can’t compare to that… I can only tell you about my conversion process and the results I got.

Acquiring the airplane

I have a flying buddy that has been in and out of the hobby for the past several years named Martin.  Martin called me after not having heard from him for a bit (maybe a year or more) and reminded me of a P47 that we had worked together to get ready to fly.  It was a 60-90 size Top Flite ARF and we had gotten it pretty close to flyable with a DLE 20 installed, servos and linkage all installed and even radio gear all in place.  For whatever reason it had just never made it into the sky.

Martin asked if I was interested in the airplane.  If you look back at my previous posts you will see that I already own a nice FMS 1500mm P47 that flies very well on 6S.  While I have a particular affinity for the P47 (my grandfather helped build them in Evansville, Indiana during the war) I was hesitant because this airplane is only slightly larger than the foamy I have and I wasn’t sure I really needed two P47s in a very similar size… plus I’d have to consider whether to convert it which might be quite a job.  Add in that I really didn’t have any room in the RC budget at that moment for another airplane and I explained to Martin that I really couldn’t give him nearly what it was worth.  Martin however, explained that he simply wanted to get out of the larger airplanes like this and since I had spent so much time working with him on it, he was simply offering to give it to me!  I offered to at least pay something but Martin insisted that if I had an interest that it was mine.  He even offered to deliver to the field in a couple days when I was planning to fly.  What could I say?  Of course I accepted.

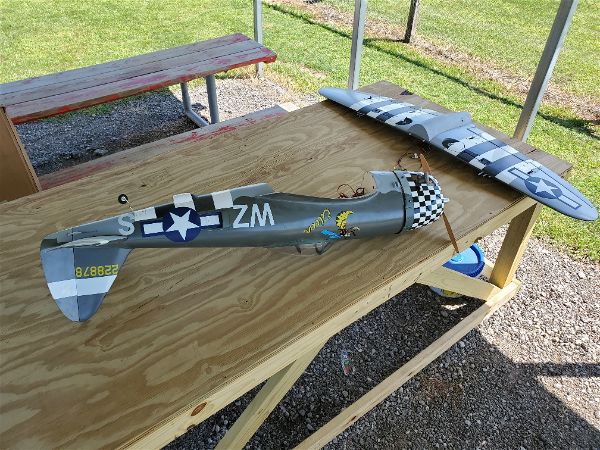
Here’s what she looked like just after delivery.


Modifications and Decisions

After a lite cleaning and a thorough inspection I made a couple decisions on things I wanted to change/upgrade or just tinker with a bit before I’d fly it.  A couple were easy decisions. 

First, I wanted to order a new set of graphics as the decals the came with the plane I knew would never last.  In my experience if you want good looking and long lasting graphics with few/no wrinkles or bubbles you buy vinyl… typically from Callie Graphics.  Callie is inexpensive, willing to work with you on any request and provides a great product.  I had a set of markings on a 50cc size Mustang for 3 or 4 seasons.  Many days the plane sat out in the sun all day and the vinyl never bubbled or faded.  I even had to peel the stars and bars from the wing and reapply them when I crashed the bird and bought a new wing.  They still looked like new when I sold the plane a few years ago.

Second, I knew I wanted to replace the landing gear, which I’ve already discussed.

The third issue was much more of a question and it took a couple weeks to come to a conclusion.  What to use for power?  Obviously leaving the DLE 20 in place would have been easy.  I knew the history of the engine and that it ran well before it came to be installed in this bird and it would certainly be an adequate power plant.  However, every other plane I currently own is electric and I had what I thought might be an excellent motor for the purpose.  In fact I had been looking for something to put the motor in ever since I acquired it.

Thus began several days of reading and research.  First I looked on various discussion groups about the airplane and what others had done.  90% plus had run gas engines… a few 2 stroke glow and a few 4 strokes rounded out the vast majority.  What intrigued was the 2 guys who mentioned they were running electrics.  Eureka!  Until I realized that there was just no easy place to put a battery hatch into the P47… at least not that I wanted to tackle.  the plane is pretty much all curves and being an ARF, access is limited unless you want to recover and rebuild extensively.  This didn’t seem promising.

While I mulled on that, I started to look into the electric motor I had and tried to figure out if it would be enough power for the P47.  The motor is a Hacker A60-5S-V2 and while the Hacker site has a fair amount of info there was only a bit of corroborating information that I could find.   It looked like it might be just a bit on the small side if you believed the Hacker site information.  Encouragingly, the actual users reported fairly uniformly that they were running this motor (and most Hackers it seemed) at the maximum ratings and even significantly above with no problem at all.  I picked up this motor at a swap meet NIB from a trusted source at about half the price of a new one… I could never bring myself to pay the full price when there were a lot of quality motors available at much lower prices… Could the Hackers really be that much better??  This was my chance to find out, right? 

With 90% of my previous electric setups I was always able to find a dozen examples of similar planes and power plants to compare to.  In this case, only a couple examples were out there… so lacking enough information to confidently pick a proper propeller and speed controller I decided to revisit an old standby… eCalc.  I won’t go into great details, but based on what it showed me I decided that the Hacker could “hack it” on the P47.   I might need to use 8S batteries (which I have none of) and the flights might be a bit shorter than I’d ideally like (6-7 minutes predicted) but I really wanted to try out this motor. 

So that issue aside I was back to the problem of a battery hatch…  I went back to all the groups and started reading again and after several hours of reading and making the firm decision to just keep the DLE-20 in place, I read a few more posts and one of the guys who was running electric power mentioned the hidden hatch… WHAT!?  I read on for hours and found nothing but then I saw reference that the hatch existed on this entire series of warbirds??  It was only 1AM by this point and I had to get up at least by 6 but this was important, right?  As I continued my research, I found a description of where the hatch was located and how to open it up on the sister warbird, the Mustang.  A quick trip to the shop and I confirmed the hatch did actually exist on my P47 as well… sort of… and the decision was made.  I had to try.

To see the next post on this subject click here.


E-flite 60-120 size retracts

I recently came into possession of a Top Flite 60-90 size P47 ARF.  It had a DLE 20 on it and was nearly in a ready to fly state and had never been in the air, but of course I couldn’t just leave it alone.  I have zero non-electric aircraft in my fleet at the moment and it so happened I had the perfect electric motor sitting in the box… so of course I converted it immediately!  I also knew that one of my flying buddies was in the market for the exact gas engine that was installed in the plane.  Thus it began.

I won’t go into detail here about the whole conversion.  For more details on that there are several posts starting with this one: P47 Conversion.  Suffice it to say that just when I thought it was fully ready to fly, now under electric power, I ran into a problem with the landing gear. 

The landing gear that came with the plane was a mechanical retract system with “plastic” mechanisms and it had a lot of slop in the system.  Even when fully locked up or down the gear could rotate… perhaps 3-5 degrees.  The result was the wheels would not stay tucked up in the wheel wells, nor did they maintain the proper angle when down and “locked”.  I first realized how big a problem this was likely to be when I taxied the plane around in my driveway.  After rolling 5-10 feet it was like applying the brakes.  You could see the wheels tilt inward at the pavement and twist inward so that they started scrubbing against the concrete.  It was obvious this was not going to work.  If I got off the ground at all, surely any landing with the wheels deployed was going to result in a flip over.  With an 11lb plane, a flip over was likely to result in some consequential damage.

Then the question became, what to do?  I disassembled the existing retracts and looked at any possibility for improving/repairing what was there but I could not come up with an adequate plan.  I could also go to one of two “big names” and get retracts for the airplane… whether they be mechanical, electric or air driven.  I was concerned the mechanical systems from the big names might put me right back where I was (at worst) or work OK, but cost me $150 at best… and of course their electric sets, which I have used before are very pricey.  I could easily have spent $300 or more on those.  I had not intended to spend much money to get this airplane flying but there was no fixed gear option so I had to do something.  I really wanted to go electric but the cost…

Fortunately I read on some forums how guys had put some E-Flite electric retracts in the plane and claimed they worked well.  I take anything I read on the forums with a grain of salt.  I’m convinced most will not admit that they are unhappy with something they spent a lot of money on and are now stuck with so I wasn’t sure.  I tried to read the specs/look at dimensions etc… but unfortunately this is a brand from Horizon Hobby and their web site is simply pathetic.  Not only is their search engine on the site total crap, but they typically provide very limited information on their products on the site and these were no exception.  No indication of the build material, no dimensions, no complete description or listing of what parts come in the box, etc…but having few other options coupled with some good reviews in the discussion threads I was reading combined with an affordable price convinced me to take the plunge.

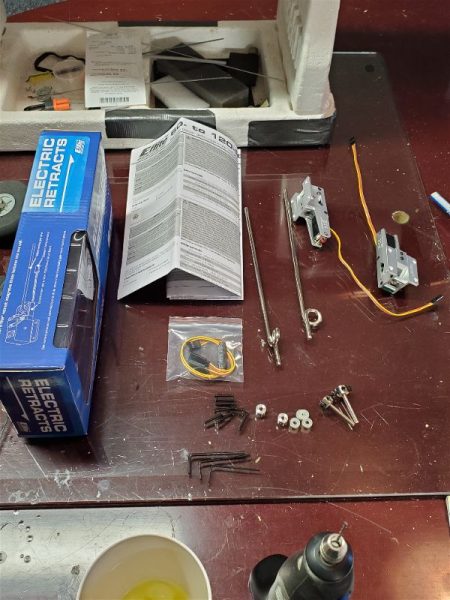
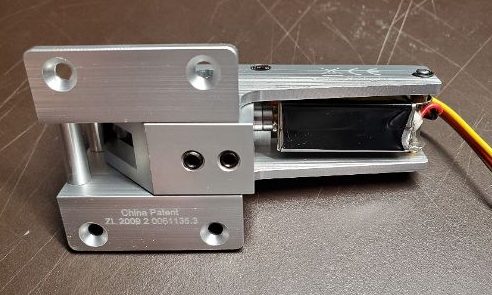
Immediately on picking them up from my local hobby store I was cautiously impressed.  These thing looked like they were machined from aluminum and what’s in the box is very complete, down to the necessary allen wrenches provide (3) to fit all the set screws!

Here’s the box contents…

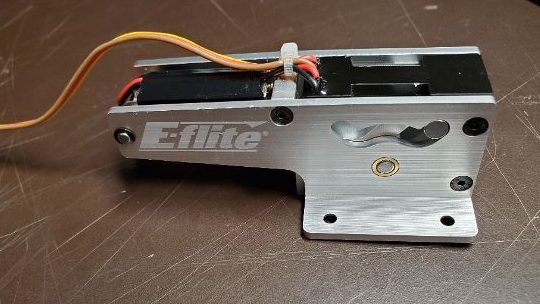
And here is a closer shot or two of the mechanism itself.  

To me, these are things of beauty, and I only paid about $155 for the pair through my local hobby shop, including tax!

It took a little work to get them into the bird… nothing terrible and none of it reflecting badly on the retracts.  Since installing these I have made I think 10 flights.  I fly off of grass and Geotex runway and there has been no rain in the last 10 days before my last flights yesterday so the ground is hard and there are some bumps out there as well and so far these things have worked flawlessly.  Not one time have I had an issue with either retract failing to move when commanded, coming up short of full motion, twisting wheels, nose overs… etc…  From a functionality perspective, I have nothing but high praise for the E-Flite retracts.

If your looking at these and trying to decide if they are worth the money, I’d say yes.  Further if you are trying to figure out how well built they are, I would say they are top notch.  I’ve seen nothing to indicate that this is anything but top quality throughout.  Finally, of course the information you need to see if these will fit is not to be found.  So here are some measurements for you in case you need them.

I’m using English/US measurements and I’m sure these were made using metric measurements so these are approximate.

Across the mounting tabs the retracts are 1.75″ wide and 1.5″ long.  Each tab is 15/32″ (just under a half inch) across the outer face.  The depth of the units measured from the back of the mounting to the bottom is 1 and a 16th and the part that extends down into the wing is about 13/16ths wide.  The mounting tab itself is approximately 3/16ths thick.  The units themselves are approximately 3.25″ long (measuring the metal “frame”) which includes the motor mount etc…  The strut is 5mm in diameter which allowed me to use my existing strut with just a minor trim at the top so that the “curly q” shock absorber bend in the struts lined up with the cutout in the wing.

Hopefully some of that will be useful to others out there.  Wouldn’t a dimensional drawing from E-Flite be nice!!  Still the units are top quality and reasonably priced!  If your in the market, I don’t think you’ll be unhappy with these.

Parallel Charging… don’t do what I did!

For those of you who are at least somewhat seasonal flyers like I am, you may recognize the dangers of the first few trips to the RC field after being mostly away from flying for some weeks or months.  There are new planes to fly, old problems with existing planes that you promised yourself you’d fix over the winter and of course just the early season issues caused by being out of the groove.

I recently had one of those “early season” moments (at least that’s what I’m going to blame it on) where I did something stupid because I didn’t have my head in the game when it mattered.  Here’s what I believe occurred.

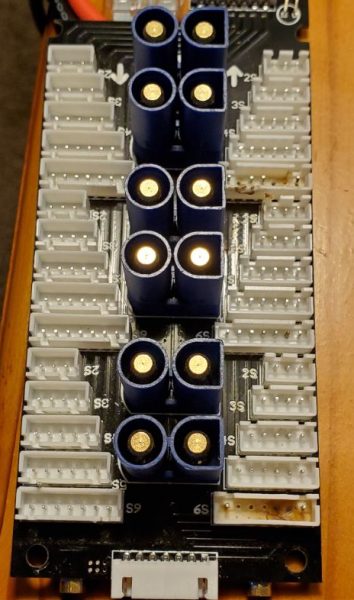
My first mistake was in not being prepared.  Usually, when I get to the field I have already charged up flight packs and my radio, insured I have all the right bolts, tubes and whatever for the planes I intend to fly, etc… but this time I just didn’t get the proper time to prep so I arrived at the field with the two batteries I had for the plane I most wanted to fly in storage mode.  So I pulled out the generator, hooked up my power supplies, grabbed the high power charger and popped the two 5S batteries on the parallel board to charge.  Of course I did this all in a hurry and without putting my glasses on.

That’s when the fun began.  As I was starting to program my charger, the smell of burning plastic and some smoke started to issue from the area of the batteries!  I quickly yanked the battery connections lose and tossed the batteries into an open grassy area away from any nearby cars and my trailer.

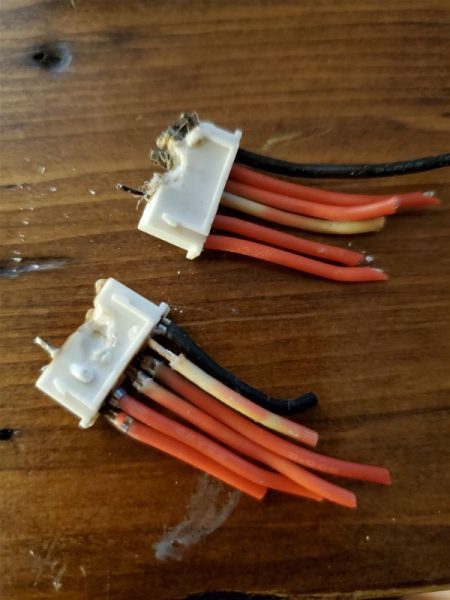
Investigation showed the parallel board and connectors on the batteries to both be partially melted including the absence of several pins in the connectors on the board itself!

I later noticed (as you may have already) that the melted connectors on the board were the 6S connectors??? So somehow I had gotten the two 5S XH balance leads at least partially seated in the 6S connectors.  And I had done so consistently!!

I’m guessing that I managed to connect the ground part of the balance lead to the first positive wire on one or both, essentially grounding cell 1’s positive wire!  In any case whatever I did caused a enough current to flow through those pins so as to melt the plastic around them and de-solder some of them from the parallel board!

So main lessons learned:

  1.  Always wear your glasses when making these connections!
  2.  Don’t get in a rush.  There’s a lot of energy involved in this process and releasing it in the wrong way is dangerous!  Rushing anything involving RC airplanes is typically a bad idea.  If you don’t have time to take your time… don’t fly!
  3. Don’t count on the locator pins on the balance plugs to protect you.  Use your brain and your eyes to insure proper alignment!

While I was at the field I decided to cut the balance plugs (now mangled beyond use anyway) from the batteries as there were exposed pins etc… and I didn’t want to transport the batteries with any chance that a short might occur and cause another event in my vehicle or trailer!  I cut them off cleanly with minimal wire left exposed, one at a time, and staggered nicely so they couldn’t easily touch.  Also I was there for 3 or 4 hours after this occurred and the batteries weren’t swelling, getting hot or showing any other signs of distress so it seemed they might be salvageable and I wanted to examine them later on my bench.

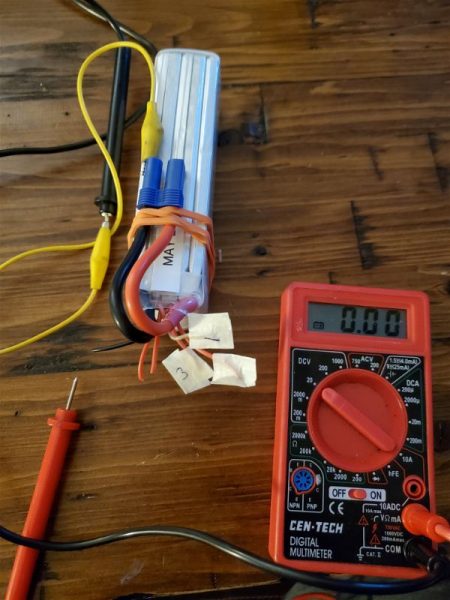
 The next day at home I started going through and measuring the voltage and labeling each wire to identify the individual cells.  All measured in the vicinity of a storage charge level and by measuring each relative to ground I was able to figure out and mark the cell order.  Here’s my test setup with a battery in the midst of the labeling process.  I have the negative test lead clamped into the ground on the main load connection and that connection rubber banded down to keep it safely away from all the positive wires.

I found a place to purchase 5S extension leads, so as soon as I get those I will attempt to safely put a balance plug back on the battery.  Once I do that I can further test and cycle to insure the batteries are still good.  I’ll post again or add to this post when I finish that process to tell you the results.

In the meantime I’m wondering if a “safer” balance board would be a worthwhile investment?  Some have not only a fuse for the main connector (which mine does also) but protective self-reset able “polyfuses” on the balance connectors.  Right now those sound like a wise investment and I encourage you to consider that option if you start parallel charging.

Don’t get me wrong.  I don’t think that parallel charging is unsafe… just that it requires a bit of caution and attention to keep it safe!

Spektrum connect issues… resolved?

One of my largest aircraft currently is my Extreme Flight 74″ 12S powered Laser.  It is also one of my favorites due to ease of assembly at the field, unlimited vertical performance and the fact that it is capable of such beautiful aerobatics!  Sometimes it even looks good when “I” fly it!  Yep, the plane is certainly more capable than her pilot.

Really the only issue I have had with this plane for quite some time is on that occasion when I get it assembled and ready to fly… except the iX12 radio and 12 channel power safe receiver will not connect on power up!  It’s very frustrating.  It’s not that it has lost bind…  I’ve occasionally gotten it to work again by cycling power once or twice or even just taking it back home and trying again…  It’s was never obvious what I actually did to fix it… and sometimes it seemed nothing would.  It happens very rarely and usually if I just go through a rebind process it works perfectly from that point on for a long time.  This typically only occurs if the plane has been sitting idle for a period of times… week or months (like first flight of the spring) is the most likely time to have this occur.

So being as it is just getting to be good weather for flying on any kind of consistent basis here in Indiana, I just ran into this issue again!  This time I was at home and had decided to tinker a bit with the Telemetry when it once again refused to talk!  Power up the radio, power up the plane, pull the pin switches for both receiver and speed controller and… nothing.  Everything is sitting at centers and the usual sing/buzz from the servos but no link…  

I tried a couple of power cycles and still no luck so this time I decided to post on the Spektrum group on Facebook.  After several posts back and forth and a number of excellent suggestions, one gentleman pointed out that the power safe receivers would not link to radio if the proper number of remotes (he even said if just the A receiver was down, that would do it)  didn’t come on line and suggested checking the contacts and coating them with electrical grease to shield them from problems.  An intriguing idea so I went back to the airplane and did some more testing.  As I did so, I also noticed that I had not done my normal strain relief on these cables so I decide to take care of that before all was said and done.

What I found was that in fact the A receiver was certainly not linking up (no lights if I recall correctly… or at least no steady light) and once I re-seated the cable, everything linked up instantly.  Repeated testing showed it all working perfectly from that point on.

I have a fair amount of pride that few of my planes crash due to “avoidable” assembly and maintenance issues so I like to track these issues down and resolve them whenever possible and then apply the fix wherever it makes sense on the rest of the fleet.  This airplane for instance has redundant flight packs separate from the power packs that run the motor, nylon insert nuts on all of the ball linkage bolts, Telemetry monitored battery levels, etc… in order to make sure it is as reliable and survivable as is possible/reasonable.  So I decide to see if I could eliminate this issue for good.

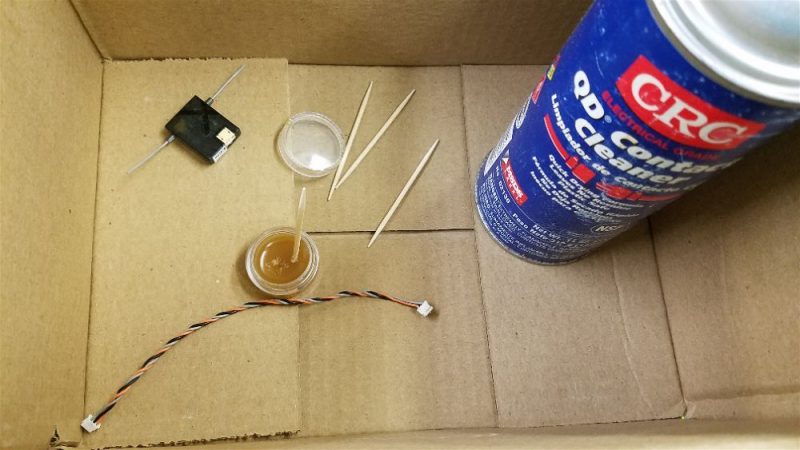
After collecting the necessary items (all shown here except the liquid tape) I started to work to resolve this issue.

The process went something like this…  First pull the remote receiver (they are all attached with sticky back Velcro, so this is not hard to do) and the cable from the airplane.  Inside the box (I’m working in the living room so protecting the furniture/carpet from harsh chemicals and spills) I spray some contact cleaner into the end of each cable connector and into the remote receiver connector.  Once dry, I took a toothpick and forced some dialectric grease down into the holes on the cable connectors and then coated the pins in the connector as well.   I did the same on the receiver while still installed in the airplane… luckily it’s somewhat roomy in there… and then reconnect everything and wipe away any excess that squeezes out.

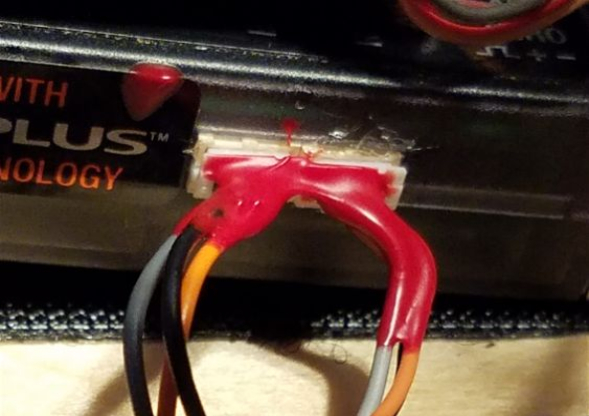
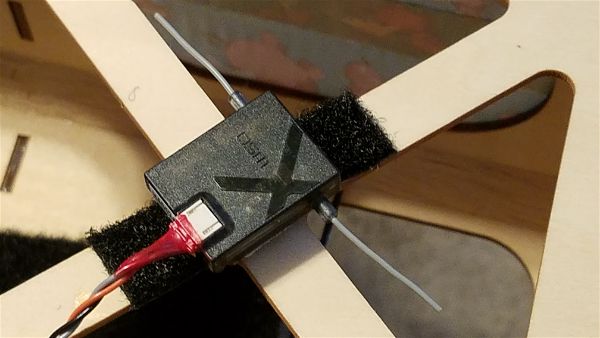
That should eliminate the possibility of corrosion in the future so once all was back in place I moved onto painting on some red “liquid tape” right on the back of the connectors and onto the first 1/4″ or so of wire for each of the four cables that connect to the remote receivers.  This helps to share the stress on those wires and eliminate the most likely break point for the connections.  The liquid tape will flex but doesn’t allow for kinking or pulling on the individual wires.  I have had a few of these wires break before but never had an issue once I applied this little “hack”.  I apply this while everything is plugged in typically.  If a bit gets on the receiver or over the outside of the connectors it doesn’t hurt a thing and simultaneously it can’t get in the way of the actual electrical connections if applied this way.

Here are the two plugs on one side of the receiver.

And here is one of my receivers sitting on top of the motor box under the cowl.  You can see how I have coated the connection, further protecting the wires against stress and contaminates to some extent.

We will have to wait and see how this works out.  I have high expectations that this problem is likely resolved and I feel very positive that this improves the likelihood that this plane will fly for years to come… or at least until I make a mistake behind the sticks!

UMX P-47 Electrical Issues Resolved

I received this UMX P-47 as a Christmas gift a couple years ago.  I have a warm place in my heart for the P-47 as my Grandfather helped put thousands in the air while working in the Republic plant in Evansville, Indiana.  I checked the markings and this model is based on an Evansville bird!  Excellent.

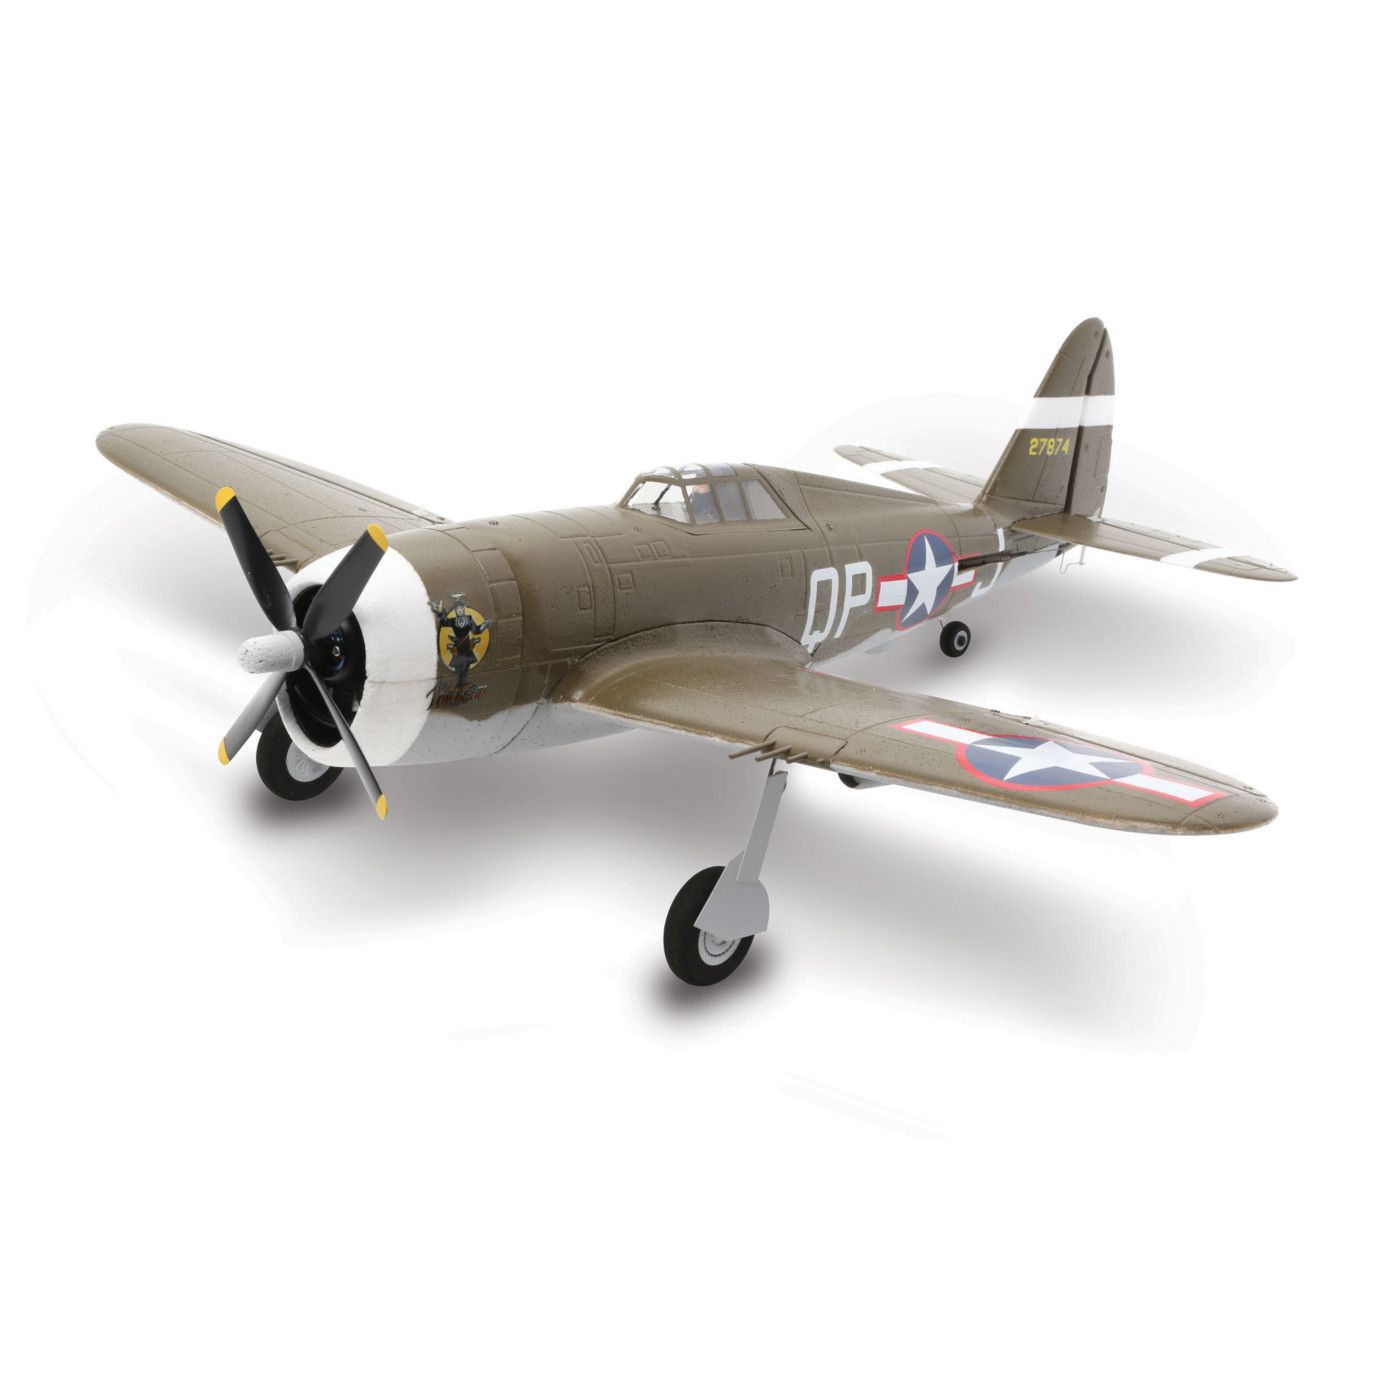
Here is what the little UMX looks like:

The P-47 was one of the primary work horses of WWII.  It was a favorite with a lot of pilots as it offered that most favored of qualities, survivability.  With plenty of armor protecting the pilot, a reliable air cooled engine and (as long as you had altitude) a dive speed that almost no other plane could match providing an escape if worse came to worse, a lot of pilots survived missions in a P-47 that would have had different results in other birds.   This led to a popular saying during WWII “If you want to get the girl fly a P-51, if you want to go home to your girl strap on a P-47.”

It was also heavily armed with 8 fifty caliber machine guns and could carry 3400 rounds of ammo along with an impressive load of bombs equal to more than a third of what the B-17 bomber could carry and so became a favorite with the ground troops as well, providing a lot of support to the boys below.

For all these reasons, I love a P-47 and though I don’t get to fly it often I do enjoy it.  It flies well for its size, is fast enough to look like its doing what it should be, and it tracks nicely, I’m sure partly due to the on board AS3X stabilization.  It requires a good size space to fly indoors and can’t take too much wind so outdoors is limited, thus the limited flying time.

Starting last year I’ve had the opportunity to fly at one indoor venue over the winter months that is large enough to enjoy flying this bird in.  It was during one of these events that I started having a weird issue with the aircraft.

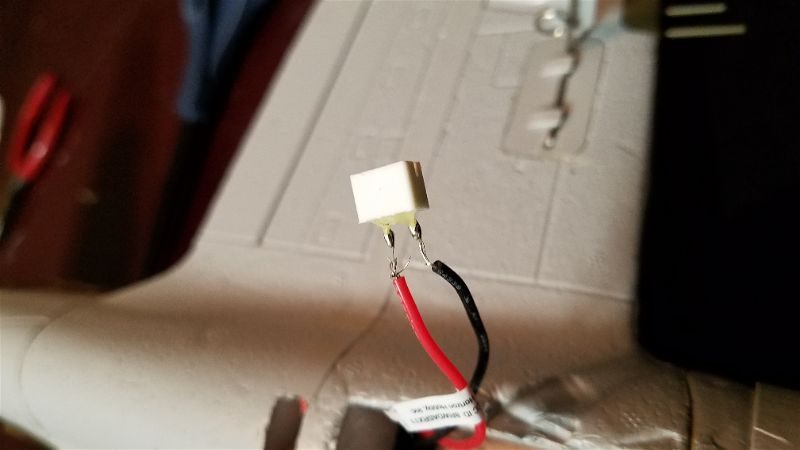
Occasionally, the bird would suddenly and completely lose power while taxiing.   This happened once and I thought I just had a bad battery.  The second time it started working again when I picked it up and re-plugged the same battery…  odd.    After that flight it went back in it’s portable hangar and sat for a couple weeks ’till the next indoor at which time I took it out and tried to fly again… It was only when the spark happened as I plugged in the battery that I recalled the previous issues.  I quickly disconnected a rather warm battery…  YIKES!  A close examination of the area helped locate the issue…

As you can see, the insulation has pulled back and several strands of the multi-stranded wire are trying to make some “non-approved” connections!  

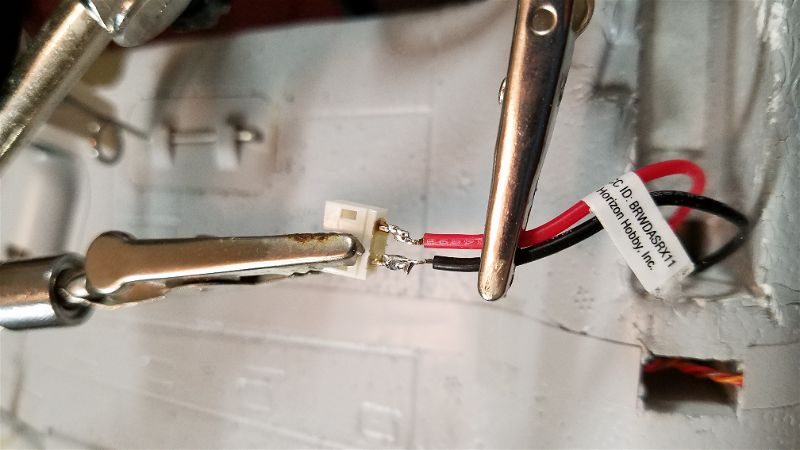
To cure this problem I first cut off the remaining strands and then reattached them with the use of my handy “helping hands” soldering clamp.


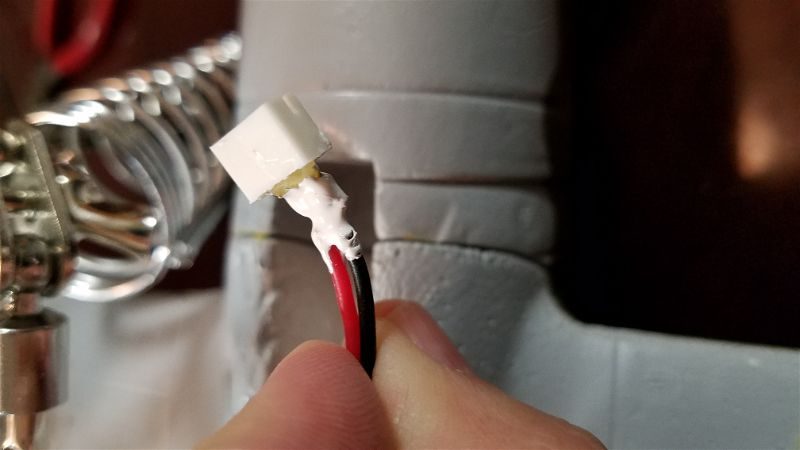
Once that was accomplished I used some liquid tape to insure that no more unapproved connections were going to occur.

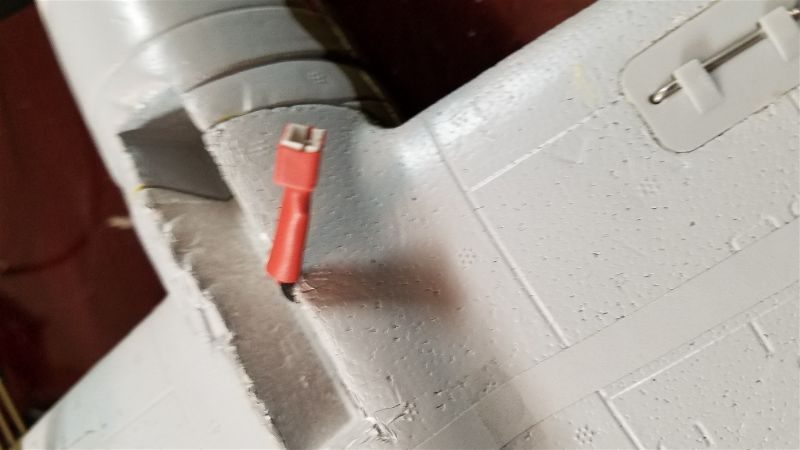
Then to help further protect the connection I applied some shrink wrap.  Here’s the final product.

I’ve since gotten 4 flights on the “Jug” without issue.  Unfortunately, with the recent outbreak of Covid-19… further flights are probably months away, but I am happy to report that the P-47 is back to mission ready status.  Here’s hoping we can all be healthy and back to this wonderful hobby soon.