Full 3D Printed Airplane – Chapter 3 (Flying)

In part 1, I discussed my road to my first 3D printed RC airplane… The Wolf from Eclipson.  It’s their “free download” which, I’m sure, is meant to lead to a good experience and influence a future purchase.  The printing part of the project went well, but I still had to get through the assembly and flying part before I would call this a success.  Part 2 will cover some of the assembly process and part 3 the flying and results of that part of the adventure… so onto part 3!??

Ok, so I’m skipping over the gathering of supplies, painting, assembly, etc… Thus why I titled this Chapter 3 when I haven’t posted a chapter 2, but I just have to get to the flying part so here we go!

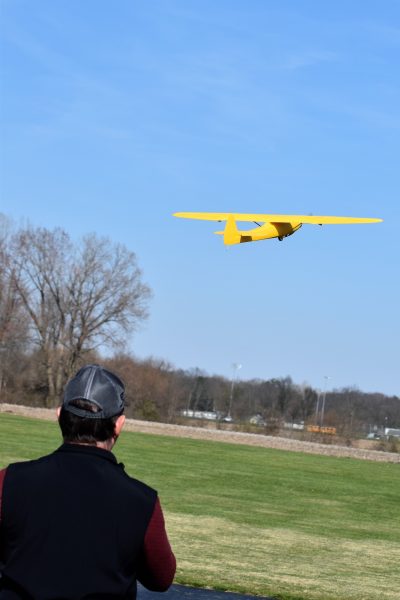
Spring has been cold, wet, and breezy with only a couple of days of warmer weather with anything like a reasonable wind speed… so I just finally decided to fly it anyway!  It was a stiff crosswind but the temperature was at least reasonable so after a long journey of learning and more than a little trepidation, I had my friend Steve give it a toss for me.

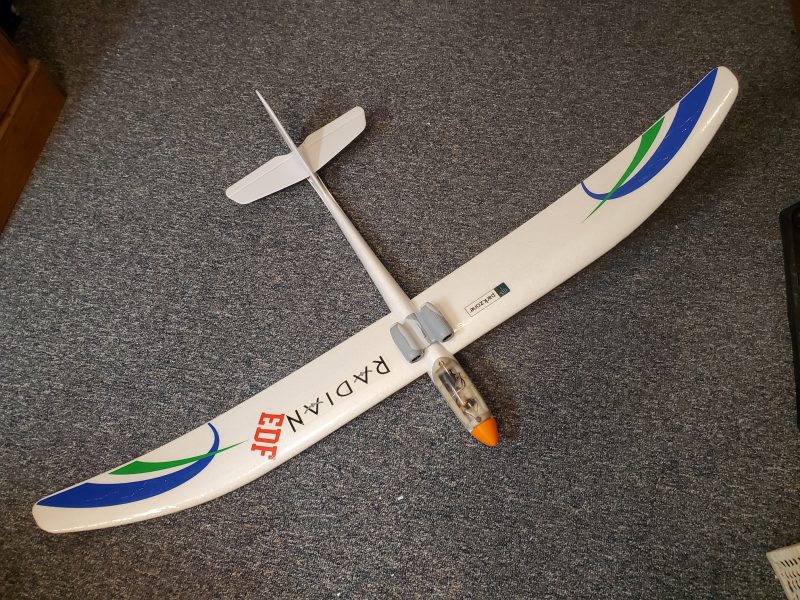
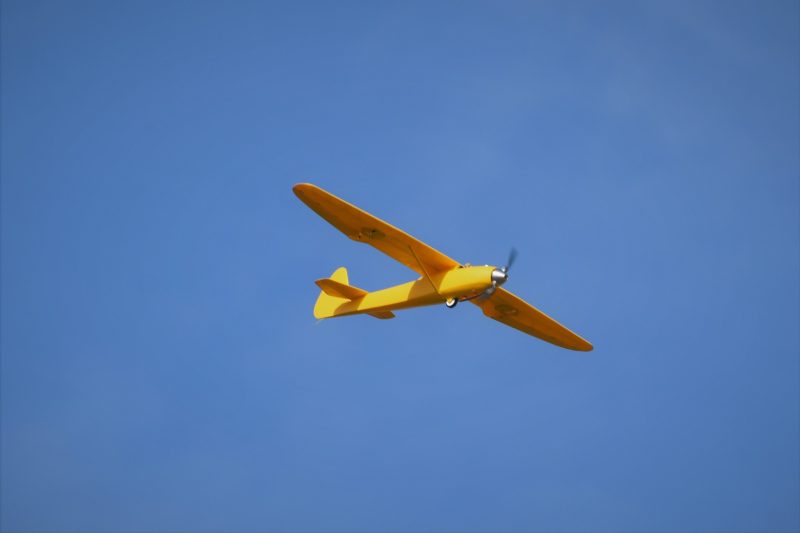
So first, I’ll comment on the actual flying characteristics.  In a word, excellent!  The Wolf seemed to have plenty of power and only required some elevator trim to have it fly hands off.  It flew really nice with maybe 1/3rd to 1/2 throttle and was capable of a wider flight envelope than I had expected even to the point of seemingly doing well as a power glider.  I forgot to do a lot of real test flying as the airplane was just fun to fly!  I did regret that the designer had opted not to include a rudder and I’m already thinking I might try my hand at some design work to add that feature but otherwise its hard to complain about how nicely it tracks and soars.

On the more technical side of things… while it flew great, it had a few issues.  For reasons I’m still figuring out, the skin of the airplane seems a bit on the fragile side.  My launch catapult (also my flying buddy), Steve, cracked a layer line just by gripping the airplane. 

For reasons unexplainable by mortal man, my elevator linkage had come off the control arm by the time I went to make the maiden flight and I had to steal a wheel collar from the axle to make a field repair.  This caused my first landing to be “wheel-less” and on the skid which caused a chunk out of the skin to crack and break loose on what I thought was a fairly smooth landing in the grass.

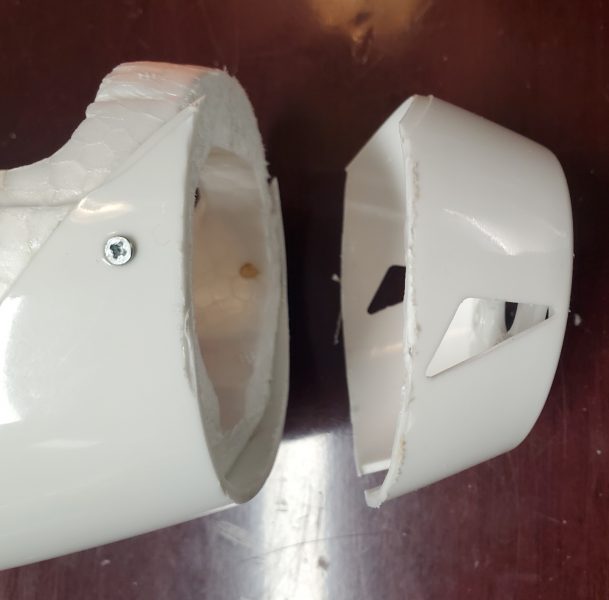
On the second flight the prop collet exited the airplane and I had to make an unpowered landing, I managed to bust the Wolf at/or near the glue joint… so maybe that was just a bad glue joint or are the layer lines just a bit weak??  I’m still figuring that out.  The collet issue is also being addressed in order to stay with the folding prop, which I think was a great choice.  It seems to be sized appropriately for great performance and allows for some true gliding without the drag a fixed prop would cause.

Those issues aside, everything worked well and I’m looking forward to some more flights in the future.


Full 3D Printed Airplane – Chapter 1 (Printing)

I’ve had a 3D printer now for a couple years and printing some add on accessories for my RC aircraft was the main reason I purchased it.  Cockpit details, air scoops, replacement plastic parts for broken scale details like antennas and the like have all been projects I have tackled successfully using my 3D printer.

My particular printer is an Ender 3 with the only functional modifications being a v4.2.7 motherboard, a glass build plate and some updated build plate springs.  The base unit can be bought several places and I recommend it as a beginner hobbyist platform.  From what I have seen, it is widely accepted as a great device in this role.  Here is my link to purchasing the current version of this printer from the Creality Store via Amazon.

At the time I purchased it, I was not particularly interested in or really aware there were very many options for printing a full RC airplane.  What I had seen were overweight, ugly airplanes that seemed to just barely fly.  After a time I heard about a new material that made it more feasible to print something that might actually approach a reasonable level of functionality… something called Light Weight PLA.  Here is a link to what I purchased.  There are other brands out there but eSun seems to be a well accepted as a quality product and I don’t have enough experience to accept the challenge of sorting out more factors than I needed to when I was embarking on a new adventure so I went with what seems to be a premium material.  Here’s a link to that:


So of course I purchased a roll of filament and quickly decided it was going to be to complicated to set up my printer to work with it.  Also my printer had such a small print surface that I surely couldn’t print anything of any size… so the filament went up on shelf to gather dust.  The reality was somewhat different, but I wasn’t wrong that with my level of knowledge at the time, I probably wouldn’t have had good results.  

Fast forward a year (or maybe 2??) and I happened on a YouTube video showing a really nice looking airplane that was 3D printed!  This got me thinking, maybe it was time to revisit the idea.  I had learned a bit more about 3D printing and felt I was ready to take the plunge.

So for a week or so, most of my recreational video watching was of 3D printed airplanes and fair amount of web research turned up some interesting information.  There were quite a few sites that espoused particular parameters and setups to get successful prints for LW-PLA and there were a number of free designs around.  What finally made me open the box was when I came across a free download from Eclipson

The 3D printed aircraft designs on their site are exceptionally nice looking… rivalying the available ARFs on the market from even the top tier companies using more traditional techniques.  They do charge for these files, but the prices seem very reasonable for the level of quality they appear to represent.  Their website is very well built and presents their product very nicely with lots of pictures and available information. 

Time out for a rant… feel free to skip to the next paragraph.  The only thing I wish for, and I may be completely alone here, is a nice manual to help me build.  They do a one page sheet that has a lot of information packed into it that is very helpful, and there is a good build video but for me personally, I hate build videos.  Especially videos with no narration or discussion like this one.  This one is as good as any I’ve seen, but I would much prefer a well illustrated and written step by step assembly book.  I’d even pay for one in addition to what is available if it was well done.  I find it hard to keep stopping  and starting a video… finding a way to backup and find that one part I’m looking for… stopping at just the right point to see what I want to see… Its all just a PITA for me.  I know some folks would rather have the video… I’m NOT one of those.  OK, rant ended.

Best of all, by all reports, the Eclipson aircraft fly very well.  What really got me out of the starting blocks was that they even provided ready made Gcode for their models, preset to work on my exact printer!  Its like just feeding in the files and hit print and out pops an airplane!  Ok, well maybe not quite that easy but it does get you around having to learn all the parameters necessary to print good quality aircraft parts using this material.  Certainly tweeking their settings a bit could make the parts even a bit better, but what I found was using their exact settings produced parts good enough to actually function.  Or at least it appears so to me.  I don’t mind learning about all the parameters and figuring out how to dial in my printer to produce my own good LW-PLA parts, but I like it even better if I can do that while another perfecty usable part is being produced!  Icing on the cake, they have one airplane you can get the files for simply by signing up!  This airplane is the Wolf.  This RC design is based on a german glider design first produced in 1935 and motorized for RC use.  So I signed up and downloaded the files.

I began printing parts from the supplied Gcode and occaisionally I’d tinker with my profile and try printing my own part just so I’d have that ability in the future and because in one or two cases I realized I could print the part just a bit better if I tuned the settings for my particular printer and material.  For instance, my eSun White PLA (that I used to print a few parts that needed more strength… per the instructions) happens to print better at 5 or 10c higher temp than the supplied Gcode is setup for.  So I pulled up the STL file provided and used my profiles I generally use for PLA+ and printed out those few parts with my own Gcode.  I suprised myself with how well those parts printed out.

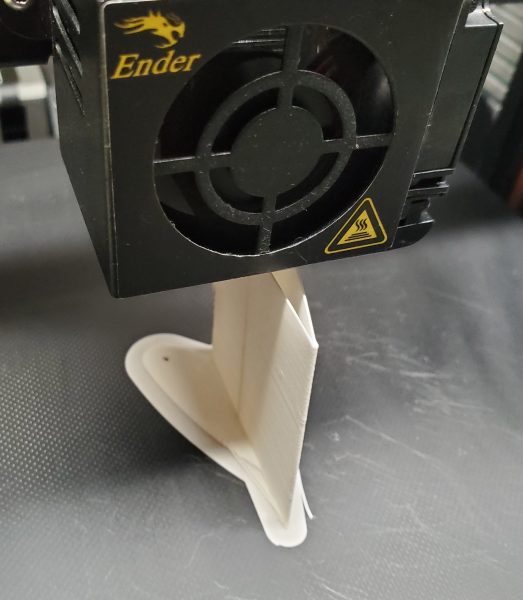
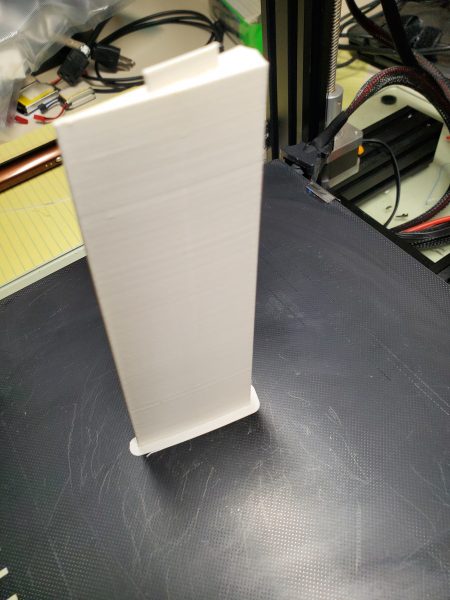
Here’s some obligatory “parts being printed” photos..  All of these are using the eSun LW-PLA+.

First section of the port side aileron getting underway…

Here’s another section of the aileron

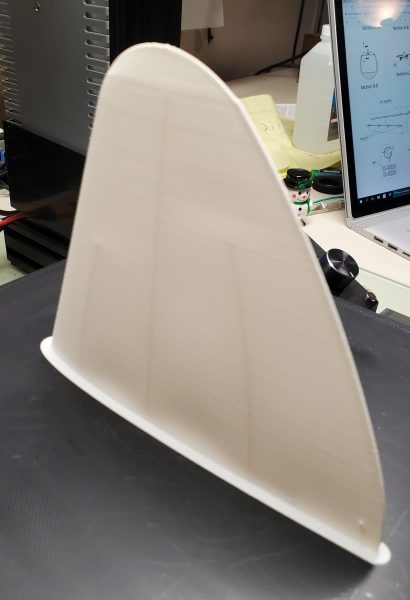
And this is obviously the vertical fin.  An exceptionally nice print if I do say so myself.

Up to this point, I had only printed some of the smaller parts of the airplane.  But if I want to have an airplane I have to tackle the big parts next and in my experience, big parts take a lot of time to 3D print.

I’m not typically impatient when building an airplane.  I don’t mind if a project is sitting on my bench for a while waiting for some necessary parts to ship in or whatever.  I can always find another project or a different aspect of this project to keep me busy.  I will admit however that I was a bit troubled by the thought of how long it was going to take to print all these parts.  I have done some moderatly large parts on my printer before that took 14 hours or more!  Looking at the airplane I was afraid weeks of printing overnight would be involved.  Luckily, once I tried it, nothing could be further from the truth.  I quickly realized that because of the way you print these, there is very little or no supports needed/desired and not much infill either.  This results in parts printing much faster that I expected.  I printed the first dozen or so small parts over a weekend and I think I got all of the LW-PLA pieces (by far the largest part of the airplane) done during a single week of just part time printing while working on other things.  Honestly think I could print all the parts in 3 days now if I really tried.

The final piece or two I needed to print, was the tire and hinges.  These pieces need to be printed  from something a bit more flexible and in the 3D hobbyist world that means TPU.  TPU is about the closest thing to rubber that we can print on a 3D printer and it demands yet another totally different set of printer settings.  After reading a bit on the proper settings, different brands and types of TPU available, etc… I decided to give it a try.  I had gained a little confidence through the process of printing the LW-PLA so I made the leap.  Another order to Amazon and the very next day I had a fresh role of eSun TPU95A in gloss black.

With my very first try, aided by the suggested settings from eSun and a small tweak or two based on articles and videos on line, I had my very first TPU print… a test piece based on a video from a youtuber named CHEP.  It looked great and did point out one small wall adhesion issue so I tweaked one more setting and tried printing my tire.  It worked well enough on the very first try.

As I went through and “post processed” the prints, removing some skirt material and sanding a couple of spots, etc… I did manage to damage a part or two and had to reprint a couple as a result.  The parts aren’t perfect and I have some ideas about what I might try to do differently if I do another airplane down the road, but I think it might actually fly some day! 

After assembling the needed RC gear and a few other necessary supplies (more on that in a follow on article) I had this pile of parts sitting on my bench… time for assembly!

Couple of new “to me” motor vendors… specs

Electric motor specs available

I recently was involved in a conversation that started out bemoaning the fact that Horizon hobby often doesn’t supply much in the way of specifications on many of their electric motors, when someone referenced a couple of sites that provided a plethora of information about that particular electric motor vendor products.

I have used ecalc to help me predict power system performance for years but that doesn’t get you around a lack of decent information and for those who for whatever reason don’t have access to that tool or have trouble understanding how to use it correctly, information from the vendor like those below has a very high value.

I haven’t tried out these motors for myself but I applaud the disclosure of specifications along with predicted (maybe tested) test results with a variety of propellers.  This really allows you to pick a setup that does what you want to do without a lot of trial and error as well as allowing us to get the most out of the motor, again without a lot of trial and error.

So here are the links to these manufacturers sites.  With this sort of available information I may have to give them a try.

Leopard Motor Data Chart

Badass Motor Data Chart


Aces High P47 Retract issues and repair

I’ve really just gotten started flying my Aces High P-47, with maybe 6 or 8 flights as I figure out the ideal balance, throws and flight envelope for this airplane.  However all of that got a bit sidetracked a few days ago when my port side retract refused to retract after a landing.  I had to cycle it 3 times to get it to extend during that last flight and after the landing it was just totally unresponsive.

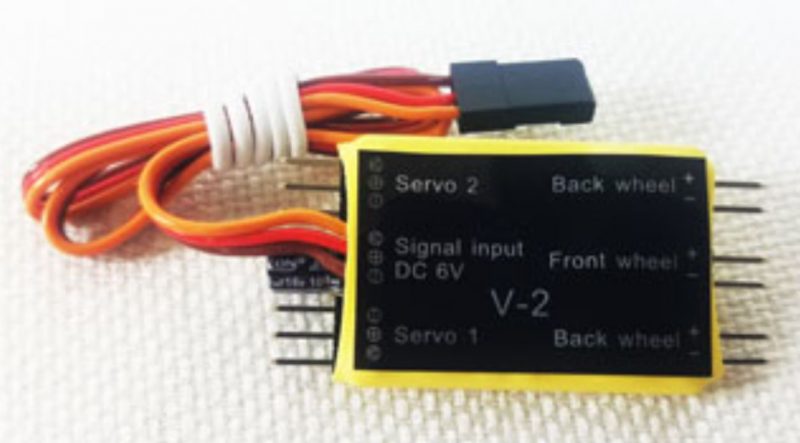
So back on the bench, I started trying to troubleshoot the issue.  First off, you have to understand how everything goes together.  The retracts in the P-47 are simple units that require a separate controller unit that looks like this:

The retracts each only have 2 wires, a positive and a negative.   Each retract unit plugs into one of the back wheel  connections on the controller.  The controller has one servo lead for power and signal input to the controller.  This plugs directly into your receiver on whichever channel you chose to control the retractable landing gear. 

In my case, in order to simplify wiring to each wing, I have a wiring harness that allows for a single multipin connector to go to each wing rather than separate servo wires.  Since the harness consists of multiple wires and crimped on pins, etc… I first decided to eliminate the wiring harness in order to eliminate any possibility that a bad wire or crimp connection in the harness was the culprit.  That accomplished and no change in operation I tried swapping the port and starboard connections.  The failure still appeared to be in the port side unit.

At this point I got in contact with Extreme Flight to see what my options were.   I provided my troubleshooting results and awaited a response.  Although the response took several days I did eventually get an email back from a support person who questioned if I was certain the retract unit was failing and not the controller.  At this point I arranged a call with the support person and walked them through the steps I had taken and they agreed that I needed a new retract… which is unfortunately on back order… with no predicted ship date!!

They did agree that the retract set should be replaced under warranty and sent me confirmation of the order… but of course I was not hanging this plane up for the season without a fight!

So moving into some real testing I removed the offending retract from the port wing and the controller from the body and fished out a spare A123 flight pack and my trusty servo tester.   (Note: when I pulled the retract I was sure to use the retract wire to pull a string from the wing root out to the retract area so that replacement would be simple. ) 

First using the starboard wing to check my test bed, I confirmed I could cycle the working retract without an issue.  During this test I noticed that the controller has LEDs that cycle from green to red depending on which way the controller is trying to drive the gear.  The LED goes off once the retract hits its limits and (I presume) the controller senses an end point has been reached.  I’m guessing it senses the spike in current as the motor stalls and automatically shuts down.

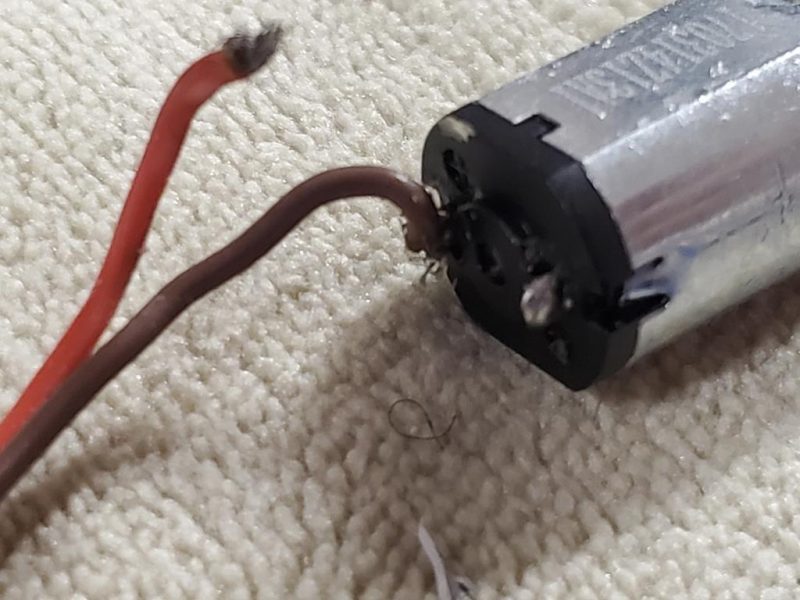
I also measured the voltage being supplied by the controller and verified that the controller simply flips the polarity to the motor in order to reverse the direction when the servo signal goes from one end to the other.  Following up on that I started trying to establish whether the continuity of the wire was good all the way to the retract motor.  I stuck a couple of very fine pins into the wire up near the motor and tested for continuity from the connecot to that point.  This established both wires were good to that point so it was down to either the motor being bad/burned up/open or just a bad connection to the motor.  I measured the resistance of the complete working retract in the other wing and established a baseline of about 4.5 ohms was a normal working unit.  Testing the bad unit showed infinite resistance/an open circuit.  After I did this, I quickly realized the red wire had indeed broken loose inside the “can” that surrounds the motor and I was able to easily pull the wire out of the entry point to the can/motor housing.  The problem now was that the motor sits inside this can and has no screws, set screws or other obvious way to get it open!

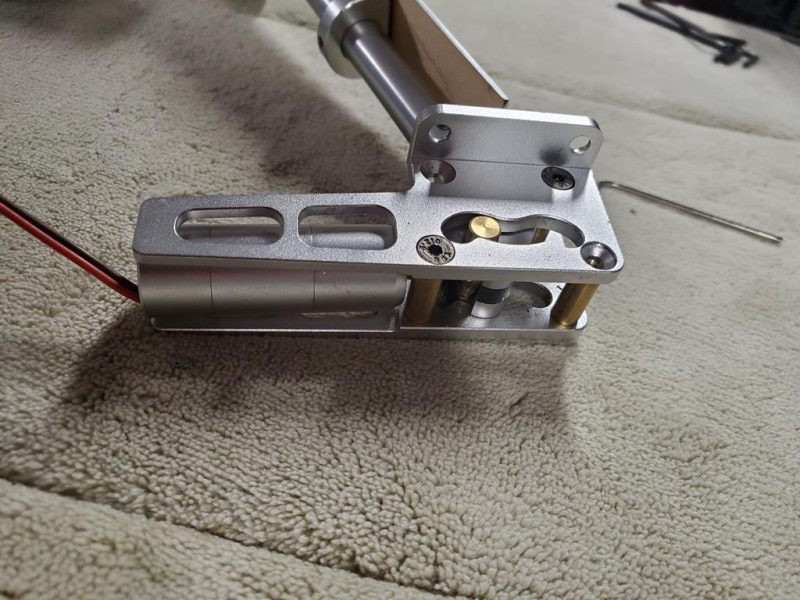
Deciding that I had nothing to lose I started disassembling the retract mechanism.  

Once the screws on one side were removed it was simple to separate the motor assembly/screw/trunnion pin from the remainder of the servo.  Note that there are  ball bearings in the sides of the assembly so while mine easily stayed in place, I’d be gentle and try not to dislodge those if you ever have reason to dig this deep!

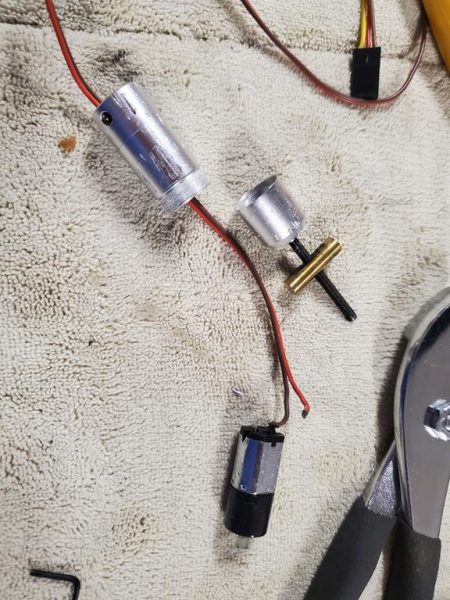
Once the motor can was loose in my hand I realized that if it were going to be possible to get inside the can and get to the solder connection point on the motor it had to be some sort of split/friction fit or two parts had to twist apart somehow.  I first took a razor knife and tried to split it along either of two lines around around the enclosure… neither yielded to my efforts.  Finally I grabbed the center of the can with a pair of pliers and tried twisting either end.  Finally the end nearest the trunnion pin rotated a bit and I was able to unscrew that part and slide the motor out from inside the rest of the assembly.

At this point it was possible (if difficult to manipulate due to just the small size of the solder tabs on the motor and gauge of wire) to re-solder the wire and test the operation.  Hooking the controller back up to my servo tester and operating the retract motor was again attempted and all went well.  Keep in mind the motor will just run continuously as there is nothing stopping the motor so no current surge to tell it to stop.  This is normal/expected operation in this state.  Also note that there is a spacer in the end of the can where the shaft extends out to the trunnion and the shaft of the motor is keyed into the threaded shaft so be careful when reassembling not to lose of those parts and to align the motor carefully so its keyed shaft fits correctly to the threaded rod end as you put things back together.  I was concerned that the wires might touch the can and short out the controller output as there is no obvious protection from this happening but it didn’t so I’m assuming the inside of the can on that end has some sort of clear insulator or other mechanism to prevent it even though I never figured out exactly what it is.

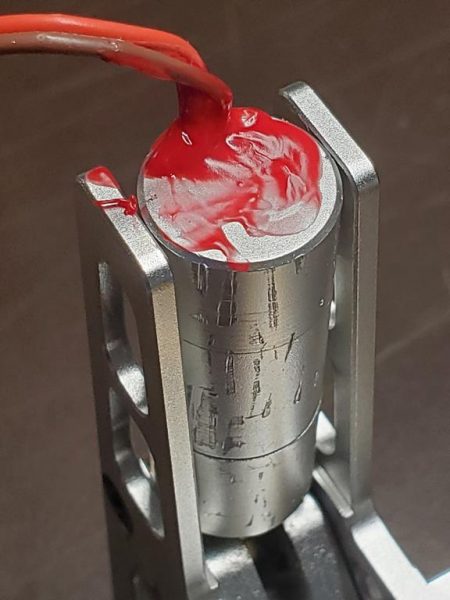
Once I completely re-assembled I took some steps to protect against another failure due to motion of that wire or strain on the wires.  First I coated the entry point with liquid electrical tape and let it set up.  

As you can see by the scars on the can, I marred it up just a bit with my pliers during the process but now that you know that the end cap nearest the pivot point is the one that unscrews, you could probably avoid this with some care and perhaps a wrap of tape around the can in strategic locations when disassembling.

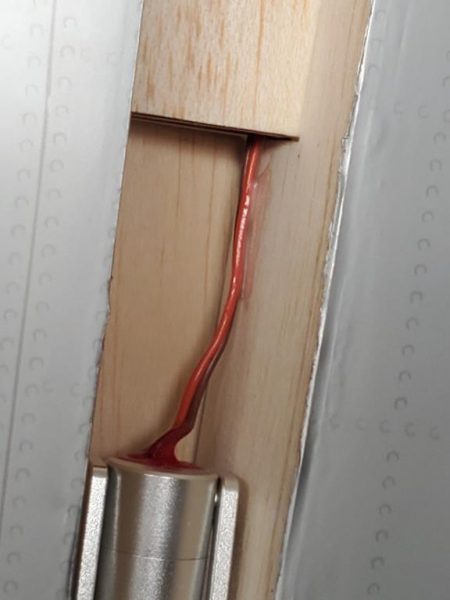
Once that was accomplished (on both retracts) I mounted the retract back in the wing, used the pull string to get the wire properly routed.  At this point I pressed the wire up against the balsa sidewalls of the wheel well and applied a bit of glue to make sure no further physical strain could be applied to the wire at the entry point to the can.  As shipped that is just an entry hole with no grommet or strain relief of any type so I’m being doubly certain to protect it moving forward.

How will it hold up?  Is this the end of the retract issues on this bird??  Well we shall see, assuming I manage not to do anything stupid during my flights.  Let’s hope for the best.

I’m only now realizing that I have no idea what keeps the motor from spinning around in the can… I didn’t see an alignment pin or flat inside the back of the can etc… but it would seem there must be something there besides the wires that can’t rotate… I’m guessing there is something in the front area that accomplishes this.  Well that’s an investigation for another day and probably only if/when I get the new set or have to work on these again so lets hope that remain a mystery!

If you have this airplane or the Aces High FW-190 from Extreme Flight that looks to use similar retracts, I’d definitely address some sort of strain relief on your retracts to avoid similar issues.  Blue Skies.


Seagull Models T-6A Texan II

Early in 2020 I was wandering through a huge swap meet over in Dayton, Ohio and I chanced across two new-in-box 60″ish” size Seagull Models T-6A Texan IIs…  One was made up in a beautiful Red/White/Blue/Black and Silver scheme and the other in more of a gray camouflage pattern. 

Model Airplane News - RC Airplane News | Top 10 Warbirds of the Year — RC Heavy Metal Reviews

I admired the models and quickly decided they were not for me.  I kept telling myself that a T-6A is a jet trainer and surely would be fast and heavy and besides, what did I have for a power system?  They are a bit more unique though and the red/white/blue scheme sure looks nice… I almost didn’t make it past the table when the owner made an offer to let me have one for what couldn’t be more than 1/2 of the cost of a new model!!  I stuck my fingers in my ears and ran to the next set of tables… 

Fast forward a couple hours later and I’m about to finish my first lap around the meet when I noticed what looked like a NIB Hacker motor.  The gentleman explained he had bought it as a spare that he had never needed.  I had some recent experience with another Hacker that was part of one of the best E power setups I had ever operated so this looked tempting.  Again the price was right and this time I didn’t try too hard to resist.

Now armed with a high powered 6S power system (1250W continuous and able to easily handle 1600W) I realized I had the exact motor for the Texan II.  After a brisk walk and a quick negotiation I had the airplane as well.  Wait, what had I done!?  It is still a jet trainer.  I like lightweight, overpowered, nimble and aerobatic aircraft with simple fixed gear!!  Why did I buy this beautiful, sleek, heavy trainer with mechanical retracts??

Over the next couple weeks I worked my way through assembly of the T-6A.  Since my expectation was that this airplane would likely end up being something I’d only fly once in a while and probably end up selling to those who have more appreciation for “war birds” I decided to make sure I added most or all of the scale details (something I might normally skimp on) and try not to spend an inordinate amount of money assembling all the pieces and parts I would need.

With that in mind I installed the pitot tubes on the wings, the anti-static rods on the elevator  and even took the time to make a color change on one of pilot busts so that they wouldn’t look quite so much like twins!  I also took some extra time to apply the decals and even did some “base layer” covering work under the star and bar logos to help cover up the color change underneath and not allow it to show through.  I also opted to install the mechanical retracts where I would normally have spent the $300+ to purchase electrics.  The mechanicals are going to cost me more like $50 to install, mostly the cost of a retract servo.

The first pleasant surprise was how well the retracts worked with nice direct routing of the linkages.  Ok, so I’m not a big fan of the plastic inserts for the wheel wells, but with some care they at least are a decent color and fit.  Again, I’m not a big fan of a once piece wing but the upside is the  simple retract linkage geometry and the need for only 1 servo to service both mains.

Once I got it all assembled I was back to the overall look.  I love the lines of the Texan II, the PC-9, and similar aircraft and this one has a great color scheme… but I wasn’t getting my hopes up on flying characteristics so with little fanfare I took it out to the field and with only a couple of friends present I flew it for the first time.  All I can say is wow!  This thing is certainly a warbird.  It’s not light and flies much better with a little more throttle… she’s no floater… but it feels like it is on rails in the air and has enough wing to handle the weight so just by keeping a modicum of speed on the bird, she flies great!

Since that day I have probably put 30 more flights on the airplane and I’ve had zero issues with it.  It flies really well and with all the scale touches it looks great in the air.  I don’t recall flying it without someone commenting on how nice it looks.  I’ve switched out to a very slightly less efficient 4 blade propeller for even more appropriate scale looks on the ground and I’ve had a few of the scale details get broken during transport and assembly but otherwise it has so far been a great airplane.

I created some protective covers out of foam, cardboard and tape to protect several of the protrusions… antennas, static rods, etc… and had to create some replacements once in a while the flight characteristics have been very pleasing and I do enjoy flying it… and lets admit it… the comments and attention it gets!  I have a Styrofoam holder (cut with a foam cutter from a shipping container for frozen food) for the body and a wing bag for the one piece wing that helps keep it all safe during transport and those have cut down on the issues.

So in summary, I’d recommend the plane to anyone interested in a nice psuedo scale attractive airplane that wants to get into warbird type aircraft.  Its a nice step from sport planes into that realm and you will enjoy flying it as long as you remember what it is and fly it accordingly.  3D is not ever going to be its strong point, but sleek lines and scale aerobatics are done with ease and look really nice in this bird.  It has earned a place in the hangar at least for now.


New Hangar 9 P-47 67″ ARF… One flight and gone.

My first attempt at a replacement for my late lamented Top Flite is the H9 20cc size P47D 

P-47D Thunderbolt 20cc ARF, 67"

I transplanted all of my radio gear, servos etc… from the Top Flite and contemplated a number of updates/changes etc… 

Should I try to 3D print a better cockpit?  The provided instrument panel in particular looks like it could only be accurate if the instruments were updated to 2020 standards!  I decided to go ahead with the supplied until I decided how much I liked this particular model. 

I also contemplated and decided to put my retracts in the wing and even ordered a retractable tail gear.  When that didn’t fit I tried another and spent a fair amount of time fabricating linkage to make it work correctly.  Don’t believe the Horizon web site…  The nose retract they recommend simply can’t work as the tailwheel retract for this airplane!

I did find some plans for and 3D printed some wire guides to make wiring the bird easier and then crimped up some multi-connectors to make it hassle and error free.

After all that the bird was beautiful but heavy… compared to my Top Flite this bird was 3 lbs heavier and when I flew it I immediately found that it just didn’t track like the Top Flite and the thrust to weight ratio is anemic as well.  The extra 3 or 4 inches of wingspan just can’t compensate for the increased weight.  Now maybe my repaired power system is not operating as it was…. I don’t believe so but it is possible.  Or maybe the power system is just to small for this slightly larger WS and appreciably heavier craft.  Again, perhaps but there is no way the recommended Power 60 would be better.  I love the power 60.  It’s an underrated and amazing motor, but it isn’t going to outperform the Hacker A60. 

I flew one flight on the airplane and was so disappointed I took the airplane home and stripped my radio gear, retracts, etc… aside from the servos and wire guides… out so I could put it up for sale immediately.  Eventually a friend of mine purchased the plane and he and I are installing a DLE-20 he has.  Maybe with that power plant it will find a new lease on life.

For me, I have my eye on an airplane that is similar in size and weight to the Top Flite…  Hopefully my third P47 will be a charm!  For me, the H9 is to heavy for its size to fly the way I like.  I suspect that many warbird guys would love this plane, but anything I fly needs to fly well first.  Looks, scale detail, etc… all have to take a backseat and this was not my impression of the H9.

Hacker A60 Repair

After the great NX10 failure of July 2021 I found myself with a Hacker A60-5S V2 motor with a bent shaft…  I had heard that parts were available for these motors so I searched and sure enough I found the replacement shaft readily available and at a pretty reasonable price… especially considering how well the motor had run and the higher initial cost of the motor.  I had expected worse so I went ahead and ordered the replacement shaft.

I had included a request for information on the replacement procedure when I ordered the shaft so when it appeared on my doorstep in just a couple days I was pleased until I realized that there were no directions included.  None on the website either and after searching the web thoroughly it didn’t appear there were any videos or descriptions either.  Not even a good exploded view of the motor was to be found!

This left me in a bit of a quandary.  After staring intently for a couple days at the motor and replacement shaft while they sat patiently on  a corner of my desk I eventually unscrewed the bolt that seemed to be some sort of bearing retainer at the back end of the shaft.  There was a thick non-ferrous washer underneath that came off with it but it didn’t just fall apart at this point so I examined it some more.  Seeing that here was a threaded hole and a matching allen bolt/set screw in the replacement shaft package I soon surmised that this set screw was hiding just behind the front plate of the motor and could be reached with an allen wrench via one of the vent holes on the sides of the motor.  With the help of some very bright lighting to make sure I guided the allen wrench to the screw correctly and that making sure I had a nice fit, I managed to unscrew that as well and fish it out of the motor.

At this point I could see no reason the shaft shouldn’t slide out but tugging and pulling (and cursing) didn’t seem to make it happen so I set it down for another bout of staring and perusing of the internet.  There were several videos of shaft replacements for electric motors but none of this model and many talked about pushing the shaft the wrong way causing damage to the coils in the motors… yikes!

A couple days more passed and I decided it was time to just take the plunge.  using a 1/4″ drive socket that happened to taper down to the perfect size to press this shaft out I placed the motor face down on my drill press table with the shaft through the hole… I was going to try to press it out forward as I had seen one other Hacker done in a video (a totally different looking motor but hey I only had two choices).  I had heard a drill press is a pretty good arbor press substitute so I started putting some pressure on the shaft which seemed pretty determined to stay right where it was.  Wondering if I might be purchasing a new motor soon I put a bit more pressure on it and… it moved!

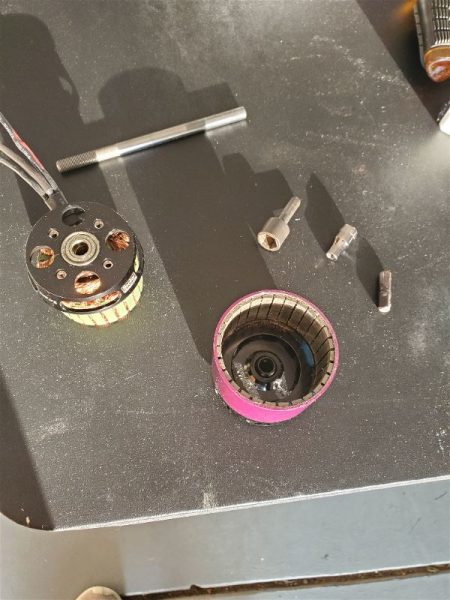
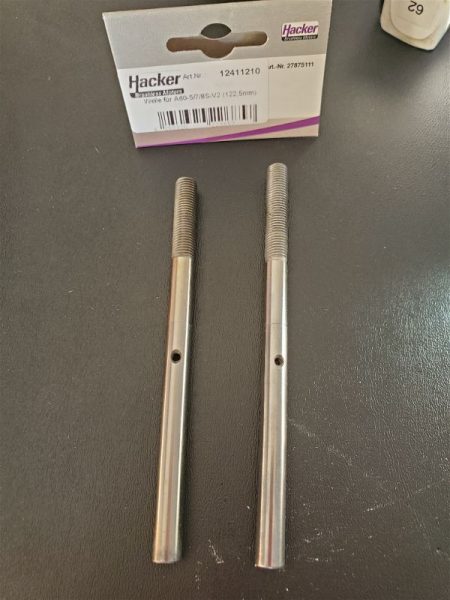
I had to find another rod to push the shaft through a bit more before it started to move a bit more freely and I could press it the rest of the way out by hand.  Finally I had something that looked like this.

After a fair amount of cleaning with high pressure air and a little careful brushing with a toothbrush I grabbed the new shaft and discovered it’s a little shorter than the old one.

The important dimension however from the back of the shaft to the set screw was the same so not a big issue.   There was really only one more big “trick” I had to find out the hard way and that was a little issue of aligning the threaded hole up with the hole in the front plate so the set screw would go back in place easily.  Since it’s down in a dark hole when reassembled it took a bit of finagling but I eventually managed to get it all aligned properly and the motor looks like new and seems to run smoothly once again.

I’m working on the replacement for the Top Flite P47 now… of course a new Jug is in the works and now I have the perfect motor for the job! 

Top Flite 60-90 size P47 ARF… Final flight. Spektrum NX10 failure investigation begins.

My Top Flite P47 was a super flying airplane with a great power system and has been performing flawlessly.  I have been testing out some different props to determine best mix of power, speed and flight times attainable.  Have broken a few props but otherwise she was running great.

Unfortunately all good things must end and a couple weeks ago she ended a flight looking like this.

No photo description available.

Here’s how it went.  On takeoff, I started a nice steady climb and flipped both the landing gear up and flaps up switch.  As you can tell in this photo, the gear cycled all the way up successfully and I’m confident the flaps did as well from the way the it was flying.  I then made a left turn and was nearly in knife edge when I suddenly realized I was no longer in control of the airplane.  The plane was sliding on its wingtip toward the ground and nothing I could do with the sticks had any effect.  Being electric and a good way out I heard nothing other than a sickening crunch after it disappeared below the corn stalks…

In disgust I dropped my gaze to my radio and was surprised to discover there was no display and no lights whatsoever!  I removed my sun glasses to be sure and verified the radio was indeed off.  After walking back to a seating area (I needed to sit down) I turned the radio back on and it powered up normally and showed the battery was at 4.0 volts which is in the range of 80-90% of it’s full charge state… i.e. the transmitter battery is not dead or even low.  I then tried to figure out if my neck strap, clip or some placement of my hands could have turned the radio off and I cannot imagine how to make that happen while going through the maneuvers that I performed.  It takes a good 4-5 seconds of steady pressure on the power button to turn off the radio and in that time period before the plane stopped flying I had flipped two switches and moved both sticks to adjust throttle and perform my turn.  Try that and tell me if you can do it, even if you try!

After a long walk in the corn locating the “remains” I started reclaiming all the parts and considering the wingtip and nose in a near knife edge collision to the ground, the components aside from the airframe faired as well as could be expected.  The speed controller had a fan mounted on it… That plastic frame did not survive but the replacement is $10 and the speed controller itself has tested out to be in good condition so far and does not have a mark on it otherwise.  The receiver is likewise undamaged and tests good as do all the servos.  The motor had the worst result, being a bit dirt caked and the main shaft turned out to be bent.  I’ll post on that separately.  The retracts, as you can see in the photo were safely retracted before the loss of signal occurred and also seem to be unscathed.  Even the two batteries (a 6S 5000 and a 2S 5000 run in series) look in good shape and still charge as before.  As I said, things survived pretty well aside from the air frame.  It is a total loss with only the tail surfaces seemingly intact.

As you can imagine, this started a serious investigation into why the radio shut down.  I’ll post a new entry about that soon.

So ends my favorite war bird to date.  There will be a replacement of some sort soon!  Here’s hoping your flights are more successful than this one was.


Comparison – Night Vapor versus UMX Night Vapor

I have owned a Parkzone Night Vapor since not long after they first shipped.

ParkZone Night Vapor RTF [PKZU1100] | Airplanes - AMain ...

I’m not saying I’ve only owned one in all that time… I’m guessing 3-5 have passed through my hands.  One tried to fly just a little higher than a hovering helicopter, another had an unfortunate incident getting hung up in the net of an indoor soccer field and was heavily damaged during retrieval…  And one just  eventually had so much tape and added glue on it that it just flew like a brick.  Parts of that one still survive in my parts drawer to this day.

The Night Vapor was a fun, super floater that almost anyone could fly or even learn how to fly on.  A year or two into my run of Night Vapors (that doesn’t sound fun??) we discovered that the motor from the Parkzone Cub fit into this airplane and gave it a nice boost in power allowing for prop hangs, awesome slow high alpha and great climb rates with only a minor penalty in flight duration…. so that is the setup I’ve been flying ever since.  The only drawback to this seemed to be that you could stress the airframe enough to make it twist and become a bit erratic if you used to much speed/power… especially in a dive.  That is a very minor issue and easily avoided.

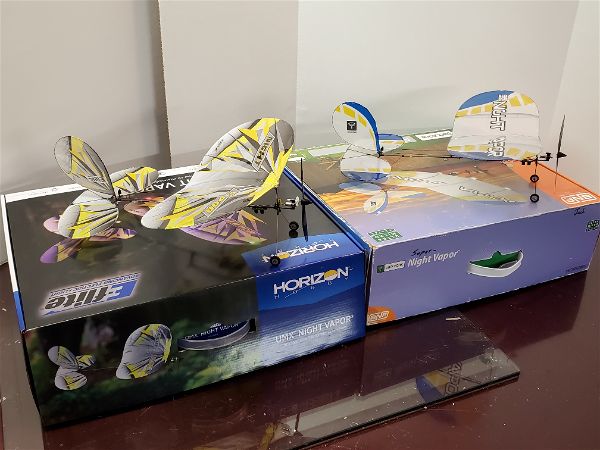
My current iteration of the Night Vapor is less than a year old but when I found out that Horizon had decide to do a “respin” on the Night Vapor I quickly decided I had to get one.  Here they are on my bench side by side.

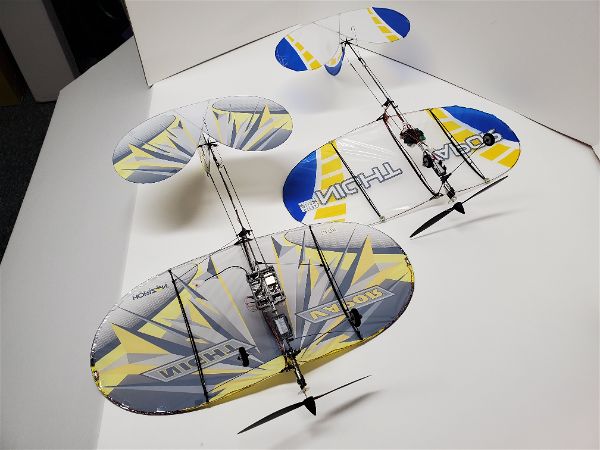
  So here are the differences in the two in a static comparison.

  1.  The new NV is obviously done up in a different color scheme.  As far as covering material, wing area, tail area, etc… they appear to be sized and constructed identically aside from the color and frame differences noted below.
  2. The frame of each is identical with the following exceptions.  Most of the parts look to be interchangeable.
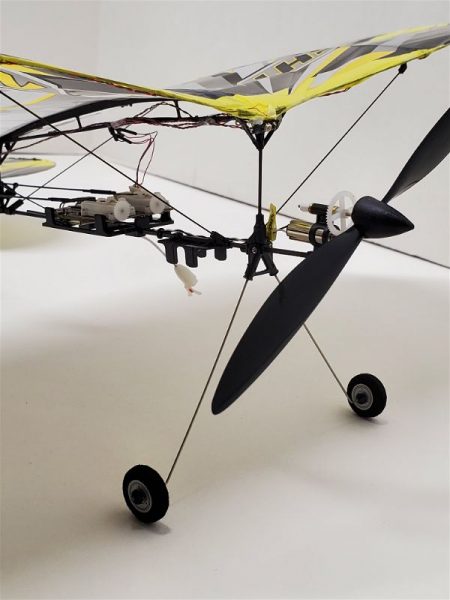
    1. The new UMX has wire main landing gear legs instead of the CF on the old.
    2. The new UMX has additional bracing from the body to the first rib on each side, near both the leading edge and trailing edge of the wing.  You can see these here.
    3. There is a larger frame/plate to hold the new receiver/servo “brick” in the UMX
    4. The new aircraft weighs .73 ounces versus the old aircraft at .57

Other differences of note:

The old PZ had 6 LEDs.  3 on the front of the wing, two on the back and one further back on the bottom of the tail boom area.  The new UMX NV has one in front, two wing tip lights and one on the tail boom.  The LEDs on the new airplane allows for some programming of the lights for different color combinations (White, Red, Purple, Blue, Green or Yellow) on the front and back lights, each independent of the other.  You can also have each solid on or a slow strobing affect.   This is easily accomplished from your transmitter.  The wing tip lights are green starboard and red to port with no adjustment available.  They are synchronized in a blink-blink-off pattern which also is not adjustable.

Flight wise the new airplane does fly just a bit heavier than the old plane.  To me it is noticeable but not offensive.  All up with a battery the difference is around 20-25% heavier for the new plane so it makes sense that it would be but the new plane is still very much a floater and the AS3X definitely helps around those pesky air vents, prop wash from other airplanes, etc…  and the extra wing bracing helps limit twist and flex in the wing when you stress the airframe a bit with those high power dives or speed bursts that are bound to happen!

I like the new landing gear as well.  The wire springs back nicely and doesn’t have a tendency to shatter like I’ve seen happen often (only once to me) and having the front and back lights be customizable is a nice touch.

In my opinion AS3X and SAFE are obviously a bit of overkill on an airplane like this but the telemetry feedback is really nice to have and has me wondering how many less batteries I might purchase over the next couple years if I actually pay attention to the warnings I have programmed!  Not sure how likely that is though as I never want to land this airplane except to show off my hand catch skills (don’t tell AMA) so I will probably continue to run most of my batteries to exhaustion.

The plane does do some pulsing of the motor as you fly the battery down to around 3.3V so you don’t have to rely on telemetry warnings.  Shut down comes at around 3.1V and once it has occured there is no restarting the motor until the battery is unplugged and replaced (presumably with a charged specimen!) .

After flying it stock a few flights I have now swapped in the motor from my old NV which is really the old cub motor I mentioned earlier.   I hope it will do for this new UMX NV what it did for the old one.  My worry is that these are brushed motors and I wonder how much longer it will last.  Horizon is not typically forthcoming on specs on their electric motors especially these micros so I have little hope I’d ever be able to replace this motor when it’s time has come as the motor for the old cub is no longer available either…  That will be a sad day.

So my feelings on the new NV are mixed… but weighing toward the positive.  I wish they had given it something equivalent to the cub motor to start with, especially with the increased weight but it sill flies crazy lite so it’s not a big issue and the added features are nice additions.  I have no qualms about giving up my old NV… I think this will be a worthy successor.


Pilot for the Top Flite P47 and the Extreme Laser

I have always liked a nice pilot figure in the cockpit of (particularly) scale airplanes but I won’t put one in if I think the airplane isn’t a good flyer already or if I think the additional weight will negatively affect the aircraft. 

I also don’t like to spend a lot of money for something that isn’t going to make the plane fly better.  As a result, few of my airplanes sport a pilot bust of any sort.  However…

With the outcome of my recent conversion of a Top Flite P47 to electric power being successful beyond my expectations I felt like I might want to find something to fit my new favorite warbird!

I did a lot of looking around and eventually I was getting the usual deluge of ads in Facebook, on email and in my browser for every size and type of pilot bust imaginable and in every price range from custom full body figures costing hundreds of dollars to plastic profiles barely recognizable as pilots for a couple dollars.

Finally I ran across an ad from one of the vendors that I’d done some business with in the past and started looking at the Benchcraft line of pilot busts.  They are very reasonably priced and come in something like 14 varieties ranging is size and type (jet pilot, WWII pilot, civil, etc…).  I found a couple of likely options and then saw a few others that might find homes in some of my other planes so I ordered a half dozen different figures including two likely options for the Thunderbolt.  I could do this because these are mostly priced in the range of $3-$6!

Here are some examples.

The lady and the guy in the red hat are both pretty decent figures for adding that little something to your airplane if you aren’t going into competition!  These aren’t masterpieces of scale modeling by any means but really pretty nice for the super low price and you can always dress them up a little with your own custom paint job if you so desire.  OK, I don’t know what the logo on the front of his red cap is supposed to be… hy? ky? ny?  No idea.  And yes, there are a couple of errant blue dots on his hat but again, the price is right and they are nice and lite weight.  I may try my hand at some painting some snowy day to see how good I can make one of these look but I’ve seen much worse in some ARFs I’ve bought.

The WWII British pilot bust leaves me a bit mystified I’ll admit.  every bit of him except his eyeballs is either the natural “light brown” color of the material he is molded out of or the dark brown that I would presume would make sense as his jacket color… and you can clearly see that there is little rhyme or reason to which is which.  The mold is OK but the paint job looks like it was done blindfolded.  In defense of Motion RC where I purchased these, it exactly matches the picture on the web site so you are getting what you should be expecting!

I chose the BenchCraft American WWII pilot bust for my P47 and so cut away the canopy glue (luckily Zap canopy glue is what was used so this was possible without crazy amounts of effort as it stays pliable) to allow access to the cockpit.  I lost a bit of covering and had to add a little cross brace to mount to in order to get the pilot situated in the proper position.  Here he is ensconced in his new home.

Next came some covering patchwork inside the canopy area and then a reapplication of canopy glue and the Jug is ready to fly again!


As you can see, this figure has a much higher quality paint job than his British counterpart and I didn’t feel the need to do any touchup on him.

Similarly I added a figure to my 74″ Extreme Flight Laser and I may yet install a couple of these others into some other planes down the road.  If your looking for something inexpensive and lite weight to make your cockpit look a bit more realistic, take a look at this option.