
After the great NX10 failure of July 2021 I found myself with a Hacker A60-5S V2 motor with a bent shaft… I had heard that parts were available for these motors so I searched and sure enough I found the replacement shaft readily available and at a pretty reasonable price… especially considering how well the motor had run and the higher initial cost of the motor. I had expected worse so I went ahead and ordered the replacement shaft.
I had included a request for information on the replacement procedure when I ordered the shaft so when it appeared on my doorstep in just a couple days I was pleased until I realized that there were no directions included. None on the website either and after searching the web thoroughly it didn’t appear there were any videos or descriptions either. Not even a good exploded view of the motor was to be found!
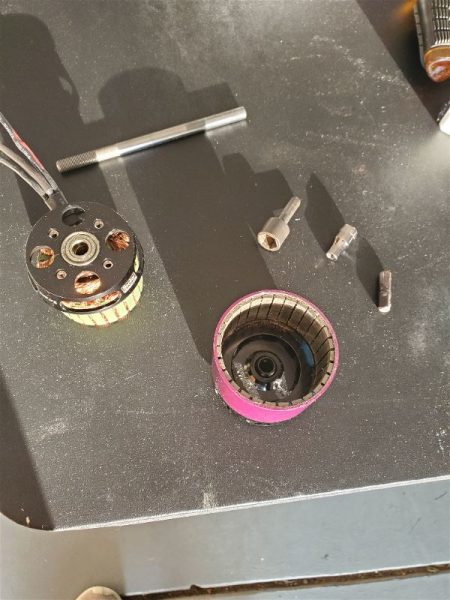
This left me in a bit of a quandary. After staring intently for a couple days at the motor and replacement shaft while they sat patiently on a corner of my desk I eventually unscrewed the bolt that seemed to be some sort of bearing retainer at the back end of the shaft. There was a thick non-ferrous washer underneath that came off with it but it didn’t just fall apart at this point so I examined it some more. Seeing that here was a threaded hole and a matching allen bolt/set screw in the replacement shaft package I soon surmised that this set screw was hiding just behind the front plate of the motor and could be reached with an allen wrench via one of the vent holes on the sides of the motor. With the help of some very bright lighting to make sure I guided the allen wrench to the screw correctly and that making sure I had a nice fit, I managed to unscrew that as well and fish it out of the motor.
At this point I could see no reason the shaft shouldn’t slide out but tugging and pulling (and cursing) didn’t seem to make it happen so I set it down for another bout of staring and perusing of the internet. There were several videos of shaft replacements for electric motors but none of this model and many talked about pushing the shaft the wrong way causing damage to the coils in the motors… yikes!
A couple days more passed and I decided it was time to just take the plunge. using a 1/4″ drive socket that happened to taper down to the perfect size to press this shaft out I placed the motor face down on my drill press table with the shaft through the hole… I was going to try to press it out forward as I had seen one other Hacker done in a video (a totally different looking motor but hey I only had two choices). I had heard a drill press is a pretty good arbor press substitute so I started putting some pressure on the shaft which seemed pretty determined to stay right where it was. Wondering if I might be purchasing a new motor soon I put a bit more pressure on it and… it moved!
I had to find another rod to push the shaft through a bit more before it started to move a bit more freely and I could press it the rest of the way out by hand. Finally I had something that looked like this.
After a fair amount of cleaning with high pressure air and a little careful brushing with a toothbrush I grabbed the new shaft and discovered it’s a little shorter than the old one.
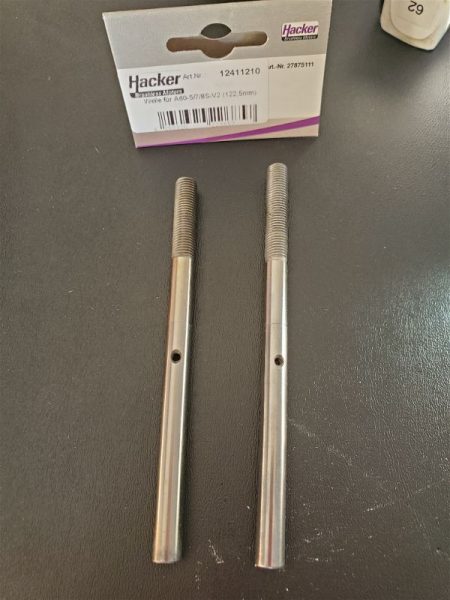
The important dimension however from the back of the shaft to the set screw was the same so not a big issue. There was really only one more big “trick” I had to find out the hard way and that was a little issue of aligning the threaded hole up with the hole in the front plate so the set screw would go back in place easily. Since it’s down in a dark hole when reassembled it took a bit of finagling but I eventually managed to get it all aligned properly and the motor looks like new and seems to run smoothly once again.
I’m working on the replacement for the Top Flite P47 now… of course a new Jug is in the works and now I have the perfect motor for the job!