Turbo Timber SWS ARF – Part 2: Tuning – Prop Changes, Rates, etc…

Following the basic build/assembly I was able to get back to flying and tuning the TT to give me the performance I am most interested in.  In my case, the last thing I care about is high speed.  I’m interested in aerobatic capability, STOL performance and duration as much as possible with a bit of 3D capability thrown in… though I’m not a true 3D capable pilot.

Here are some of what I found and the adjustments I’ve made to get the most out of the airplane.

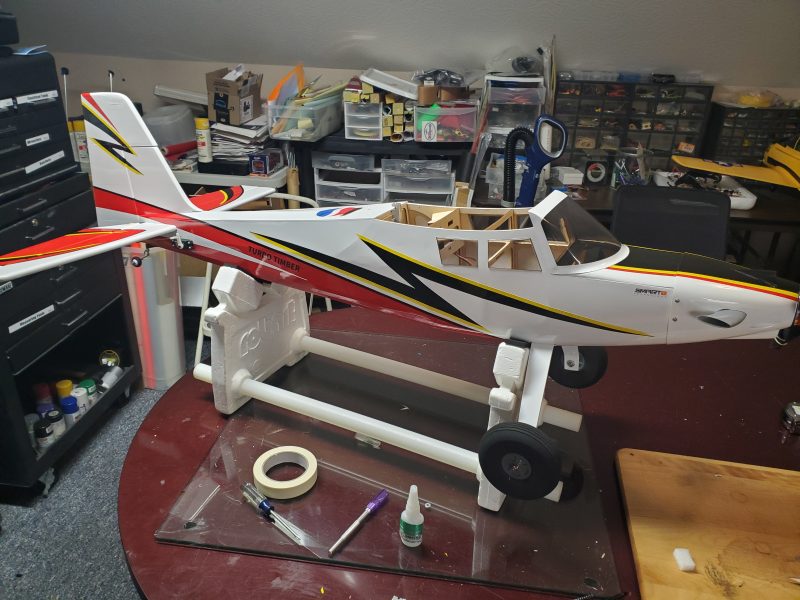
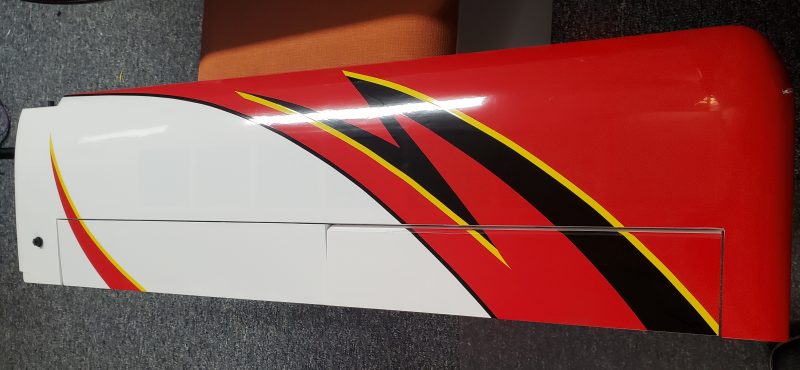
One thing I did early on was to change the color pallete a bit.  I added some bright yellow pinstriping to give the plane a bit of individuality.  I also used only a few of the supplied decals in a slghtly different pattern than the pictured model on the box.  Just something to separate my airplane from any others that might appear on the flight line.

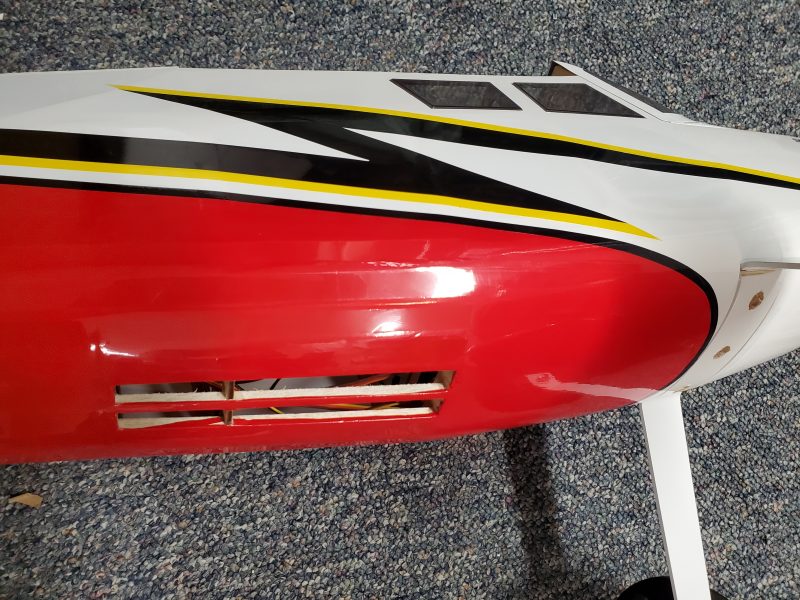
More pertinent to performance, I have made a few other changes, the first of which is to create some exit area for airflow through the airframe such that the ESC and battery get some cooling.  In my case I opened up some of the spaces between longerons just aft of the bottom beacon LED.  Air inflow is largely useless without a way for it to exit and can even create problems like hatches blowing off with positive pressure created behind them, etc…  Ditto for any covering that becomes loose over time.

I also did quite a bit of flying with a few different prop sizes and types… though i could do some more.  The provided prop is great.  If it isn’t a Xoar beechwood, it is a very close copy and I have run both the original and a Xoar 15×8 and see no performance difference.  I’ve also run a 15×6 and 16×6 APC-E.  The 15×6 was adequate and dropped top end power and average current flow but the airplane just didn’t have the same punch… Ultimately I did not enjoy flying the aircraft with that prop.  The 16×6 is my current favorite.  It seems to draw just a little less current than the stock prop while giving even a bit more torque and giving up nothing other than just a tad of top end speed.  Since I see no use for that anyway, I am spending my time flying with the 16×6.

Once I was happy with the prop I started expanding my flights to get all my throws, mixes, rates etc… dialed in.  I’m getting close to having all that set to my satisfaction.

My latest big setup and tuning change was to take thrust reversing back out of the picture!  I have had it in since the begining, and enjoyed doing some short landings and backing into the pit area.  All good fun, but the biggest thing I was unhappy with was the downline speed of this aircraft.  It just seemed like pointing the nose down was like dropping a concrete block.  It made downline manuevers rushed and didn’t look the way I like to see an aircraft like this fly.

What I believe now is that the speed controller just doesn’t allow for the brake to be turned “off” whilst having reverse thrust enabled.  While I always expected that letting the prop freewheel would result in some downline braking… I never realized how much!  With the 16×6 prop providing a larger “disc” and the prop free wheeling… the airplane seems to really maintain a nice downline pace.

With that change, I have been happily exploring and practicing many of my favorite skills including smooth “tail up” takeoffs and landings, intermediate level IMAC style aerobatics, flap usage on landing and takeoffs, etc…  I finally am flying the plane I always hoped it would be and have turned off some of my rates as I get things dialed in to the point that I no longer need them.

If I could turn braking on/off remotely, I’d certainly entertain having that available on landing and I am still tinkering with crow and full span flap useage but the main settings are fairly locked in at this point.  Next up is likely to do some glider towing.  Will have to see what I can do to get a good climb rate but limit forward speed to get the best tow flight profile!  There’s always another challenge with a versatile aircraft like this one!

I’m looking forward to flying the Turbo Timber SWS for (hopefully) years to come.  She looks to be a long term member of the hangar.


Turbo Timber 2M SWS Part Seven – Disaster!

All of our planes have expiration dates on them, and unfortunately the Tubro Timber 2M’s clock expired on May 30th!

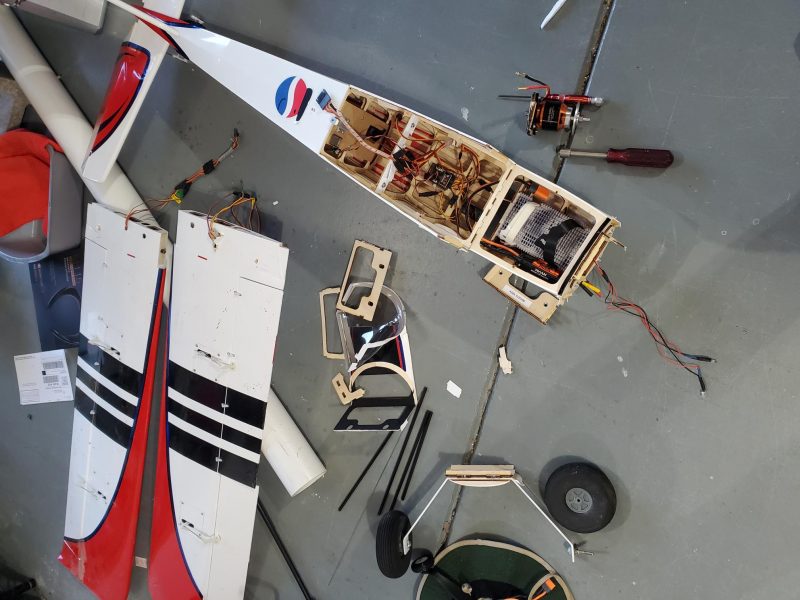
Here is a shot of (mostly) parts after the crash

This was very disappointing after all the time and effort I took to set this airplane up the way I wanted it.  Often, I purchase a plane and just do what I think is necessary to get a few good-safe flights before deciding if I wanted to spend the time to really make it mine, but I took the route of “I will be flying this plane for years, lets do it right!” with the TT,

I have documented a majority of those changes in previous posts so I won’t rehash those here.  So what happened? 

I was flying my third flight of the day when things went wrong.  On the first couple flights, I had been practicing some short takeoff and landings.  Using take-off flaps and full throttle got me takeoffs with lots of right torque and about 2 feet of roll from a dead stop!  Nice… need to work on correcting for the torque.  With short landings I was making full flap touches and then slapping in reverse thrust.  Not quite mastered yet, but promising!  I did lose one prop to a ground strike while doing this so gave up on that manuever for the day.

Flight three, I started experimenting with the flight envelope.  I made some slow passes with full and partial flaps along with some rolls, loops and other basic aerobatics.  I had also made a couple of high speed passes.  I had just noticed that one of my high speed passes registered 90 mph… wow.  I made a nice half loop climb to about 300 feet and rolled back to upright.   I then pushed down gently at about 2/3rd throttle, intending to establish a 45 degree dive back toward the runway.  As I rolled in more throttle I suddenly lost control of the pitch of the airplane… I believe I made it to about 20 degrees down pitch when it pitched back up momentarily… what the???

At this point I heard what was obviously flutter of the elevator.  If you haven’t experienced it, I can tell you it sounds like a loud buzzing sound and you won’t like it.  I immediately pulled back on throttle and tried to level the plane but instead it simply pitched a bit further nose down and dove to the ground.  She hit hard with about 60 degrees of nose down.  Later investigation showed damage to the cowl (mangled), electric motor box (crushed), landing gear (ripped out), windshield, front and rear wing mount (ripped out), horizontal tail (shattered on both sides)… etc…  It was pretty much a total loss airframe wise.  Wings looked better but it turns out the root rib on one is broken and the other has quite a bit of compression damage on the trailing edge of the flap and aileron.

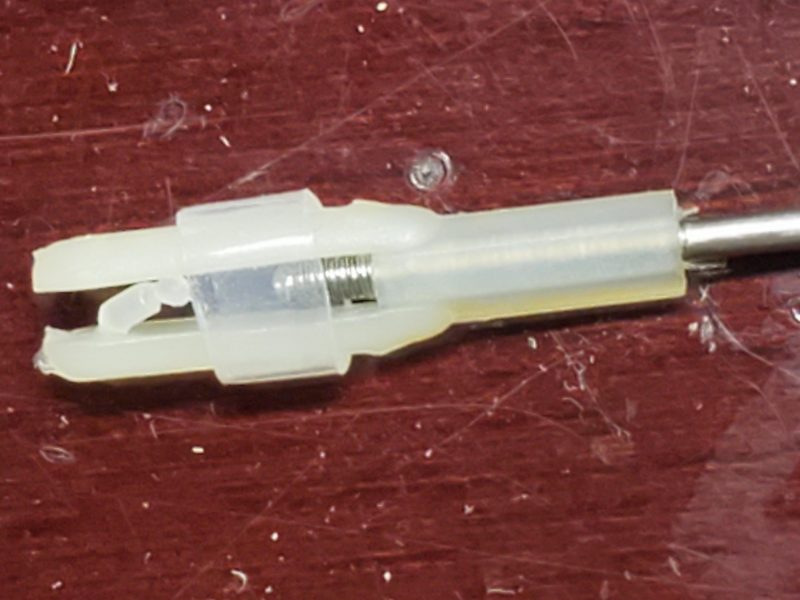
As is often the case, it is impossible to be 100% sure, but I think this is the culprit:

This picture is showing the elevator clevis as it existed when I recovered it from the wreckage.

In retrospect, I should have known that an airplane with this amount of power and speed should not use plastic/nylon clevises.  I just don’t trust them at 90+ mph…  Its disappointing that E-Flite didn’t use some better hardware and even more so that I didn’t think to change it out.  My only excuse is I honestly did not think the TT would be quite this fast… I was thinking of it as more of a STOL airplane.

I have since figured out that the hardware is 2-56 (more or less).  Its a bit sloppy when I thread a standard 2-56 metal clevis on the rod… I’d minimally use a jam nut with a metal clevis and likely I’d likely use 2-56 with bolt through ball links.  I don’t think there’s a need for 4-40 as all the rods are nice and short!

I would love to get another, but I won’t spend the full spend again on a BNF.  I’ll consider an ARF or 2nd hand purchase if I can find one… and in the meantime I am reaching out to Tower Hobbies both to inform them of the issue and ask if they are willing to work with me on a replacement.  I don’t expect them to just ship a full replacement but I’m hopeful they give me some consideration toward the cost to do so.

If nothing else I’m hopeful they will add some sort of advisory, so that others can consider some way to avoid similar occurances in the future… or even changing out the hardware on future production runs.

Please learn from my mistake!!  If you have a big/powerful/fast airplane with similar hardware… consider an upgrade.

I’ve linked the previous information on my adventure with this aircraft below.  Please browse at your leisure.

Part 1 – Buying and unboxing

Part 2 – Inspection and possible modifications

Part 3 – Assembly and modifications

Part 4 – Radio setup, modifications, and repairs

Part 5 – Final tweaks

Part 6 – Flying and Analysis

Turbo Timber 2M SWS Part Four – Radio setup, modifications and repairs??

Turbo Timber 2M SWS – Part Four

There were a few things I felt I just needed to change right out of the box with the new Turbo Timber SWS.

My first thought was that I wanted to take advantage of the electronics provided in this newest iteration of the Turbo Timber.  To that end, I started down a long list of adjustments I wanted to make.

First, I did a bit of programming on my radio.  Starting with a template I created from the program I had based on the Grand Tundra, I checked all the settings were adjusted per the manual.  Using the template gave me the voice prompts and standard switch locations I would normally use without having to manually reenter them.

 I always like to have my ailerons on separate channels when I have the channels available but in this case I also wanted to do it to allow for a bit of crow mixing.  To allow for this, I adjusted my wing type  to 2 aileron, 1 flap.  I didn’t bother to split the flaps as they are not hinged to deflect upwards anyway so there is not much to gain.  One accomplished, I removed thy Y harness and wired the ailerons each to their own channel making sure to get the correct aileron in the appropriately labeled channel.

Next up, I wanted to enable the reversing function of the ESC.  I attempted to enable this using the ESC telemetry programming screen that normally is available as the last telemetry screen you will find if you scroll through all the Telemetry screen with the airplane and radio powered up… but to no avail.  The screen just wasn’t there!  After some troubleshooting, including rebinding, upgrading my radio to the latest software, etc… I realized that the ESC was loaded with very old code.  I was a bit iritated with this, as that particular function has been out for a very long time and I would have thought by now, Horizon would have made sure all the shipping product had that code already loaded.  But apparently not.

I then pulled out my trusty ESC programmer and connected with my laptop and updated to the latest version.  Following a power cycle, “bingo” the programming screen was now available!  I adjusted the braking method to allow reverse with the laptop and programming box but inevitably realized after disconnecting and packing it away… that there was another setting or two I wanted to adjust!  For one, I wanted to move the reversing function to a higher channel to eliminate conflicts with other radio functions I might want to program on the lower channels.

No problem, I simply went in with the radio and scrolled across to the ESC programming screen and entered the menu via the indicated stick motions… or maybe not.  After a couple of attempts, I recalled that you need full channel output to get this to work so I adjuted my switches to max throw and again, things were looking up.

As I was scrolling through the options, I realized there were a few other things I wanted to adjust.  So while I was in the screen I adjusted the brake/reversing function to channel 10 as planned,  but also disabled the auto cell count function and disabled the voltage cutoff feature.  If you think that’s a bit unusual, let me give you the brief logic.  First, I like to run the new HV Lipo batteries from SMC and I have seen ESCs that will mistake an HV 6S for a 7S and if the cutoff feature is enabled, this can lead to a cutoff occuring very early in the flight.  This can be dangerous, especially to the airplane’s health!  Throttle being cut just after takeoff is not ideal. 

Second, if I have to make a choice between damaging my batteries due to overdischarging them but managing to eek out enough power to get my airplane down safely… or having the ESC protect my $90 battery at the expense of trashing my $800 airplane… I think you can guess what I pick.

I also set the BEC output to 7.4V instead of the default 6.0V.  The servos in this bird are high voltage and the vast majority of Spektrum receivers (including the 8360T provided) are capable of working with a wide range of voltage inputs.  With this equipment I would always favor a higher voltage setup.  For reference, volts times amps equal watts (which measures power).  So you can provide the same amount of power supplying a higher voltage with less current draw and high current often exposes any flaws in the electrical system.  For instance, many connectors can easily handle a higher voltage than we require but when they have to pass higher current they begin to heat up and the excess heat causes failures.  So as strange as it might sound, if the electronics are designed for it, I believe using higher voltage is easier on the system.  High current causes problems that an appropriately high voltage does not.  Also pulling less current to do the same work means longer flight times, assuming the extra battery weight to get the higher voltage isn’t prohibitive.

On a related note; I am always torn between using separate flight pack batteries (usually a 2S LiPo) or letting the ESC provide the power on 6S powered aircraft.  At the typical size/weight range of a 6S bird, you are approaching airplanes that can typically handle the excess weight of a separate battery pack to provide power to the servos and radio gear without noticable effect on wing loading.   Also, separating this function relieves some of the load on the ESC as well as providing a level of fault tolerance if the ESC should fail or the main fligsht pack gets disconnected, etc…  That’s the positives of using separate receiver packs.  On the downside, it adds weight to the airplane, adds expense to the setup (additional packs, switches, etc…) and adds a bit of complication which weighs in against reliability.  Complicated things just fail more often.  When I move up to higher cell counts I default to a seperate power pack (or two) but 6S is right on the border for this setup, in my mind anyway.  For the TT SWS I do not plan on a separate pack, so setting the ESC to high voltage is what I believe is the best option.

Once finished, I moved on to wiring up my multi-connectors to make the wings easier to attach and detach along with cleaning up a bit of wiring.  This presented a bit more of a problem than I anticipated.  First, I made the connections between the three servo wires exiting the bottom of the wing and then wired up the other side of the multi-connector to the receiver.  Doing a trial fit I realized that there is a bulkhead that touches the bottom of the wing in between the wire for the lighting and the wires for the servos.  I thought about notching the bulkhead but I didn’t like that idea so I went to plan B and pulled the lighting wire back up to the flap servo hatch and then fished it down along side the servo wires to make them all emerge at the same exit.  Here’s a couple of pics of the process.

Here’s the original routing with my multiconnect already plugged into the flap and aiileron wires.
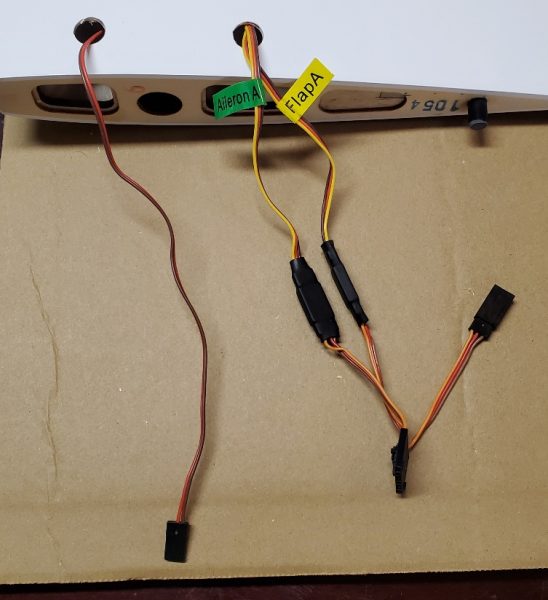
 

I used a wire to snag the lighting wire from the front portion of the wing back into the flap servo pocket.  I then pulled the servo connector end of the wire back to this point.
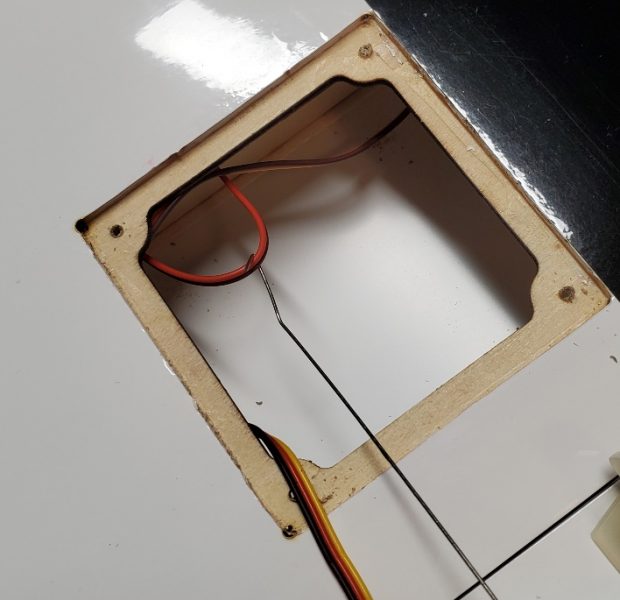
Following that I looped the wire through large nut (a convenient heavy weight to help with the process) and lowered and shook the wing to get the wire to drop down to where I could snag it and bring it out to the wing root.
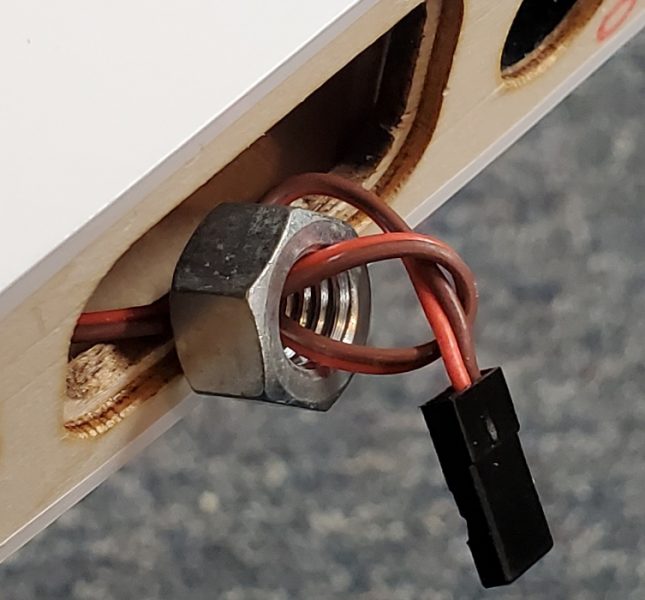
 

At this point I removed the nut and fed the wire through the same hole in the bottom of the wing that the servo wires emerge from.  Problem solved.

Once I got those connectors in place, I remembered a problem I had with the smaller Tundra’s and which will be amplified by the size in this case.  That is, when assembling the wings and plugging in the wiring, you must hold the wing up out of the way and even with only two connections to make, this can be a bit tedious… especially if there is wind trying to grab that big wing and throw it on the ground!  I’d seen a few approaches to fix the problem and I liked the idea of attaching the connectors inside the airplane so that I could connect each connector with one hand.  After a few measurements, I created a bracket that holds the connectors in place in the airplane and can be disassembled if needed for any sort of repair.  I used my trusty 3D printer to create this bracket and used some canopy glue (which can be removed in a pinch but holds plenty tight for my purposes) to help hold it in place.  Here’s a pic of the installation.
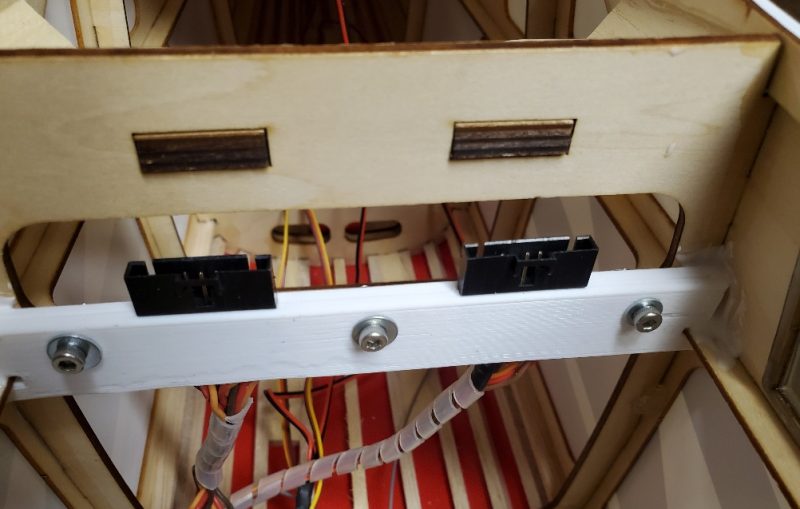
At this point, I recalled that I wanted to have a way to switch the landing lights (these are located in the cowl) off and on.  I had this on my Grand Tundra, and enjoyed it.  So I moved on to connecting up a small in-line switch (the PERS v2 from Hansen Hobbies) to allow me to switch that output.  After inserting the PERS, I noticed the landing lights were flickering and soon one and then the other winked out.

To me that seemed… to use a technical term… BAD!  I pulled the PERS back out and connected back to the standard wiring… no go.  I then got a separate battery… nope.  OK, so what the heck… then I recalled that ESC voltage setting… 7.4V… instead of 6… hmmm.  I guess the LED circuit wasn’t designed for the higher voltage… even though every other component of the airplane is!  Even though every other LED seems fine!  Yes, Horizon Hobby didn’t tell me to do that… or that I even could.  But, I still think they could have done better on this one.   

It was a bit of a job to replace the LEDs… They were glued in very well.  I ended up crushing them with pliers to break them up and then drilled out the remains before gluing in replacements.  With an appropriate resistor in line with each to limit current appropriately at the higher voltage, things brightened up nicely and putting the switch in line was easily accomplished without issue.

At this point, I was getting pretty close to finishing up with all of my setup for the TT SWS.  Next time, I’ll try to wrap up this series with my final few items before she has to sit in corner and wait for some nice weather.

Here’s a quick “chapter guide” if you want to jump to any of the other posts on this aircraft:

Part 1 – Buying and unboxing

Part 2 – Inspection and possible modifications

Part 3 – Assembly and modifications

Part 4 – Radio setup, modifications, and repairs

Part 5 – Final tweaks

Part 6 – Flying and Analysis
 

Spektrum NX10 failure analysis and repair

In a previous post I reported on the demise of one of my favorite airplanes.  The Top Flight P47 60-90 size ARF.  The cause of that crash was that my Spektrum NX10 powered off mid-flight.  This is disappointing as I have run the NX for several months and been extremely happy with it.  The radio link to all of the planes as I  flew them has always been rock solid… well at least while the radio was on!

After the crash, there was no doubt the radio had turned off unexpectedly.  So began the investigation.  I posted online about the failure and found just two folks who had claimed to have something similar occur and none had an occurrence during flight. 

Thinking back, I honestly believe I may have seen it happen once on the bench shortly after first receiving the radio but at the time I was on very early code and was still learning to use the thing.  As it happened I was working on a setup of an airplane and turned away for a few seconds to check something else behind me… an email arriving on my computer or whatever… and when I turned back the radio was off.  I was so uncertain at the time as to the sequence of events that I passed it off as “perhaps I turned it off without thinking or realizing it when I got distracted”.  I really couldn’t believe the radio turned itself off and I never saw it again through setting up 20 or so airplanes on it, multiple upgrades, template creations and many flights on many airplanes later I hadn’t seen it again so had forgotten about it and moved on… until it did it again and my plane crashed.

Online I got the usual advice and questions… folks trying to helpful asking about battery state, shake tests, testing the on/off switch, etc… and I did as many of them as I could justify or understand to no avail.  I tried to jiggle the battery and connector particularly looking for an intermittent connection from the battery but it stayed on solid through all the shaking, wire twisting, switch tapping etc… that I could figure a way to inflict on it.  In a few days I acceded to inevitable and sent it off for repair with fingers crossed.  I spent years troubleshooting network for a living so I understand troubleshooting software and hardware systems like this when there is no no repeatable test case and no apparent error (other than a pile of wreckage) to be seen is an extremely trying task so I held little hope.

Now on the forums there are several very respected folks who monitor and comment on things and one is a gentleman who actually works on the software team for the NX series radios.  Andy, like others, recommended sending it in and contacting them to discuss it.  After the radio had been in their hands for a few days I reached out to him to try to figure out the easiest way to reach whomever was testing my radio.  I knew that the best chance of getting a fix was to give them as much information as possible and the online form only allows so many characters so I gave Andy a complete description of the issue and asked for his advice on how to get this to the correct people.  I also tried to impress on Andy that I really wanted a resolution beyond “no problem found” as I would never commit another airplane to flight with that radio unless we could determine a cause and apply an appropriate fix.  I also explained that I have been a pretty loyal Spektrum user for many years now and have purchased many Spektrum radios and spend a fair amount of time helping my fellow club members get the most from their Spektrum radios.  I really didn’t want this story to end with “…and that is why I have a $500 radio that sits in the corner and gathers dust”.  Returning it to me in that state would be a waste of postage.  Unsaleable and unusable…

Just a day later I got the notice that Horizon had sent me a shipment.  I feared the worst… then came the invoice for $0 and a note that they had decided to simply replace my NX10 under warranty!  Is this the best of all outcomes… no.  It is however the best response that I think Horizon had available to them and I commend them for excellent service once again.  I’m sure they tested my radio and had no way to recreate my issue.  I ran it for months and only saw it happen (maybe) twice and the circumstances of each were different.  I’m sure both Horizon and I are hoping it was simply a one in a million intermittent hardware issue and neither of us will ever hear anything like it again.

Horizon even went so far as to transfer all my models over to the new radio and upgrade the software to the very latest version.  They also sent me a complete new kit… radio, battery, strap, etc… all the stuff that comes with a new in the box system…. even though I had only sent them my bare radio minus batteries etc…  Of course they cannot replace my airplane.  That is simply asking to much and lets face it; if you can’t handle an occasional loss of an airplane you probably need to get out of the hobby.  They did more than I think is reasonable to expect in a bad situation and I appreciate that they are electing to take care of a loyal customer such as myself.  I have experienced much less satisfactory service from companies who have gotten a lot more of my money but Horizon seems to get it right more often than not so I will continue to support them and spend my money with them as often as I can.  Thanks to Andy and the rest of the team there.  You guys do it right.  Thanks again.

So I now have a brand new NX10 and am starting to get my planes bound to it and ready to go.  My Timber X is back on the NX10 and flew well on the first couple of test flights…. It may be a bit before I put the 12S powered Aerobat or the 1/4 scale cub back in the sky with the new radio, but as my confidence in the radio recovers, I’ll be moving everything back over.  Fingers crossed this will be the final chapter in this saga.

Top Flite 60-90 size P47 ARF… Final flight. Spektrum NX10 failure investigation begins.

My Top Flite P47 was a super flying airplane with a great power system and has been performing flawlessly.  I have been testing out some different props to determine best mix of power, speed and flight times attainable.  Have broken a few props but otherwise she was running great.

Unfortunately all good things must end and a couple weeks ago she ended a flight looking like this.

No photo description available.

Here’s how it went.  On takeoff, I started a nice steady climb and flipped both the landing gear up and flaps up switch.  As you can tell in this photo, the gear cycled all the way up successfully and I’m confident the flaps did as well from the way the it was flying.  I then made a left turn and was nearly in knife edge when I suddenly realized I was no longer in control of the airplane.  The plane was sliding on its wingtip toward the ground and nothing I could do with the sticks had any effect.  Being electric and a good way out I heard nothing other than a sickening crunch after it disappeared below the corn stalks…

In disgust I dropped my gaze to my radio and was surprised to discover there was no display and no lights whatsoever!  I removed my sun glasses to be sure and verified the radio was indeed off.  After walking back to a seating area (I needed to sit down) I turned the radio back on and it powered up normally and showed the battery was at 4.0 volts which is in the range of 80-90% of it’s full charge state… i.e. the transmitter battery is not dead or even low.  I then tried to figure out if my neck strap, clip or some placement of my hands could have turned the radio off and I cannot imagine how to make that happen while going through the maneuvers that I performed.  It takes a good 4-5 seconds of steady pressure on the power button to turn off the radio and in that time period before the plane stopped flying I had flipped two switches and moved both sticks to adjust throttle and perform my turn.  Try that and tell me if you can do it, even if you try!

After a long walk in the corn locating the “remains” I started reclaiming all the parts and considering the wingtip and nose in a near knife edge collision to the ground, the components aside from the airframe faired as well as could be expected.  The speed controller had a fan mounted on it… That plastic frame did not survive but the replacement is $10 and the speed controller itself has tested out to be in good condition so far and does not have a mark on it otherwise.  The receiver is likewise undamaged and tests good as do all the servos.  The motor had the worst result, being a bit dirt caked and the main shaft turned out to be bent.  I’ll post on that separately.  The retracts, as you can see in the photo were safely retracted before the loss of signal occurred and also seem to be unscathed.  Even the two batteries (a 6S 5000 and a 2S 5000 run in series) look in good shape and still charge as before.  As I said, things survived pretty well aside from the air frame.  It is a total loss with only the tail surfaces seemingly intact.

As you can imagine, this started a serious investigation into why the radio shut down.  I’ll post a new entry about that soon.

So ends my favorite war bird to date.  There will be a replacement of some sort soon!  Here’s hoping your flights are more successful than this one was.


New Radio – Spektrum NX10

NX10 Arrives

NX10 10-Channel Transmitter Only

Since February 2018, I’ve been primarily flying using the Spektrum iX12 transmitter.  I’ve certainly developed a love/hate relationship with the iX12 over the past 3 years.  I’m not overly fond of a touch screen  interface on a screen this small, the slow power up can occasionally be annoying and if you try to rush it you frequently run into disconcerting delays and seeming instability that requires a fresh shut down and restart.  Additionally, running anything more than the basic Airware app on the radio seems to be asking for trouble as the platform is just barely adequate to run it… let alone adding anything else into the mix.  On the other hand, the text to speech option really makes spoken prompts far more useful and the display is sharp.  Additionally, the built in WiFi and Bluetooth on the iX give you have capabilities that no other radio in the Spektrum line can match.  Wireless headset use, keyboard and mouse connection, direct download of updates, etc… Bottom line, while I can work with the iX12 and it has its strengths, it occasionally frustrates me so I decided when the NX line came out I’d grab a possible replacement and give it a try.

So in November 2020, I ordered an NX10 from my local hobby store.  As usual they gave me a great price and didn’t ask for any deposit or credit card to get my radio on order.  While I waited for it to arrive (first predicted to be in by mid-December) I read up on the discussion groups, watched videos about the NX line and weighed my options on which radio I would get rid of to pay for the NX when it arrived.  I had both an iX12 and a black addition DX9.  I’ve always liked that DX9 but 90% of my airplanes were setup and working on the iX12 so I started out by taking the DX to a couple of swap meets and it found a new home quickly.  In fact it paid for a majority of my NX10 purchase as that radio is still very popular and I had the charger, manual, original strap and pretty much all of the original accessories it came with along with the case.

In February, the NX10 arrived and it is pretty much as advertised.  It feels good in the hands, especially to those who like a bit lighter radio, even with the large 6000mah 1S LiIo battery on board.  The weight is a big point of contention on line in the forums but I find it a nice balance between the heft of a DX18 and the almost disconcerting lightness of a DXe for instance.  I like the dark, mostly matte finish of the radio and I hope we never go back to radios with all the chrome on the front… at least not as long as that chrome is applied to a plastic base!  That is the worst of both worlds.  Easy to damage, flake off, etc… while also being shiny enough to blind you if the sun hits it just right while you are trying to look at the front panel for whatever reason.  The NX display is a bit sharper (higher res) than the DX line though not quite up to par with the iX and the added colors of the NX versus the DX are pleasing though you have to be careful to avoid color combinations that work great indoors but are totally washed out and nearly invisible in the light of day!  Not up to the iX12 standards with the capability to show pictures, etc… but still an improvement over the DX monochrome display.

The sliders on the back of the radio are a disappointment to some and I can definitely attest that they are not smooth by any stretch of the term but for me they simply don’t matter as I have never found a real use for them anyway.  If you are a fan of sliders and expect a smooth control akin to a volume control slider on an audio mixing board, you have come to the wrong place!  Of course they work.  They just don’t have high end feel to my fingers… I suspect these are the same as what the DX had and I don’t recall the iX being distinctly better either but then again I just don’t use them.  Maybe someone who does can comment with a better comparison.

The gimbals feel fine and they have all the usual adjustments which are all reachable via front panel access to the various trim screws.  That front panel access is a nice change from many previous radios which require taking off covers etc…  If you tend to just live with the feel of the sticks the way the radio comes out of the box you will have no throttle ratchet and the throttle seems a bit “grabby” to me… not very smooth and this is again something that a vocal minority on the forums have brought out as a flaw with various solutions put forth.  For the vast majority of aircraft fliers I suspect a quick adjustment to enable the ratchet and adjust spring tensions to suit your preferred feel will be in order and will result in a good experience for the vast majority of aircraft fliers.

The NX10 has the hall sensors versus standard pots.  I haven’t noticed an different feel but I know the hall effect are considered higher end/more reliable so they may prove themselves over time but don’t expect to be able to tell a real difference just from pushing the sticks around.

The best and worst of the comparison between the NX10 versus my iX12… as far as what matters to ME are as follows:

I continue to miss the flexibility of the text to voice capabilities of the iX12.  Having to use canned responses that aren’t intuitive to me or sound too much the same so that I have to actually concentrate on what the radio is saying are just not even half as useful to me.  Someday we have been told they will upgrade the sound editor that was available for the DX radios and that will fill a big part of the gap for me but until then, this will be the biggest drawback.  Assigning them can be a bit tedious as well… having to scroll through long lists of prompts or build your own list but its not something I do that often so its not a critical shortcoming.

Otherwise there are many things I like much better. 

First, I have no need and do not enjoy using the touch screen on the iX12.  It’s to small for my big hands, though very sharp to look at.  The radio can also lag behind when trying to quickly move through menus and make adjustments and takes far to long to boot up.  I’ve heard all the excuses as to why, all the workarounds to try to make it better etc… and I just feel like they really missed the boat by handicapping the 12 with such an underpowered platform.  I can boot up the NX10 and configure a new airplane by the time the iX12 boots up and becomes stable!  OK, maybe that’s an exaggeration but not much of one.

Also, the battery life on the NX10 with the shipped battery seems to be much better than the iX12 which has to remain on, albeit in standby mode, the whole time I’m at the field unless I want to wait 5 minutes to boot it every time I fly.  By comparison the NX10 is ready to go in seconds.  You can buy an aftermarket battery for the iX12, which I did, but that makes it a bit heavier and is another expense for something that they could have done out of the box.

The use of WiFi in both radios is great.  Comparing to the iX12 they are a close run thing but I actually prefer the NX as the WiFi setup is all inside the user interface versus having to go out to android and connect to WiFi and then jump back into Airware and do what you want to do and then back out to disable, etc…  This allows easy registration and upgrading which is great.  The lack of Bluetooth in the NX is a small disappointment but not huge as the interface of the NX (very DX like) only rarely would benefit from having a keyboard/mouse connected and there are Bluetooth converters available if you really want to have headphone connectivity.  Again an aftermarket expense but understandable in this case as the Bluetooth in the iX was available largely due to the Android platform.

There are other things I could discuss but I’ll end with this one.  The NX allows for easy USB connectivity to a computer.  This enables simple connectivity to some flight sims and games and also gives access to the internal storage area of the radio where models and templates are stored etc…  That means there is another simple avenue for backing up or uploading airplane configurations, etc… 

After a few months of using the NX10 I moved forward with my conversion and sold my iX12 as well.  I had found I could do all I needed to do with the NX10 and had come to enjoy using it while the iX became a fixture sitting in a corner of the shop, unused.  I took that money and bought a “backup” NX8 which after registration and loading of my existing model setups, sits in the case waiting for the day I need a “backup”.  Occasionally getting use as a buddy box or loaner radio to my friends in need.

One final note.  Getting from an iX or DX radio to an NX platform is easy as the iX can read iSPM (iX format), NSPM (NX format) and SPM (DX Format) files and write either iSPM or SPM format.  The NX can read all three types  but only writes NSPM format files so going back from an NX to a DX is not quite so quick and easy as a DX files are SPM format only.

In summary, I’m all NX now and just waiting for improvements to the sound capabilities down the road.  There have been a few bug fixes that have come through for some small annoying things like scratchy sounds and little roller glitches but since upgrading is so easy and none of the other fixes have really much affected me I just stay fairly current and keep flying.  If I ever hit the lottery I might be tempted to go to an iX20 but it isn’t something I see happening anytime soon as the value just isn’t there for me and the NX has been such a good experience so far.

Spektrum connect issues… resolved?

One of my largest aircraft currently is my Extreme Flight 74″ 12S powered Laser.  It is also one of my favorites due to ease of assembly at the field, unlimited vertical performance and the fact that it is capable of such beautiful aerobatics!  Sometimes it even looks good when “I” fly it!  Yep, the plane is certainly more capable than her pilot.

Really the only issue I have had with this plane for quite some time is on that occasion when I get it assembled and ready to fly… except the iX12 radio and 12 channel power safe receiver will not connect on power up!  It’s very frustrating.  It’s not that it has lost bind…  I’ve occasionally gotten it to work again by cycling power once or twice or even just taking it back home and trying again…  It’s was never obvious what I actually did to fix it… and sometimes it seemed nothing would.  It happens very rarely and usually if I just go through a rebind process it works perfectly from that point on for a long time.  This typically only occurs if the plane has been sitting idle for a period of times… week or months (like first flight of the spring) is the most likely time to have this occur.

So being as it is just getting to be good weather for flying on any kind of consistent basis here in Indiana, I just ran into this issue again!  This time I was at home and had decided to tinker a bit with the Telemetry when it once again refused to talk!  Power up the radio, power up the plane, pull the pin switches for both receiver and speed controller and… nothing.  Everything is sitting at centers and the usual sing/buzz from the servos but no link…  

I tried a couple of power cycles and still no luck so this time I decided to post on the Spektrum group on Facebook.  After several posts back and forth and a number of excellent suggestions, one gentleman pointed out that the power safe receivers would not link to radio if the proper number of remotes (he even said if just the A receiver was down, that would do it)  didn’t come on line and suggested checking the contacts and coating them with electrical grease to shield them from problems.  An intriguing idea so I went back to the airplane and did some more testing.  As I did so, I also noticed that I had not done my normal strain relief on these cables so I decide to take care of that before all was said and done.

What I found was that in fact the A receiver was certainly not linking up (no lights if I recall correctly… or at least no steady light) and once I re-seated the cable, everything linked up instantly.  Repeated testing showed it all working perfectly from that point on.

I have a fair amount of pride that few of my planes crash due to “avoidable” assembly and maintenance issues so I like to track these issues down and resolve them whenever possible and then apply the fix wherever it makes sense on the rest of the fleet.  This airplane for instance has redundant flight packs separate from the power packs that run the motor, nylon insert nuts on all of the ball linkage bolts, Telemetry monitored battery levels, etc… in order to make sure it is as reliable and survivable as is possible/reasonable.  So I decide to see if I could eliminate this issue for good.

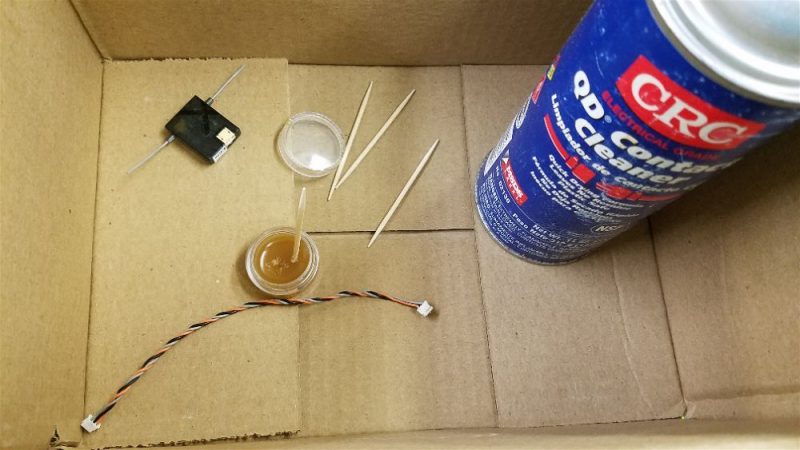
After collecting the necessary items (all shown here except the liquid tape) I started to work to resolve this issue.

The process went something like this…  First pull the remote receiver (they are all attached with sticky back Velcro, so this is not hard to do) and the cable from the airplane.  Inside the box (I’m working in the living room so protecting the furniture/carpet from harsh chemicals and spills) I spray some contact cleaner into the end of each cable connector and into the remote receiver connector.  Once dry, I took a toothpick and forced some dialectric grease down into the holes on the cable connectors and then coated the pins in the connector as well.   I did the same on the receiver while still installed in the airplane… luckily it’s somewhat roomy in there… and then reconnect everything and wipe away any excess that squeezes out.

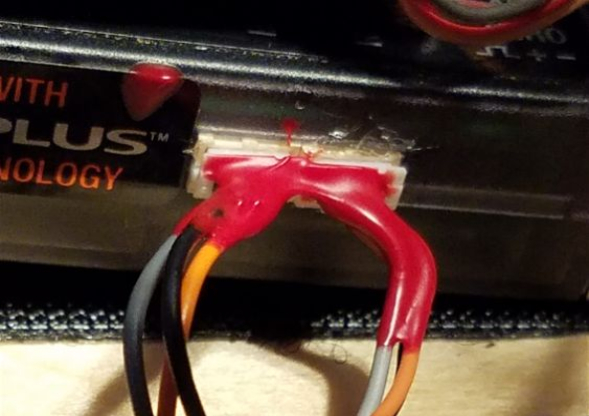
That should eliminate the possibility of corrosion in the future so once all was back in place I moved onto painting on some red “liquid tape” right on the back of the connectors and onto the first 1/4″ or so of wire for each of the four cables that connect to the remote receivers.  This helps to share the stress on those wires and eliminate the most likely break point for the connections.  The liquid tape will flex but doesn’t allow for kinking or pulling on the individual wires.  I have had a few of these wires break before but never had an issue once I applied this little “hack”.  I apply this while everything is plugged in typically.  If a bit gets on the receiver or over the outside of the connectors it doesn’t hurt a thing and simultaneously it can’t get in the way of the actual electrical connections if applied this way.

Here are the two plugs on one side of the receiver.

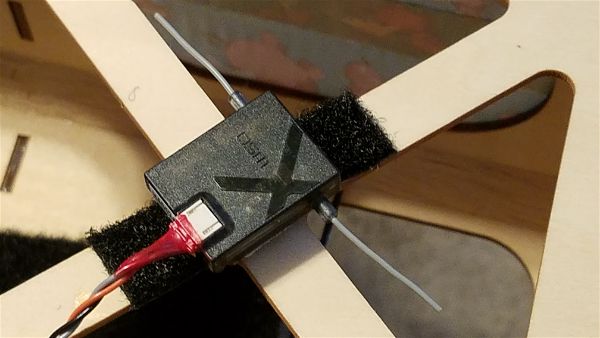
And here is one of my receivers sitting on top of the motor box under the cowl.  You can see how I have coated the connection, further protecting the wires against stress and contaminates to some extent.

We will have to wait and see how this works out.  I have high expectations that this problem is likely resolved and I feel very positive that this improves the likelihood that this plane will fly for years to come… or at least until I make a mistake behind the sticks!

Spektrum iX12 – 1 month in…

Image result for spektrum ix12

One of my more recent additions to the RC hangar is not a new airplane but instead a new controller.  I have been using a DX18 for a few years and have found it to be an excellent radio.  I have zero complaints operationally with the 18 but I really like the newer designs that have come out without all the excess “chromed” plastic.  What’s the point in putting a coating over plastic that will eventually wrinkle/peal and otherwise just create issues?  It looks nice if you like chrome I suppose… never a big draw for me… and sometimes can create glare issues on especially sunny days.  Also, while not a big fan, there are times when a voice notification would be welcome.   I’ve held off because previously they were rigidly defined.  Want the radio to say “charge my battery!”?  Sorry, the only message available is “low battery”.

Spektrum’s approach of putting an Android tablet functionality “up front” in the iX12 sounded like it would have some nice advantages and I haven’t yet needed channel 13 and up on my DX18… so after a bit of research I took the plunge.  Hey, it’s a hobby!  If I’m going to get a little closer to the “bleeding” edge of technology in some facet of my life, this is the place to do it.  So after some time with the radio here is what I have observed and what I’ve done so far.

So far, I have had zero issues… I am somewhat familiar with Android so I think I have avoided some of the odd issues that folks on some of the forums have reported.  I moved 16 models over from my DX18 Gen 1 and everything has worked great so far.  I’ve flown a couple small quads plus 4 or 5 indoor airplanes and other than messing with the spoken prompts, I haven’t modified my setups at all.  Generally, I like the look and feel of the mechanicals of the transmitter.  If you’ve ever handled a DX9, you will find much of this radio to be very familiar.  Some parts of the box are even better, like the back sliders (which I rarely use) being much smoother.  The UI is not yet totally intuitive to me but I’m getting accustomed to it quickly.  I am beginning to like the text to speech options though I wish the audio defaulted to all OFF.  Will probably build myself a template for future use to accomplish this.

The radio is not capable of terribly loud audio levels and some have complained about that.  It certainly is not capable of the same volume of the DX9… Of course folks complained about distortion with the DX9 so Spektrum may not have been able to win this one!  Volume is not an issue for me as I intended from day one to use a blue tooth headset as I hate hearing the constant chatter of audio from other folks radios while I’m trying to fly.  I like to hear my aircraft (and others) and all that chatter is distracting and irritates me after a while.  I also think it impedes communication with my fellow pilots as needed for safety so I love the blue tooth headset option afforded by the Android interface. 

In order to make the audio usable, not annoy my fellow pilots and maintain safety I intend to use a single earpiece.  I bought the Sentry BT950 so I can use whichever ear I like… So far I like how it sits on my neck and audio seems plenty loud.  I have a couple other Bluetooth sets so I can try some others if need be but this one is a nice cheap option I can afford to leave in my flight case.

I also picked up an inexpensive blue tooth keyboard and mouse (Logitech model K380 and model M535, refurbished).  Both paired up and worked right off.  One oddity that was noted in some of the forums was apparent immediately.  When used in conjunction with the iX12, the enter key doesn’t function as you would expect.  So far the esc key seems to function in place of the enter key for text entry.  I’d bet there is an app that would remap the keys for me but I’m OK with using the esc key for this purpose.  The mouse works great and even has a “gesture” button that can be used to do swipes and such so you can pull up the various “side” menus etc… I’ve only used the mouse and keyboard a bit during setup of new aircraft but so far it seems like a great alternative to using the screen based keyboard to create all the text to speech prompts, timer call outs etc…  Do I need them to accomplish this?  No, but I like to have the option for anything that is going to require much typing.  I don’t even like to send long texts on my touch screen Android phone so having a keyboard is a nice option for me.   All my blue tooth hardware total cost me $70 and I will use some of it for other things so in my mind they are cheap at the price and nice to have options.

I routinely pull pictures directly from the web using the Chrome browser on the radio to use as my icons in the model selection screens and downloading the updates from google play is a nice and familiar way to operate so the ability to connect to a WiFi network directly from the radio is another nice to have option.  All in all, I like the radio so far.  There have been complaints about some issues (minor for me) like the audio level, slower model selection than other radios (30 seconds to change models versus maybe 5-10 on most radios) and the fact that it takes about 2.5 minutes to go from powered down to fully functional the first time you power up at the field.  This last is something you adapt to fairly quickly.  Just turn it on when you get to the flying site.  By the time you get a plane or two out, all is ready to go.  During the day, simply double tap the power button and go into sleep mode after each flight.  Coming back to full power up from there is a couple seconds.  The battery will last all day using this routine. 

As I worked with the radio a bit there were a couple of additions I decided were worthwhile.  First, there is a company (Powerhobby) who sells vinyl wraps for the face of many transmitters including the iX12.  I have occasionally dropped something onto the face of my transmitters in the past and I thought maybe this might give it a bit of extra protection.   Also a little individuality never hurts… I already know of one other guy in the club who has an iX12 on order so now there won’t be any mistaking mine for his!  Installation of the vinyl was a bit tedious but not terribly so and I think the result is pretty nice.  Here is what mine looks like after the application.

In addition I quickly noticed that the touch screen was going to often get greasy and spattered, etc… so I decided to take the leap and try to find a good screen protector.  I have not had great luck with the cheap plastic sheets you get for cell phones… they either mute the sensitivity of the screen, cause visibility issues, etc…  so I looked for a glass cover for this use and actually found one sold through Radiocontronics.  It is made of something marketed as “AirGlass” and is apparently from a company called Brotect.  I hesitated to spend ~$24 with shipping for what looks like a highly hyped piece of plastic cut to shape… but I have been pleasantly surprised.

Installation was pretty straight forward.  Clean with supplied lens cloth and carefully drop into place.  Done.  So far I have to say the screen is every bit as responsive as ever, there are zero bubbles or imperfections and so far it seems to pick up less dirt and finger “grease” than the screen itself did.  I wish it were just a millimeter or so bigger in both dimensions than it is… there is a very fine line around the screen that is visible if you know what to look for but is probably not noticeable to anyone else.  That aside though, I have to say it is working as advertised and if it keeps all those microfine scratches off my screen that my DX18 seemed to accumulate regularly (and it wasn’t even touchscreen) than I will be ecstatic.

At around the $600 mark, I think there is a lot to like in this radio.  And yes, I am a bit of a Spektrum fan for which I make no apologies.  I have worked with several other brands like Futaba, Hitec, Airtronics, Multiplex , Graupner and a couple others I can’t even recall.  All of them have some interesting features and strengths but it is hard to beat the Spektrum value for the dollar, excellent support and good balance of feature set with ease of programming.  The iX12 leans toward the more complex end of their line of radios so it may not be the ultimate answer for those who are not smartphone savvy or that are just happy with their DX7s or 9 or whatever but I think I’m going to enjoy it for quite some time.  At least until the iX12 Gen 2… or iX18 or whatever hits the market next! 


Graupner MZ-24 Radio — What???

My flying buddy Kelly, who I’m pretty sure considers me his personal “RC Aircraft Mechanic and Radio Setup Technician”… decided some time ago that he wanted to get a new radio system for his RC needs.  I know he has had good experiences with his Graupner charger and is a big fan of German engineering in general and so had high hopes when he ordered his new radio system.  He even talked to me first to insure that I was up for learning a new system and I said yes….

I have programmed many RC radio systems over the past 15 years or so. Airtronics RD6000, RD8000, Hitec Prism 7, Futaba 9CAP, Multiplex EVO 9, JR9303 and Spektrum DX8 and DX18 are all transmitters that I’ve spent time programming.  I’ve spent significant time and effort setting up multiple aircraft from trainers to multi-engines and delta wings to 3D aerobats on these radios and now I can add the Graupner MZ-24 to that list… or at least I’m trying!

Some random thoughts on my experience so far.

The MZ-24 is NOT a 24 channel radio.  For EVERY other radio in my list above you could probably correctly guess the number of channels by picking out the number in the radio name… but not the Graupner.  For some reason the number of channels you can control is 12… you can now decode that the MZ-18 is a 9 channel system, maybe?.  Kelly wasn’t fooled… he’s definitely a guy to research his purchases but I was fooled for a minute or two.

What Kelly thought was a German radio was apparently designed and built in South Korea?  Now that’s not a bad thing in my book… I’m pretty sure that more than half of the electronics in my home were designed and built there and I wouldn’t keep buying them if I didn’t think they were great products….but this radio…. maybe not my favorite effort from our friends in South Korea.

Setting up the flap system on this radio has been a multi-week odyssey which has ended in…. success… but only after completely abandoning the built in flap system functionality!  Apparently, setting up the flap system to do a simple 3 position flap setting with elevator mix is completely beyond my ability using this radio if I try to use the built in flap system.  Even after a few exchanges on the phone and via email with Graupner support I could not reliably make the flaps worked as I wished.  Setting the end points of the flap function is apparently impossible, and simple reversing of the function and strange things like changes in speed through the travel of the flaps are a couple of the  challenges I faced when trying to use the flap system.  Take my advice and just leave that function alone.  Just assign the channel, set the endpoints and sub-trim to establish the motion you want.  Slow the servo with the servo speed function and then build your own mix for elevator or whatever else you need.

Programming the telemetry system on this radio is… just odd.  While most other functions are configured in a somewhat intuitive method… when you get into the telemetry system you are confronted with screens of text that look like they are something from a 1970s computer application… i.e. from the days when computers didn’t yet have a mouse attached or a graphical interface.  Gone are all the pretty colors, graphs and symbols.  Absent are any understandable directions… at least for the simple voltage monitor we wanted to use.  Even the list of “alarms” are just labeled with numbers.  What each number represents is cataloged where?  Imagine how easy it could be to program a telemetry system if you a full touch screen color screen with audio prompts available…  Oh, that describes the Graupner radio!!  Unfortunately what we get is text only…  Did the graphical interface team all quit mid-project?

The range of receivers available, reasonable pricing as I recall and apparently solid build quality… even the various ports and options available… All would give the impression of a high quality, easy to use, good value, complete RC system.  To bad that it seems this product never got “finished”… or at least that is how it seems.

We are going to continue to work with this system and just see how it goes… at least until or unless we run into actual RF issues, which I don’t expect.  Here’s hoping Graupner does some more development and sorts out the oddities in the user interface.  The potential is certainly there.

For my part, I think I’ll stick with my Spektrum DX18.  I think both it and the DX9 are great radios that do about anything you’d want and who’s interface is far superior to the Graupner… even without a touch or color screen!


Throttle lock/Kill Switch programming on the DX8

A couple years ago I was taxiing back toward the pits with one of my smaller gas powered planes and had stopped to observer another flyer doing a nice touch and go… My plane was sitting by my feet at a sedate idle during this distraction.  When I turned back, I returned my left hand to my radio and inadvertently slid the throttle stick to full!!  Luckily I was pointed at the pit chain link fence 6 feet away with no other obstructions… like people… so as I grabbed the stick and returned the throttle to idle the plane made a dash for the fence and quit as a result of the impact and the prop breaking into several pieces.  It did no real harm to anything except the prop and my pride… but it woke me up and from then on I have been much more attentive to my models while they are running.  When I am idleing, my thumb is hooked across the top of the throttle stick so that it cannot easily be moved upward.  As well, I now have a kill switch on every fuel powered airplane and it is always in the same position on the radio so I don’t have to hunt for it!  With gas planes I have a mechanism hooked into the ignition circuit that kills power to the ignition.  Depending on the type of engine and ignition system it may work a bit differently but each disables the ignition which kills a gas motor immediately.

With the advent of more electrics in my fleet this became even more problematic.  Electrics, once the battery is connected, should be considered to be “running” in all cases and therefore treated with the respect that would be due any idling engine.  Since you can forget the battery is plugged in at times, I try to be especially careful to restrain my electric powered aircraft whenever I’m not holding on to them and a battery is installed.  I have also setup a throttle cut switch that limits the throttle channel output to zero or as close as possible.  In some radios this is simpler than others.  In my Spektrum DX-8 there are two ways to accomplish this… maybe more… but I’ll show one of them here that I use most.  (I believe the 7s, 9 and 18 all do it similarly)

Note: You can do all of the following without the plane even being present and certainly don’t want to play with this with the plane powered up!  I highly recommend you test after you finish however with the plane well restrained or the prop removed.

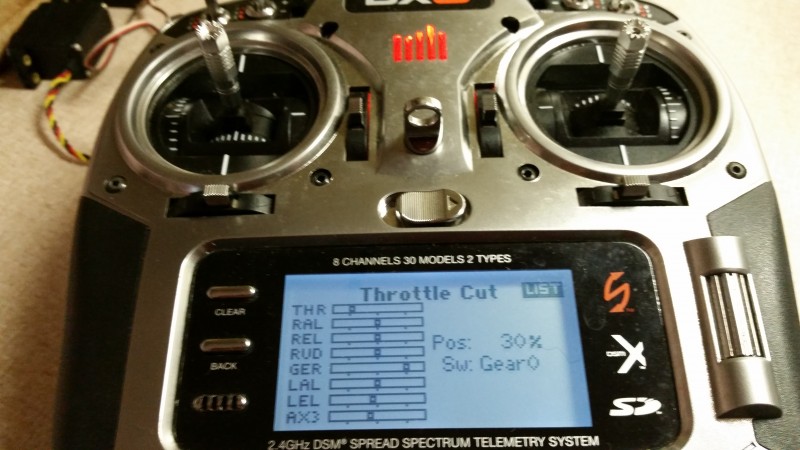
First, the DX-8 has a throttle cut option in the setup menu.  If you go into that menu and change the inhibit to a switch label (I tend to use Gear0 as I’ll show below) you get a screen that looks like this.

2015-10-29 20.03.02

You’ll notice that the switch is set to Gear0 (that’s a zero).  I use this setting as I tend to setup my radio so that starting point for all airplanes when I fuel up or attach a battery is with all switches pushed away from me.  It really doesn’t matter which way you do it.  I’ve worked with computers and electronics so long and the way I was taught logic you generally consider 0 to be off and 1 to be on…. I guess position 2 is “really on” in the case of a 3 position switch!

With my radio set this way the throttle is locked so it cannot inadvertently start up without moving both the throttle stick and moving the gear switch out of its starting “safe” position.  The other thing you may notice is that the position reads 30%.  I played with this and came upon this setting by trial and error.  I believe this has to be done because of two factors.  First, the designers created this for (I believe) primarily fuel powered aircraft where the stop/kill position is significantly different from the idle/standard starting position.  In an electric aircraft you generally don’t want an “idle” with the prop moving when you pull back to the lowest position on your stick.  You want a full stop.  Second, most speed controllers in my experience will look at the throttle setting on power up (as long as it’s at least somewhere near one end of travel or the other) to be the zero/stop point.  That’s fine until you combine with point 1.

So imagine you plug in the battery with the throttle 30% lower than “idle”… which is what the throttle position would be if you left that setting at zero and had the switch pushed forward/off when you plugged it in.  All seems fine… Your speed controller makes its little tunes and if you move the throttle stick nothing happens but your servos are energized (this may vary by manufacturer of the speed control).  Great, you are ready to taxi and you flip the switch to the armed/on position and immediately the prop spins to a “high idle” setting!!!  That’s not convenient, nor especially safe.  This is because with the kill switch in the forward/off position the throttle was at a point 30% or so below the idle point and when you plugged in the controller reset that to be “zero”.  By testing I have found 30% to be about the right point to avoid this issue.  Now the kill switch doesn’t really change the position of the throttle at all and acts more like a throttle hold then a cut.  Ideal for what we want when dealing with electrics.

There are other ways and other radios do it differently.  On my DX-18 which I fly more than anything else I use the F switch instead of gear because I use the gear for other things… like retractable gears!  But whichever switch you use, I suggest you keep it consistent.  This way your routine on each plane is the same at least as regards to a safe “startup” and also because occasionally you may want to hit it in a hurry and not having to think about which switch it is can make a big difference in response time.

I’ll try to post on a different method in the near future.  Hope this is helpful.  Fly safe!