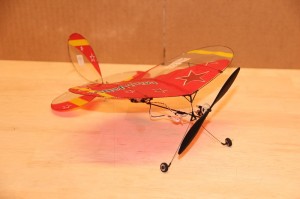
This is a picture of me with one of the oldest planes in my current fleet…. The Telemaster 40.

(I’ll add some basic stats here later….)
I built this airplane from a kit back around 2000 or 2001 and I recall telling folks it was a box of sticks with some loose suggestions about how to build an airplane! It wasn’t all that bad, but it wasn’t like the newer kits that have pictures for every step either. It was a rolled up set of plans with about 5 pages of double columns of fairly fine print for instructions. The plans are well drawn and the instructions about as clear as you can get but there were still many challenges along the way.
In any case, the results are a very light, great flying machine. Notice I didn’t necessarily say it was “easy flying” because I don’t think of the Telemaster as a great training machine. I’ve instructed for a few years and I would pick any number of the newer trainers over the Telemaster as a first airplane.
Flying wise, I’d say the Telemaster is great, but somewhat different than most planes. Maybe closer to the way a scale cub flies than most trainers. Getting the most out of this plane requires you to use rudder to avoid a lot of “skid” in the turns and the flying tail combined with the tail-dragger configuration forces the proper application of rudder and elevator to get smooth take offs and landings.
But don’t get the idea that this means it doesn’t fly well. It’s a blast to fly since it weighs in at something like 5.5 lbs with a Saito .82 for power (probably one of the few trainers of this size that truly would fly well with a standard bushing .40!). It floats down and lands so soft and easy that it’s hard to tell when it is actually on the ground. Throw in the flaps and low passes can last what seems like minutes as the plane almost hovers while remaining parallel to the ground. With the extra power of the Saito, takeoff rolls are optional with comments like “Gee, you almost rotated those wheels a full turn before you left the ground!” being common. Of course you can feed the power in easy and do a nice “pick up the tail and roll sedately down the runway” type takeoff once you get the hang of it. Touch and goes can be done similarly without the tail wheel ever making contact but the mains on the ground for 200′ or more… if that’s your preference!
Because of the sturdy and light construction, you can carry a drop box, strap on floats, maybe a camera, carry a glider aloft… whatever you like. I’ve done all these and a few others just because I can. Rolls can be slow to moderate… truly fast is not in the cards with the 6′ wingspan and small ailerons but you can add rudder to get a little quicker roll if needed. Stall turns and inverted flight are no problem, in spite of the dihedral and loops are no issue at all. The tail feathers are quite a way back there and the surfaces there are fairly large so rudder and elevator are both quite effective.
Assuming the ARFs are half as much fun, I would recommend a Telemaster to anyone interested in a versatile, fun to fly plane. It’s a step up, skill wise from most trainers but it’s worth the effort and will teach you some really good lessons about using the wing, what that left stick is for besides going faster (if your mode 2) and allow you to get into all sorts of interesting related things like flying on skis, floats or whatever.
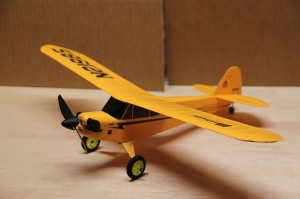
In case you were wondering, the “Wonder” color scheme is the second incarnation of this bird. It’s earlier “Italian Green and Red” color pattern which was a bit more traditional looking had seen better days so winter of 2012 I made a change and stripped the covering down to it’s mostly white base. I then recovered a few damaged areas and ended up with a basic white palette. Having a set of dies handy to make circles of various sizes with little effort and a bunch of colors of leftover covering spawned the idea and the newly re-named “Wonder” plane was re-born!
Now all the best puns are heard often. “I have a lot of bread tied up in this plane”, “It’s a wonderful flying plane”, “It’s a little slice of heaven”… You can imagine.