Throttle lock/Kill Switch programming on the DX8

A couple years ago I was taxiing back toward the pits with one of my smaller gas powered planes and had stopped to observer another flyer doing a nice touch and go… My plane was sitting by my feet at a sedate idle during this distraction.  When I turned back, I returned my left hand to my radio and inadvertently slid the throttle stick to full!!  Luckily I was pointed at the pit chain link fence 6 feet away with no other obstructions… like people… so as I grabbed the stick and returned the throttle to idle the plane made a dash for the fence and quit as a result of the impact and the prop breaking into several pieces.  It did no real harm to anything except the prop and my pride… but it woke me up and from then on I have been much more attentive to my models while they are running.  When I am idleing, my thumb is hooked across the top of the throttle stick so that it cannot easily be moved upward.  As well, I now have a kill switch on every fuel powered airplane and it is always in the same position on the radio so I don’t have to hunt for it!  With gas planes I have a mechanism hooked into the ignition circuit that kills power to the ignition.  Depending on the type of engine and ignition system it may work a bit differently but each disables the ignition which kills a gas motor immediately.

With the advent of more electrics in my fleet this became even more problematic.  Electrics, once the battery is connected, should be considered to be “running” in all cases and therefore treated with the respect that would be due any idling engine.  Since you can forget the battery is plugged in at times, I try to be especially careful to restrain my electric powered aircraft whenever I’m not holding on to them and a battery is installed.  I have also setup a throttle cut switch that limits the throttle channel output to zero or as close as possible.  In some radios this is simpler than others.  In my Spektrum DX-8 there are two ways to accomplish this… maybe more… but I’ll show one of them here that I use most.  (I believe the 7s, 9 and 18 all do it similarly)

Note: You can do all of the following without the plane even being present and certainly don’t want to play with this with the plane powered up!  I highly recommend you test after you finish however with the plane well restrained or the prop removed.

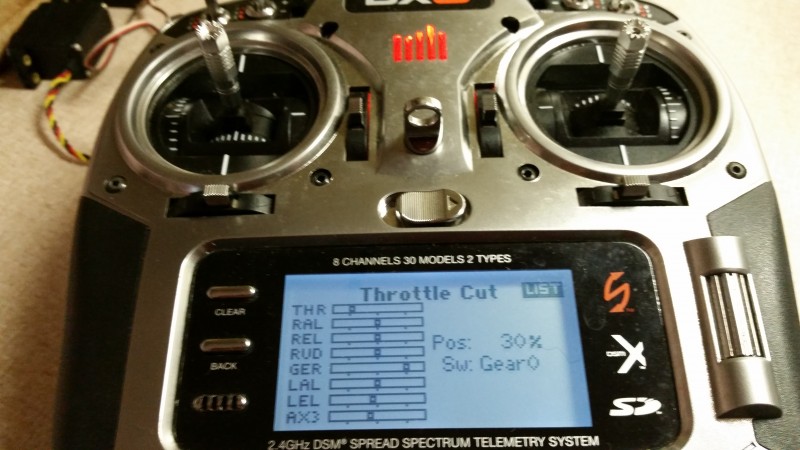
First, the DX-8 has a throttle cut option in the setup menu.  If you go into that menu and change the inhibit to a switch label (I tend to use Gear0 as I’ll show below) you get a screen that looks like this.

2015-10-29 20.03.02

You’ll notice that the switch is set to Gear0 (that’s a zero).  I use this setting as I tend to setup my radio so that starting point for all airplanes when I fuel up or attach a battery is with all switches pushed away from me.  It really doesn’t matter which way you do it.  I’ve worked with computers and electronics so long and the way I was taught logic you generally consider 0 to be off and 1 to be on…. I guess position 2 is “really on” in the case of a 3 position switch!

With my radio set this way the throttle is locked so it cannot inadvertently start up without moving both the throttle stick and moving the gear switch out of its starting “safe” position.  The other thing you may notice is that the position reads 30%.  I played with this and came upon this setting by trial and error.  I believe this has to be done because of two factors.  First, the designers created this for (I believe) primarily fuel powered aircraft where the stop/kill position is significantly different from the idle/standard starting position.  In an electric aircraft you generally don’t want an “idle” with the prop moving when you pull back to the lowest position on your stick.  You want a full stop.  Second, most speed controllers in my experience will look at the throttle setting on power up (as long as it’s at least somewhere near one end of travel or the other) to be the zero/stop point.  That’s fine until you combine with point 1.

So imagine you plug in the battery with the throttle 30% lower than “idle”… which is what the throttle position would be if you left that setting at zero and had the switch pushed forward/off when you plugged it in.  All seems fine… Your speed controller makes its little tunes and if you move the throttle stick nothing happens but your servos are energized (this may vary by manufacturer of the speed control).  Great, you are ready to taxi and you flip the switch to the armed/on position and immediately the prop spins to a “high idle” setting!!!  That’s not convenient, nor especially safe.  This is because with the kill switch in the forward/off position the throttle was at a point 30% or so below the idle point and when you plugged in the controller reset that to be “zero”.  By testing I have found 30% to be about the right point to avoid this issue.  Now the kill switch doesn’t really change the position of the throttle at all and acts more like a throttle hold then a cut.  Ideal for what we want when dealing with electrics.

There are other ways and other radios do it differently.  On my DX-18 which I fly more than anything else I use the F switch instead of gear because I use the gear for other things… like retractable gears!  But whichever switch you use, I suggest you keep it consistent.  This way your routine on each plane is the same at least as regards to a safe “startup” and also because occasionally you may want to hit it in a hurry and not having to think about which switch it is can make a big difference in response time.

I’ll try to post on a different method in the near future.  Hope this is helpful.  Fly safe!


Updates… Carbon Cub motor, AR9000 repair

In an earlier post I related my misfortune with my Carbon Cub motor having failed.  Another covered the issue of channel cross interference in a Spektrum receiver.  Well I’m happy to report that both issues are now resolved.

The Carbon Cub motor was replaced with no charge by Horizon Hobby.  In fact it came back in something like 4 days which allowed me to get a test flight in at the club field before slapping the floats on and making a trip back down to Lake Lemon near Bloomington, IN for the fall float fly.  Once again the Cub performed great.

I would still recommend the Carbon Cub, but I would certainly advise keeping a close eye on the BL52 motor from E-flite.  I love the Power 60 on my Extra 260 but this motor is not that same quality in my opinion.

On the receiver, once again Horizon finally came through, and not only replaced but upgraded me to a new AR9020 DSMX receiver.  I was a tad disappointed the tech still couldn’t recreate the issue after I sent them a video and exact transmitter settings that allowed me to recreate the issue using both my Spectrum radios!  The important thing I suppose is they did right by the customer and that seems to be the way they tend to  operate which is not always the case with all businesses.  Kudos to Horizon on that front.

It’s getting to be late in the flying season here so expect to see some building projects, indoor/micro electrics and similar discussion soon.


Carbon Cub – Motor problems!!

I bought my cub back in late 2014 and started flying it more as the weather got warmer here in Indiana.  It has become my go to flyer and I probably have 100 flights or so on it by now. Unfortunately, yesterday it got put out of action by motor problems.

There have been 5 of the Carbon Cubs in the local club.

  • Cub #1 was sold as the pilot and the plane just didn’t get along… he could never get his to fly the way he wanted.  Just not his style I suppose.  I saw it flying at an event at another club this last weekend.  Doing great on floats and seeming to have no issues as all.
  • Cub #2 is still in action but doesn’t get much flying as the pilot has other aircraft he flies more often.  It had a motor issue within the first 20 flights or so and Horizon took care of it.  The new motor has only a few flights on it since being replaced.
  • Cub #3 crashed within the first dozen flights or so with smoke issuing from it mid-flight and a burned up ESC and Motor apparent upon inspection after the crash.  The airplane was heavily damaged in the crash.  That motor was dragging badly and apparently drew so much current it fried the ESC.  Owner of Cub #2 heard the engine grinding just before Cub #3 malfunctioned but didn’t even get time to speak up before the smoke started and it was all over.
  • Cub #4 had what appears to have been an ESC issue but I have not heard exactly what occurred.  I just know it crashed and is out of service for the time being.  It was flown pretty hard… this guy is a 3D pilot and he flew it that way.  Nothing wrong with that but it may have played a part in its demise.
  • Cub #5 is mine.  It has been flown a lot, but well treated and nothing happened recently that I would have expected to cause motor issues.  I have not flown it exceptionally hard, had a nose impact or done much of anything unusual.  Flew on floats a few days before, in heavy wind a day before that… Last flight was a long climb at mid-throttle using the wind to climb to near 1500′ AGL then a lazy dive punctuated with some spins down to about 100 feet.  Probably not as hard on it as my glider tows to 1000′ or so that I’ve done in the past.  When I pulled out to level and throttled up a bit I could hear the grinding and tried to limit throttle usage as I made a quick landing.  I can see that several  magnets have moved toward the rear of the motor and there is some gray residue inside the battery compartment where the airflow carried the shavings.  I will clean that up and hope for the best regarding the rest of the electronics that are in the path of the airflow!

That makes 3 (maybe 4) of the 5 local Carbon Z Cubs that have had a similar issue.  Horizon took excellent care of the owner of Cub 2 with a new motor sent out quickly.  Cub 3 was replaced after the owner sent it back in for diagnosis.  Not sure about the other one.  My motor is on the way back to them now.  I’m hoping this isn’t a representative sampling of the failure rates for these motors.  I have read about a few folks on the discussion groups having these same issues.  If Horizon takes care of me the way they have these other guys, I guess I would still recommend the plane to others but I will definitely tell folks to keep an eye on the motor.  A failure at the wrong time could certainly ruin your day!

I’ll update when I hear back from Horizon.  Hoping for a quick turn around… it’s less than 2 week’s ’till the next float fly!!

ElectroDynamics Multi-Connex… The answer for the Carbon-Z T-28 and many others.

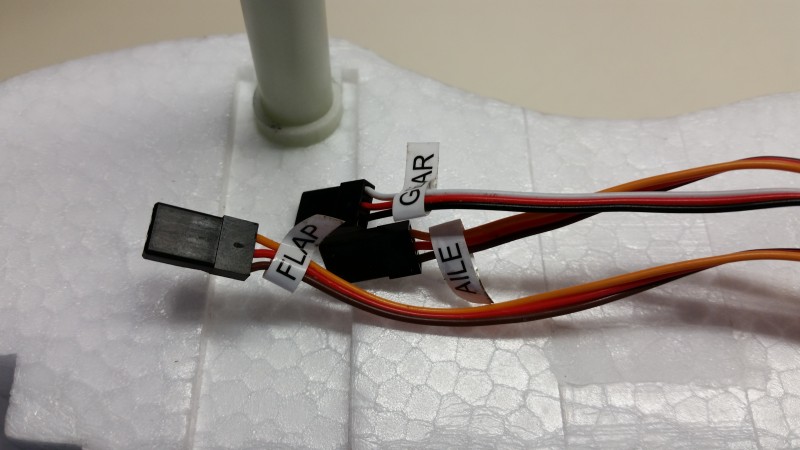
After a few trips to the field with my buddy Kelly and his new Carbon Z T-28 we quickly became aware that assembly was a bit painful because of the number of servo wires that must be connected when attaching the wing and the shortness of the wires supplied in the T-28.  The length of the wires can be easily fixed but just connecting the 6 wires correctly and reliably time after time seemed an unnecessary annoyance to get to what the Carbon-Z does great… fly!

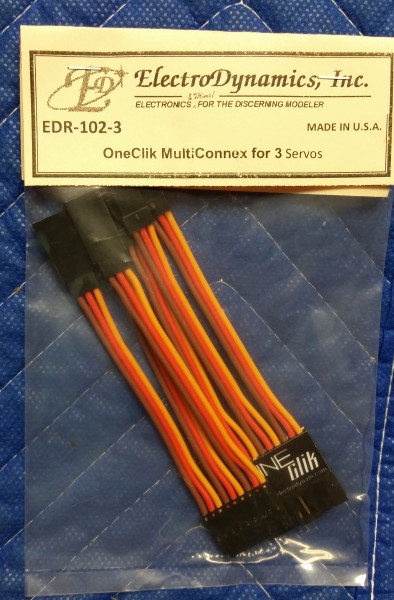
Another club member pointed out some multi-pin connectors often used in jets and after some quick searches we located the ElectroDynamics OneClik Multi-Connex.  Made for 2,3,4 and 5 servos connections these seemed to fit the bill so we placed an order.  Very shortly (even though we chose the most economical shipping method) we had two of these packs on the bench.

2015-09-24 19.15.43

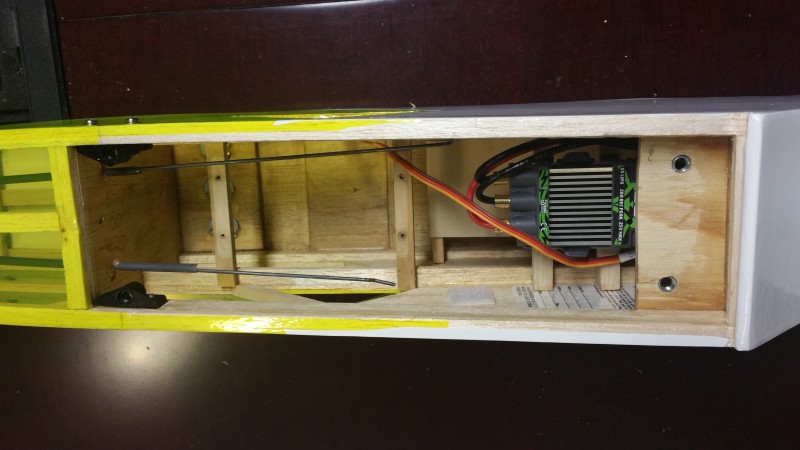
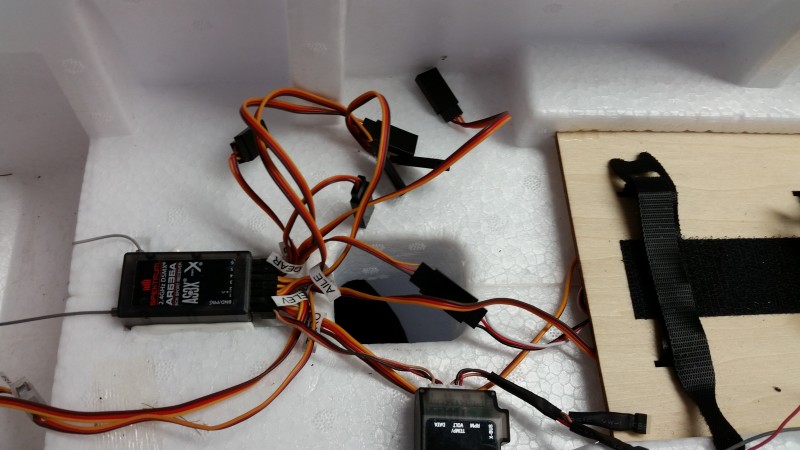
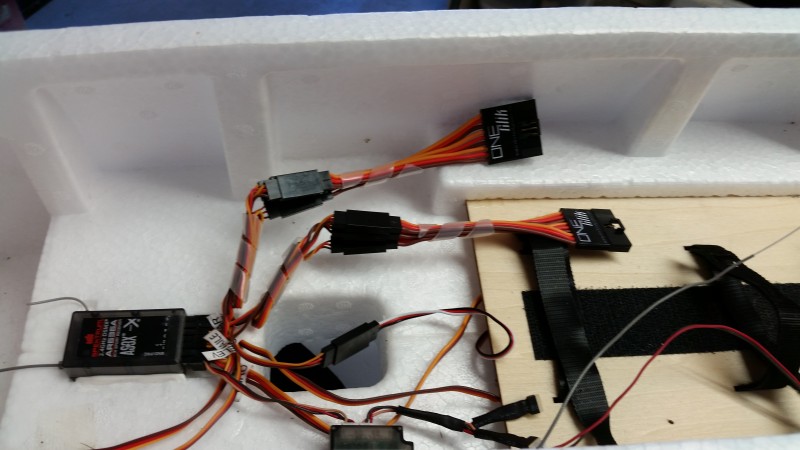
Here’s the interior of the T-28 before we applied the OneClik solution.

2015-09-25 10.46.05

and likewise here is the wing root before the installation.2015-09-25 10.33.54

Here is the wing root after just sorting out the wires and plugging them in (in alphabetical order just for ease of remembering!) to the new One-Clik wiring harness.

2015-09-25 10.36.37

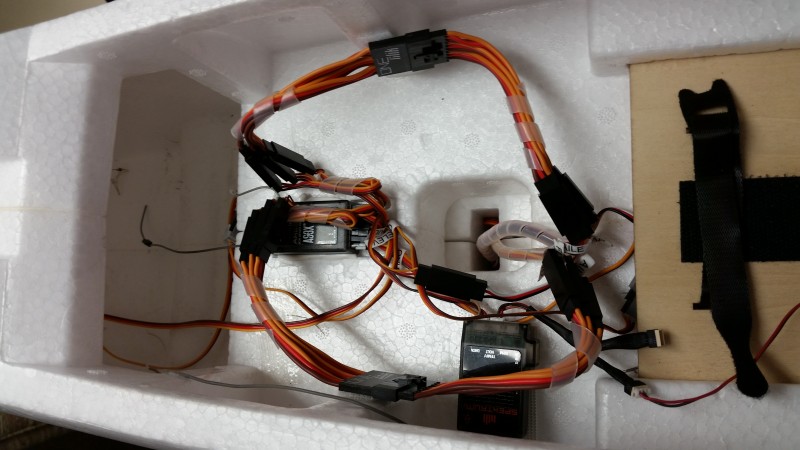
Similarly the interior of the fuselage (with a little wire combing to really clean things up as well).

2015-09-25 10.52.16

I applied a bit of combing to the wing wires as well and then with only two connectors to feed through the bottom of the fuselage it is suddenly very easy to assemble the T-28!  A  bit of Velcro (just a 1/4″ square of so on the connector and a small strip on the sidewalls) makes a nice “keeper” for the new connectors and completes the transformation!

2015-09-25 11.08.30

Admittedly, it helps that the T28 uses all “Y” connectors so there is no right or wrong for left or right sides so you can’t connect it wrong but for those that don’t… at least you’d only have to label right and left!!

The product has a nice snug fit, a great positive click connection and appears to be of a very high quality.  The pricing seems very reasonable and my only regret is that I didn’t order some of these for my Mustang!  Oh well, even with shipping these seem to be a bargain.

Since installing these, we have made a couple trips to the field and unlike previous trips, the setup time is less and we have not had a miss-connect (pretty much impossible now).  In the past this was a tedious task which has occasionally resulted in having to pull the wing and find an errant wire.  I think that is likely in the past.

This system will likely become one of my go to upgrades for all future multi-servo wing aircraft.  The ease of use and added security of the connection is a huge plus in my opinion and I highly recommend you give these a shot especially in those larger and more complicated craft like warbirds and the like with flaps, lights, and etc…

Battery Energy Sensor…

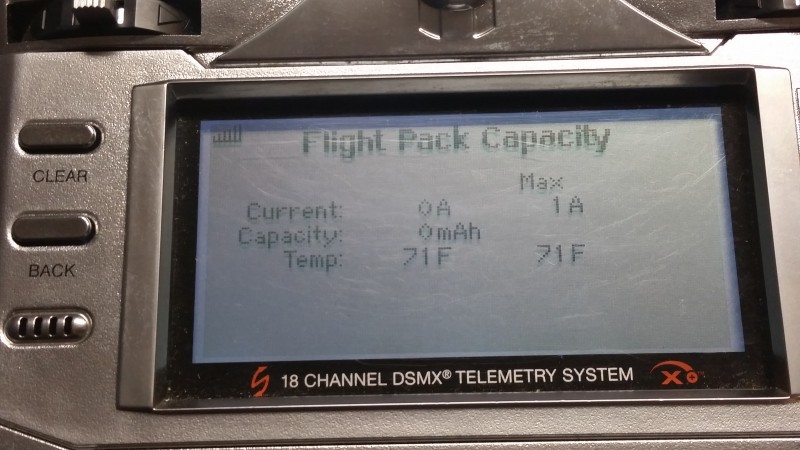
I recently got my hands on what seemed to be one of the first batch of the new Spektrum SPMA9605… known as the Flight Pack Battery Energy Sensor.  Where the earlier options had been a current sensor and a voltage sensing lead, the new sensor promised to not only read instantaneous current, but to keep accumulated current draw and pack temperature as well.

I installed it into my AeroWorks Extra 260 (60-90 size) powered by a Power 60 E-Flite motor by the expedient method of simply plugging in the two EC-3s and the xbus connector from the earlier installed current sensor.  Upon testing I was dismayed to find I could see no option to display the new information…  Only after fussing with it at the field for 30 minutes or so did I recall that I had declined to upgrade the software in my DX-18 months before, seeing no need for any of the fixes that centered mostly on helis and sail planes.  I especially did not want to rebind all of my aircraft since every previous version had required that.  The latest versions promise that it might not be necessary but I had not been interested in testing that assertion.

A couple days later (tonight in fact) I downloaded the latest version and after backing up the DX-18s memories… placed the updated file on the memory card and hit the proper keys…  After a couple of minutes the radio finished the process and miraculously upon power up, I had full control of the little Extra!

Even better, I now had the option to include the battery pack sensor in my display and set thresholds and alarms.  I set up appropriate levels and tested the current readings and all looked promising.  Since my built in temperature sensor was already in use monitoring the motor, I wanted to take advantage of the temperature capability of the new sensor.

Now, I became confused as the port labeled temperature on the side of the sensor was clearly 4 pins and the only temperature probe I had available was clearly a three wire connector… and actually only used two of them!  I chatted with a supposed expert on the Horizon web site and they had not physically seen the sensor and could not help, nor did the documentation that came with the unit so much as mention the temperature port.

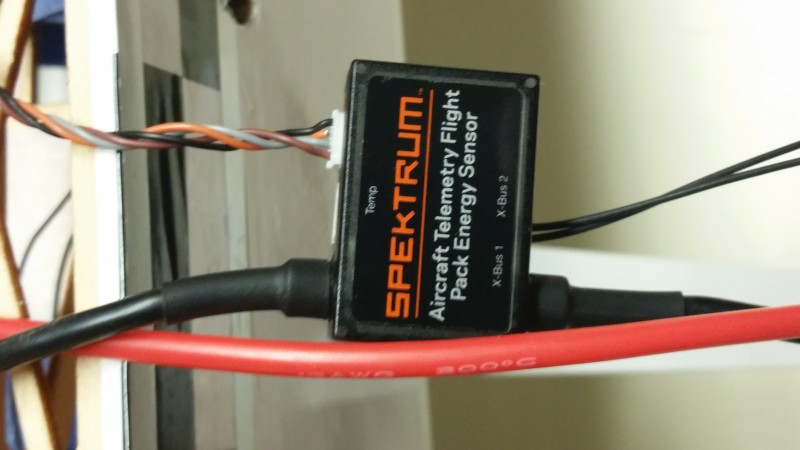
I had nearly given up hope of finding an answer when I finally noticed the top label of the sensor was (at least apparently) applied upside down…  Where the label says X-Bus 1 and X-Bus 2 there is but one port and it is 3 pins…. X-Bus is a 4 pin connection.  On the opposite side is a label Temp and on that side are dual 4 pin ports…  Clearly these are the two X-Bus ports and the one 3 pin is the temp sensor!!  I had already plugged in the single X-Bus port into one of the two ports on the side labeled temp it could only fit on that side.  I went to look at pictures and realized that all must be this way!  Someone should tell the folks on the assembly line… 🙂

Here is a picture showing the labeling and the correct wiring.

2015-09-09 21.04.58

Turning in the radio after this revelation shows the following…

2015-09-09 21.06.20I now look forward to actually flying and testing the capacity measurement capability and am excited that I will no longer endanger my batteries by over discharging them.  The closest I could do before was to set a low voltage limit which often meant I would get a warning that would sound at anywhere from 5-35% of capacity remaining depending on throttle setting at the time.  I have great hopes that with this new capability I can set the alarm for a calculated 80% of battery capacity used and expect a much more accurate accounting.

I will post more as I get time to fly and test this capability.

T28 Carbon Z… Not mine but I got to fly it!

A couple weeks ago I got a call from my flying buddy, Kelly.  It went something like this.

“If I were to buy this T28 Carbon Z… could you store it for me?  Oh, and would you have a battery or two for me to try?  Oh, and could you program my DX-8 to work with this thing?… Not that I’m necessarily going to buy it!”  Right….

Of course I said, “Yes, yes, yes… and bring it over tonight and we’ll get it setup”.  As you can guess, he did and we did!  Here’s what we’ve learned after approximately a dozen flights.

First of all, we took the airplane out with a completely stock setup and tried a few flights with a couple 6S 4000mah battery and while the plane flew nice… it ate batteries at a prodigious rate!  We were lucky to get a 6 minute flight and the batteries were down to dangerously low levels to even get that much.  Horizon recommends 3500-5000mah batteries and claims 8 minutes flight times for a 5000.  We have since found that the 8 minute flight time on a 5000mah is a reasonable estimate however I can’t imagine anyone being happy with a 3500 pack in the airplane so don’t waste time or money on the smaller packs… just go straight to the 5000s… or maybe slightly larger!  Kelly got a few flights today with some new 6S 5300 Glaciers and was much happier with the 7-8 minute flights with 30% or so left on the packs!

The plane flies extremely smoothly with great stability and recent forays into the flaps down/low speed arena kept Kelly smiling all afternoon…  Also, flying at slower speeds helps extend the flight times!  Win/Win!

photo

So here’s a few quick tweaks we’ve applied to this point.

First, since we always try to set up a throttle safety/kill switch, that became the first order of business.  In order to get things to work correctly, the throttle cut had to be set to a value of 30…  a bit odd but it works great!  If you leave the default value and power up the airplane with the throttle cut enabled you get a surprise when you turn it off.  The prop starts to turn slowly… sort of a nice low idle!  Since plugging in the battery with the throttle kill set to off/run mode sort of misses the whole point, I recommend you set the kill to 30!  Of course this may vary with other models or types of radios.

Next, we needed to reverse the gear channel to get the switch working the directly we wanted on this bird.  That may sound like just a personal choice but I mention it because it may seem a bit confusing if you’ve not been lucky enough to mess with electric retracts before.  Since electric retracts tend to just stop when meeting a heavy resistance, you may not realize which position the switch is in until you take the load off the gear and flip the switch back and forth a couple times.  Not a big deal but take the time to play with the gear a bit… and who could resist that anyway… to see how this works and make sure all is happening the way you expect.

Third, in order to maximize flight time without endangering the batteries, we installed a telemetry module and attached the voltage sensing lead to the speed control connection.  You can do this a couple ways.  There are harnesses available from Horizon you can insert in line between the battery and speed control or you can simply strip back a little insulation on the speed control wires and tack solder them in… just be sure to protect the exposed wiring when you are done so no unexpected sparking and smoke is likely to happen!  The telemetry module runs fine off of the included receiver, which is great.  We set the warning tone to kick in at 20.5V…  Under load this seems to equate to about 30% battery left when it starts to beep.  This gives you very reasonable amount of flight time left over to make that perfect approach.

So, up to now, the T28 Carbon Z seems to be a hit…. as long as you stay with a large pack!  My limited flight testing indicates it flies… well, like a T28!  I prefer the Carbon-Z Cub but the T28 is the best AS3X equipped plane I’ve flown.  I’d love to try it without to compare.  It doesn’t have the power to weight ratio that the Cub does,  but it can climb quickly on the wing and do nice scale maneuvers.  It also looks beautiful in the air.

It certainly seems Horizon may have another great aircraft in the lineup.  It may seem a bit pricey… but you get retracts, a nicely detailed cockpit and a great looking and flying aircraft for the price with no real deficiencies that I’ve found…  right out of the box.  That is what an ARF should be.


What does Geotex runway have to do with a float fly??

So normally a Geo textile runway has little to do with a trip to attend the twice-annual float fly at Lake Lemon, just North of Bloomington, IN.  But in this case, the outing was dual purpose.  Let me explain.

There has been an ongoing discussion at my “home” RC club about the possibility of putting down a Geotex runway at our field.  As usual with any group of humans, opinions vary widely on the topic from complacent acceptance of whatever is under the wheels… to those who think laying down some fabric on a small portion of the runway is going to destroy civilization as we know it… to those who think it would be a great addition to the field and are anxiously awaiting the installation!  I will admit to being a proponent of giving it a try but I’m not predicting it will be the ultimate solution for everyone that some seem to be hoping for.

“So how does this relate to a float fly?” you are probably asking yourself at this point.  The answer is that the folks that are running the float fly are members of the Monroe County RC Club and they have had a Geotex runway for 2 years now.  Since I was definitely planning on attending the float fly anyway and wanted to get a first person look at the surface I sent out an email to the MCRCC officers and explained that I intended to come down to the float fly and wondered if they would mind if I and a few buddies stopped by the MCRCC club field and did a little examination and flying from their runway.  I quickly got a couple of very welcoming emails giving permission for our visit so I gathered up some interested fellow RCers and planned our trip.

Surprisingly 2 of the party of 5 didn’t even plan on flying at the float fly!  They just wanted to see the runway and I guess figured watching us crazy people flying RC planes off of water was just a bonus!

20150607_105450

Here’s the visitors…. from L to R.  Martin Hooks, George Horning, Corey Lucas, Steve Woods and I was behind the camera.

So here is a quick rundown of the runway…

The installed fabric sits at a level just slightly below the grass which resulted in a very smooth roll from the grass to and from the material.  The Geotex runway at MCRCC is about 29′ x 150′ which was very adequate for small electrics and glow up to 40-60 size based on our trial flights.  We flew the micro T28 from ParkZone, it’s bigger (42″) brother, the FlyZone Beaver of a similar size, a glow powered Revolver and finally did taxi only tests with my 50cc powered Wildhare Slick.  It was not ready for flight that day but taxi tests from just rolling to tail off the ground running on the mains was sufficient for what we had in mind.  The observations of the group were mostly positive.  The runway seemed to be a bit bumpy for the smaller aircraft (we were later told it had not been rolled yet this year but can be, and probably will be soon).  My feeling is that I could wish for something a bit longer and maybe a bit wider to allow for “cheating” into the wind when it is inevitably not aligned with the runway… but it was adequate as is.  Otherwise, other than getting used to taxiing on a “smooth” surface, it was especially nice for the smaller aircraft.  Aircraft like the micro T28s that just can’t take off from our grass runway at all, and the larger T28 that with stock gear is more likely to flip over than roll out on landing at our field, were certainly in their element on this surface.

The most informative part of the visit though was when we moved onto the float fly site and met and discussed the runway material with several MCRCC members.  I have been a bit skeptical that we might need to do some grading to lay down our own Geo textile runway but they did little or no such work at MCRCC.  With only roundup and “scalp” level mowing they have had no issues with laying the material down over what they had and have had no issue with it coming up, erosion, wind or whatever.  Apparently even when overrun with flood waters a couple feet deep the material stayed put with just the standard staples holding it in place!  They also related that they had been through a very contentious process and that the vote to lay down the material had passed by a mere two votes!  One gentleman was kind enough to relate that he had been a very vocal opponent of the project but was now a convert and was very happy that he had stood up at a later meeting to say that he was wrong and that he now enjoys the Geotext runway as much as anyone.  We have some very strongly opposed folks at our club as well but after visiting with these folks and bringing up all of the objections I had heard from our own members, I was left with the feeling that none of those concerns are really valid based on the experience of these folks.

According to the folks present, the runway is now a big hit with almost every member with some of the (previously) most adamantly opposed now enjoying the benefits.  The visit helped allay my own fears that we might be wasting money on something that would need a lot of maintenance or might not work well over our (perhaps rougher) surface.  It is certainly not a done deal that we will move forward with the project, but I feel pretty good that the cost to do it this way is low and even a failure will just result in a need to roll it all up and reseed… If we are successful, it seems like we might even attract more of the small electrics/park flyer crowd and open up some new options for our members including more retractable gear aircraft.  There was a lot more conversation about things like how to repair damage, rolling, re-inserting staples that push up… etc… but the general tone was that they had found that most of these issues are easily handled.

Moving on to the float fly, it was fairly breezy with some swirling air making the flying a little more “bouncy” but really not bad.  I suspect the wind direction (quartering from behind us as we stood looking out at the lake) worked to our advantage since the large hill behind us did much to block the wind.  I flew the Carbon Cub through 4 batteries with nothing untoward occurring and did some prop hanging and aerobatics to the applause of some nearby “party barge” occupants that were hanging about a hundred yards or so off shore.  Landing with the wind gusting and waves to play with was really fun.  With the reliability of the electric power plant and the nimbleness of my AS3Xless Carbon Cub allowing for some sweet splash and goes, spot landings and long wave-top hopping skims it was hard to wipe the grin off my face during and after each flight.  I also flew the Flyzone Tidewater which handled the waves and taxi duties great but was a handful in the air with a continuing tendency to dive as throttle is applied.  I later figured out the engine pod was leaning forward with increased throttle and did some repairs to help reinforce it.  I have since flown it a bit more off grass and it greatly improved and so I am looking forward to a future float fly to give it some more air time.

Corey flew his Beaver on at least 2 occasions and Steve was able to get a good flight in on his cub after some early issues were resolved.  Martin flew his Quad a bit and captured this image showing my Carbon Cub on a landing approach.

Screenshot_2015-06-07-18-32-14

The Carbon Cub on a nice smooth approach for landing at Lake Lemon…

I’m pretty sure everyone enjoyed the day immensely and I for one am looking forward to (fingers crossed) a successful Geo Textile runway install AND another visit to the fall edition of the MCRCC float fly event at Lake Lemon.  Thanks so much to the officers and members of Monroe County RC Club who allowed us to visit their field and participate in their event.

Packs, Chargers, Power Supplies and more – Generators

After realizing that my budget generator would not run my new power supplies, I did some checking and found that this was a common issue with generators that did not include an inverter.  Without this feature, the generator does not create a proper sine wave AC output and some devices will not tolerate the “dirty” power thus created.  Of course Inverter generators are MUCH more expensive but also typically come with some very advantageous features as well… At least most do.

The things I thought were most important to consider aside from the clean power output included weight, noise limiting, some additional power (wattage), quality and of course price!  I quickly decided I wanted something in the 1500+ watt range, under 50 pounds if possible, and as good quality as I could get at the best price.

This quickly got me to a short list including Honda, Yamaha, Champion and a few others including a unit by Westinghouse.  The Honda and Yamaha seemed to be the real leaders among those who use these a lot but they are pricey as well.  If the extra money was the only way to get there, I’m willing but I won’t go there without good reason so I did some further comparison.  It also helped that one of the local club members has a Honda that I was able to borrow and use for a couple weeks.  In the end I took a chance on the Westinghouse for the following reasons.

While the Honda worked wonderfully, was quiet and is reportedly very reliable… I didn’t see enough positive difference to negate the $430 price delta between this and my eventual choice.  Similarly, the Yamaha was eliminated for the same reason.  The Champion, when I saw it at a local store, was a bit larger and heavier than I wanted and there were some reports, including some videos available on the web that claimed it was a significantly noisier than the Honda or Yamaha.  I’ve been around enough generators that I can attest to the fact that the power available from your generator can make you very popular at the field… but the noise level it creates can even more quickly make you a social pariah… relegated to the far reaches of the field.  I added a last minute addition to the possibilities when I saw that the local Harbor Freight offered a unit half the price of the Honda but quickly eliminated it when I saw it was listed as 20lbs heavier as well.  I can’t fly my airplanes from my bed with a thrown-out back and I don’t want to waste a bunch more space on a cart or other method to make it easier to move about.

In the end I chose the Westinghouse.  At 60% of the price but almost exactly the same weight and with reportedly similar sound levels it checked all the boxes.  1800W continuous/ 2200W peak power output, ~40lb, economy mode, low oil protection, etc…  I also appreciate the fact that while I realize that the Westinghouse name on the front is not indicative of the company that I recall from my youth… the engineering team behind this unit is located in Wisconsin and there are few opportunities in this hobby to support “locally” designed if not built products.  So here’s my experience with the Westinghouse WH2000iXLT.

First and foremost it does exactly what I purchased it to do.  My power supplies run with no issue behind the Westinghouse.  Further, it has started within 2 pulls or less every time so far.  In a side by side test, the difference in sound between the Westinghouse and my friend’s Honda is not discernible.  Some claimed the Westinghouse was louder and others said they could not tell a difference.  With the econo mode off on both units so that they ran at full RPM, I thought the Westinghouse was louder as well, though it was slight.  The only drawbacks I’ve seen so far are that both the oil and gas fill seems to be a bit more difficult than they need to be.  The oil fill is hidden under a hatch and pretty much requires a small extension spigot that comes with the generator.  The gas cap is smallish and the opening underneath even smaller so that it seemed difficult on first fill to get gas into the unit without slopping it all over the case but with the long run time between gas fills, I don’t expect to do it frequently.  Still it would be nice if it were easier.  Both these “complaints” are a bit nit picky as they aren’t going to be every day issues for me but I wanted to mention them for those who might consider this unit.

Overall I am very happy with the Westinghouse so far.  I’ve used it on 4 or 5 trips to the field so far and it is performing better than I expected and pretty much as advertised.  It’s light enough for me to move around easily, quiet and easily cranks out the power I need with quite a bit to spare… or share!  Barring problems, I am very please with the Westinghouse unit and even happier to have the extra $400 still in my wallet that I would have otherwise spent on the more expensive units.  I’m not normally very price conscious when it comes to my hobby gear as I enjoy a really good quality product and would rather pay extra for high quality than risk being disappointed but I have to say, so far, this is one bargain that seems to have come with no real drawbacks.  A win-win if ever I’ve seen one.

Here is a link to the Westinghouse on Amazon.  Check it out for yourself.

Packs, Chargers, Power Supplies and more – Power Supplies

With the FMA PL6  chosen as the charger I ran right into the realization that I could never use the full capability without some increased power supply capacity…  My standard rig at the field was a low end, unlabeled supply that I got surplus at a hamfest.  It had never failed to deliver but I also don’t think it was designed for more than about 20A at ~12-13VDC.  In the shop I have a bit better solution where I have a 52A 12-15 VDC supply available.

However…  there is a limit on the charger in that the input side of the charger can only accept 40A maximum.  That translates to a max of ~500W of charging power on 12VDC.  In order to get near the full 1000W you would need something closer to 25VDC at 40A.  Of course no charger is fully 100% efficient so the real numbers are 15% or so less but the basic idea holds.  So what am I to do?  My first thought was to start hauling my 52A bench supply to the field but that has two drawbacks.  One, is I would be limited to the 12V max of something less than 500W.  Not terrible, but having the max power available at the field could be even more important that back in the shop where I have (figuratively speaking) all day to charge batteries.  So, off in search of a way to get 25V or so at 40A.

First, I started looking for commercially available, purpose built supplies to do the job and quickly realized that such supplies are both unusual and very expensive!  I really didn’t want to spend 2-3 times as much on the power supply as I did on the charger.  Keep looking… and then I happened to come across high amperage 12V supplies for what I thought were very reasonable prices.  $60 each.  They were converted from computer (Dell server) power supplies and could supply 57A at about 12-13V.  Ok, that’s much more reasonable… maybe I could just use one of those and get along with slightly less than 500W of charge power… at least for now.  But then I recalled I had seen information mentioning using two identical supplies in series to get twice the voltage… Now we’re talking!!

Based on that vague remembrance I bought two of these supplies.  Both together were cheaper than I had paid for the bench supply a few years ago and each was more capable.  After a modicum of research I started experimenting and found that I could get a good working 25V supply at 57A by wiring the two supplies in series.  My first attempt resulted in one of the supplies shutting down… but with a little more research I found that by isolating the ground I could avoid the second supply from seeing a short when both were plugged into the same AC source.

I believe the power supplies likely include bonding the DC output ground terminal to the AC ground.  This means that when the two supplies are plugged into a common outlet and are sharing the same AC ground they are also sharing a common DC ground.  The result is that when the positive lead of supply A is plugged into the negative side of supply B… it is essentially creating a dead short.  Luckily, these supplies are very sophisticated and include the ability to clamp down the output in a case such as this so no damage was done.

Once the grounds were isolated from one another the supplies powered up and supplied a nice steady 25VDC.  I created a carrying case from a Styrofoam cooler and built a power panel in order to have a single 24V output as well as the availability of either 12VDC output if desired.  It is well protected in the cooler (which opens up when in use for better cooling) both from the elements as well as vibration and “bumping” around in the trailer.  I’ll update this post with a picture or two in the next couple days.

This whole rig worked great on my bench, so I took it to the field and after 3 flights on the CZ Cub decided to do a nice 1 hour parallel charge.  I fired up my low cost 900W generator, plugged in my new power supplies and… nothing!!  Further testing back at the shop confirmed that the whole rig worked but just not with my generator.  I’ll go into that in the next post on the subject detailing my search for a new generator.

Packs, Chargers, Power Supplies and more – Chargers

With my LiPo battery needs recently moving up into the 6S 3-5000mah range I quickly came to the conclusion that my charger was not going to be up to the task.  Not that it wouldn’t work.  I’ve already been charging some of the new 6S batteries with my existing multi-channel charger.  It works just fine, it is just very slow.  I don’t like to charge without being in a position to keep an eye and having it take 2 hours to charge 1-4 batteries made that a painful experience.  I also don’t like to have to keep running to my charger and hooking up another battery every time I fly in order to keep battery packs ready to go for the next flight while I’m out at the field.  That can work if you buy enough batteries and keep your charger running, but having to keep track of which channel is at what point in the charge cycle and continuously feeding the charger just takes away from my enjoyment while at the flying field. Finally, I don’t like the idea of just buying a bunch of batteries to avoid charging at the field as I fully expect my expansion into electrics to just continue and they don’t exactly give these big battery packs away!

Purchasing the right charger with the capability to charge these larger cells quickly, especially if I could be charging multiples, would be great.  So ideally, I’m looking for a way to charge 2 or more 5000mah 6S packs in 60 minutes or less… with 30 minutes being the target.  Let’s look at what it will take to do that.

First, you need to understand that chargers often advertise that they can charge up to a (for instance) 6S LiPo at rates up to 8A per channel.  Unfortunately they often tend to hide somewhere further down in the fine print that each individual charging channel is only capable of charging at a maximum rate of up to 50W.  Those specifications are not mutually exclusive.  The charger can in fact charge at a rate of up to 8A and can handle 6S LiPo cells… just not a 6S LiPo at 8A… What does that mean for you?  It’s really quite simple.  A 6S pack tops out at about 25V.  Since Watts equal Volts times Amps, that means that 2A is about the maximum charge rate you can expect to charge a 6S pack at with this 50W charger… 2Ax25V=50W…  In order to charge at the advertised rate of 8A, the battery being charged would have to max out at just over 6V… 8Ax6V=48W.  So with a charge rate around 2A, for the 5000mah pack the best I can hope for is a charge time of 2.5 hours.  Just to get to a 1C rate of 5A for a 6S 5000mah LiPo would require a 125W capable charger.  For my desired 2C/10A charge rate I would need a 250W charger.  To do two at once I’d need a 2 channel charger with 250W per channel.

So with those numbers in mind I want a charger with at least 250W per channel and I wouldn’t be upset if I could charge at a 4C rate which would require 500W of power!  Occasionally, I’d like to be able to get a pack ready to fly in short order if I happen to have just flown my last battery and need arises.  I don’t recommend doing it often, but most of the packs I am buying these days allow for charging at up to 5C rates!  Another “nice to have” would be the ability to measure the batteries internal resistance and I wouldn’t cry if I had a way to record the relevant details during a charge or discharge cycle.  After reading many reviews and picking through specifications I decided to purchase the FMA Powerlab PL6.  This is a single channel charger that can supply over 1000W of charge power, has a reasonably priced PC control program with nice graphing capabilities and measures internal resistance as part of the charging process.  I was going to spend $175-$225 all in including the charger, control cable and a balancing board but the folks who own these seem to rave about them and with 1000W of power, I don’t expect to be worrying about more power anytime soon.  Here’s a link to the charger itself.

While this is a single channel charger, I have discovered that a lot of folks have taken to parallel charging packs on these high power chargers.  I have actually charged as many as 5 3300-4000 6S packs at a time at 1C rates, so 5 packs done in a single hour!  To do that you’ll need a parallel charging adapter like this.

There are many version of this depending on the type of connector your batteries use.  Since I’ve been using EC-3 in all my larger aircraft, that is the version I show here.

I’ve also pushed to 2C charge rates at the field to get a couple packs back to full quickly.  This means that while it isn’t exactly a multi-channel charger as I envisioned, I have been able to do practically everything I wanted with this new setup.  I’ve also started to work with the PC interface and explored the graphing capability as well as recording the IR measurements.  The piece you need for that is the USB Adapter.


So far, it’s been an excellent charger that I have had almost no complaints about.  That’s not to say that there weren’t some surprises!

First, although clearly documented, I didn’t really pay attention to the fact that the permanently attached wires that are used to supply power to the charger are furnished with an EC5 connector.  This seems odd as most  chargers terminate onto bandanna plugs which are easily plugged into most power supplies.  Not a huge issue.  The first thing I did was to create an adapter which I now wish I had made a bit longer.  The 9 inches or so I did create is just a bit short in many instances.  A couple feet would have been better.  I’d also warn that you want to use at least 10 gauge wire as you may be drawing close to 40A for extended periods from the supply and you don’t want to heat up the wires to much.  I would recommend 2 feet or so as a nice compromise between to long which tends to always be in the way, and to short which causes issues with physical location of the batteries under charge, the charger itself and the power supply it is attached to.

Finally, you should take note that whatever charger you choose for charging larger LiPo batteries will likely require a fairly hefty power supply to feed it.  That is my next post.