After we built the first P-40 (this one being round two) and got a few flights on it we began to immediately see problems with the cowl mountings. It seemed impossible to keep the screws from backing out and even around the ones that didn’t the vibration immediately started chewing up the mounting holes. No amount of reinforcing of the fiberglass helped and while bonded washers have proven to be effective in this role they would have completely trashed the scale lines of this bird. So when cowl number two arrived I got creative and decided we needed a better mounting system that didn’t result in having to put a bunch of (I don’t remember the exact number but it seems like 20) holes in the cowl. I came up with a system of mounting using blocks epoxied inside the cowl with 2 guide pins and two bolts. It seemed to be working quite well… right up until an unfortunate lack of airspeed, altitude and ideas destroyed more than just the cowl. So fast forward to today and I had to recreate the mounting method.
This time I thought I’d document a bit in case someone else wants to try it. It worked well but it’s a bit devilish to get the alignment right. It’s amazing how tightly it holds though with only two pins and two bolts holding it and zero holes in the cowl to mar the great looks. The basic idea is to use the two bottom mounting blocks on the firewall for alignment pins, then using the the blocks on the bottom front of the motor box to accept bolts that are reachable via the (already needed) exhaust cutout.
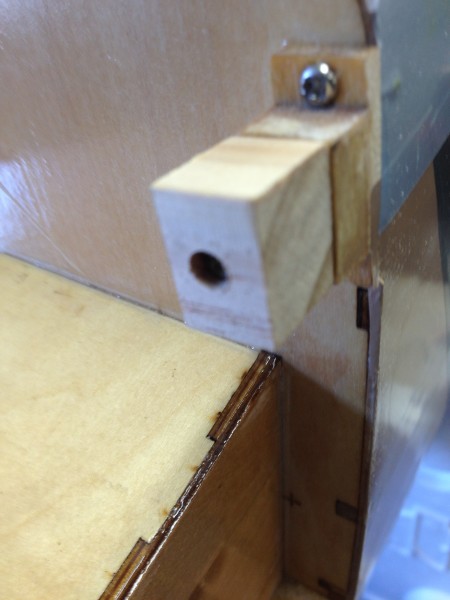
Here is one of the firewall mounting blocks after drilling and the addition of an “alignment pin”.

Then I marked and drilled a block with a matching hole. Where I was careful not to drill all the way through the firewall, this block can be drilled all the way through. I matched it up to be flush with the outside edge of the block attached to the firewall and also beveled the hole so that the locator pin could be inserted easier. Here it is after the initial fit.
The tricky part is to then put the cowl on and get it aligned as perfectly as possible. Using the spinner back plate helps. Once it’s right, mark the inside of the cowl and get prepared to apply some epoxy.
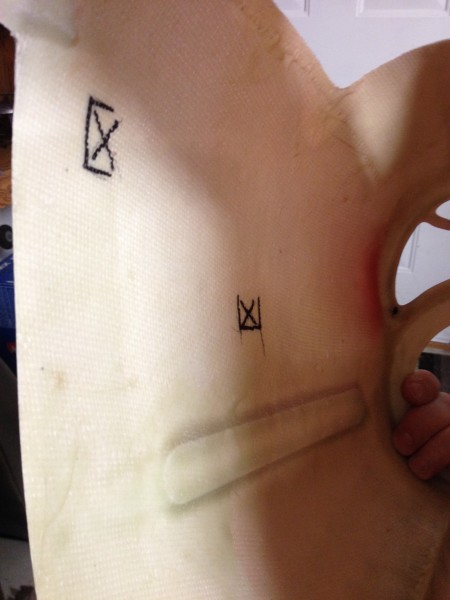
Importantly at this point, where the block is going to be glued to the inside of the cowl, you need to clean the cowl inside surface with something that will cut through the mold release agent (think wax) that was applied when the cowl was made. You can use some acetone (caustic stuff so be careful and make sure you have good ventilation) and/or sand the surface before applying epoxy. Standard clamps can hold these blocks in place until they are set. If you do this in the general area before you mark the block locations it will make you life easier in the long run. Ask me how I figured that one out!
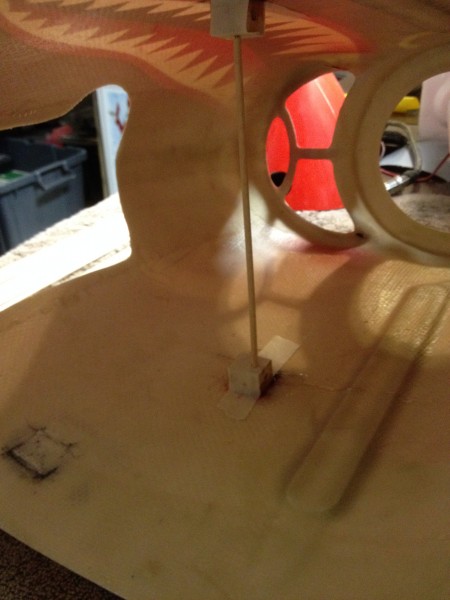
Similarly, the forward mounting blocks must be carefully aligned, marked and glued in place. These I pre-drilled to snugly pass an 8-32 bolt and drilled and tapped the existing bottom motor box blocks to match. Thin CA (very thin preferably) will harden those threads nicely, though you may have to re-run the tap 15 minutes later to make sure the CA didn’t block the threads. Here is one method of holding the forward blocks in place while the glue dries… This method used masking tape and a “cut to length” dowel. If you look closely you can see the holes to pass the bolts through have already been pre-drilled.
In order to be reachable from outside the cowl the bolts are inserted from the bottom. Happily this results in a very firm mount. I used allen bolts which require a fairly long ball driver to access in this position. Once you have these all in place you may (if your like me) find the blocks don’t perfectly match the surfaces to which they are attaching and one or more may need to be redone. Sometimes a little sawing or sanding to make the surfaces match will suffice. Otherwise a hammer will remove the block and a layer of the fiberglass with it (if you epoxied it well).
I’ll edit this post in the next few days to add a picture showing the mounting bolts in place. I’ve done this twice now and it probably took me 3-4 hours to get it right, even the second time. It’s time consuming and painstaking work but it leaves no marks and the cowl seems rock solid when it’s done.