Picked up the new Vario sensor for my Spektrum Telem setup in Radian glider. Shop testing. Seems pretty cool with DX18 beeping up a storm!
Steve’s Green Models Jenny
Sometimes I hit a lull in my own building and repair efforts and often that’s because my buddies need my help or just a place to work on some airplanes and I have enough open table space in the shop to let them leave a project sitting between sessions. There aren’t very many RC airplane projects I don’t enjoy working on or at least lending a hand with and as long as I’m not in a rush to get some critical repair done on one of my own planes it just gives me a chance to see some more airplanes and learn something new.
Lately I’ve been busy with other things so haven’t done much work on my own planes, but have had a few of my buddies projects brewing in the shop. One such recent project was this Green Models Jenny. Now available through Maxford. I found their website at www.maxfordusa.com.

This is 38″ wingspan electric that had been languishing at the local hobby store for a while before the new owner decided to make Steve an offer he couldn’t refuse in order to get it off his shelves. After unpacking it and admiring the beautiful structural work, transparent covering and all the guy wiring and control lines… we started out to assemble it. Immediately deciding we should just glue the tail surfaces in place rather than rely on just the screws (which didn’t seem to hold it very tightly) we mixed up some epoxy and got it all aligned and settled in place. Of course we then quickly decided that the wing seemed to be meant to be put in place from the tail forward… OOOPS! Well, with a bit of cursing and removing the struts we managed to do it from the front and all was well. Hey, we were working without full instructions and gathering what info we could easily find on the web… and all’s well since the result look pretty good!

The pull-pull system employed for all of the tail surfaces is actually a method I prefer and it is very light, so ideal for a small electric like this. Assembling them was a bit of a pain, but hopefully you only do that once so it should work out. We managed to break one of the “wires” connecting the wings whilst assembling the model but repair with a bit of thread was pretty simple so no big deal there. Steve found some larger but still appropriate looking wheels and the motor seemed to get warm quickly with the stock propeller but tests with something a bit smaller seemed promising. We also noticed that every bolt and nut holding the wings together would practically fall off immediately without a bit of thread lock so that has been taken care of as well. I’d consider buying a set of small (I guess these might be 2-56) nylon insert aircraft type nuts but the the thread lock should work for now.
It’ll probably be a few weeks ’till we get a chance to go get a maiden flight but based on thrust tests in the shop and reports I’ve seen on line, I expect good flying. I’ll post an update and hopefully some in flight or at least day of flight photos whenever that happens
Flyzone Beaver – update 3
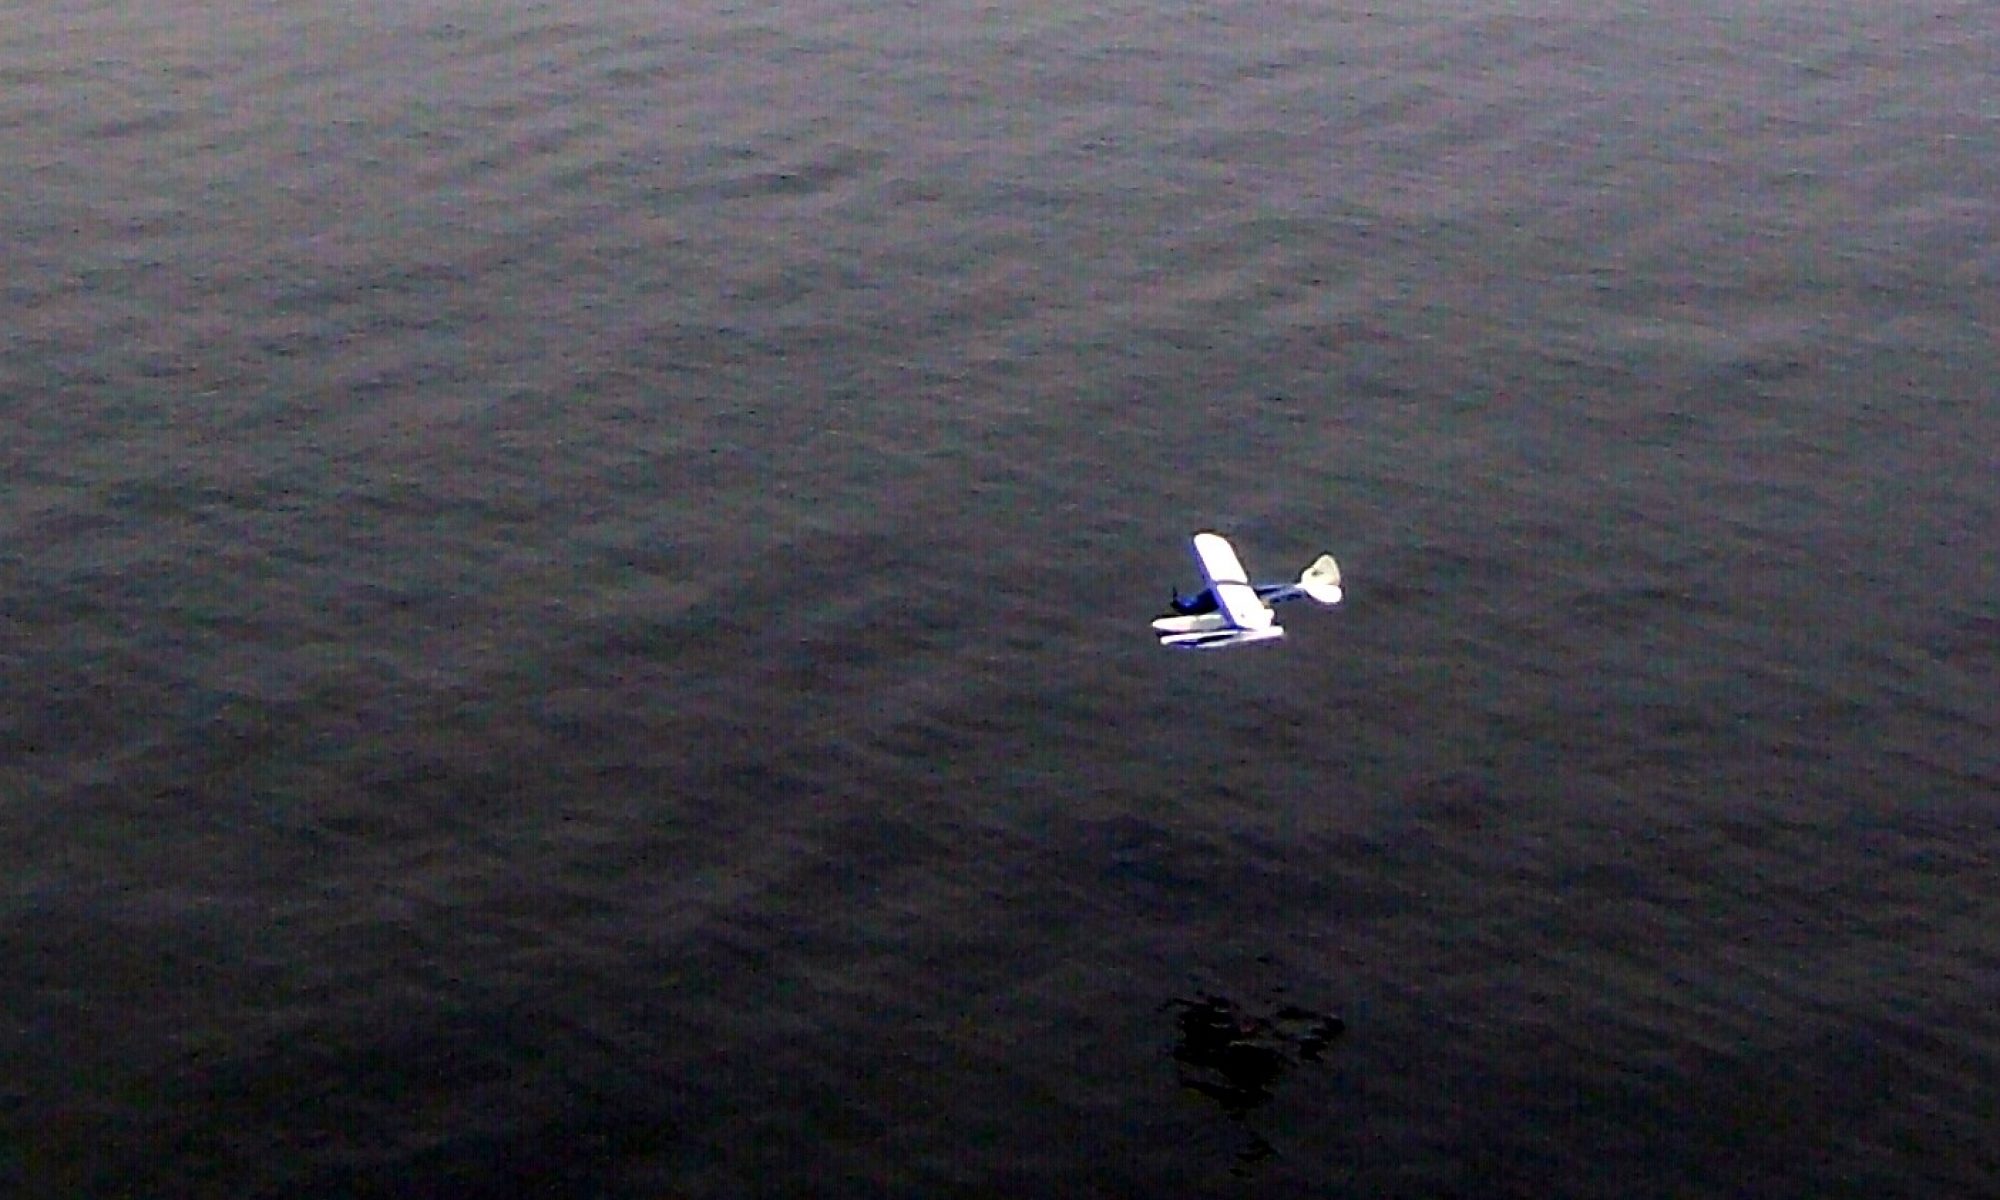
Flew the Beaver last weekend at a friends pond. Even with gusting winds to about 13 mph the new water rudder rigging worked well. With that issue fixed I would say it taxis and lifts off the water well. The only possible draw back I can see is that when the float with rudder lifts first it can cause some minor directional changes while the other stays down. This is brief though and doesn’t represent a real problem. The new linkage is definitely a major upgrade from the ridiculous design that Flyzone utilized out of the box. I’m not saying this one change makes this plane a winner but it at least resolves one of the biggest drawbacks that directly affect its performance as an airplane. Now that taxiing and flying off water are more easily accomplished.
If you have or are considering purchasing this plane I highly recommend you do something similar before you even attempt float based operations.
One other positive to report is that after an unfortunate wind gust the airplane ended up floating upside down. After minutes of this a recovery was made and the plane was found to have taken on so little water that no problems resulted and the plane was immediately ready for another flight. This is often not the case with other float planes but the Beaver is light and buoyant enough to survive a dunking without taking on much water.
This experience has raised my opinion of the Beaver slightly but I don’t expect to be writing any fan letters on the product anytime soon!
Just posted a new article on storing LiPos for longer life
I just added a new document to the my Articles page discussing ways to extend the life of your LiPo batteries. Hope you enjoy it.
FlyZone Beaver – Update #2
Spent a little time looking at the water rudder connections and decided to just eliminate one rudder… never needed more than one on any other float plane… then do a standard pull-pull connection to the other. It’s all rigged now. Looks like this:
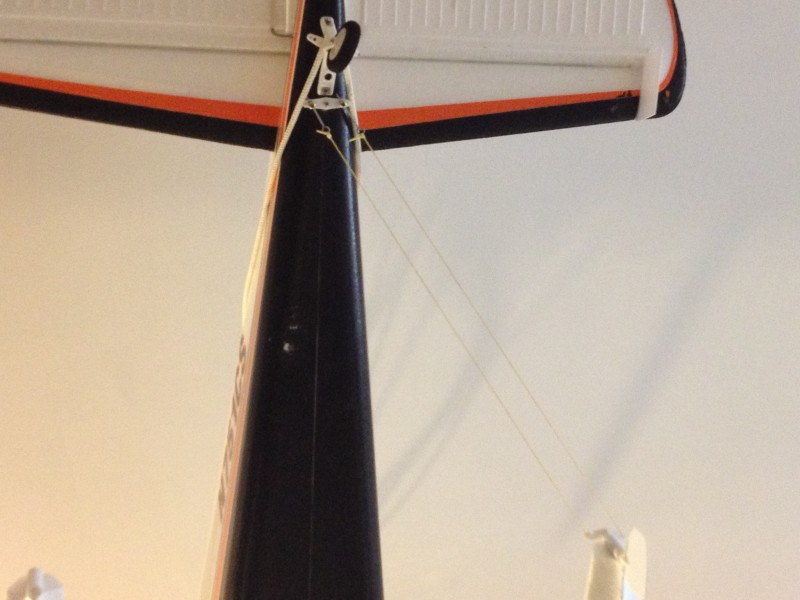
Kept the eyelets on the end for adjust-ability and used Kevlar thread for the runs just because I had a small amount on hand that was probably not enough for anything much larger. I haven’t tested it yet so will have to get back with update #3 with a report after a field test… or is that pond test?
FlyZone Beaver – Update #1
Just a quick update with thoughts after float flying the FlyZone Beaver.
The plane does fly well off of water and looks great in the air with the floats attached. But I continue to find shortcomings that make me wish for a bit more refinement from FlyZone.
In this case its the water rudders that have me irritated. No two ways about it, the linkage mechanism with the rubber bands to return them to center is just a bad design from square one. They are impossible to get to center well and especially to do so repeatedly. The rudders will turn sideways and drag in the water (of course only one at a time) causing uneven drag and unexpected turns. I usually say a water rudder is a necessity for float planes but I’m tempted to disconnect these permanently. Maybe I can rig a pull-pull cable system for one and remove the other…. its worth a try because the system as is… is just crap.
The plane is not particularly overpowered either so taking off does require some time using the water rudders. It’s not terribly underpowered either, unless your dragging a sideways rudder through the water on takeoff!
In case you are wondering, while at the Nall recently I was camped next to two guys who both had them and they had the same issue with the water rudders… it isn’t just me!
I will continue to fight this problem so if I come up with an acceptable solution I will post again. With the money invested and the space it takes to haul this plane around with the wings attached permanently (for all intents) I have to at least make it into a good float flyer so it won’t become a total hangar queen!
Flyzone DHC-2 Beaver… “Missed it by that much.”
First flights and final thoughts on the Flyzone Beaver
Yesterday afternoon, April 8 was the first flight on the Flyzone Beaver. The first flight was done on wheels with an 1800 3 cell (older, brand unknown) LiPo. Power was adequate with the 3 blade 11×6 MA making little excess noise. After a bit of aileron and elevator trim she smoothed out fairly well considering the slightly breezy conditions. Taxi on our early spring uncut/rough field was adequate even with the stock wheels. Roll rate was acceptable (not fast, but OK considering the long wingspan), tight to mediums size loops were possible but don’t stretch it to far or you may run short of power. Turns needed a bit of rudder to avoid “skid” and add some authority. Nothing wrong with any of that. It was hard to get a really good feel for the handling with some 15+ MPH gusts up there but generally I would say it handled well.
That success led me to spend the time to attach the floats and try it again. Attaching the floats was a bit of a job with 2 people working it. I probably would have given up and waited to do it on my bench where I have a better stand, no wind to deal with etc… had I not had help. I don’t see doing this often as a real option… certainly not at the field. I will probably only switch them back and forth 2 or 3 times a year. They could make this a lot easier with a bit of design work but that seems to be the theme for this airplane. I pulled the water rudders off to avoid any untoward encounters with the ground. Unfortunately they are not pivoting like my larger water rudders are (“spring” loaded via a rubber band) so flying off of hard surfaces like snow/ice/dirt with them attached is not recommended. At least not by me!
Here I am with floats attached after all the days flying was over with…

Photo by K. Bogigian
The second flight, the first with floats, was more of a sit in place and struggle to move due to the increased friction and a less than fully charged battery. Swapping the battery for a smaller capacity but fully charged power source got it sliding and once moving it took 30-50 feet to get up to speed and then was off. Not terrible considering we are talking dry grass here. Based on my experience with larger planes with glow engines flying off both water and grass this gives me confidence that getting off the water won’t be difficult. Flying was not a lot different than without the floats. The extra weight was not a big issue and did add some additional stability in the wind. Here’s a couple flight photos.


Photos by K. Bogigian
You can’t deny that straight out of the box the plane looks pretty good in the air. The lines look good to my eye and with the added weight of the floats the plane has a bit more stable track as well. The flaps seem to do almost nothing with the factory available travel. I will eventually have to do something to correct that. There is simply no more travel available with the existing control arm and linkage geometry. Maybe as part of that I will change the linkage to something much easier to re-connect like a snap on ball link or something similar. This would help to overcome the whole wing removal and attachment difficulties without having to readjust the flaps each time. Even with my SUV it takes up entirely to much room with the wings and floats attached.
Here are my current overall feelings on the Beaver at this point.
The Beaver certainly seems to fly well and has excellent ground handling on wheels. I expect good things from float flying as well based on my “floats off of grass” flight. The outlines and color scheme are good which results in a good looking and very visible aircraft. The quality of the build is somewhat lacking… not in any way that will affect flight-worthiness but rather making the plane’s cosmetic details poor. Errant glue, lack of same where it belongs, “smeared” colors, etc… all take a potential A+ aesthetic and bring it down to average. The biggest drawbacks however are based on a lack of consideration to the things that make an RC plane easy to get ready to fly and maintain. Access to the interior is limited, “daily” assembly is painful and likely results in changing centering/trim on the flaps and wing removal and attachment just isn’t thought out well. Ditto for swapping between landing gear and floats. Even changing batteries can be a tricky balancing act since there is no easy way to support the plane while inverted while simultaneously using 2 hands (a necessity) to swap the battery. At least not without a cradle of some sort. For around $200 I expected a bit better.
I hope Flyzone will spend some time re-engineering and come out with a Beaver version 2 at some point in the future as the subject matter is great and it could be a great little RC airplane with some better engineering. I expect to have some fun flying on floats (always a favorite of mine) but this plane will not get the number of flights it deserves due to the drawbacks noted. To quote Maxwell Smart… “Missed it by that much”. It’s a bit early to give this plane a final grade but I think at this point I would rate this plane a solid C+.
Flyzone Beaver – Basic assembly finished
Well, the Beaver is ready for a preliminary flight. Assembly is done with the exception of some thread lock on a few of the control surface adjustment screws.
![IMG_3111[1]](http://flyrc.info/wp-content/uploads/2013/03/IMG_31111.jpg)
Flyzone DHC-2 Beaver ready for 1st flight…
To get to this point I went through the instruction manual and completed all the appropriate steps and other than some slight issues with the order of steps it was all pretty clear. For some reason, Flyzone thought it better to attach the tail wheel before installing the horizontal and vertical stab (which is all one process) and that just puts the wheel in the way so I took it back off as I was fiddling with getting the tail attachment done and then reinstalled it afterword. It’s not a big issue either way. I did appreciate that the instructions leave attaching the prop as the very last step which is always a good idea for electrics, which are always dangerous once the prop is installed. Electrics are like safely handling a firearm… assume it’s always “loaded” or ready to spin the prop and you are a lot less likely to get hurt.
I stripped the windshield off (it looked ready to eject at any moment out of the box anyway, held on with only 6 little dots of glue) and used that access to make some of the build steps a bit easier. Also, since I have no plans to ever remove the wings again I went ahead and spot glued the aileron/flap/lighting wires down so they were not dangling down and visible in the windows of the Beaver. I left the reattachment ’till the very last thing so I could more easily get to my receiver which now resides in the front seats. I added a little dark foam over the top of it so that it’s not very visible and reasonably secure.
I did trim one of the wing struts to match the length of the other. This involved removing the screw and end piece from the tube. Re-drilling the screw hole for the end piece to attach to the spar tube and reattaching. This was not particularly difficult but I wonder how/why they are different lengths to start with. Even after that the wings don’t seem to be perfectly level with the horizontal stab but there doesn’t seem to be an adjustment method mentioned or provided for. I will likely try some shim washers at the spar attachment point on the bottom of the wing to see if I can force the wing to level. It’s not bad but straight planes just fly better so I’ll give it try.
I can’t recall ever finishing a plane and flying it exactly according the manual and the Beaver will not be an exception. Here are the things that I changed prior to being deemed first flight ready:
- I didn’t care for the 2 blade prop and oversize chrome plated plastic spinner so I ordered a 3 blade Master Airscrew replacement along with a prop nut from the ParkZone T28 and replaced this assembly. It’s an easy swap and looks a bit more scale to my eye. Everything I’ve read says the Beaver can afford the very slight power loss this will likely cause. I’m not usually a fan of 3 blade props for efficiency reasons, nor MA brand props as they don’t seem as rigid as some others and just don’t seem to pull as well compared to other manufacturers offerings I could name but I couldn’t find any other that fit the bill so I’m going to give them a try in this case. If I really need better power I can always switch back to a 2 blade and/or some other brand and composition.
- I pulled the receiver and went to something that is directly compatible with my Spektrum radios. I wanted to add a channel or two anyway and had a nice 9 channel DSMX receiver laying around so that is what is in the bird. Totally unnecessary to have anything this high end but it was available and what with splitting the ailerons and adding an “e-switch” I needed 7 channels at least. Anylink was an option but with the range limited to 1000′ per the manufacturer and the external box and cabling.. etc.. I just don’t like the solution they offer for my radio system. All the external connections are messy and 1000′ is just not far enough for this big a plane in my opinion.
- As mentioned, I added an e-switch (an RcExcel opto kill switch in fact) so I can turn the lights on and off from my DX8. I disliked the idea that the lights would constantly pull current from my battery when I don’t need them during full daylight and I had the switch laying around so why not?! I think it will be cool to switch them on when the light starts to fade.
Of course by the time I stuffed the large receiver (and 1 remote) and the e-switch into the bird it simply wouldn’t easily fit in the compartment up front so I moved the receiver to the front seat area as noted before.
That puts the Beaver in a “ready for maiden flight” status at this point. Maybe later today if not a bit later this week she will venture into the sky. Once I get a flight or two, I will go back and thread lock the various EZ connectors that hold the flight surfaces. I’ve never been fond of these for primary flight controls but for this little plane I will try to live with them. Next update should be a flight report and/or the float assembly and installation. Hoping to be fully ready and tested out on floats before Joe Nall 2013 in May.
Flyzone Beaver – Unpacking and inspection
Started unpacking and inspecting the Flyzone Beaver.
Pulled all the parts out of the box, removed all the bubble wrap and scanned for damage. Worst ding is in one of the floats – took a picture or two as I went.


I guess my hopes were pretty high after reading 185 pages (not finished yet) of the discussion thread on one of the popular RC sites. So far I’m not overly impressed.
Yes, the flaps and ailerons are actuated in a very scale appearing manner, the overall lines are nice as well and its great to get the nice lighting package already installed. Having the option to run floats or wheels with both included is wonderful too. However…
I’m gonna blame the amount of dings/scuffs/scratches etc… on the packing method. Sure most things are wrapped in some micro-bubble wrap and the inboard ends of the wings where all the linkage and joiners stick out were covered in cardboard… but somehow things managed to vibrate/rub and bang into each other on their way here. In addition to the ding in one float, the landing gear “fairing” where it meets the body of the plane on one corner is slightly crushed and almost broken off. The bottom of one wing has a groove in it where something rubbed or pushed up against it and there are a few others similar spots. Most notably the side windows which bubble out nicely (very cool looking) are both scuffed/scraped up (very not cool looking).

None of this damage is really bad but it seems to me that if Flyzone had gone one extra step and after bubble wrapping everything simply taped all the pieces to the box (like others do) the chances of damage of this type would have been significantly decreased. I’ll get over it but when you buy something new it would be nice if it looked new!
In addition there are lots of other small things that add up to my overall feeling of disappointment. Many places the orange decals were applied to the foam with what appears to be sand grains under it forming small but noticeable protrusions. The bottom of the horizontal stab has some nasty smears where it appears the black ink/paint ran over the orange and one spot where it looks like the orange dripped on the black. Luckily its on the bottom so I guess most folks won’t ever see it. Hard to spot at 50 feet and 50 mph!


Oh, and the whole front windscreen is loose. Doesn’t look like it was ever glued in properly and I guarantee the airflow around it would certainly have it coming loose in flight in the first 5 minutes if I don’t re-glue it. Lucky I’m a modeler! Speaking of glue, whatever they use it is apparently difficult to get in the right place. There are many places where glue has been… let’s say “generously applied”, resulting in some sloppy looking glue joints and then others like the windscreen where glue appears to be sadly lacking. Not sure yet what I’m going to do with the over application areas… trim back… leave alone. We’ll see.


Just looking over the plane and realizing that its going to be a job to hook up and route all the wires away where they won’t be obvious and getting the servos to hook up and adjust things through that small top hatch is likely to be a challenge but that wouldn’t be so bad if they had found a better way to attach the wings. Why not put a servo in each wing for the flaps so we could avoid all that routing of the wire push rods while simultaneously having to get all three (yep, three!) wing joiner tubes to line up correctly? Seriously, 3 rods?? Countless other wings use 1 wing joiner tube. Oh, and the struts are apparently held on with screws in plastic so taking them on and off many times seems to me to be problematic at best. How many times is that going to work before I strip the holes, the screw heads or lose them altogether? Did I mention the struts appear to be two different lengths? I don’t think that’s right, is it?

The result of all this unnecessarily complicated assembly is that taking the wings on and off is going to be a royal PITA which I likely will just forgo. Luckily I have an SUV and a trailer to haul my airplanes as I can’t see taking these wings on and off on a regular basis. Oh, and changing back and forth from wheels to floats… not sure how easy that is going to be and that is exactly what I’m going to want to do!
I just can’t figure out what this airplane wants to be… With all the build issues, minor damage, etc… it just doesn’t measure up as a scale bird for me. On the other hand, with the limited utility of the wings being essentially fixed and a bit of an upscale price (for a small foamy) it doesn’t seem to fit into the “everyday, keep it in the trunk and just fly it” category either and that is a bit disappointing to me. I was hoping for something a bit “prettier” than my Parkzone T28 that would be as easy to “just go fly”. That doesn’t seem to be the case here.
The Beaver would make a great scale project… strip it down and fix all the issues, re-paint and add details to your hearts content. Maybe that is the real niche for this plane. Unfortunately, I wasn’t really looking for a big project!
I’m just hoping once I get it all done I’ll enjoy the flying qualities and especially the float flying capabilities so much I can overlook the drawbacks. Perhaps as I progress, I will see some more positive attributes, find out things are better than I think and generally learn to love the Beaver. Updates soon.
Picked up the Flyzone Beaver yesterday. Will pos…
Picked up the Flyzone Beaver yesterday. Will post build and flying updates on the web as I progress.
flyrc.info