This last Sunday… July 27th… was our club airshow. We’ve been doing a public airshow as a way to make money for the club for about 7 or 8 years now. Our acts vary but there are usually group flights from various eras or types like WWI, WWII, electric foamy, etc… as well as a buddy box session or two, some scale helicopter, 3D helicopters, giant scale aerobatics and of course 3D airplanes. This year we even had a 3D act that mixed a 3D heli and a 3D giant scale aircraft. The two pilots even swapped transmitters during the middle of that one! Its a ton of work to put on but we have some fun too. One of the acts that is a perennial favorite is the glider chase and this year was a good one.
Our glider chase is just what it sounds like. We have a trainer plane that carries an RC glider (really just a large foam glider converted to rudder and elevator only) up several hundred feet and then several of us with whatever we have that is disposable will go and try to crash into the defenseless glider. The crowd loves it and participating in it is always a blast. There are few rules other than keeping the “battle” out away from the crowd, and no attacking the carrier plane. This year we had, I think, 6 chasers out on the flight line and more chasers always makes for more excitement. The usual result is that the glider gets away cleanly (even though the glider pilot is generally not trying to get away!) and the chase pilots often aren’t so lucky. One of the first things you figure out is that making your plane hit another in flight when you intend it is much harder than when you aren’t trying!! Another is that you can’t begin to keep everyone else in sight so you are forced to watch your plane and the target plane… there just is no way to watch everyone else at the same time. It helps to have a spotter as well to get you in the neighborhood of the glider when you overshoot and aren’t sure which plane is the target!
The more common scenario is that the chase planes collide while trying to get close to the glider as all the planes try to occupy the same small box of airspace. I always tell folks that if you fly a plane in this event and land it without damage you have just received the gift of a free plane! You have to write off your plane on takeoff and just hope to find the wreckage to recover your electronics. Anything more is a gift. Of course the high level of attrition is why the crowd loves it. Here’s my experience during one such flight last Sunday.
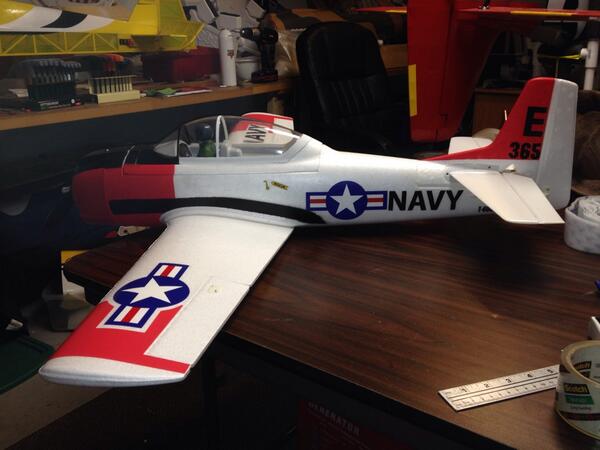
I took off immediately after the carrier plane and circled up slowly to try to stay in the same altitude range as the glider and preserve fuel. The Duraplane I fly for this has a small tank and sometimes the glider stays up a while and most of the action is at high throttle so fuel preservation is key. I stayed a good distance away from the carrier plane in order to not endanger it. When the release was called out on the PA my spotter directed me toward the glider. Shortly that area of the sky got crowded with planes darting in and out of my vision field. My rule is never pull away from other planes as I attack. If they get between me and the target they are going down! After a couple passes I had dropped below the glider and pulled up toward the target just as another plane dove past. An audible “pop” occurred as he passed and I saw a strip of something fall away from the right wing. After a near miss with the glider I circled once to check controls and all seemed OK so I turned back into the fray. I was (apparently) unharmed. Probably just a slapped wing and a little lost covering. Since my wing is mostly foam I figured it was OK. I could tell it was my right wing that had been hit but apparently nothing serious.
Here is the actual damage that occurred on the first mid-air: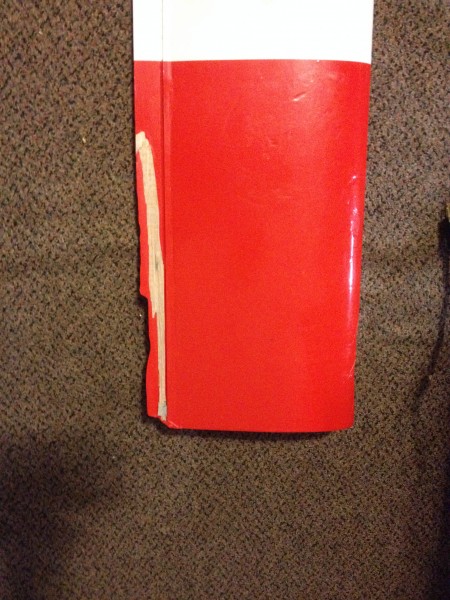
This is the right 1/3rd of my wing and you can see the strip of aileron that is missing is about 1/3rd of the total on that side. Looks like a prop got into it and did some carving. I saw something fall away but couldn’t tell it was part of my airplane and the plane seemed to handle OK.
A few minutes later the glider is down to about 50 feet and the announcer calls “knock it off” as we are getting close to the crowd and the runway. One plane has already gone into the Corn when he failed to pull up quite quick enough after a vertical dive at the glider. As I pull out and turn down the runway I see another plane coming head on at high throttle… about 6 feet away!!! There was no time to react. A loud thud and lots of pieces go flying but my engine is still running. I have a vague recollection of seeing “the other guy” dropping away into the corn and then I realize I may have an issue of my own. Ailerons are totally non-responsive… rudder is working and there is some dihedral in the wing so turns are possible but sluggish. I call out that I have no ailerons and ask for a clear field. The landing is fairly uneventful and I taxi back to look at the plane. Now the wing has a bit more damage.
Here is the other wingtip:
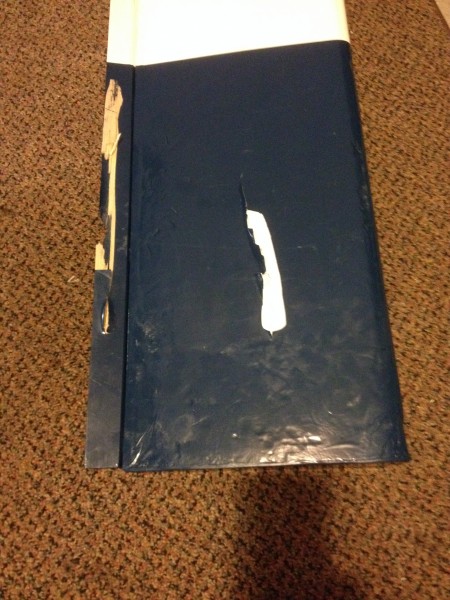
That white gash in the wing goes all the way through where the prop of the 25 size glow plane cut through it. The other end of the prop came down on the right aileron and now it is pretty much trash as well. The servo and linkage for the ailerons sits atop the wing and the wingtip of the other plane (after hitting my prop I expect) hit that and broke the servo arm causing the linkage to depart and leaving no control at all over my ailerons. His wingtip was pretty much mulch for several inches.
There was quite the buzz in the crowd when this occurred and both I and the other pilot knew what we were getting into. No harm, no foul. In fact, it was a lot of fun and a real crowd pleaser. I was amazed to have had two midairs in one flight and even more so that I landed the airplane successfully and with as little damage as it has.
Drat that glider… I’ll get my revenge… next year.