Sharing some pics and video from 2 recent float flys

Over the past couple weeks, I have attended a couple of events that were in whole or at least primarily float flying oriented.  I enjoy being out near a lake or pond as they generally add to the natural beauty of the setting and flying off of water adds a different challenge to RC flight both from an aircraft handling approach and for the technical challenge of setting up a float plane to fly well.  I highly recommend you take a shot at “float flying” if you have the opportunity.  But be warned, like many things in RC, it can be addictive!

Lake Lemon – Monroe Counry RC

The first event was put on by the good folks at the local RC club in Bloomington, IN and was held at Lake Lemon just to the NW (I believe) of that city.  The second was a couple weeks after and was an event put on by my “home” club, the Indianapolis RC Modelers.  Below are a few picturess of the “goings on” from each.  The Bloomington club had a good turnout with about 15 pilots I would guess, including 3 from my club… myself, Corey Lucas and Steve Woods.  The venue is almost ideal with a nice big, low to the water dock as well as a huge body of water with almost no obstacles to contend with.  They also had 2 retrieval “party barge” boats and served up a nice lunch as part of the registration fee of only $10 per person.

Here are some pictures from the event

Corey and the Nexstar are ready to try some float flying!

Image 1 of 8

Also while we were there, Steve tried his hand with his .120 size cub…  Here’s a video clip of the takeoff… and landing.

No real damage was done… Steve had the engine running again after a brief dry down period.  Did you see what went wrong?  The consensus around here is the wake allowed the plane to leave the water a bit to soon and this added to Steve doing a bit to aggressive a pull up caused a stall…  Better luck next time Steve!

Wilson’s Pond – Indy RC Modelers

The second event is one we have done every year for the last 5 or so, sometimes twice a year, and is held at a pond owned by the family of one of our members, Roy Wilson.  It’s obviously not as open around the pond and the size of what you can fly there is a bit more limited as a result, but we consider ourselves lucky to have such a beautiful spot to enjoy ourselves and it is not difficult to fly off of for planes up to about 60 size or so.  In the last couple years, we have not had much attendance… perhaps somewhat due to weather being “unkind” for several of the events and undoubtedly because we have few opportunities to do this sort of flying around here so getting a proper float plane setup isn’t the top priority of many folks.  We all have to decide where best to spend our model budgets and something you won’t use often doesn’t rank highly with everyone.  Another factor is that we have not really tried to promote the event as much as we did in past years so many folks just don’t know it’s going on.

A nice added attraction for this event is that there is a fairly nice field adjacent to the pond that you can fly most anything from so it is not limited to water based aircraft!  I flew several planes and played with my air boat this year and had fun as always.  I flew the PZ T28 on floats, the Carbon Cub (the micro version) as well as the Flyzone Beaver.  The Beaver excels at this (once you re-engineer the water rudder) and I fly it primarily as a float plane so it doesn’t get a lot of flight time away from the water.  My flying buddy, Corey, flew his Electric Nexstar from the water and his DLE 20 powered Cap Maniac from the runway.  Here are some photos of the action.

One of our members does a little boating...

Image 1 of 5

Here’s a video clip of my Dumas Windy air boat eventually doing it’s signature spot spin manuever.

And one of Corey’s first landing at the pond with the Nexstar… ignore the first 5 seconds or so while I attempted to find the plane in the sky!

The basic idea here is:  Water plus RC airplanes = lots of fun!!  Try it, you’ll like it!


Putting the Telemaster on Floats

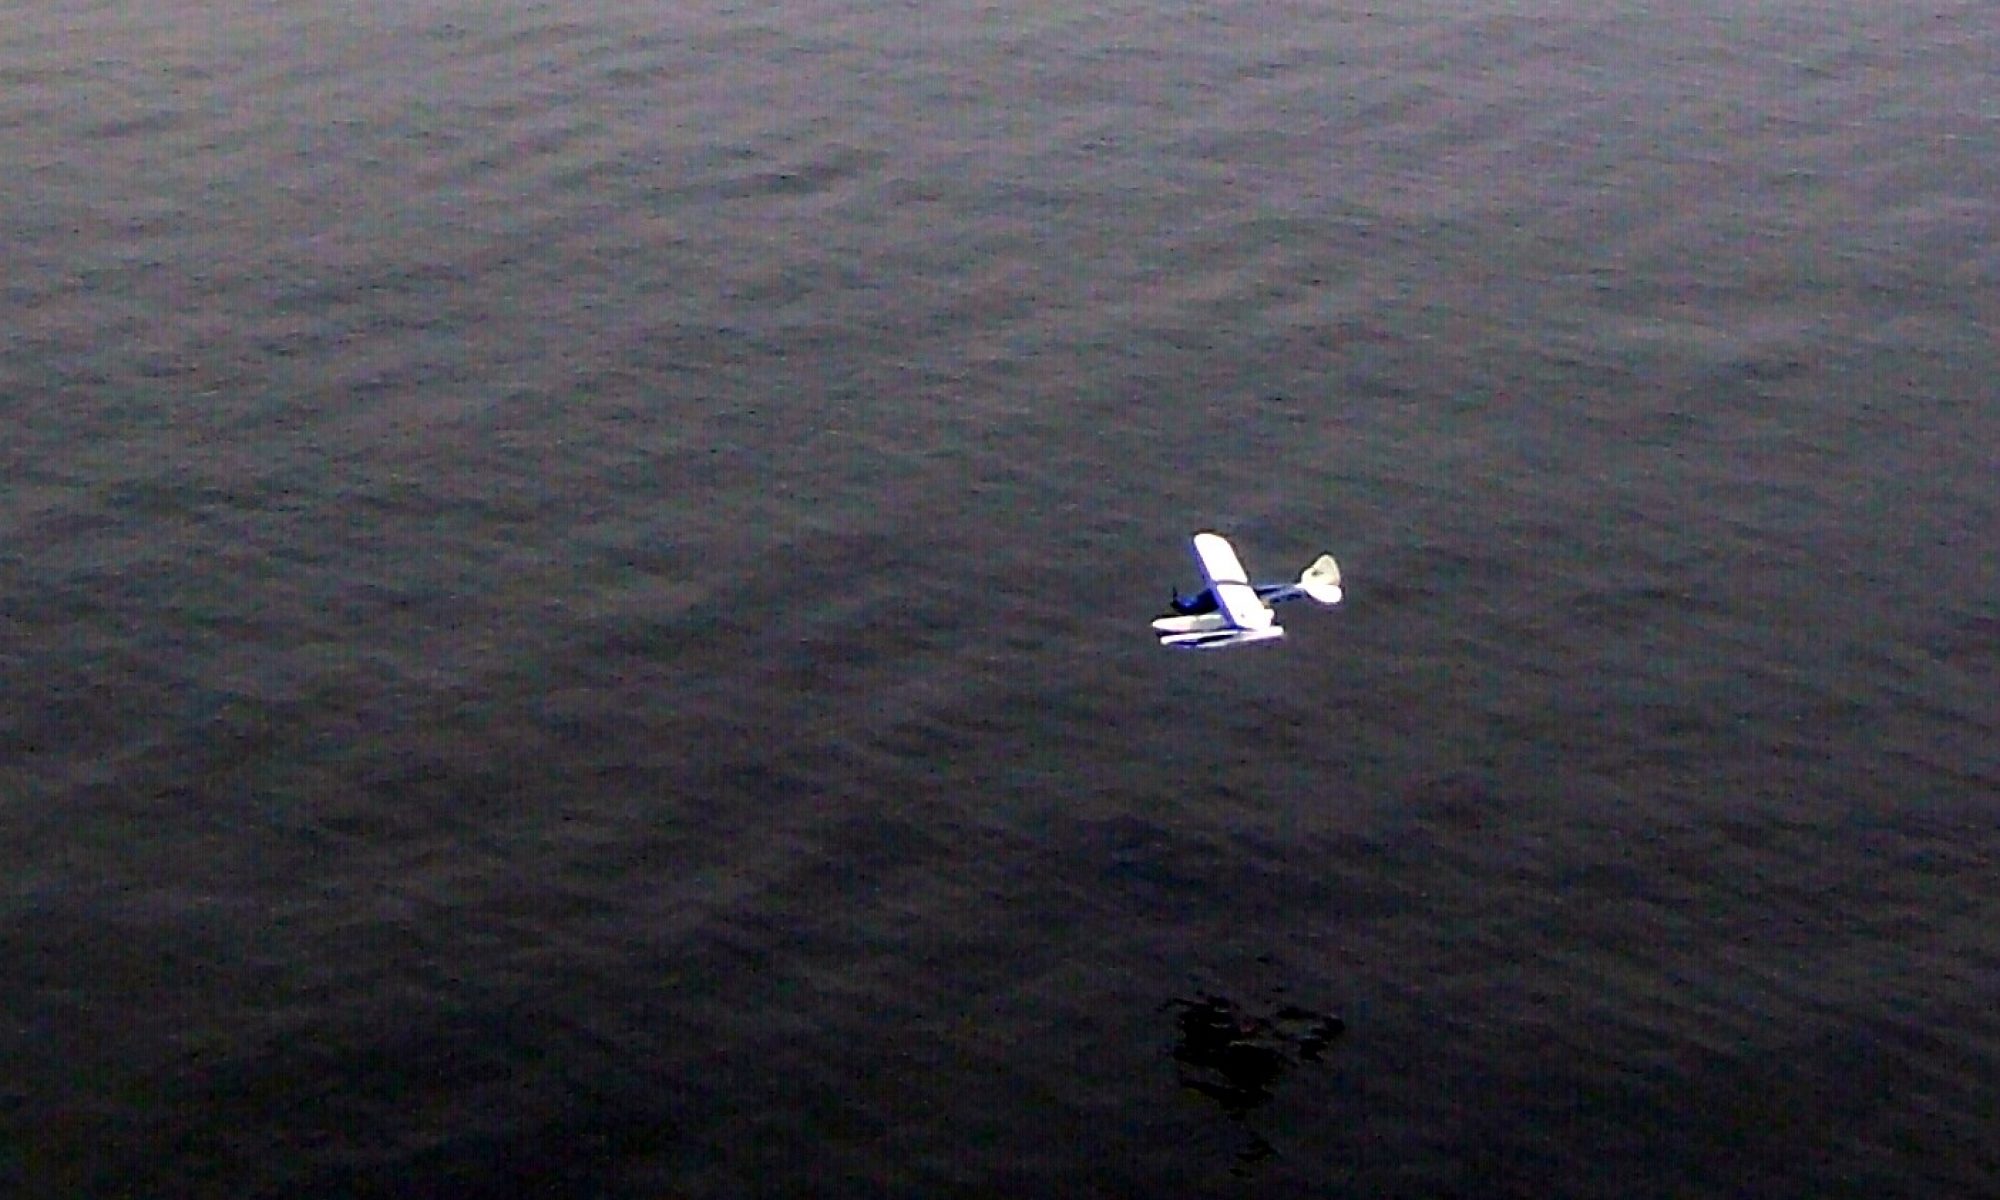
This weekend is a float fly so I have been in the shop lately swapping out the wheels on several of my airplanes for floats.  I’ve been flying off floats whenever the opportunity arrives for a number of years now and I thought I’d try to share both the attachment method I use on my Telemaster and some of the tips and pitfalls for float attachment and float flying that I’ve learned over that time.

Here are a few quick float sizing/attachment guidelines that I have found will greatly increase your chances for success.

  • Floats should be mounted in such a way that the “step” on the bottom of the floats is in line with the balance point of the airplane.
  • Floats should extend beyond the nose of the airplane.  This seems to help to minimize the chance of the airplane flipping during a “to steep” landing and during takeoff if the tail rises to quickly.
  • A water rudder is a necessity for most aircraft.  Without this feature, you are very much at the mercy of the winds and will have trouble making turns during taxi maneuvers on the water.

Here are the floats I use on my Telemaster 40.

IMG_1677[1]

As you can see, I use a second aluminum landing gear as a secondary support, and Ernst water rudder and a separate water rudder servo.

Below you can see the rear mounting holes (there are blind nuts inside the body) that the rear landing gear mounts to.  Right behind that is the battery hatch.

IMG_1678[1]

Below is the “on float” servo that drives the water rudder.  This servo has been specifically water proofed but is otherwise a standard servo.  While some espouse dual water rudders, I have seen very little need.

IMG_1680[1]

The attachment to the floats is shown here (both front and back look similar).  The slack between the two wheel collars allows for a bit of telescoping action during landings to absorb some shock when the floats hit the water a  bit harder than planned.  For instance when a sudden burst of gravity interferes with an otherwise perfect approach.

IMG_1681[1]

That about covers the most important plot points.  I run my water rudder on a separate channel and then just mix it with the rudder so I can easily center it and adjust the travel independent of the main rudder.

Hopefully this has given you some useful ideas about how to get your own airplane on floats and ready to fly.  It can be a bit challenging to get everything set up correctly  but it is worth the effort.


Glider Carry for the Telemaster 40 – Pt. 2

Just a quick update that the glider carry worked well… but not for George’s glider.  While the carriage worked great and the release system worked flawlessly for the Radian, what I hadn’t foreseen was the length of George’s glider would bring the glider’s rudder into contact with the Telemaster vertical stab.  So back to the drawing board…  I was not happy with the saddle on the bottom of the carriage not properly fitting the Telemaster wing anyway so when I can get back to it I think I’ll be extending the bottom of the unit with new side supports that will raise the whole unit by about 4 inches as well as being cut to fit the wing surface better.

When I get some new parts built and tested I will post again.  In the meantime I’d love to hear from anyone else who has done this.  Feel free to share your experiences.

Glider Carry for the Telemaster 40 – Pt. 1

Myself along with a couple of other flyers at my club have taken to doing a bit of glider flying of late.  A couple of us have Radians while our current president (George) has a true un-powered balsa and monocoat ship.  While the Radians have no trouble getting to altitude with their on-board electric motor, the traditional glider needs some external help.  We don’t have a winch at the field and a high start takes a lot of time and effort to rig and takes up the whole field for a period of time.  In short, we wanted a better way to get a glider to altitude.

We discussed doing a tow but that seemed to require to many modifications and complex release mechanisms… While it looked fun we decided that a “carry” to altitude might be a better solution…. and it so happens I had picked up just such a mechanism at a swap meet a couple years ago.  I pulled it out and got to work to get it in “ready to fly shape”.

Of course life is never that easy and I immediately found a couple issues.  First, the unit had developed some warp over time and it seemed a bit flimsy.  It also doesn’t fit the top shape of my Telemaster’s wing.  That last I’m hoping to hold off for another time.  For now, I hope a bit of foam will help to distribute the load until I can come up with a better solution… if all else gets worked out!

So first things first, I started out by dis-assembling the carriage and doing some sanding to expose the wood so I could bond on some reinforcing.  For this I chose some carbon fiber tape from Dave Brown models that I had picked up on a whim at a hobby shop I recently discovered while on a business trip to Cincinnati.  I had never used this product but the instructions were spot on, recommending tape to bind the ends, etc…  I think you’ll do well if you just follow the included directions.

Here are a few pics showing the process…

Here is the disassembled structure.  Note that one of the bolts that form the pivot twisted off during the dis-assembly process..

IMG_1644[1]

This is after sanding.  If you don’t get rid of the paint and open up the grain the epoxy won’t stick and the carbon fiber reinforcing will just peel off.

IMG_1646[1]


Here is the cutting and fitting process.  The tape is vital to holding the carbon fiber together during cutting.  Remove it just as you lay the CF onto the epoxy.  By cutting all lengths before mixing the epoxy I managed to do one whole side before the epoxy started getting gummy.


IMG_1649[1]

Here is one side with the CF  laid down and weighted down so it dries straight.  Maybe not as neat as I could be but I think it will serve the purpose.

IMG_1653[1]


After letting this dry overnight and reassembling I did some tests and things were not working well.  The glider would scoot back on the cradle and the rubber bands would slide up against the front of the carriage.  This caused release to be unreliable.  One side or the other would come off sooner with several seconds before release occurred after the servo released the rotating arms.  Sometimes it would be several more before the other side let go.  That could cause major issues.  I tried polishing up the leading edge of the wood and even waxing it but that proved to be insufficient.

Here is a picture of the hold down system… The bands won’t stay out in the indent area of the release arms.  The bands rub on the wood and release is iffy at best.


IMG_1659[1]


Realizing I needed to get the rubber bands to stay in those indents at the ends of the arms, I realized that the direction they were pulling had to be adjusted.  No amount of sliding the glider forward or careful routing of the bands would make that happen so I decided I needed something to redirect the bands around to reposition them on those release arms.

Here is my fix… A peg (really a bolt held in on both sides with nuts) to redirect the rubber band up and over so that it stays in the indent of the release arms.  Now the release is immediate every time.


IMG_1660[1]

With this modification I think I am ready to test the carriage with a glider aboard.  I’m guessing on how many rubber bands are needed to hold the carriage in place, how many to hold the glider in place and really about everything else as well.  Planning on a test run or to with the Radian perched atop the carriage tomorrow evening.  Look for another post with some pics soon with the results and reports on how it went.

If all goes well, George’s glider will be next on the list.  Wish me luck!

Hangar 9 Alpha 40 Trainer… Experiences good and bad.

At my local RC Club we have had several of the Alpha 40 RTF trainers (the orange model) used by students while learning to fly.  In general, these have been excellent flying airplanes.  Stable and well behaved with the included Evolution engine providing more than adequate power.  We usually ended up swapping the three blade prop for a 2 blade, especially if the 3 blade got broken.  Two blades are more efficient and much more widely available.  We would often eventually remove some of the limiters on the motor (needle valve collars) to get more power out of the engine as well.  After all, to much power is almost enough!  Generally these planes have been pretty trouble free and fly well.

Given all of this, when one of our younger members lost his Alpha to a battery problem another was purchased and the job of assembly was mine.  We presumed the new ARF would fly similar to the old RTF… especially using the same motor, servos etc…  Pretty much everything except the battery, switch and one of the servos survived and was moved to the new plane.  As I was building the new airplane I noticed they had redesigned the firewall and added a bottom hatch (surely a side effect of adding an electric power option, which I applaud).

Unfortunately I also noticed a few issues I was not particularly happy about.  First, the throttle rod routing is not ideal.  This is not the first plane I’ve seen with this problem so I did a bit of creative warping and rigged up something that was workable.  I’d recommend skipping installing the rod and substituting a cable type linkage to make the throttle linkage work with much less binding.  Likewise, the nose steering rod binds.  For this one it appears to be a problem with the routing of the rod combined with the flat ground on the steering strut and the straight steering arm.  As the arm rotates back toward the firewall, the wire binds against the edge of the guide and puts a lot of stress on the rudder servo.  If you position everything perfectly and limit the end points during your radio setup you can get a workable setup.  Luckily, there really isn’t much travel needed on either the rudder or the nose wheel so I managed but this seems like a poor design to expect a beginner to be able to successfully handle.

Another of our members suggested the use of an offset steering arm might accomplish the relief of this stress and allow for more travel.  I think it is certainly worth trying.  In the meantime we had a workable arrangement if not ideal.  Onward to the test flights.

A bit of tweaking, a balance check and the usual post build checks and we made a few test flights.  At that point, we started to notice a pattern of difficult takeoffs followed by lots of trim inputs, etc…  This was not good.  We couldn’t hand this ill behaving plane to our young member and expect good results.  He was still just getting comfortable flying without an instructor and not ready to handle this ill behaved ship.

It took a lot of left rudder to keep the plane flying straight down the runway and if it was trimmed for straight takeoff rolls the plane would constantly turn in the air and had to be re-trimmed for straight and level flight.  We tried many different adjustments, re-aligning the front wheel and rudder several times, trying various landing gear bends, insuring the wing was centered etc… but we could not keep the plane from at least often, if not always, veering sharply right when it was near rotation speed.  We also tried to add some lead to the left wingtip after noticing the right main wheel often stayed on the ground longer than anything else which seemed to help.

At that point we tried another Alpha wing which did NOT resolve the issue entirely even though after it was removed it was proven the first wing was very off balance… being heavy on the right wingtip.  This is an ongoing investigation at this point but after spending 3 hours working with 2 other RC pilots with probably 50 years RC experience between us… it makes me wonder what would cause this plane to act so oddly during takeoff.  I don’t believe the new Alpha ARF has this problem generically… it’s just this particular model that is vexing us I’m sure.  Once we figure it out… or get tired of this and just move on to another trainer… I’ll post an update.

For now, I can honestly say the Alpha 40 ARF doesn’t seem to be quite as good as the predecessor RTF model but is still a pretty good deal for the price and the only downsides should be readily avoidable if you know what to watch out for and spend just a few extra dollars on a throttle cable and a different steering arm!  Hopefully with these tweaks you can assemble a good flying airplane suitable for a beginner and still enjoyed by those of who have been flying for 15 years or more.


Two mid-airs in one flight… what fun!!

This last Sunday… July 27th… was our club airshow.  We’ve been doing a public airshow as a way to make money for the club for about 7 or 8 years now.  Our acts vary but there are usually group flights from various eras or types like WWI, WWII, electric foamy, etc… as well as a buddy box session or two, some scale helicopter, 3D helicopters, giant scale aerobatics and of course 3D airplanes.  This year we even had a 3D act that mixed a 3D heli and a 3D giant scale aircraft.  The two pilots even swapped transmitters during the middle of that one!  Its a ton of work to put on but we have some fun too.  One of the acts that is a perennial favorite is the glider chase and this year was a good one.

Our glider chase is just what it sounds like.  We have a trainer plane that carries an RC glider (really just a large foam glider converted to rudder and elevator only) up several hundred feet and then several of us with whatever we have that is disposable will go and try to crash into the defenseless glider.  The crowd loves it and participating in it is always a blast.  There are few rules other than keeping the “battle” out away from the crowd, and no attacking the carrier plane.  This year we had, I think, 6 chasers out on the flight line and more chasers always makes for more excitement.  The usual result is that the glider gets away cleanly (even though the glider pilot is generally not trying to get away!) and the chase pilots often aren’t so lucky.  One of the first things you figure out is that making your plane hit another in flight when you intend it is much harder than when you aren’t trying!!  Another is that you can’t begin to keep everyone else in sight so you are forced to watch your plane and the target plane… there just is no way to watch everyone else at the same time.  It helps to have a spotter as well to get you in the neighborhood of the glider when you overshoot and aren’t sure which plane is the target!

The more common scenario is that the chase planes collide while trying to get close to the glider as all the planes try to occupy the same small box of airspace.  I always tell folks that if you fly a plane in this event and land it without damage you have just received the gift of a free plane!  You have to write off your plane on takeoff and just hope to find the wreckage to recover your electronics.  Anything more is a gift.  Of course the high level of attrition is why the crowd loves it.  Here’s my experience during one such flight last Sunday.

I took off immediately after the carrier plane and circled up slowly to try to stay in the same altitude range as the glider and preserve fuel.  The Duraplane I fly for this has a small tank and sometimes the glider stays up a while and most of the action is at high throttle so fuel preservation is key.  I stayed a good distance away from the carrier plane in order to not endanger it.  When the release was called out on the PA my spotter directed me toward the glider.  Shortly that area of the sky got crowded with planes darting in and out of my vision field.  My rule is never pull away from other planes as I attack.  If they get between me and the target they are going down!  After a couple passes I had dropped below the glider and pulled up toward the target just as another plane dove past.  An audible “pop” occurred as he passed and I saw a strip of something fall away from the right wing.  After a near miss with the glider I circled once to check controls and all seemed OK so I turned back into the fray.  I was (apparently) unharmed.  Probably just a slapped wing and a little lost covering.  Since my wing is mostly foam I figured it was OK.  I could tell it was my right wing that had been hit but apparently nothing serious.


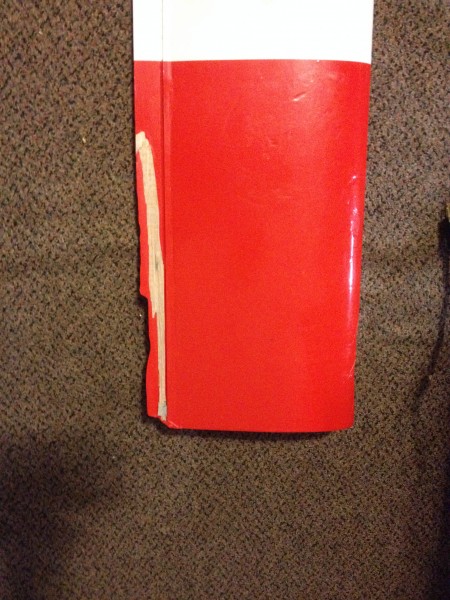
Here is the actual damage that occurred on the first mid-air:2014-07-31 14.47.03

This is the right 1/3rd of my wing and you can see the strip of aileron that is missing is about 1/3rd of the total on that side.  Looks like a prop got into it and did some carving.  I saw something fall away but couldn’t tell it was part of my airplane and the plane seemed to handle OK.

A few minutes later the glider is down to about 50 feet and the announcer calls “knock it off” as we are getting close to the crowd and the runway.  One plane has already gone into the Corn when he failed to pull up quite quick enough after a vertical dive at the glider.  As I pull out and turn down the runway I see another plane coming head on at high throttle… about 6 feet away!!!   There was no time to react.  A loud thud and lots of pieces go flying but my engine is still running.  I have a vague recollection of seeing “the other guy” dropping away into the corn and then I realize I may have an issue of my own.  Ailerons are totally non-responsive…  rudder is working and there is some dihedral in the wing so turns are possible but sluggish.  I call out that I have no ailerons and ask for a clear field.  The landing is fairly uneventful and I taxi back to look at the plane.  Now the wing has a bit more damage.

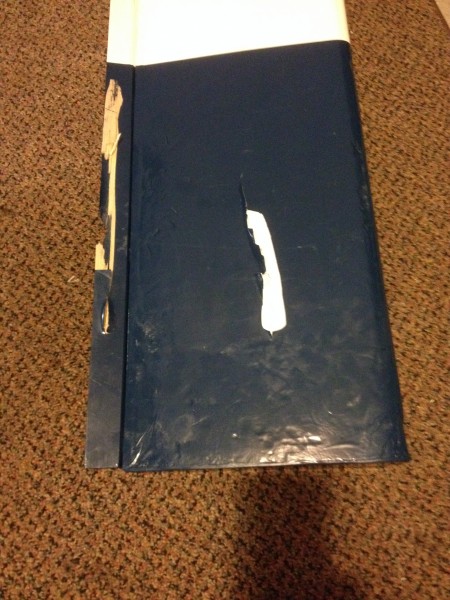
Here is the other wingtip:

2014-07-31 14.48.03

That white gash in the wing goes all the way through where the prop of the 25 size glow plane cut through it.  The other end of the prop came down on the right aileron and now it is pretty much trash as well.  The servo and linkage for the ailerons sits atop the wing and the wingtip of the other plane (after hitting my prop  I expect) hit that and broke the servo arm causing the linkage to depart and leaving no control at all over my ailerons.  His wingtip was pretty much mulch for several inches.

There was quite the buzz in the crowd when this occurred and both I and the other pilot knew what we were getting into.  No harm, no foul.  In fact, it was a lot of fun and a real crowd pleaser.  I was amazed to have had two midairs in one flight and even more so that I landed the airplane successfully and with as little damage as it has.

Drat that glider… I’ll get my revenge… next year.

P51 Mustang Red Tail – Latest Updates

In the last 2 weeks I’ve had the Mustang up on 6 flights and put it back in “race ready” condition just in time for our annual Tim Mills Derby Days RC Airshow.  This is just a little wrap up of the updates I’ve made and issues I’ve had since building up a new wing and electrifying the Robart retracts.  I will come back and edit this post with a few added photos in the coming days.

Working more or less chronologically, I got the wing built up and the retracts installed along with installing the retractable tail gear in the fuselage.  All seemed to be working pretty well so I went out for the first flight.  It went well, with “Drag Racer 2” going through her paces just I remembered.  She flies heavier than anything else I fly but with no real handling problems or bad habits other than needing a lot of speed to handle well.  Fairly much what you’d expect from a big war bird.  Maybe the ailerons could be dialed up a bit but the rolls are probably pretty close to scale… maybe a second or a bit more to complete a roll??  I’ll have to check that and consider increasing throws on those.

This first flight, I kept the gear down and the landing was fairly uneventful with the exception of  a tendency to turn right as the roll out got slow.  Nothing that the rudder couldn’t correct.  The landing gear took the shock on landing  better than I expected.  A pleasant surprise.

Second flight a half hour later was a bit more exciting…  After the first couple laps I hit the retract switch and all three disappeared into the  bottom of the airplane as planned.  So far so good, except the plane wanted to climb rapidly.  At first I didn’t understand but soon the reality of removing drag and closing the majority of the large pockets in the bottom of the tail and wing set in.  The plane is just getting more lift and experiencing less drag… which equates to the tendency to climb.  That’s generally a good thing so why fight it.  Eventually, a couple flights later, I trimmed it for level flight with the gear up and just got used to pulling a little up when flying with the gear extended.

After a few high speed passes I decided it was time to land and went for the retract switch again.  A quick pass to check gear down and… uh-oh… only 1 main is down!  While having all sorts of awful thoughts about how a Mustang would land on no gear (22 lbs of airplane on the scoop… yikes!) or even worse with only one main gear I tried cycling the gear a couple times.  Eventually I had the two mains down and locked.  The tail gear also managed to jam part way down but I decided to live with that and brought it in smoothly again.  No damage and now it is obvious that the gear door is pivoting on the strut and getting caught on the edge of the wing inset.

Back in the shop to tighten and re-glue the doors and come up with a solution for the tail wheel jam issues. The problem seemed to be that the cables that steer the wheel go slack when retracted.  This allows the tail wheel to pivot around in flight and get caught against the side of the plane when the command comes to move.  After some consideration, I added some rubber bands to the assembly to hold the wheel straight when no servo linkage pressure is being applied.  This keeps the axle and wheel from contacting the insides of the fuse OR the landing gear doors when coming down.

Back at the field a few days later and it was time for flight 3 and 4.  These two flights went well and it was during these that the trim got adjusted to account for the wheels up “slick” condition of the airframe in normal cruising mode.  As I flew, I got more and more comfortable with the airplane and made some “photo” passes in near knife edge and about 20-50 foot altitudes as well as fast low passes, immelmans, loops, split S(s), aileron rolls… Pretty much anything you’d expect a Mustang could do.  Both landings were smooth with comments from a pilot who owns this same ARF (not modified and with the wire gear on) to the effect that I was making him look bad by coming in to land so smoothly.  I love to see a big bird do a nice landing so I spend extra time and effort to make mine look good when I can.

Also during these flights I noticed just how much slicker the plane is with the gear up.  I was expecting 2-3… maybe 5 mph increase in speed.  What I got was 10-12!  In a couple of cases the GPS on board said I had hit 113, almost 114 in a shallow dive toward the field.  Before anyone comments on the inaccuracy of GPS speed, I can tell you I have tested the GPS versus the Pitot tube type instrument and they are very consistently within 1-2 mph of each other.  Engine RPMs hit somewhere around 7500 at their highest which didn’t seem to harm the DA-50 at all.

Those flights went very well and the landings were nice with full flaps and just a click or two of power on landing.  Back in the shop I painted the mounting blocks to match the struts and added the guns to the leading edge.  Two .50 cal in each wing in this B/C model (unlike the 3 per wing in the D).  The guns I did a bit different this time.  I cut circles out of flat black and then circles out of those big enough for the gun barrels.  I then ironed these covering “donuts” onto the leading edge at the appropriate spots and then drilled in the donut hole so the gun barrels could be expoxied in place.  After all was complete, a little flat black paint to cover up the brass tubes from which they are fabricated and all is ready to go.  There seems to be quite a variance in gun installations in different Mustang models so these look good enough and much better than the factory glue on pieces.

About the only thing left for this bird is more flights and some added epoxy on a couple of cowl screw inserts that are walking out.  I’m actually getting past the knee knocker factor of flying this bird and starting to enjoy it for what it is.  Not my favorite or best flying aircraft, but very impressive in the sky with plenty of wow factor for the crowd.