My buddy Kelly decided to put his P-38 on his new Graupner MZ-24 radio. This gave me the opportunity to play with his new radio which posed some challenges but I’ll save that story for another time. The issues with programming the MZ-24 were eventually resolved but then another issue with the P-38 was found.
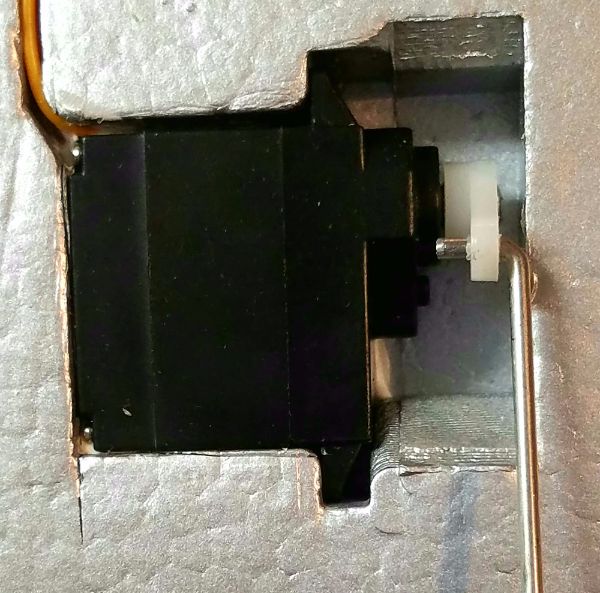
The P-38 has a control board that acts as a 4 to 1 connection for the 4 flap servos. This means that all movements (including centering and trim) affect all flap servos equally. Unfortunately, one of the outboard servos is not set for neutral at the same point as the others. Here is a picture of the two outboard flaps with the servo arm at neutral…

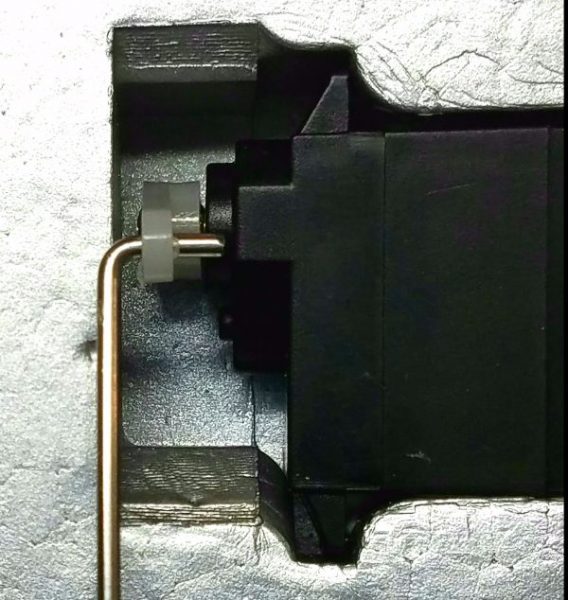
Notice the control rod in the picture above lines up with the edge of the servo case protrusion. In the picture below, it is entirely inside the case protrusion. I.E. the servo arm on one is much closer to perpendicular to the wing than on the other.
Because of this, the corresponding position of the control surface is impossible to match up between the four surfaces involved. I can match up either endpoint on this one flap by adjusting the linkage but the further you move from that position, the more magnified the discrepancy between this surface and the other three becomes. It’s simply geometry.
Typically, the solution to this is to simply remove the servo arm and rotate it to a matching position to the other 3…. assuming this difference is “one tooth” which I’m hopeful is the case. In this installation the problem is compounded as the servo is sitting flat in the surface of the wing with the arm retaining screw pointing toward the wingtip. I understand this orientation is likely a necessity as the wings are not exceedingly thick so orienting the servo this way makes sense but to every design decision there is a trade off and this one results in severely limiting access to that screw. An additional compounding factor is that the servo is glued in place which makes accessing this screw nearly impossible without some more drastic measures. I know this is common practice in foam models but it is NOT a practice a can say I’m fond of and this is a perfect example of why.
I tried to pull the servo out, but the glue appears to be underneath the servo and I don’t think I can remove it without risking tearing a hole clear through the wing… So the only approach I can come up with is to cut a triangular groove into the bottom of the wing so that I can get a screwdriver in there and remove the screw so that I can rotate the arm to the proper position. I’ve been looking at it for days and have come up with no better ideas so soon I will start the necessary surgery and hope for the best. If I can make the cut precisely and neatly enough with a sufficiently sharp blade, I’m hopeful it can be replaced with minimal structural or even cosmetic damage.
I guess I need not point out that better quality control could have avoided this issue and perhaps Motion RC would do something to take care of this issue if I called but honestly what could they do? Sending a new wing is the only option that would do us any good and with the decals already in place that makes a bit more work and I am hoping this will end up being an easy fix. I hope the hardest part will be stealing myself to cut into my flying buddy’s brand new airplane! I’ll post further post-op. Wish me luck.


One Reply to “Motion RC P-38 – outboard flap issue”