“Wax” coating for foam airplanes…

As I have ventured into more Electric powered flight I have acquired more and more foam aircraft.  Foamies are great as they are durable, easily repairable in most cases and very light.  Foam is also easier for manufacturers to shape into all sorts of shapes and allows them to mold in a lot of intricate detail if desired.  Sometimes the downside of foamies is that the foam tends to get dirt and dust embedded in it, grass stains and other scuff marks etc… As well, whatever paint has been applied often wears away quickly.  That’s not a big deal when the plane is the $30 variety but as the foam and electric planes get bigger, more detailed, and more expensive, you tend to become more interested in preserving them.  Even my T28, which is cheap at twice the cost (but don’t tell Parkzone) gets dirty and ugly far to fast in my opinion.  I am on my third and have probably 1000 total flights on them, and wanted a way to protect the latest edition.

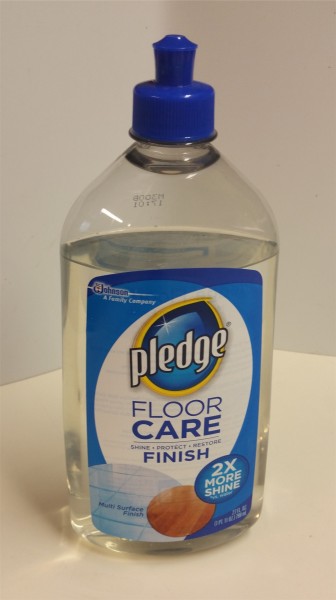
I have seen folks using a clear spray coating of either urethane or something similar but it can damage the foam (either the spray itself or sometimes the propellant used).  As well, many of these eventually yellow and are hard to remove once that occurs.  Looking for something better, I ran across some information recommending a coating of Pledge Future floor polish to help preserve the foam and whatever finish has been applied to it.  I hunted a bit and found the product had since been renamed and re-marketed as Pledge Multi Surface Floor Cleaner so I went out an hunted down a bottle and first did a test coat on a scrap of foam with promising results.

2015-03-07 14.37.48

I have since coated part of my FlyZone Tidewater and all of my Parkzone T28 with it and I have to say the surface seems to be quite tough and very slick and shiny.  In both cases I covered the airplanes by simply painting it on with a foam brush but you really can’t tell that by looking at them.  I have read that many folks have applied it with an air brush with great results as well but aside from giving you a thinner and lighter coating (which may be important to you if weight is a critical in your application), I don’t think you will be able to tell the difference in finish as the product seems to be self leveling in nature and I ended up with a very smooth, slick finish on both aircraft.  Here’s a view of the T28…  it may be hard to tell from this but the finish is much slicker now than it was before.

2015-03-07 14.33.49

So aside from a small amount of weight there are a couple possible downsides to watch out for.  As I learned first hand on the Tidewater, the paint on your foamy may be soluble by the coating!  Yep, the paint on the Tidewater started running as soon as I applied the “Future”.  So test first with a very small amount of finish in an unobtrusive spot before applying widely.  With care, I did manage to coat all of the colored areas with a minimum of runs (a bit of dabbing with a paper towel works wonders).  On the plus side the T28 finish had no issues at all.

Secondly, while the viscosity of the product (just a bit thicker than water) lends itself well to application via foam brush or airbrush, it also can run easily so apply lightly.  The good news is a little reapplication will often soften the area and allow the aforementioned self leveling to occur.  If worse comes to worse, ammonia based cleaners will take it off so you can start over!  Keep this in mind while cleaning the aircraft in the future as many window type cleaners will contain ammonia and dull or remove the finish.

Based on my experience so far, I’m planning on having a buddy do a coat of Future with an air brush for my Carbon Z Cub.  He has more experience with air brushing than I so once I do a little bit of customization/decoration I plan on handing it off to him for the actual application.

If you need to get some Pledge Multi Surface to try it out for yourself and can’t easily find it locally, here’s a link to Amazon for the correct product.  Pledge Floor Care Multi-Surface Finish

It’s cheaper there than I found it locally, even with shipping!  I’ll update this post with my experience once flying season is in full swing.  Please comment with your own experience here as well.

“Bargain” battery? Maybe now it is..!

While working with a new pilot at our club field the other day he mentioned that in order to get his charger to properly work with the battery he was using for his on board glow (a pretty standard 4.8V NiMH pack) he had to bend the wires just right and/or stick pins in the connecter, etc…

I immediately told him this was NOT the norm and he should not continue this practice.  This is a warning that something isn’t right and we need to figure out what and why.  He took the battery out and we tried to check the voltage and sure enough the connector was almost impossible to get a good connection on…  I volunteered to take it home for further investigation and likely swap out the connector.  It was clearly labeled as a 2300mah NiMH from one of the more recently arrived web based resellers and a quick browse showed claims that it is a low discharge NiMH variant.  Some call these Hybrid NiMH and there are other terms.  The nice thing about this type of NiMH is that have a low discharge rate when stored so they don’t tend to drop their capacity between flight sessions like many NiMH batteries do.  I wouldn’t use a standard NiMH if I could avoid it because I just can’t count on them to be ready when I am and I don’t always know I’m going flying, sometimes until a couple hours before leaving for the airfield.  Standard NiMH with their high on the shelf discharge rates just don’t work for me.  This is especially true when you combine that with the low charge rates most will tolerate.  I can’t store them fully charged and expect them to hold for long and I can’t fast charge them…. just doesn’t fit my flying habits at all.

This battery looked like a nice combination of low price and a reasonable battery technology for our needs in RC aircraft.  Combine that with a low price and maybe there was something to be happy about here.  But what about that connector?  When I got the battery home I decided the connector was just not very good quality.  The pins (sockets really) were moving to much in the plug and didn’t appear to have been crimped evenly.  Next I noticed that the wires were significantly smaller than the average servo wires I’m used to.  Maybe 26 gauge instead of 24?  I’d rather replace the lead than splice it anyway so I took off the outer shrink wrap and this is what I found….

photo 2

First of all, I wonder if using what appears to be masking tape as the insulator to keep the wires from laying directly on the battery ends is the best choice or just an economical one?  I guess it’s not terrible since I presume it’s there to prevent chafing more than electrical insulation or perhaps just to aid in assembling the battery.  I’m used to seeing strapping tape/fiberglass tape here.  Seems like the masking tape might attract some unwanted moisture though.  Anyway, that isn’t so bad but the wires being so thin I did not like.  Seems like some slightly larger gauge silicon wire would be ideal but I guess you can only expect so much for single digit (dollars) pricing.

I then started to strip the tape and de-solder the wires when I noticed the following.

photo 1

Do you see the insulation cut on the black wire?  This was caused by the outer shrink wrap around the battery cutting into the insulation on the wires.  Either the shrink wrap should have been applied differently/softer heat shrink used or perhaps a wire shield/wrap/guard of some sort used around wires.  I’ve seen others use a nice rubberized sleeve (maybe just some appropriately sized heat shrink) to keep this from happening and add some stress relief in this area.  Hmmm… bad connectors and questionable construction/poor quality control…  Makes me think the savings on this battery might not have been such a bargain after all.

My point here is really just a long winded way of saying that very often in this hobby, “you get what you pay for” applies.  Even when you are buying something as mundane as a basic 4.8V NiMH pack.  I have no idea how good the cells that make up this pack really are.  Time will tell.  But even if they are top end like Sanyo Eneloop, the short cuts they took to make this pack more of a “bargain” could easily have resulted in a high cost to the user.  If the cut had been in the red wire and it had shorted to the negative can of the battery it was sitting on top of, the best cells in the world wouldn’t have helped.  Same for the connector that wouldn’t reliably do its job.  Every little bit of quality I can get in my airplane products is welcome.

Hopefully, with the new lead attached and a few wraps of some decent quality electrical tape, this “bargain” battery pack really will be.

PVC… Great for plane holders, wing racks, etc…

I needed to create a wing rack for when I’m carrying a larger number of planes in my trailer such as when I go out for trainer night at the field when I usually displace my 30% Edge with some combination of my Telemaster 40, Sturdy Bird and a sport/fun fly plane along with my Radian glider.  Usually 2 or 3 of these join the mix.  It becomes a problem to find a place for all these 4-6′ one piece wings so I decided to build a small wing rack and of course to do that I reached for some trusty PVC pipe.  This stuff is cheap, strong and there are a variety of “joint” pieces available to join two, three or 4 pieces together at 90, 135, and 180 degree angles, plus caps, etc…  You can build all sorts of stuff useful in RC.

I will add a few example photos for you to give you some ideas about where this can be useful.  Here is a pic of a stand we created to hold the Giant Scale P40 while we worked on it last winter on the bench.  Also in the pic is the pipe cement and the special cutters that work kind of like ratcheting scissors to give you a quick and easy PVC pipe cutting ability.  A wood or hack saw work OK too but they make a mess and take about 10 times as long to accomplish the task.

PVC Plane Holder

Here is a boat holder I created.  The two posts sticking out were used to hold the surface radio I used to carry with it.

2013-08-09 17.50.27

And this one is the new wing rack I just completed.  It will get some padding added soon.

2013-08-09 17.51.12

Sitting next to it and housing my P51 mustang is a combination structure using 2x8s along with PVC and velcro.  I took one piece of PVC and drilled holes through it to match the wing mounting block in the body to give me a cross piece that drops into notches in the 2x8s for a very reliable and secure hold down method.

2013-08-09 17.52.48

I have created wing racks in the garage that hung on the wall, plane stands for holding a couple of planes nose down and many other useful items.  With the different sizes available and combining velcro, pipe insulation for padding and even combined with wood at times where some heft or additional strength is required, you can create a whole host of useful stands, racks, carrying aids and much more.  Best of all you can assemble and do some “custom fitting” without using any glue and then go back and disassemble and reassemble as many times as necessary to get what you want before applying the cement.  And the material is relatively inexpensive!

Let your imagination go wild.  With a few sticks of PVC you can do a lot for less than you might think.