Just did some updates and posted my first video on my blog/web page for all things RC Aircraft related. First video is embedded in the post titled GPS Telemetry – First flight.
Flying indoors at the gathering place 2 night at 5…
Flying indoors at the gathering place 2 night at 5:30. Working in the shop about noon.
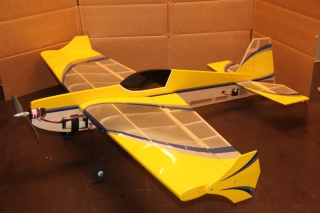
Aeroworks Extra 260 Electric
My Aeroworks Extra 260 EP-3D ready to fly… not much more than a static model at this point!
This is my AW Extra 260. Vital stats as follows:
- Power is a Super Tigre Electric 400 Speed 950kV with an APC 10×4.7
- Weight 14-15 ounces with battery
- Battery is a 3 cell Thunder Power 1350 3S LiPo rated at 25C
- Speed Control is Castle Creations Pheonix 25
- Servos are all E-flight S75s
- Radio gear is a Spektrum DX8 and 6 channel Orange RX and JR remote DSM2 system
I created the motor mount (just a light aluminum plate with some holes drilled) as I didn’t want to spend the $80 for the motor that was recommended and this one (at around $20) used a Y shaped bolt pattern as opposed to X-mount that was provided for the high dollar motor so modification was in order. At this point “flying” has been limited to hold it pointed to the ceiling in the garage and throttle up until I can let it go and quickly grab it again before it wants to hit the ceiling. That is seemingly happening with about 50-60% throttle so power won’t be an issue.
The last few days have ranged from 15 above to a few degrees below (Fahrenheit) and I am fond of 75 degrees, sunny and no wind so it will likely be a few weeks before it gets a proper test flight!
Well in all honesty I did fly it once early on with an over sized battery (hard to find anything large enough that fits the slot cut for it) right before the cold winter weather set in but that was limited to just confirming it flew, nothing fell off and everything responded to control inputs properly. It was to windy and cool to make a proper assessment that day so while nothing catastrophic to report I can’t say if it flies well or not yet.
I may move it over to a new Spektrum 4 channel receiver before my next chance to fly. Dropping the remote will save a bit of weight and I’d rather have a Spektrum brand receiver than a knock off anyway. I’ll feel more confident about flying it way out and up and with the new receivers being only $30 or so I don’t mind paying for the Spektrum name. Besides I’m only using 4 channels and this way I can get closer to having all of my fleet on DSMX.
Parkzone Mini Vapor – lesser relation to the Night Vapor
The PZ Mini Vapor – A bit less than the Night Vapor in almost every way
I have so much fun flying my Night Vapor that when the Mini was announced I went to my local hobby shop and put one on back order. It was a few weeks before it became available but it came in shortly after we fired up the indoor season in these parts so all worked out well enough.
I took the Mini out of the box as soon as I arrived home, took a best guess as to battery placement and quickly shut off the ceiling fans. A short take-off run down the kitchen island and I was flying… sort of. OK, so balance was a wee bit nose heavy and it took a few seconds to remember that I had forgotten to do my usual rudder to aileron mix (the rudder is set up to respond to aileron input… which is fine when your expecting it!). Luckily, the wall is 4 feet away from the kitchen island/runway and not 3! Once I got the balance straightened out and the mix set up, I was back in the air and decided flying in my living room was probably not a fair place to test out this little airplane. It seemed a bit quicker than I had imagined and the living room walls seemed to come up quick! Maybe after a few trim flights in the gym and I could be happily tooling around in my living room like in the video!
So for the next couple indoor flying sessions I did some trimming and balance tests and flew with the stock battery (30mah I think) as well as the 70mah from the Night Vapor. In the long run, what I figured out was that the Mini Vapor just isn’t (for me at least) up to speed compared to the Night Vapor. I can fly the Night Vapor in the same space and at the same apparent minimum speed as the Mini. Also, the Mini doesn’t seem to have quite the power to weight ratio as the Night Vapor… loops are harder to do, max climb is a bit slower and as one would expect, at 1/3rd the weight, the Mini can’t handle wind at all.
So is the mini such a terrible little plane? Not at all. It’s a nice little plane in it’s own right and capable of flying in a small space with some practice. Just the fact that we can go out and pick up a production airplane that is so small and light and flies this well is pretty amazing. It just isn’t what I wanted and expected. I’ll still fly it (in the gym) but probably only when the Night Vapor batteries are all on charge!
Parkzone Ultra Micro J3 Cub
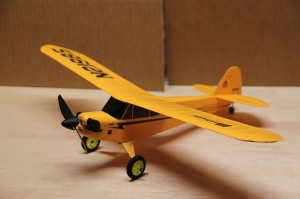
My ParkZone J3 Cub with Prop/Save and Wheels from RC Funlab
This was my ParkZone Cub. I recently passed it on to a fellow flyer who simply enjoyed it so much I gave it to him! A month or so ago at one of the indoor flight sessions I let him have a couple flights with it and he immediately started doing touch and go passes and just generally running around in ovals and having a ball. He’s the younger brother to one of our best young 3D fliers at my home club (Indy RC Modelers) and he’s had a few little indoor planes so I knew he would have no trouble with it. When I got home I realized that I had done pretty much all I ever wanted to do with it. I didn’t need it any more so I fixed up a minor crack that it had earned that night and boxed it up until I saw the young man again.
I was originally attracted to the petite little Cub because it’s a pretty decent looking semi-scale bird…. considering it’s an indoor electric molded from foam! With some panel lines, a fake engine and with the edition of some “sorta-tundra” tires it looked and flew pretty nice. My only immediate disappointment was I actually expected it to fly a bit slower. Isn’t that how Cubs fly? It seems to need a bit more speed than I would have expected but I adapted to that fairly quickly. I enjoyed it for a while but over time I realized it flew…. well… like a Cub! Actually like a model Cub, which is to say stable with better than scale power but limited to the normal things that a 3 channel, micro electric can do.
Over the course of 6 months or so I got a bit bored and soon gravitated toward other, more interesting airframes like the Night Vapor and SBach. The Cub only got flown when nothing else was available or conditions were such that I wanted to fly something “disposable”. It just wasn’t all that much fun for me anymore. Don’t misunderstand, I had my fun and felt like I got my money out of it. It’s still one of the better looking examples I’ve seen and my young flying buddy sports a big smile when he is at the controls.
In summary, I would recommend the Cub as long as you understand what you are getting. This is not a plane to fly in the house and of course outdoors in mild wind is OK but no more. Maneuverability and power are reasonable but this is obviously no aerobat!
I would suggest the prop saver option as these are well known for breaking prop shafts (right at the back edge of the prop so you have to replace prop and shaft!) in the case of any nose down landing. Otherwise, it’s a quality little airplane right out of the box.
Parkzone Night Vapor… Indoor or light wind flyer
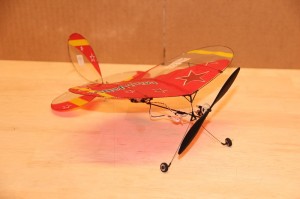
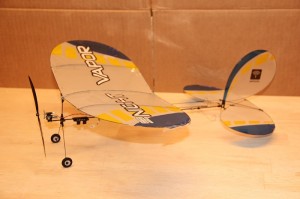
My Night Vapor – showing some wear and tear but still flying great.
The Night Vapor is a sub-one ounce, 3 channel indoor flyer from Parkzone. I’ve been flying one for about a year and a half and probably have 150 flights on this little aircraft. I think it is one of the best values in RC, at least for those who are flying DSM2 or DSMX radios. I bought mine Bind N Fly and have flown it on the JR x9303 as well as (most recently) my Spektrum DX8 and have great fun every time.
The Vapor has a fairly large flight envelope, ranging from medium-slow to extremely slow high alpha, almost hover, which can be sustained for as long as you feel like holding the elevator back and correcting ever so slightly with the rudder (even if it is on the aileron stick) and some very mild jockeying with the throttle. Fast it will never be, at least in level flight and I don’t recommend high throttle dives. If you try to go fast, be aware that there seems to be some tendency to warp the wing/tail and everything else in a full throttle dive that may result in some unintended maneuvers. Buy this plane to go slow and enjoy exploring the low end of the envelope… that is where this bird shines. Low wind… maybe up to a bit less than 10mph??? is OK but in a gym with no wind or blowers on at all is ideal.
In the gym, doing carrier landings on a standard 6′ table, using the same table as a limbo or even tempting the gods with some “through the rafter” flying is all very possible and a heck of a lot of fun… just don’t expect anyone to climb up there or come up with a cherry picker to retrieve your airplane!
A few tips based on my experience with the Night Vapor. Once you figure out the proper location of the battery for balance (the whole carrier slides on the fuselage “stick” for adjustment) and get accustomed to the flight envelope of the normal setup you are ready to make a few adjustments to get the most out of this airplane. That should take about 4 flights as the Night Vapor is really easy to fly, but take 10… it’s all fun! Save the full throttle setting for fast climbs, loops and the like and stick with the 70mah battery for a while so the balance is consistent and the airplane remains light. Slow and light is where she shines.
Assuming you have a better transmitter than the little “video game controller” quality that comes with the RTF model (Not saying they aren’t usable but they don’t have the features I’d like) go back and make a few adjustments. First, move the linkages in on the control surfaces as far as they will go to get maximum throws available. Then go into the radio and put in appropriate endpoints so that the elevator and rudder can’t bind together when both are at extreme throws. Add some expo or at least some dual rates and start experimenting. What looks a lot like a flat spin, the aforementioned “near” hover, tight loops and other interesting maneuvers become much easier at this point. Try bigger batteries like a 120mah for longer flights but expect to give up just a little vertical and of course low speed, high alpha takes a bit more throttle. I prefer to stick with the 70mah and 12-15 minute flights are easily attained with it so I see no point in anything larger unless it’s all you have handy!
Finally, you may have noticed this bird has lights on it for night flying!! I would recommend you get used to day flying first as trying to get used to a new airplane AND trying to stay oriented would be a bit challenging… please don’t ask how I know. Once you are comfortable this is just about the best thing every built for cruising around the night sky, (not too far away) making touch and goes off the top of your camper or other nearby “landing strip” and just generally having a good time out of doors after the sun goes down.
In my book, the Night Vapor is an airplane I would likely replace immediately if something untoward occurred. Of the 14 or so flyable airplanes I own… few fit in that category.
GPS Telemetry – First Flight
I picked up the Spektrum GPS module over the Christmas holiday. Somehow I was not even aware when this item came on the market but when I saw the ad for it I knew I had to try it. I immediately dropped an email to my friendly local hobby shop and a few days later I picked it up. I already have telemetry in my Wildhare 50cc size Slick as well as my Topflite P51 “Redtail” Mustang but this, in my mind, was a totally different level. I’ve already posted on some basic telemetry usage in my Radian glider, but being able to track altitude, heading and speed in addition to GPS coordinates was potentially a game changer. In my mind, there were so many possible upsides to this new sensor.
The module is a bit pricey, but you have to keep in mind that the GPS module is a possible replacement for a couple of the other existing Spektrum sensors and therefore some of the sting of the ~$100 price tag is diminished. When you throw in the heading and position facilities the module starts to seem a bit more reasonable. Lets be honest, none of us fly RC airplanes because its a particularly cheap hobby do we?
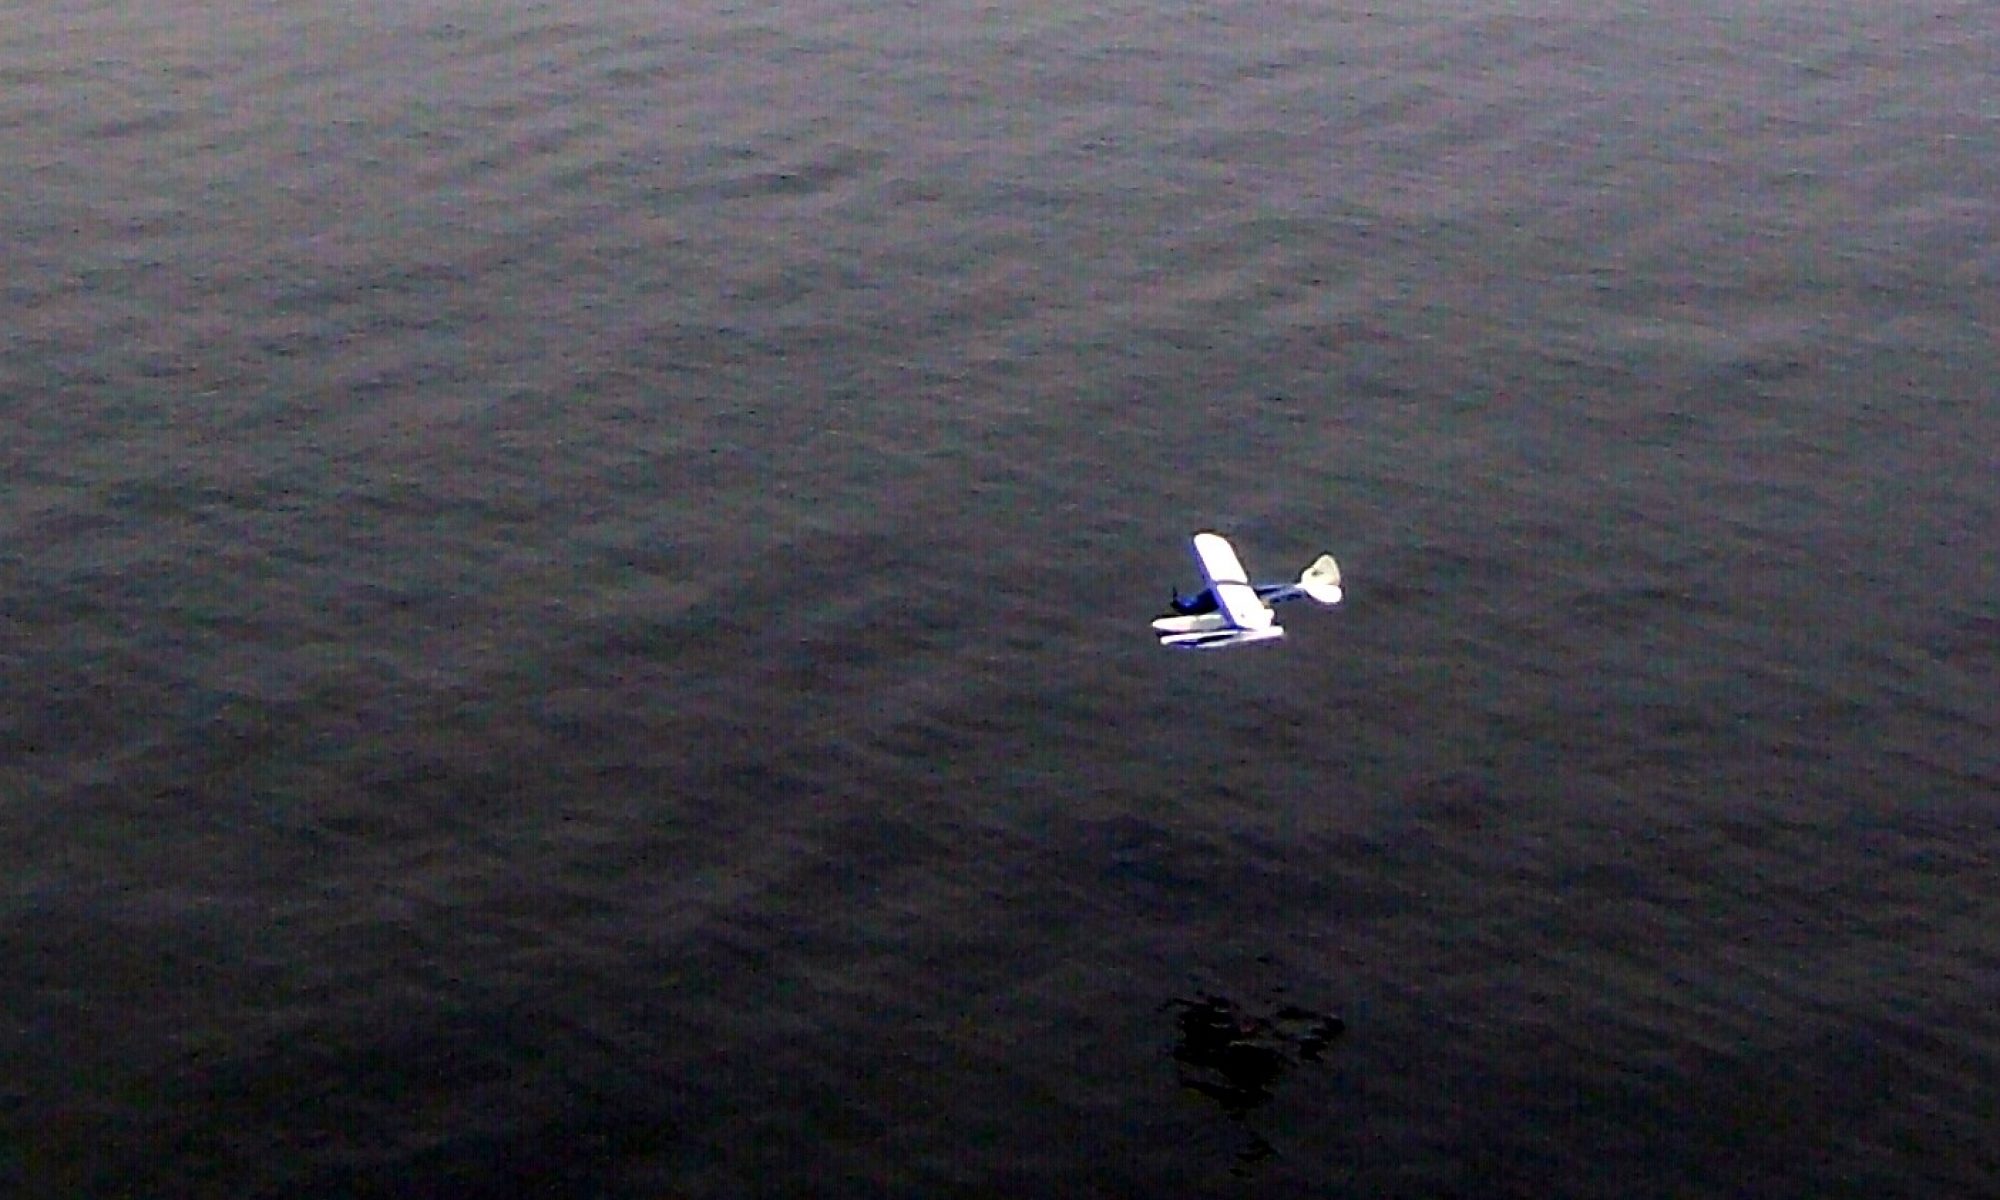
That was my train of thought when I got busy and installed a TM1000 and the GPS module in my trusty Telemaster 40. Looking at the local weather forecast on the shop TV convinced me to add the floats as well. Skis work in some snow conditions but I have found floats work well on a wide variety of ice/snow or water. A quick test start on the trusty Saito 82 and a good overnight charge and all was ready. A couple days and 4-6 or maybe it was 6-8 inches of white stuff later and January 1st, 2013 dawned calm and cool. Time to test out the new GPS module!
After a nice long flight, I entered our club’s nicely heated shelter, downloaded the telemetry file and emailed it to my old (original model) Ipad. As you can see by this clip (I’ll insert a video here eventually) the STI application can overlay the collected flight track on what appears to be a satellite shot of the flying field. Then you can replay and watch as the entire previous flight plays out as a small airplane icon moves across the map and leaves behind a trail of arrows. A window can be brought up showing all the GPS information as the flight plays out on the map. By noting the heading, altitude, speed, etc… and comparing to the track you quickly start to recognize loops and stall turns and can easily see just how close you came to that tree line or how high you really flew. This is extremely cool stuff with some real life usefulness behind it. Here is a small sample video showing the first minute or so of my flight.
- Allow me to pause the flight and clear all those little arrow tracks. After a while I can’t see the airplane icon for all the little arrows.
- Give me the ability to “zero” the altitude with the push of a button and let the program do the math to tell me what the variance in altitude is from that point on.
- Put a scale of some sort on the screen so I can get some sort of idea of relative distance… even better if I could set a zero point just as I’d like to do with altitude and let me see distance from that point.
Having said that, this technology makes a lot of valuable information available to us. During part of my flight I flew out “close” to our northern tree line… or so I thought. On review I had more available space than I thought. Very good to know. When practicing for IMAC, one of the prominent issues to watch for is flying a straight line parallel to the runway with a constant altitude. Without the ability to do this you will never score well at a contest. This is a lot more difficult than you might believe. With GPS telemetry, you can answer these question once and for all. As you might guess, the GPS module has already been moved (likely permanently) into my Slick (my IMAC dabbling plane) and another has been ordered.
How fast? How far? How high? Where? When? All those questions are answered once and for all with GPS. I can’t wait to get a plane in the air with a GPS combined with a “full boat” of other sensors. Ever wonder how your engine temperature varies with throttle and speed? What the unloaded RPMs really are in flight? I’m looking forward to learning all those things during this upcoming flying season.
I’ll try to write up an article some time soon showing all the Spektrum Telemetry pieces and parts and the ins and outs of making the system work. There are some small quirks but nothing overly difficult and the information gained is fascinating.
January 12 – Maiden flight of Steve H’s Aeroworks…
January 12 – Maiden flight of Steve H’s Aeroworks .60-.90 Extra 260 was highly successful. DLE 20 power. A few tweaks and it’ll be sweet.
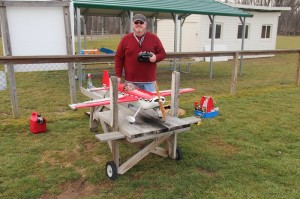
Here is the proud owner/pilot. I did the maiden and Steve took the next flight. Very little trimming needed. Plenty of power. 62 degrees and very little wind is not your average Indiana January day!
Flying indoors tonight at The Gathering Place in G…
Flying indoors tonight at The Gathering Place in Greenwood, IN. 6-9. Night Vapor, mini NV and Freestyle foamy are ready to fly.
Spektrum Telemetry – Altitude and Flight Voltage in a Glider
I have recently been exploring the Spektrum telemetry system a bit. I have fairly full house Telemetry install in my 50cc size Mustang but it has limited flight time at this point and getting it out in the snow wasn’t feasible so I started with a smaller testbed to do a little experimentation.
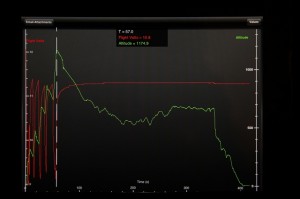
I installed a TM1000 Telemetry receiver into my Parkzone Radian glider. I had recently replaced the original receiver in that bird with one of the new, low cost 4 channel DSMx receivers which just so happens to be telemetry compatible so by just running the standard wiring from the data/bind port on the receiver to the TM1000 I had a working system. I then added the Altimeter sensor and created a little wiring harness to tap into the balance plug on the 11.1V, 1300mah LiPo flight pack and I had access to a fair amount of information. I could see fades, frame loss and hold on each antenna as well as receiver voltage and the pack voltage plus the altitude. I went out to my test area (known as the side yard) and made a short glider flight. Here is what the display on my iPad looked like when I downloaded the data afterwords. The red line is the battery voltage (note the drop in voltage when I was climbing/running the motor). Green is altitude.
While examining the data after the fact on the iPad was interesting and informative the best part was what the system allowed me to accomplish while I was flying. During the flight I had the display up on my DX8 showing altitude and while having the motor shut down was able to get into some lift that I believe was coming off a neighbors roof heated by the sun. I noticed a bobble that I thought might indicate some lift but couldn’t tell whether I was getting into a lift area or not… the bird was already at 500+ feet altitude and a couple hundred yards away at the time and I just couldn’t tell visually whether I was gaining altitude or not. By peeking at the display from time to time and circling around the suspect area I was able to figure out when and where I was gaining altitude and was able to verify where to position the Radian to gain some altitude. I spent about a minute continually peeking at the altimeter readout and circling back to the lift area and gained about 150′. While I’m sure others could do much better and probably do so without any need for instrumentation, for me this was ground breaking stuff. It was the first truly useful example of what these tools can add to the game that I’ve seen and it convinced me that adding telemetry could give me more than just some cool factor! I’m already thinking about other ways to make use of some of the other available Spektrum Telemetry sensors.
Next time I’ll talk about my first experiment with the GPS sensor at our New Years day “freeze fly”.
