I recently got my hands on what seemed to be one of the first batch of the new Spektrum SPMA9605… known as the Flight Pack Battery Energy Sensor. Where the earlier options had been a current sensor and a voltage sensing lead, the new sensor promised to not only read instantaneous current, but to keep accumulated current draw and pack temperature as well.
I installed it into my AeroWorks Extra 260 (60-90 size) powered by a Power 60 E-Flite motor by the expedient method of simply plugging in the two EC-3s and the xbus connector from the earlier installed current sensor. Upon testing I was dismayed to find I could see no option to display the new information… Only after fussing with it at the field for 30 minutes or so did I recall that I had declined to upgrade the software in my DX-18 months before, seeing no need for any of the fixes that centered mostly on helis and sail planes. I especially did not want to rebind all of my aircraft since every previous version had required that. The latest versions promise that it might not be necessary but I had not been interested in testing that assertion.
A couple days later (tonight in fact) I downloaded the latest version and after backing up the DX-18s memories… placed the updated file on the memory card and hit the proper keys… After a couple of minutes the radio finished the process and miraculously upon power up, I had full control of the little Extra!
Even better, I now had the option to include the battery pack sensor in my display and set thresholds and alarms. I set up appropriate levels and tested the current readings and all looked promising. Since my built in temperature sensor was already in use monitoring the motor, I wanted to take advantage of the temperature capability of the new sensor.
Now, I became confused as the port labeled temperature on the side of the sensor was clearly 4 pins and the only temperature probe I had available was clearly a three wire connector… and actually only used two of them! I chatted with a supposed expert on the Horizon web site and they had not physically seen the sensor and could not help, nor did the documentation that came with the unit so much as mention the temperature port.
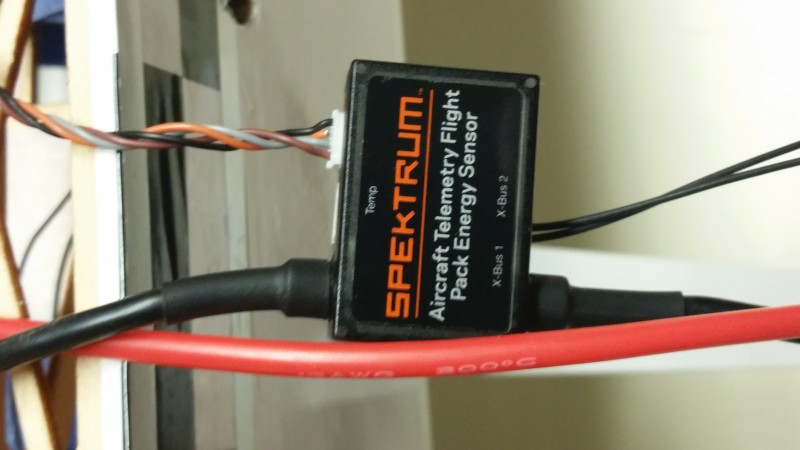
I had nearly given up hope of finding an answer when I finally noticed the top label of the sensor was (at least apparently) applied upside down… Where the label says X-Bus 1 and X-Bus 2 there is but one port and it is 3 pins…. X-Bus is a 4 pin connection. On the opposite side is a label Temp and on that side are dual 4 pin ports… Clearly these are the two X-Bus ports and the one 3 pin is the temp sensor!! I had already plugged in the single X-Bus port into one of the two ports on the side labeled temp it could only fit on that side. I went to look at pictures and realized that all must be this way! Someone should tell the folks on the assembly line… 🙂
Here is a picture showing the labeling and the correct wiring.

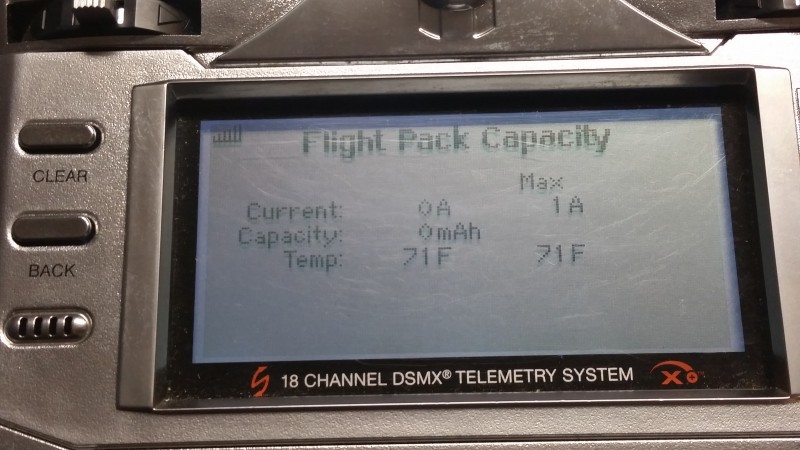
Turning in the radio after this revelation shows the following…
 I now look forward to actually flying and testing the capacity measurement capability and am excited that I will no longer endanger my batteries by over discharging them. The closest I could do before was to set a low voltage limit which often meant I would get a warning that would sound at anywhere from 5-35% of capacity remaining depending on throttle setting at the time. I have great hopes that with this new capability I can set the alarm for a calculated 80% of battery capacity used and expect a much more accurate accounting.
I will post more as I get time to fly and test this capability.
