With cold weather and rain the rule for the first few days after the initial assembly of the CZ Cub I turned to setting up my radio and adding one or two “upgrades”.
First up, I went through and put triple rate control throws and levels of expo on my radio. Also I set up for a stopwatch timer as I am unsure of the flight times I can get from the recommended Eflite 30C 5S 3200mah battery I purchased. From there I setup the flap system with a nice slow 2 second deployment and 20 percent of down elevator throw. Unfortunately with no indication of how much Flap throw is considered normal there is no way to know how much flap or how much elevator mix will be required to offset it. The manual says 42% of elevator but that is hardly helpful with no idea of 42% of what!
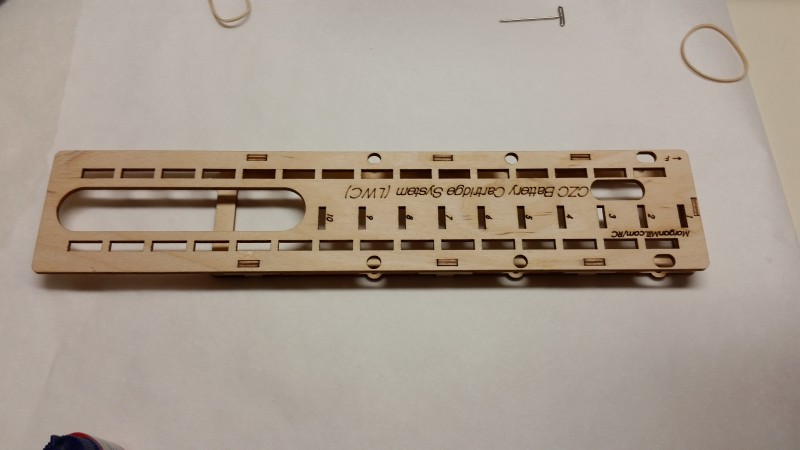
Continuing on, I had read some forums that indicated that the paint around the front hatch was prone to damage due to trying to get hands and batteries in and out and that a new battery tray that was laser cut helped with this issue. I decided that this made some sense so I ordered the Morgan Mills RC battery cartridge system and installed it. Assembly was easy once I viewed the assembly video on line about 3 times! If you don’t do that, good luck as there are NO included instructions!! The tray and cartridge seem very nice so far and definitely make getting batteries in and out easier. This is the part that replaces the plastic tray inside the airplane.
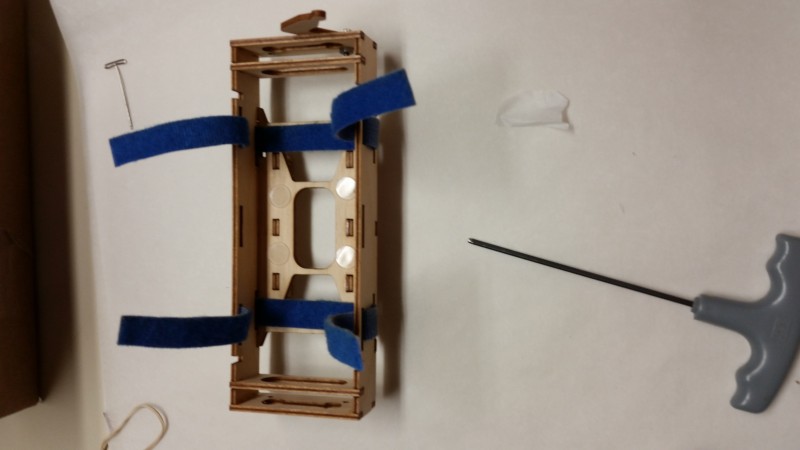
And this is the battery holder that you put the battery in before insertion into the airplane. I added the small rubber dots you see to keep the pack from sliding even the small bit that is allowed by the tray. I also used my own double sided industrial strength Velcro instead of the stuff that came in the airplane (it seems a bit weak when you consider how heavy the battery is that your securing).
So far, playing on the bench, it seems to work very nicely and the ability to easily reposition a battery to exactly the same spot every time you put it in the plane is certainly going to help, especially if you plan on running more than one size/weight pack (like I likely will).
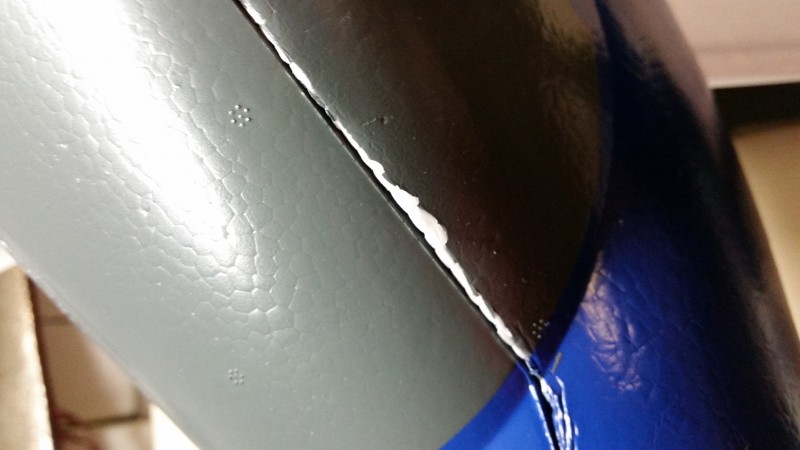
The downside of all this is that folks are right on when they say the paint in this area is fragile. In fact, I think it is pitiful… Even being aware of the issue and trying to take great care, I have already lost a fair amount of paint in this area before I’ve even made my first flight. This is very disappointing… I realize this is a foamie but it’s a fairly expensive foamie (not the original cost so much as the total investment) and there’s got to be a better way to get the paint to stick to this foam. It really worries me as to how well the rest of the paint is going to hold up. My investment at this point with battery, receiver, plane, floats, and glider release servos is over $600. I’d like to have this thing look decent for more than the first 2 weeks! I was thinking the overall price on the CZ Cub was pretty nice for this large a plane… foam or not… but I was expecting to keep the paint attached for more than a few days. Very disappointing even if it is only cosmetic. Here is a close up shot showing what has already occurred in just a few days.
Next I went to install the glider tow release servo. I love that the CZ Cub has this built in with only a servo needed to make it operational. I have two buddies who would love to have a good tow ship available to get their gliders aloft and this thing could be just the ticket! I wish the instructions were a bit clearer… or maybe just a better diagram but the actual mounting point looks a bit different than the diagram with no direction given as to what type of screw to use to mount the servo… at least E-Flite is consistent! In actual practice I ended up using one screw through the servo mounting hole on the servo and another just overlaps the end of the servo mounting tab and clamps it in place. It seems very strange but seems to work so far.
At this point I am ready to fly and while I am trying to tamp down my expectations I really am expecting some good performance. The plane only weighs 8.5lbs ready to fly at this point and with the 6S power, flaps and huge wing area it should be a real floater with some excellent power to weight ratio. Can’t wait to fly!


Follow up? Just ordered the Morgan mill system
Some of my friends go to LOWES and they will use the computer paint system to provide a small bottle matching plane part you bring in. Im told it cost about 4$ for small bottle.