
After picking up this little ducted fan at a swap I have been going over it and trying to get it ready to fly and every time I look at it there seems to be something else that needs “remediation”! First I went through the power system and had to disassemble and re-solder, etc… Then I had to re-glue the control horns on the elevator and find some mini/micro EZ links to capture and hold the control wires.
Then I started looking for replacement control horns for the ailerons. In order not to change the geometry on those (hoping the default/factory sizes are the right length) I decided I needed to create my own… So I quickly cut some out of some 1/8″ thick ply…
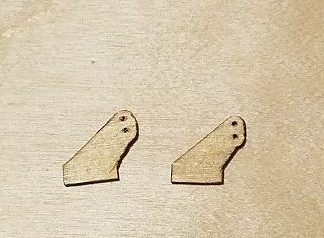
Then I cleaned up the holes in the ailerons and applied some FoamTac.
Here’s an Amazon link where you can get some of your own if you are so inclined. I can’t imagine working on foam aircraft much without some. It is very versatile and incredibly tough. : Amazon.com: Beacon Foam Tac Foam Glue 2oz Carded by Beacon Adhesives: Toys & Games
I made use of some dubro micro hardware for the needed linkage hardware and all seemed to be finally coming together… until I figured out that the elevators could move through about 1/3 of their travel without moving the servo!! This didn’t seem likely to result in a successful flight so I was back to remediation mode…
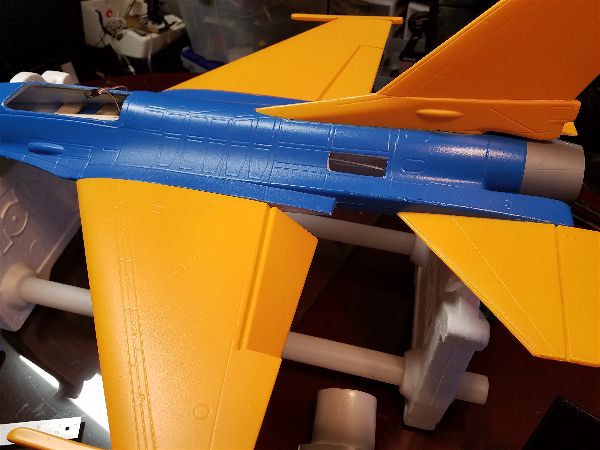
After some investigation I realized that this small airplane was showing that some things don’t change with size. Whenever you use a “wire in tube” type of linkage (one to each half of the elevator in this case) you must support and secure the outer tube. In the case of the F-16, the flexibility of the linkage makes it ideal to route around the ducting but makes securing it all the more important. Whoever built this plane originally didn’t do this. Unfortunately this meant I had to cut some more access holes since the plane and the power system are more or less permanently glued together at this point. Here’s one of the new holes… I tried to follow some existing panel lines so maybe they won’t be quite as obvious when I replace them.
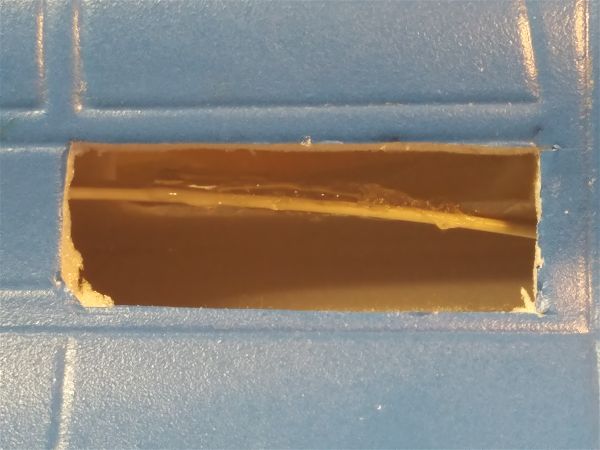
After strategically cutting these access panels I used a bit more Foam-Tac to secure the linkage outer tube to the foam side wall of the aircraft and/or the duct tube… whatever it was already laying against. Here is the outer linkage glued to the duct tube.
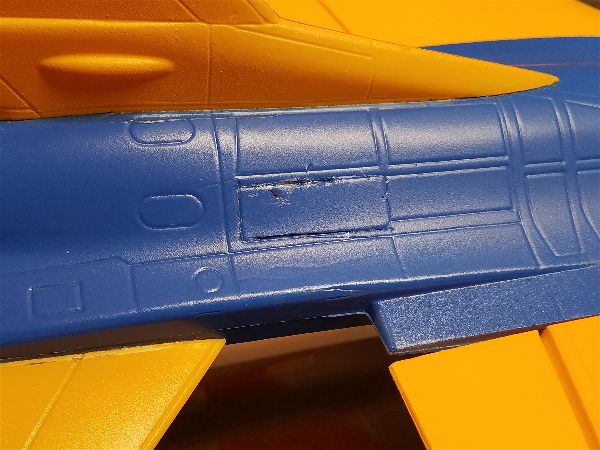
Then replacing the access panels gets me back to where I’m ready to install a receiver and get this thing ready. Here it is with the panel back in place… not perfect but this is not a competitive scale bird!
Of course the airplane had some final (I hope) flaws to throw at me… As I was getting things back together, I noticed that the top and bottom of the nose area (immediately behind the nose cone) were not securely attached to each other. I cut some strips of box tape to help secure these together and once more I’m almost ready to secure all the electronics and install and bind a receiver. Hopefully I’m nearing a ready to fly status.