With the basic airframe finally assembled it was time to start doing some personalization. In reality, I had done a fair amount already, or at least prepared to do a fair amount. Let me explain.
While I was waiting for the aircraft to arrive, some of the parts I thought I might want to get as spares came back in stock. When they did, I ordered a spare prop assembly and a second canopy. The spare prop because I figured if anything ever happened, I certainly couldn’t run to a nearby shop and pick up a 5 blade prop! The canopy, because I wanted to do something to scale it out a bit and make the plane a bit more individualized. When those arrived, I immediately opened up the canopy and started looking for some 3D printable upgrades.
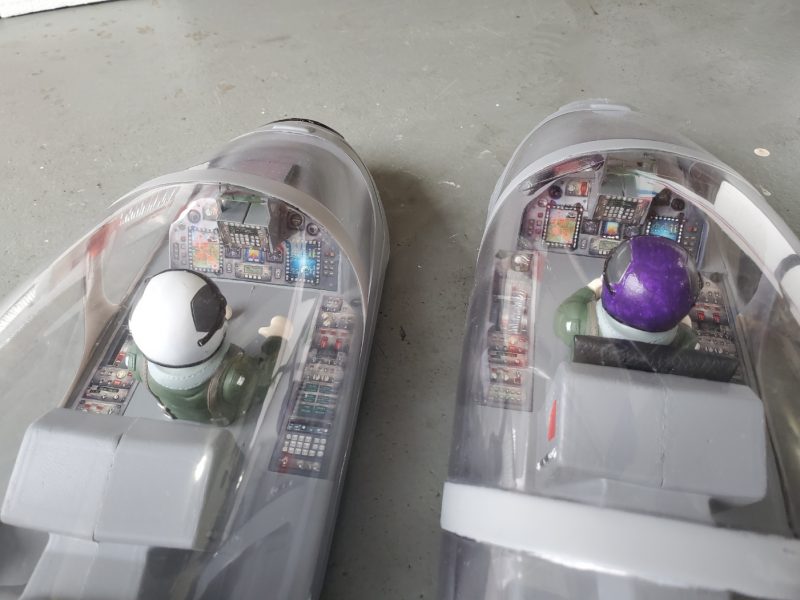
I ended up sizing and printing out a number of bezels for the cockpit touchscreens and some of the circular guages, along with rearview mirrors and even a sunshade that fits around the front cockpit control panel. Add those to some painting… helmets, bezel buttons, etc… and few other touches to add some dimension to the cockpit and it at least looks a bit better than just “stock”.
I continued the upgrades with some custom made “leather” seat back cushions and even added some functional louvered vent panels and did some foam cutting to allow for at least a little airflow.
Here’s some pictures to detail some of the changes.\
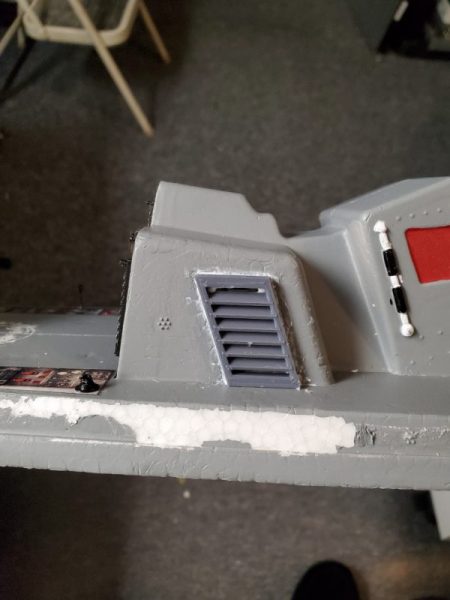
Here’s a view of my cutout to allow some actual airflow via the vent panels I printed to replace the foam grooves that were there to mimic the vents from the real aircraft.
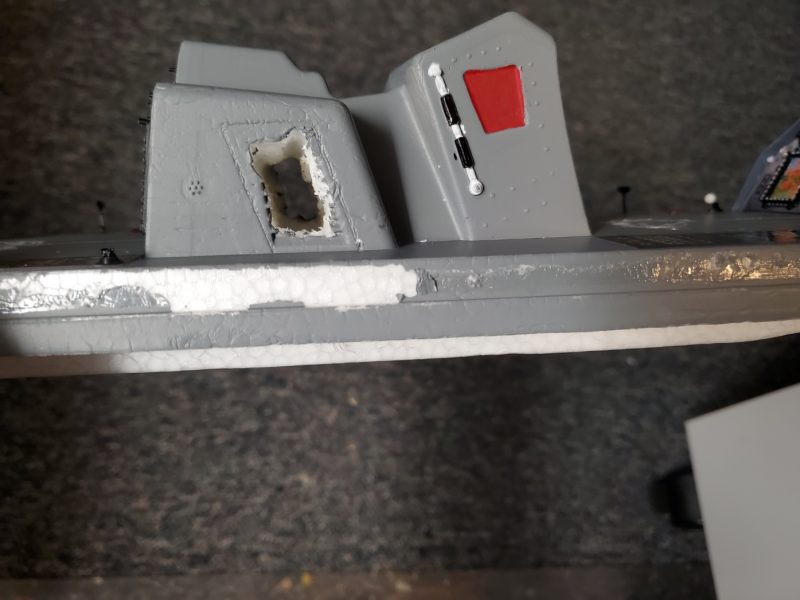
Then I created a 3D printed vent cover panel and glued in.
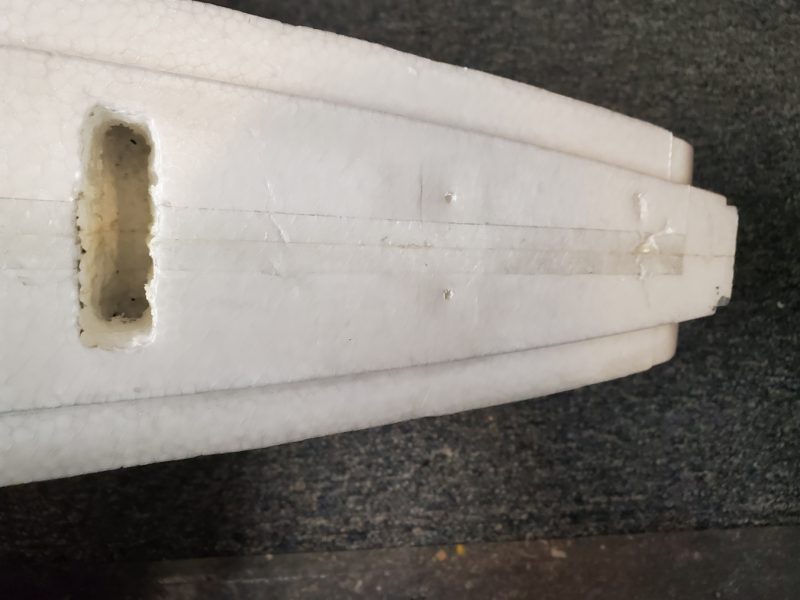
Finally a cutout from the bottom to allow airflow from within the airplane
This is a side by side showing the rear cockpit area. I repainted helmets, moved the hands/arms a bit, added the seat cushion, some bezels, vent nozzles, and rear-view mirrors, etc…
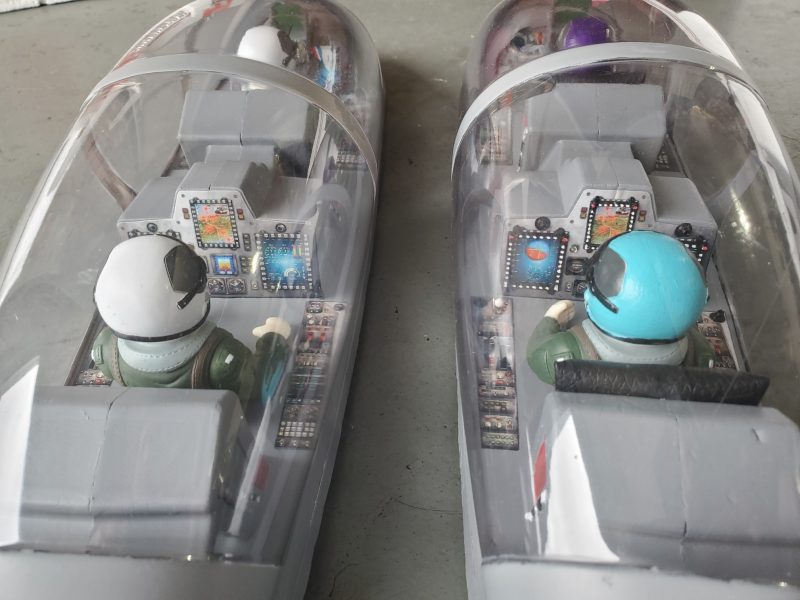
Up front I did similar changes plus adding the dashboard “shroud”
After some flights, I realized that the airplane is quite nose heavy. The airplane flies so stable and draws such great lines that it still fies very well but why not improve upon that. So I got out my foam cutter and made some space to move my battery back as far as possible without having to reroute wiring.
Here’s the before…
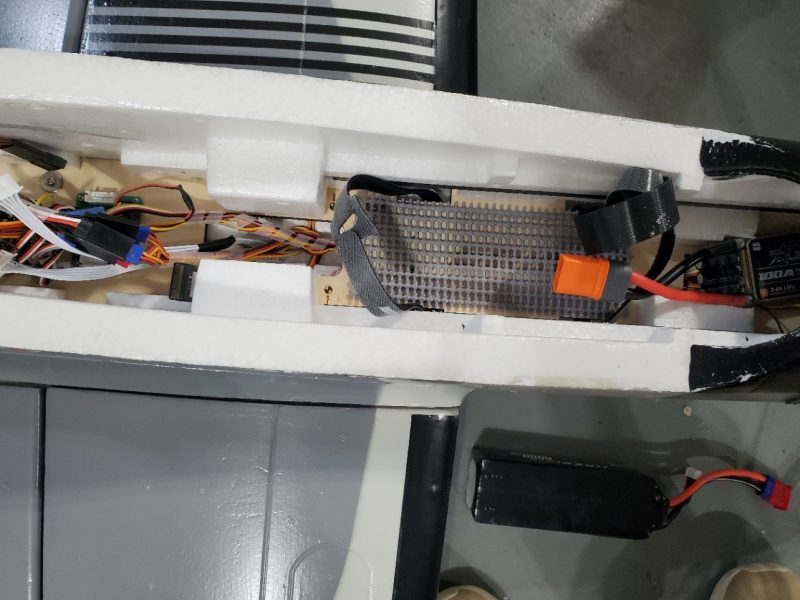
And here is the after. After removing the foam I added a backstop stick to keep the battery from moving any further back.
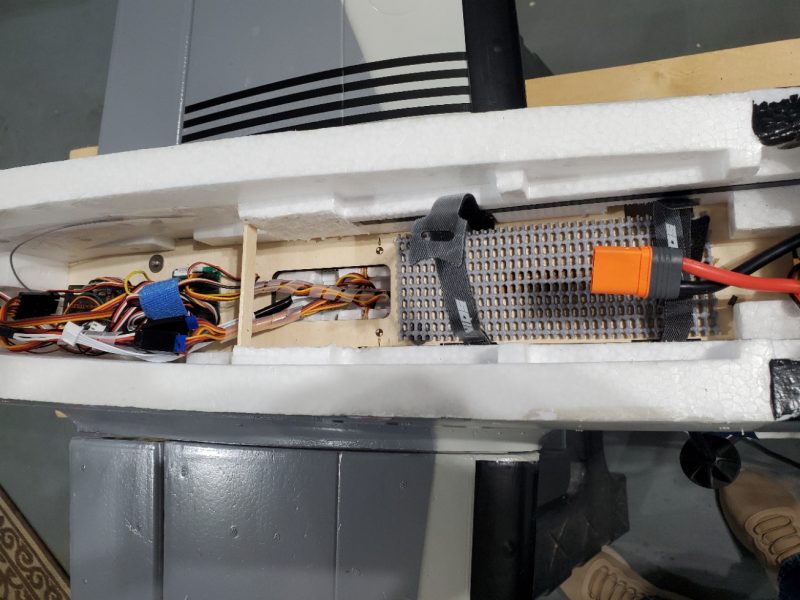
Here is the result with my 6S 6000mah installed.

The difference in flight is small but it is there and it might be even more of a factor when I get a chance to tinker with some smaller/lighter batteries. I’ve seen no downside to this mod. Some claim the extra foam helps dampen vibration in the airframe, and possibly adds some strength but I have tens of flights since the mod and I have seen no downside yet. This aircraft is popular with the FPV crowd so maybe for them the vibration dampening effects (if real) would be more evident, but for me it doesn’t seem to matter.
Recently I made a landing with a very small bounce… I usually am able to completely grease a landing but had a bit of gusty winds so took a small bounce. After the first bounce, the starboard landing gear popped out and was left dragging on the ground. Very strange but as you can see from the picture below….
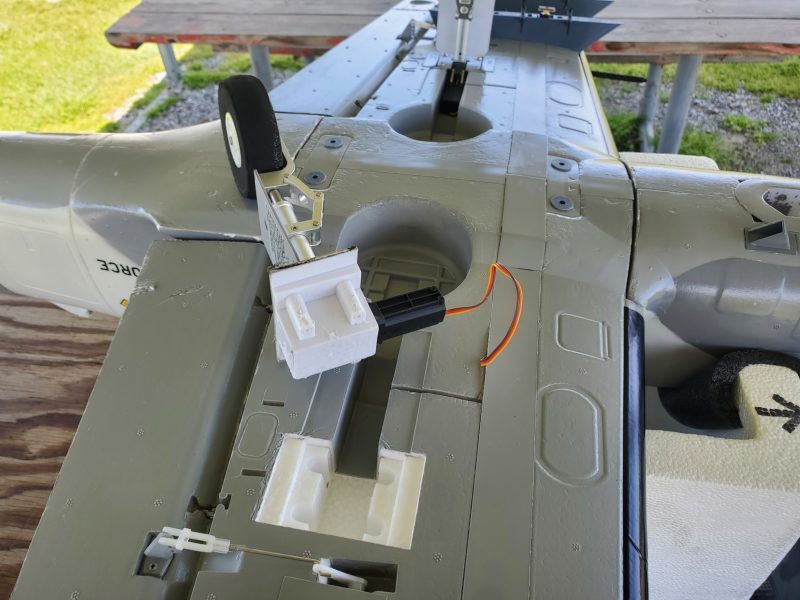
…there was almost no glue apparent on the retract! The fit into the foam was so tight, I could put it back in place and it would not immediately fall out when the aircraft was turned upright. After tucking the wire back into the channel and applying a little canopy glue, I slid the gear back in place and let dry for a day. In the 20 or so flights since, I’ve had zero issues with that retract unit.