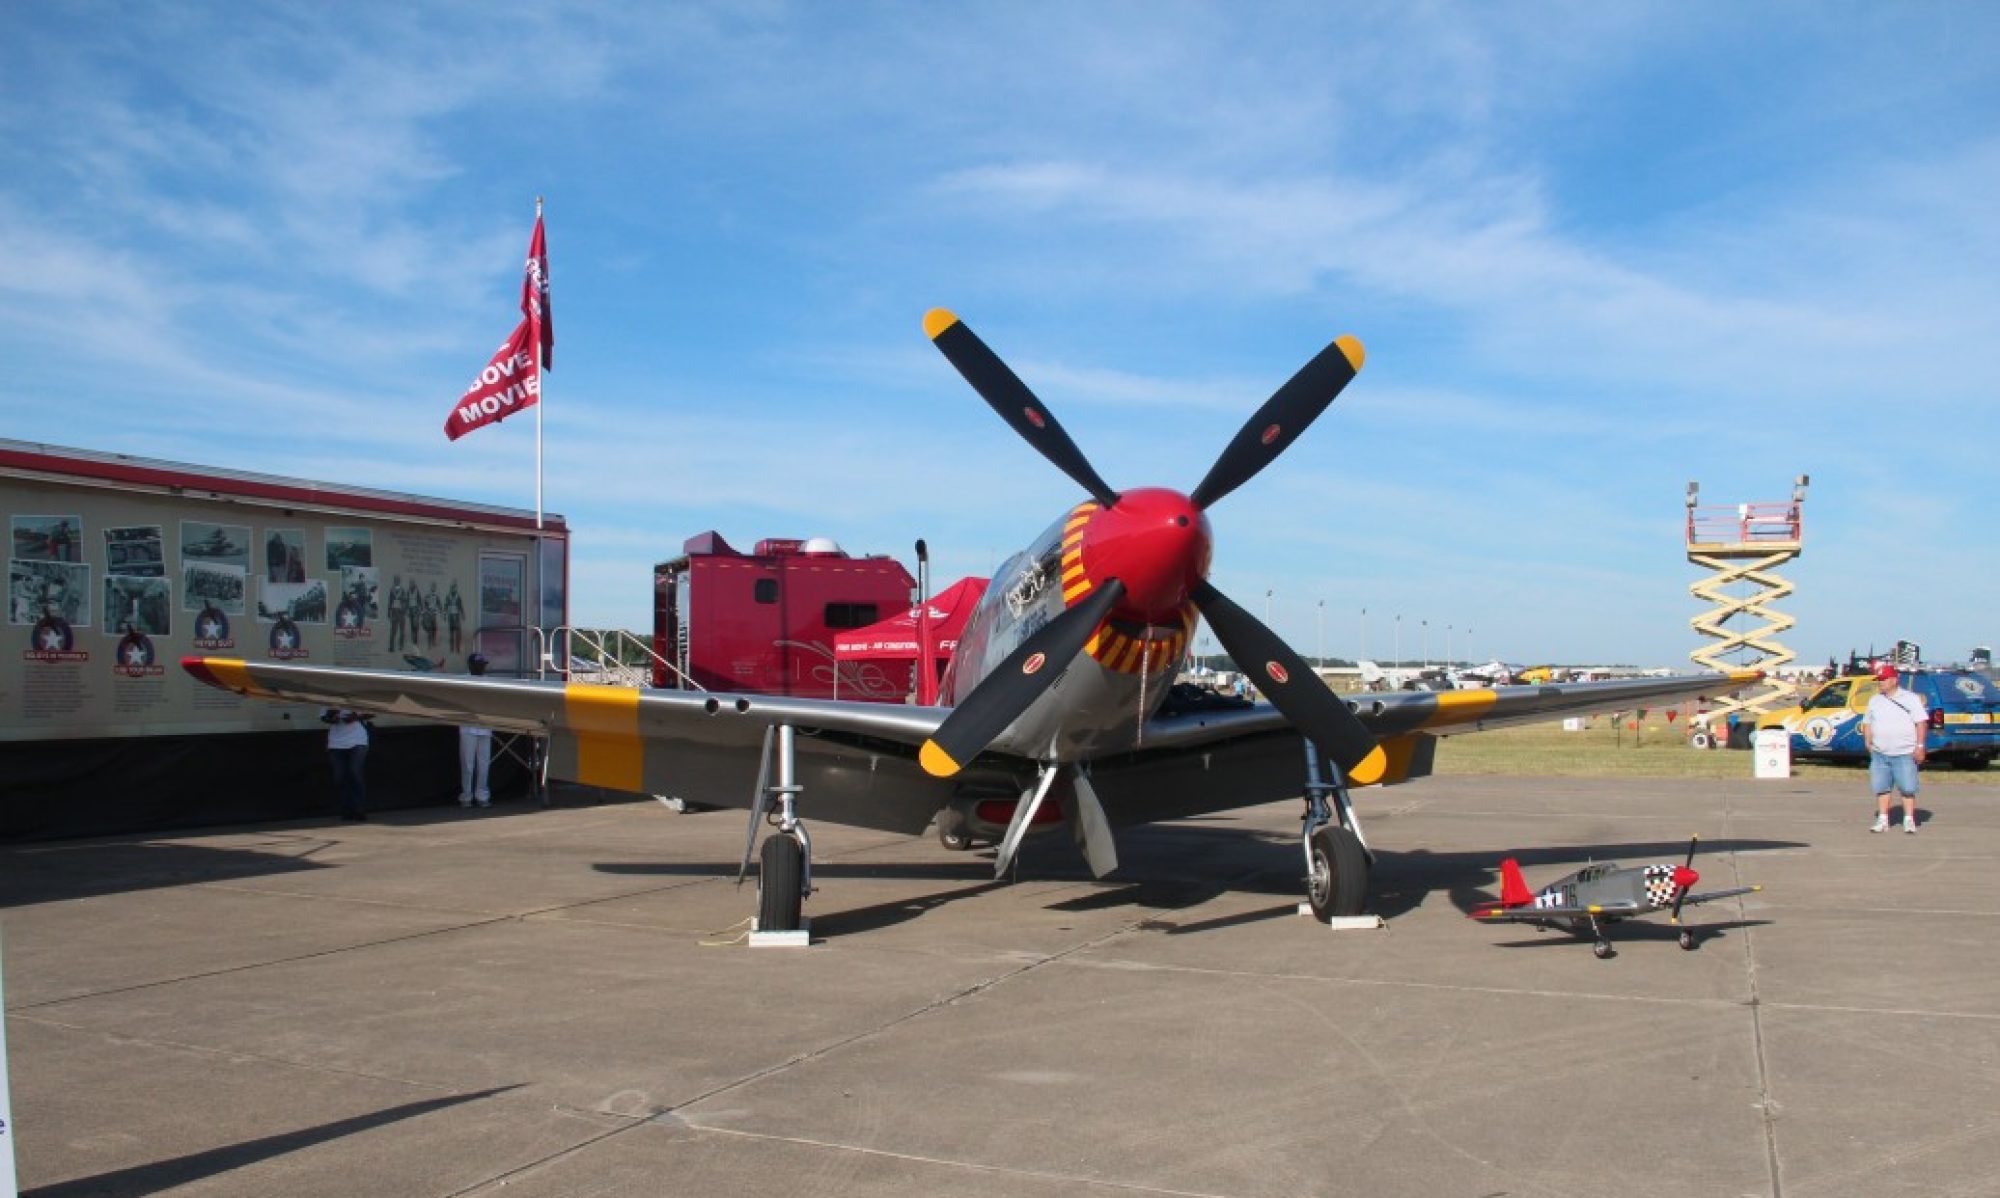
Great time at the ADA fly Saturday. Good cause. Flew glider chase; my glider and dropped the Jumper. Kelly put him on the runway. Good day.
Wildhare Slick 540 30% – Great flying aerobat
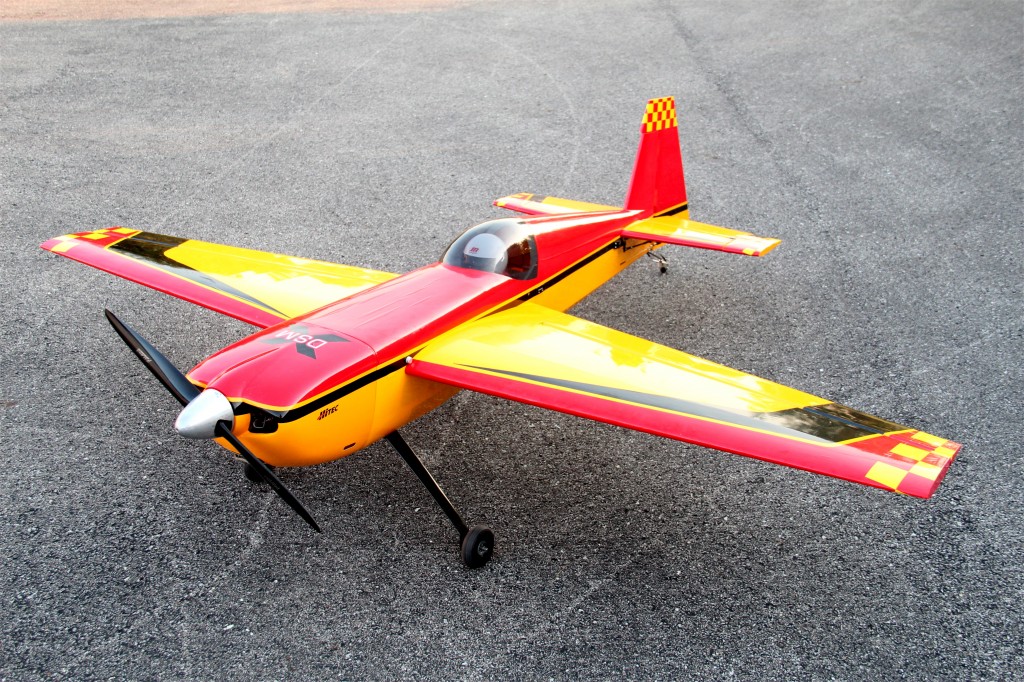
This is my Wildhare Slick 540. The basic stats are as follows:
Wing Span 88″
Length ~82″
Weight ~18 lbs
Powered with a DLE-55 and Pro-Flow Cannister and turning a Falcon 23×9 (or sometimes a Xoar 23×8 laminate). Here’s what it looks like at the moment.
Here’s a shot of the inside which has a few interesting features as well. As you can see I’m running one of the water bottle type tanks. This one is manufactured and pre-assembled by B & E Graphix. So far it has been a great tank. It’s significantly lighter than the standard type tank and the (I think felt) clunk does a great job of sucking up every drop available. Moving back behind the wing tube there are two A123 2300mah 2S packs for extremely stable power. On top of them at the top of the photo is my ultra IBEC from Tech-Aero and nearer the bottom is my TM1000 Telemetry module. Hooked to that and velcro’d to the top of the wing tube is the attached GPS sensor (there are other sensors including temp, ignition voltage, and 3 Axis G Force). Further back is my Spektrum 9110 PowerSafe receiver with all 4 remotes scattered about. Behind that you can see the pull-pull system for the rudder which is handled with authority by the Hitec 7955TG
This is without question the best flying plane I own or have ever owned. It’s completely honest with no bad habits and is as close to a “go where you point it” flyer as anything I’ve ever seen. The combo is reasonably quiet and has plenty of power thanks to the engine, prop and canister combo. It will climb straight up forever and fly at least sportsman level IMAC on 100 plus degree heat index Indiana summer days… It may be able to do more but it needs a better pilot for that. 😉
Like every aerobatic airplane I’ve ever seen or heard about, it benefits from a few of the standard mixes to perfect it’s capabilities but unlike some I’ve flown, it can fly quite well without any of them.
Unfortunately Wildhare like others in the market, quit ordering and stocking the big planes due to the slow economy in the past few years. That downturn appears to be reversing, so hopefully they will get back in the market soon before the market moves on to other folks who are already shipping new competing products.
Did my Spektrum PowerSafe receiver just save my airplane?
Had a nice day flying at our Annual Toys for Tot’s charity fundraiser yesterday and today did the recharge on the flight packs on the plane I flew. This particular plane has a pair of A123 2300mah batteries that plug directly into my Spektrum PowerSafe 9110 receiver. This thing is a $200 item but it’s main feature is the ability to plug two batteries directly into the receiver via high current EC3 type connectors. With this method the power supplied to the servos is shared between the packs and does not have to go through any switches. A soft switch is used, which means if the switch fails the airplane is on and the current to run the servos does not pass through the switch so it is not a limiting factor in supplying power to the high torque digitals that are used on all flight surfaces of this aircraft.
When I went to recharge the batteries I started with the port side pack (just because) and charged them up to full… they took about 850mah. That seemed high as I flew maybe 3 or 4 times and none were much over 7-8 minutes. As I moved to the starboard pack something even more interesting occurred. The charger said no battery was present!! Double checking the leads quickly lead to the discovery that the negative lead ended in a nice solder ball that was no longer attached to the battery! At some point it had become disconnected… I don’t know if it was vibration, poor solder joints (from the manufacturer… I didn’t have a hand in this connection) or some combination of the two.
I have no way to know if this happened before the flight or during but I can tell by the fact that the second battery took only 100mah or so to charge that I made several flights without it! If the connection was dead before I took off the first time… then it really would have only meant I wouldn’t have flown that plane on that day if I hadn’t had this system. If it broke at some point during the first flight it likely means my airplane is only here today due to having the redundancy in the system. Glad I had this system.
Of course, this receiver is not the only way to get this level of redundancy and reliability. There are other power distribution systems out there but for this size and type of airplane I think its a very nice option and one I will probably continue to deploy. I will have to look at my pre-flight and assembly routine to see if there is a way I can check for this failure mode in the future. In the meantime its nice to know its there protecting me and my airplane from disasters.
Toys for Tots is Saturday!
Looking forward to a great day Saturday 8/24 with a casual day of flying but with the added bonus of contributing to a great cause. I’ve heard pulled pork and tenderloins are on the menu and the list of prizes and some silent auction items sounds impressive. Weather says ~85 and light east wind with lots of sunshine… sounds like about the best you are going to get for August in Indiana!
I think official start time is 11 (maybe 10 so don’t quote me). Landing fee is $10 or a toy for the kids (unwrapped). We are looking to give more than ever to the Marines for the kids so if you can, stop by and support us!
Gene has done a great job setting this up and procuring prizes. This one is becoming a local favorite.
I plan on getting in some flights on the 50cc WH Slick, of course the T28 and maybe even get out and do a skydive or two!
Updated throttle servo linkage on the P51
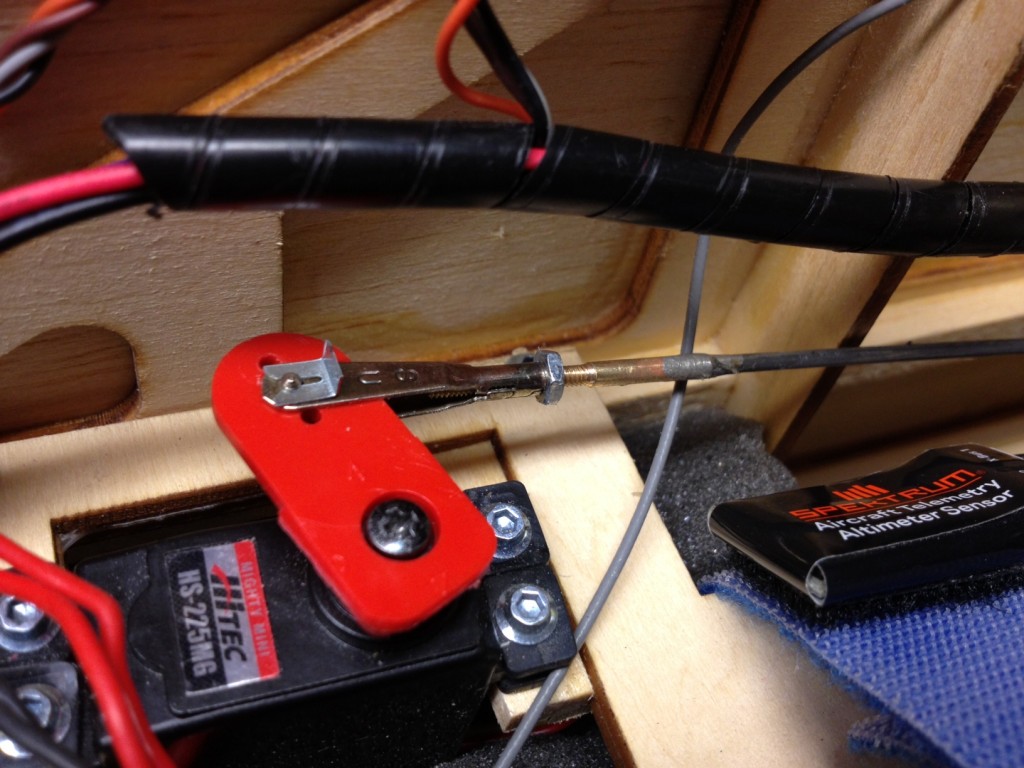
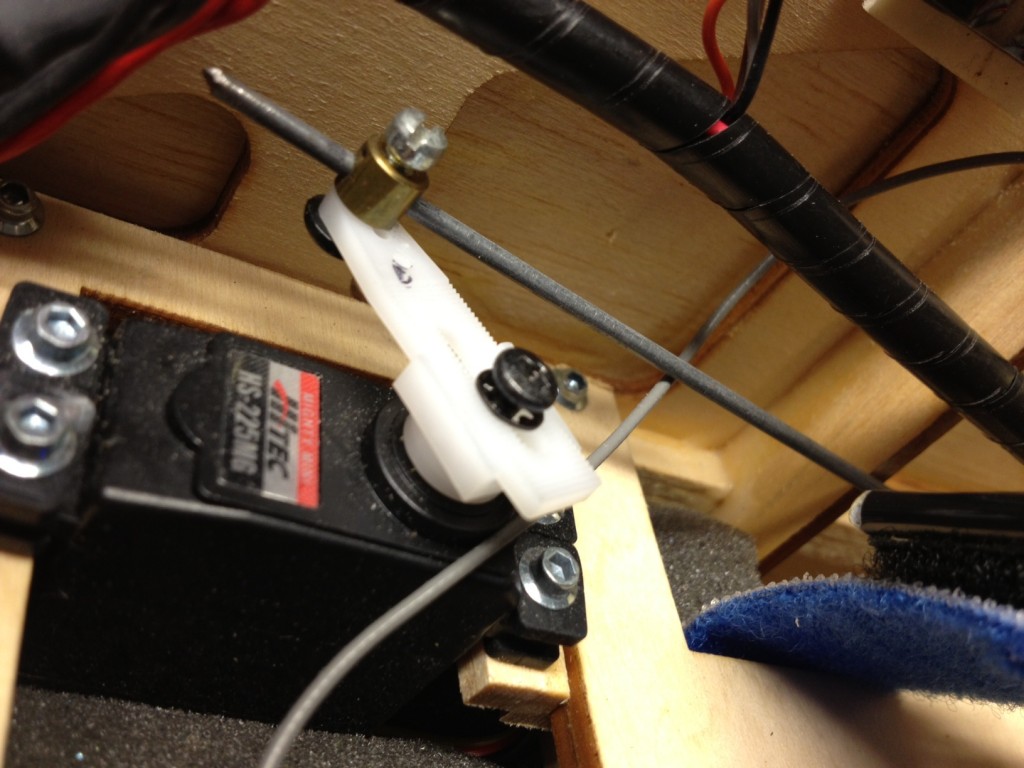
Spent a few minutes last night to make a few changes to the throttle linkage that caused me issues on the P51. Here is the updated version.
As you see I swapped arms to a fixed heavy duty Hitec arm as well as shortening the 2-56 rod and soldering on a coupler that takes me to a 2-56 threaded end. Then put a clevis with jam nut and retaining clip on to minimize chances of another disconnect. After getting the jam nut tight I coated it with a bit of clear finger nail polish to further eliminate any vibration induced loosening. I then coated the threads on the screw going into the servo (which are all metal) to help on that side as well. I could use some thread lock but need to make sure I can move it one more time when I adjust the throttle throws (if necessary) whenever I run it next.
I am open to suggestions but I think this will eliminate a re-occurrence of the issue that has me ordering a new wing! At least I hope so. The throttle end is held on with a 4-40 bolt through type ball link connector with a nylon insert nut so I don’t expect issues on that end. I cleaned up any other issues under the cowl and will reassemble that tonight and then the Mustang will get parked safely in a corner of the shop until the wing gets rebuilt. Probably will become a hangar queen for the winter and look forward to maiden day next year!
P51 crash landing… investigation Part 2… Conclusion
Continued the investigation tonight. Set the body in my trusty PVC holders on workbench #1 and started examining from the front. Pulled the cowl and found a couple minor issues… One cowl screw insert coming loose, ignition box moving a bit, but no smoking gun under the cowl. Even pulled the plug and examined. It actually looks like I have heard it should. Sort of uniform dark grey. Gap looks fine and no carbon buildup obvious. Top of the piston still nice and shiny as well. All linkage and tubing plus the telemetry sensors and wiring looked OK. I then decided to skip an actual ignition spark test for the moment and moved on back into the wing saddle area. Again nothing obvious so I turned on the plane and started looking to see if (as I thought) the ignition voltage sensing is beyond the kill. The plane died quickly like that occurred but the telemetry didn’t show the ignition voltage loss. This all worked as expected but it brought to mind the idea that maybe I had a throttle curve that brought the throttle below idle or some sort of misconfiguration of a mix that would cause that. Looking at the radio yielded nothing but when I moved the throttle back and forth I saw some odd movement and looking more closely I found the culprit. Here is the problem:
 With this screw backed out this far the adjustable arm can end up extending enough to cause the throttle to bottom out and shut down the engine. As you can guess, I will be coming up with a different type of connection. I know, some folks will say this type of connection in a big gasser is just stupid to start with, but with so little force required to move the throttle I was not worried about torque causing slippage or the arm bending or any of that. What I obviously should have been concerned about was vibration loosening the screw! I will probably replace this linkage with a standard threaded clevis (once I solder on a threaded coupler) and a standard servo arm… non-adjustable this time… A drop of something to keep the screw in place might be used as well. Perhaps nail polish or the like. I don’t think thread lock works on nylon!
Obviously its hard to be happy about a crash but the good news is the damage seems to be limited to my pride and the wing. My pride will recover… its a nasty bruise but they heal. The wing is not that difficult to replace, and not very expensive in the grand scheme of things. The better news is that I now know what caused the crash and it is easily rectified. I was hating the thought of fixing all the damage and not being able to figure out a cause. That would really make me paranoid and give me no confidence to fly the plane again. Now I’m back to looking forward to it!
P51 crash landing… investigation part 1
Pulled the landing gear and servos out of the wing this evening. Port side gear bay and main spar and ribs took the brunt of the damage. Cracks and buckling apparent. Would be difficult to fix. Would need to re-manufacture at least one rib and remove and re-web the main spar. I imagine parts of it are cracked or broken as well. The other side the top sheeting and some of one rib is crushed. I am fairly sure I will just order a new wing this fall and reconstruct over the winter.
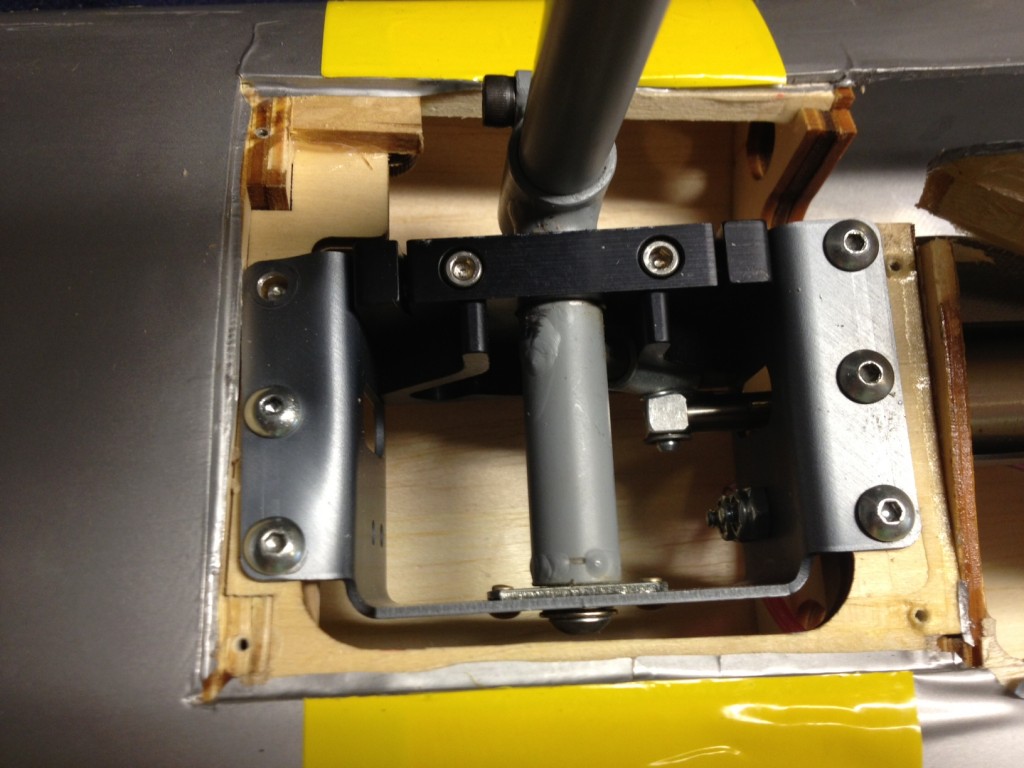
Both retracts had some flexing/bending of the mounting ears. The starboard side was bent worse as you can see here.
Some hammering against the anvil/vise seems to have straightened those out pretty well. I don’t expect the retracts are actually hurt at all. They seem to operate smoothly and the struts compress as before. Best I can tell everything is pretty straight again now.
I need to carefully inspect the fuselage but on first inspection it looks unhurt.
First look through the telemetry data has nothing significant to help pin down a cause. Both the pack voltage and ignition voltage stayed in range both before and after the engine quit. Overlaying the altitude and RPM graphs it is pretty easy to see when the engine plummeted in RPMs over a few seconds, ending at zero! I will have to carefully examine the wiring beyond the sensor, check the ignition itself as well as the plug, the hall sensor and of course the fuel system to see if I can determine a cause. The log showed no signs of problems and even if it had gone to failsafe the throttle would have simply gone to idle. I will confirm that too but don’t believe it would have quit if I took a hit and it doesn’t appear I did anyway. There was plenty of fuel in the tank when it quit so will be sure to check the plumbing as well. Still a mystery for today.
P-51 crash landing today
Due to a flame out at a very bad time the P51 made a landing in the bean field 20 feet off the end of the runway. Analysis is underway to try to determine a cause and assess damages. Quick guess is the wing will need to be replaced due to landing gear attachment point damage. More to follow when I have time to work on it. Will be looking at telemetry data as well for info leading to reasons behind the failure.
Had to pretty much program the P51 from scratch so…
Had to pretty much program the P51 from scratch so tomorrow will be a second “first flight”. Will fly noon or so to 6 tomorrow.
PVC… Great for plane holders, wing racks, etc…
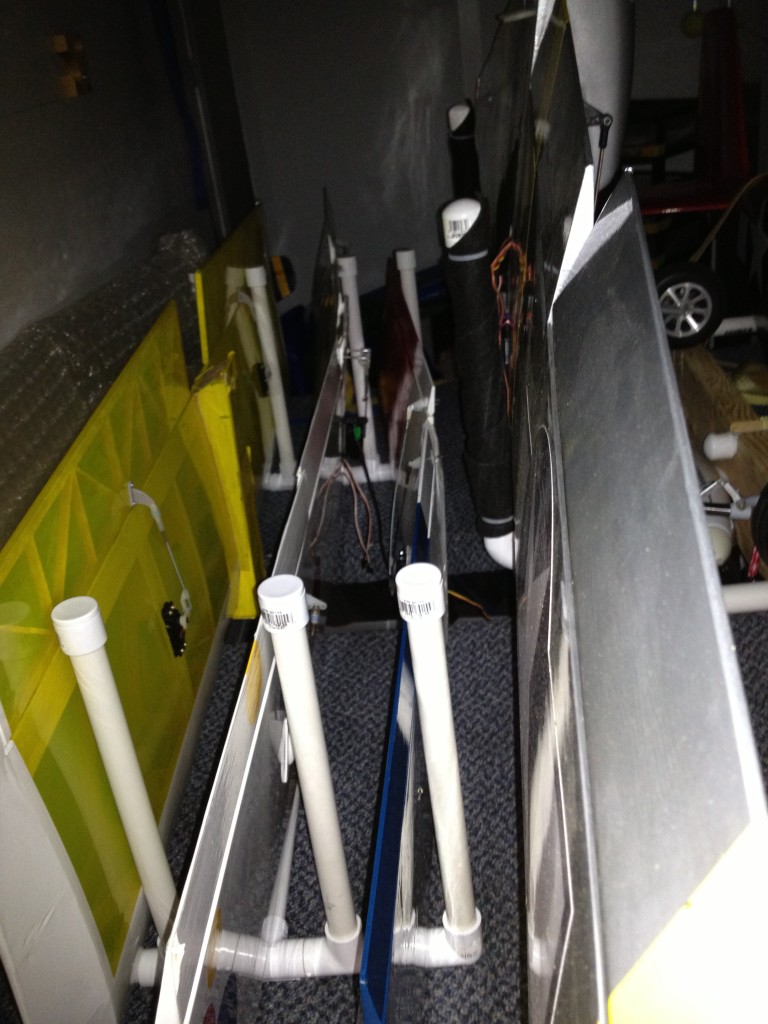
I needed to create a wing rack for when I’m carrying a larger number of planes in my trailer such as when I go out for trainer night at the field when I usually displace my 30% Edge with some combination of my Telemaster 40, Sturdy Bird and a sport/fun fly plane along with my Radian glider. Usually 2 or 3 of these join the mix. It becomes a problem to find a place for all these 4-6′ one piece wings so I decided to build a small wing rack and of course to do that I reached for some trusty PVC pipe. This stuff is cheap, strong and there are a variety of “joint” pieces available to join two, three or 4 pieces together at 90, 135, and 180 degree angles, plus caps, etc… You can build all sorts of stuff useful in RC.
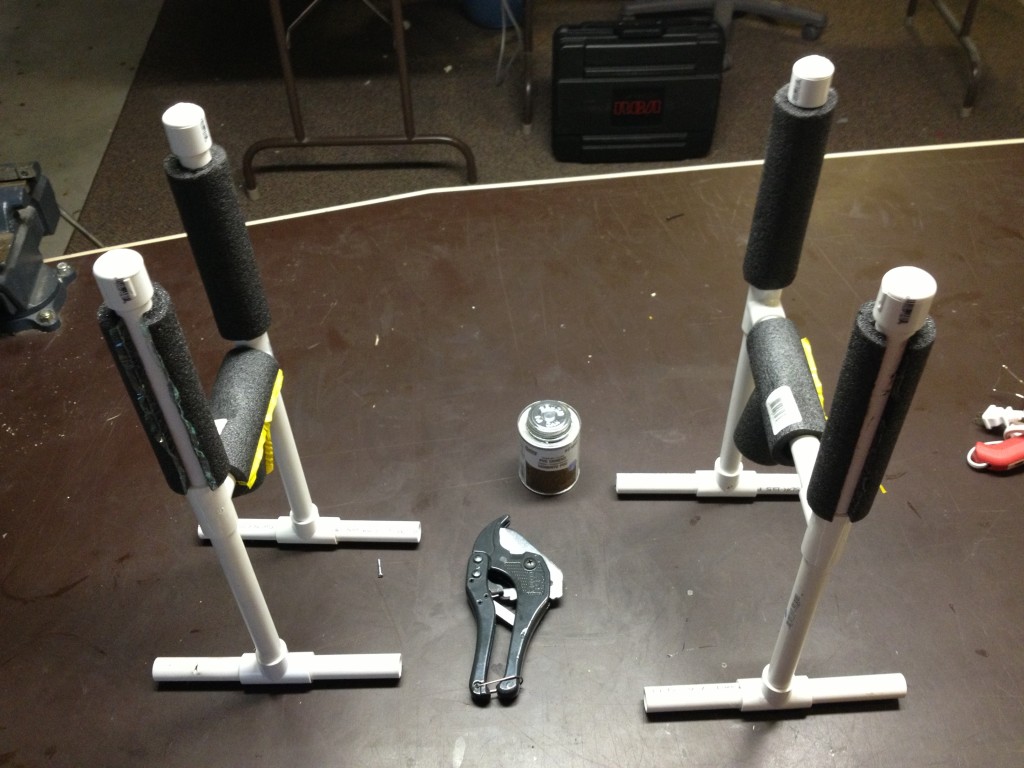
I will add a few example photos for you to give you some ideas about where this can be useful. Here is a pic of a stand we created to hold the Giant Scale P40 while we worked on it last winter on the bench. Also in the pic is the pipe cement and the special cutters that work kind of like ratcheting scissors to give you a quick and easy PVC pipe cutting ability. A wood or hack saw work OK too but they make a mess and take about 10 times as long to accomplish the task.
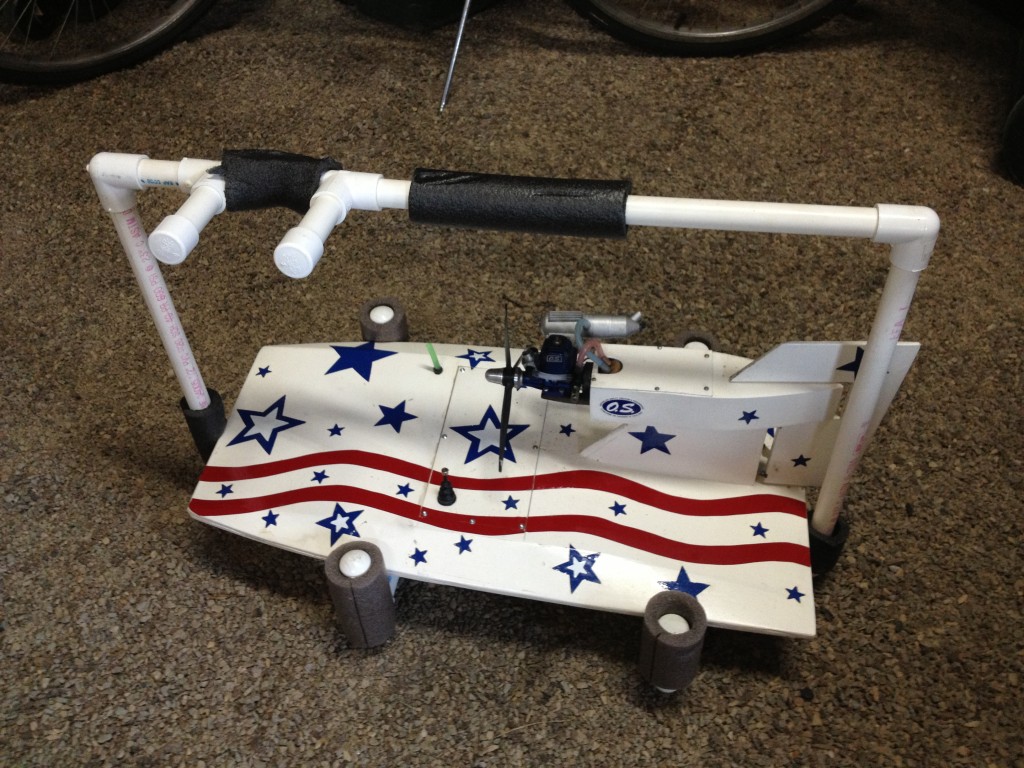
Here is a boat holder I created. The two posts sticking out were used to hold the surface radio I used to carry with it.
And this one is the new wing rack I just completed. It will get some padding added soon.
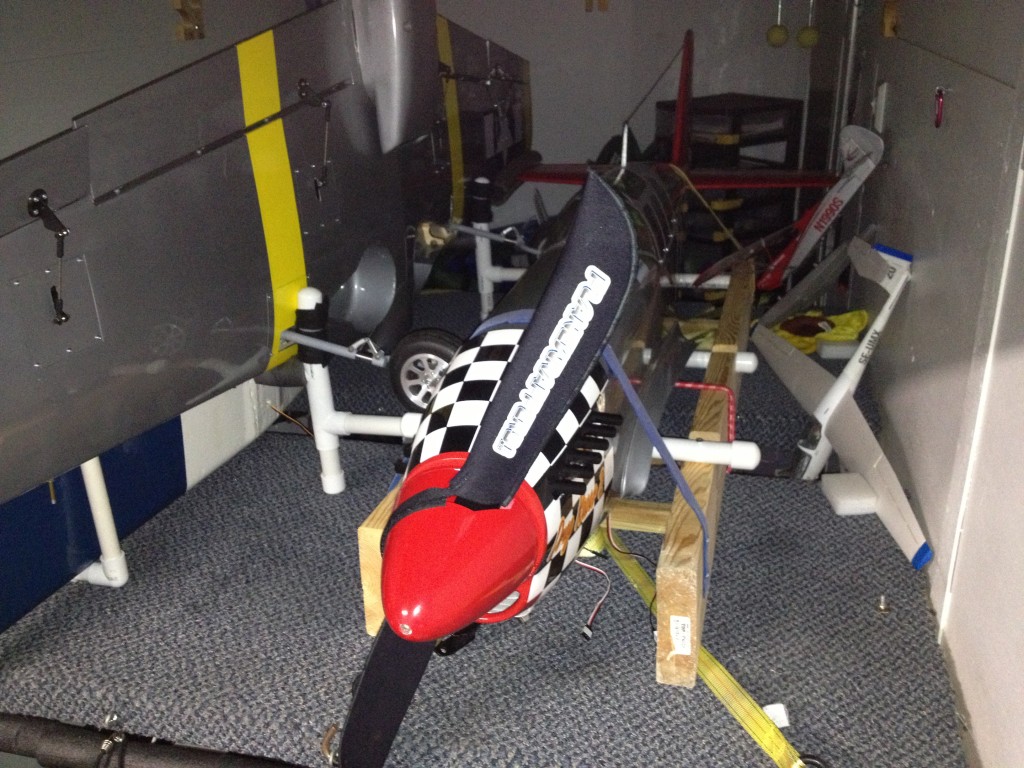
Sitting next to it and housing my P51 mustang is a combination structure using 2x8s along with PVC and velcro. I took one piece of PVC and drilled holes through it to match the wing mounting block in the body to give me a cross piece that drops into notches in the 2x8s for a very reliable and secure hold down method.
I have created wing racks in the garage that hung on the wall, plane stands for holding a couple of planes nose down and many other useful items. With the different sizes available and combining velcro, pipe insulation for padding and even combined with wood at times where some heft or additional strength is required, you can create a whole host of useful stands, racks, carrying aids and much more. Best of all you can assemble and do some “custom fitting” without using any glue and then go back and disassemble and reassemble as many times as necessary to get what you want before applying the cement. And the material is relatively inexpensive!
Let your imagination go wild. With a few sticks of PVC you can do a lot for less than you might think.
