What does Geotex runway have to do with a float fly??

So normally a Geo textile runway has little to do with a trip to attend the twice-annual float fly at Lake Lemon, just North of Bloomington, IN.  But in this case, the outing was dual purpose.  Let me explain.

There has been an ongoing discussion at my “home” RC club about the possibility of putting down a Geotex runway at our field.  As usual with any group of humans, opinions vary widely on the topic from complacent acceptance of whatever is under the wheels… to those who think laying down some fabric on a small portion of the runway is going to destroy civilization as we know it… to those who think it would be a great addition to the field and are anxiously awaiting the installation!  I will admit to being a proponent of giving it a try but I’m not predicting it will be the ultimate solution for everyone that some seem to be hoping for.

“So how does this relate to a float fly?” you are probably asking yourself at this point.  The answer is that the folks that are running the float fly are members of the Monroe County RC Club and they have had a Geotex runway for 2 years now.  Since I was definitely planning on attending the float fly anyway and wanted to get a first person look at the surface I sent out an email to the MCRCC officers and explained that I intended to come down to the float fly and wondered if they would mind if I and a few buddies stopped by the MCRCC club field and did a little examination and flying from their runway.  I quickly got a couple of very welcoming emails giving permission for our visit so I gathered up some interested fellow RCers and planned our trip.

Surprisingly 2 of the party of 5 didn’t even plan on flying at the float fly!  They just wanted to see the runway and I guess figured watching us crazy people flying RC planes off of water was just a bonus!

20150607_105450

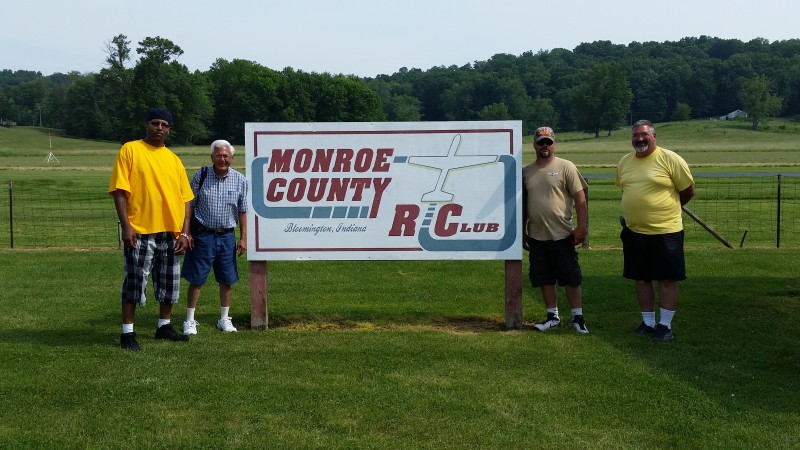
Here’s the visitors…. from L to R.  Martin Hooks, George Horning, Corey Lucas, Steve Woods and I was behind the camera.

So here is a quick rundown of the runway…

The installed fabric sits at a level just slightly below the grass which resulted in a very smooth roll from the grass to and from the material.  The Geotex runway at MCRCC is about 29′ x 150′ which was very adequate for small electrics and glow up to 40-60 size based on our trial flights.  We flew the micro T28 from ParkZone, it’s bigger (42″) brother, the FlyZone Beaver of a similar size, a glow powered Revolver and finally did taxi only tests with my 50cc powered Wildhare Slick.  It was not ready for flight that day but taxi tests from just rolling to tail off the ground running on the mains was sufficient for what we had in mind.  The observations of the group were mostly positive.  The runway seemed to be a bit bumpy for the smaller aircraft (we were later told it had not been rolled yet this year but can be, and probably will be soon).  My feeling is that I could wish for something a bit longer and maybe a bit wider to allow for “cheating” into the wind when it is inevitably not aligned with the runway… but it was adequate as is.  Otherwise, other than getting used to taxiing on a “smooth” surface, it was especially nice for the smaller aircraft.  Aircraft like the micro T28s that just can’t take off from our grass runway at all, and the larger T28 that with stock gear is more likely to flip over than roll out on landing at our field, were certainly in their element on this surface.

The most informative part of the visit though was when we moved onto the float fly site and met and discussed the runway material with several MCRCC members.  I have been a bit skeptical that we might need to do some grading to lay down our own Geo textile runway but they did little or no such work at MCRCC.  With only roundup and “scalp” level mowing they have had no issues with laying the material down over what they had and have had no issue with it coming up, erosion, wind or whatever.  Apparently even when overrun with flood waters a couple feet deep the material stayed put with just the standard staples holding it in place!  They also related that they had been through a very contentious process and that the vote to lay down the material had passed by a mere two votes!  One gentleman was kind enough to relate that he had been a very vocal opponent of the project but was now a convert and was very happy that he had stood up at a later meeting to say that he was wrong and that he now enjoys the Geotext runway as much as anyone.  We have some very strongly opposed folks at our club as well but after visiting with these folks and bringing up all of the objections I had heard from our own members, I was left with the feeling that none of those concerns are really valid based on the experience of these folks.

According to the folks present, the runway is now a big hit with almost every member with some of the (previously) most adamantly opposed now enjoying the benefits.  The visit helped allay my own fears that we might be wasting money on something that would need a lot of maintenance or might not work well over our (perhaps rougher) surface.  It is certainly not a done deal that we will move forward with the project, but I feel pretty good that the cost to do it this way is low and even a failure will just result in a need to roll it all up and reseed… If we are successful, it seems like we might even attract more of the small electrics/park flyer crowd and open up some new options for our members including more retractable gear aircraft.  There was a lot more conversation about things like how to repair damage, rolling, re-inserting staples that push up… etc… but the general tone was that they had found that most of these issues are easily handled.

Moving on to the float fly, it was fairly breezy with some swirling air making the flying a little more “bouncy” but really not bad.  I suspect the wind direction (quartering from behind us as we stood looking out at the lake) worked to our advantage since the large hill behind us did much to block the wind.  I flew the Carbon Cub through 4 batteries with nothing untoward occurring and did some prop hanging and aerobatics to the applause of some nearby “party barge” occupants that were hanging about a hundred yards or so off shore.  Landing with the wind gusting and waves to play with was really fun.  With the reliability of the electric power plant and the nimbleness of my AS3Xless Carbon Cub allowing for some sweet splash and goes, spot landings and long wave-top hopping skims it was hard to wipe the grin off my face during and after each flight.  I also flew the Flyzone Tidewater which handled the waves and taxi duties great but was a handful in the air with a continuing tendency to dive as throttle is applied.  I later figured out the engine pod was leaning forward with increased throttle and did some repairs to help reinforce it.  I have since flown it a bit more off grass and it greatly improved and so I am looking forward to a future float fly to give it some more air time.

Corey flew his Beaver on at least 2 occasions and Steve was able to get a good flight in on his cub after some early issues were resolved.  Martin flew his Quad a bit and captured this image showing my Carbon Cub on a landing approach.

Screenshot_2015-06-07-18-32-14

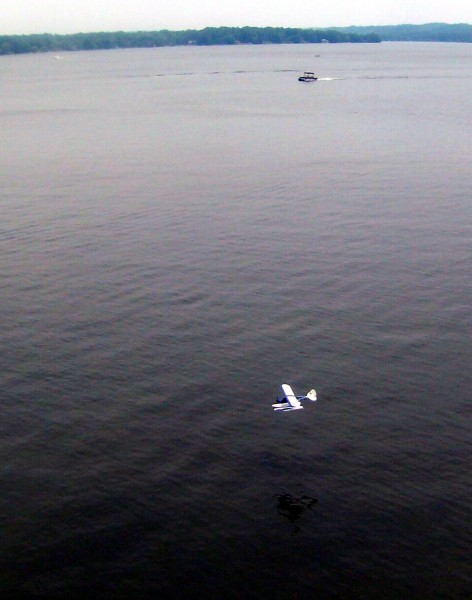
The Carbon Cub on a nice smooth approach for landing at Lake Lemon…

I’m pretty sure everyone enjoyed the day immensely and I for one am looking forward to (fingers crossed) a successful Geo Textile runway install AND another visit to the fall edition of the MCRCC float fly event at Lake Lemon.  Thanks so much to the officers and members of Monroe County RC Club who allowed us to visit their field and participate in their event.

Packs, Chargers, Power Supplies and more – Generators

After realizing that my budget generator would not run my new power supplies, I did some checking and found that this was a common issue with generators that did not include an inverter.  Without this feature, the generator does not create a proper sine wave AC output and some devices will not tolerate the “dirty” power thus created.  Of course Inverter generators are MUCH more expensive but also typically come with some very advantageous features as well… At least most do.

The things I thought were most important to consider aside from the clean power output included weight, noise limiting, some additional power (wattage), quality and of course price!  I quickly decided I wanted something in the 1500+ watt range, under 50 pounds if possible, and as good quality as I could get at the best price.

This quickly got me to a short list including Honda, Yamaha, Champion and a few others including a unit by Westinghouse.  The Honda and Yamaha seemed to be the real leaders among those who use these a lot but they are pricey as well.  If the extra money was the only way to get there, I’m willing but I won’t go there without good reason so I did some further comparison.  It also helped that one of the local club members has a Honda that I was able to borrow and use for a couple weeks.  In the end I took a chance on the Westinghouse for the following reasons.

While the Honda worked wonderfully, was quiet and is reportedly very reliable… I didn’t see enough positive difference to negate the $430 price delta between this and my eventual choice.  Similarly, the Yamaha was eliminated for the same reason.  The Champion, when I saw it at a local store, was a bit larger and heavier than I wanted and there were some reports, including some videos available on the web that claimed it was a significantly noisier than the Honda or Yamaha.  I’ve been around enough generators that I can attest to the fact that the power available from your generator can make you very popular at the field… but the noise level it creates can even more quickly make you a social pariah… relegated to the far reaches of the field.  I added a last minute addition to the possibilities when I saw that the local Harbor Freight offered a unit half the price of the Honda but quickly eliminated it when I saw it was listed as 20lbs heavier as well.  I can’t fly my airplanes from my bed with a thrown-out back and I don’t want to waste a bunch more space on a cart or other method to make it easier to move about.

In the end I chose the Westinghouse.  At 60% of the price but almost exactly the same weight and with reportedly similar sound levels it checked all the boxes.  1800W continuous/ 2200W peak power output, ~40lb, economy mode, low oil protection, etc…  I also appreciate the fact that while I realize that the Westinghouse name on the front is not indicative of the company that I recall from my youth… the engineering team behind this unit is located in Wisconsin and there are few opportunities in this hobby to support “locally” designed if not built products.  So here’s my experience with the Westinghouse WH2000iXLT.

First and foremost it does exactly what I purchased it to do.  My power supplies run with no issue behind the Westinghouse.  Further, it has started within 2 pulls or less every time so far.  In a side by side test, the difference in sound between the Westinghouse and my friend’s Honda is not discernible.  Some claimed the Westinghouse was louder and others said they could not tell a difference.  With the econo mode off on both units so that they ran at full RPM, I thought the Westinghouse was louder as well, though it was slight.  The only drawbacks I’ve seen so far are that both the oil and gas fill seems to be a bit more difficult than they need to be.  The oil fill is hidden under a hatch and pretty much requires a small extension spigot that comes with the generator.  The gas cap is smallish and the opening underneath even smaller so that it seemed difficult on first fill to get gas into the unit without slopping it all over the case but with the long run time between gas fills, I don’t expect to do it frequently.  Still it would be nice if it were easier.  Both these “complaints” are a bit nit picky as they aren’t going to be every day issues for me but I wanted to mention them for those who might consider this unit.

Overall I am very happy with the Westinghouse so far.  I’ve used it on 4 or 5 trips to the field so far and it is performing better than I expected and pretty much as advertised.  It’s light enough for me to move around easily, quiet and easily cranks out the power I need with quite a bit to spare… or share!  Barring problems, I am very please with the Westinghouse unit and even happier to have the extra $400 still in my wallet that I would have otherwise spent on the more expensive units.  I’m not normally very price conscious when it comes to my hobby gear as I enjoy a really good quality product and would rather pay extra for high quality than risk being disappointed but I have to say, so far, this is one bargain that seems to have come with no real drawbacks.  A win-win if ever I’ve seen one.

Here is a link to the Westinghouse on Amazon.  Check it out for yourself.

Packs, Chargers, Power Supplies and more – Power Supplies

With the FMA PL6  chosen as the charger I ran right into the realization that I could never use the full capability without some increased power supply capacity…  My standard rig at the field was a low end, unlabeled supply that I got surplus at a hamfest.  It had never failed to deliver but I also don’t think it was designed for more than about 20A at ~12-13VDC.  In the shop I have a bit better solution where I have a 52A 12-15 VDC supply available.

However…  there is a limit on the charger in that the input side of the charger can only accept 40A maximum.  That translates to a max of ~500W of charging power on 12VDC.  In order to get near the full 1000W you would need something closer to 25VDC at 40A.  Of course no charger is fully 100% efficient so the real numbers are 15% or so less but the basic idea holds.  So what am I to do?  My first thought was to start hauling my 52A bench supply to the field but that has two drawbacks.  One, is I would be limited to the 12V max of something less than 500W.  Not terrible, but having the max power available at the field could be even more important that back in the shop where I have (figuratively speaking) all day to charge batteries.  So, off in search of a way to get 25V or so at 40A.

First, I started looking for commercially available, purpose built supplies to do the job and quickly realized that such supplies are both unusual and very expensive!  I really didn’t want to spend 2-3 times as much on the power supply as I did on the charger.  Keep looking… and then I happened to come across high amperage 12V supplies for what I thought were very reasonable prices.  $60 each.  They were converted from computer (Dell server) power supplies and could supply 57A at about 12-13V.  Ok, that’s much more reasonable… maybe I could just use one of those and get along with slightly less than 500W of charge power… at least for now.  But then I recalled I had seen information mentioning using two identical supplies in series to get twice the voltage… Now we’re talking!!

Based on that vague remembrance I bought two of these supplies.  Both together were cheaper than I had paid for the bench supply a few years ago and each was more capable.  After a modicum of research I started experimenting and found that I could get a good working 25V supply at 57A by wiring the two supplies in series.  My first attempt resulted in one of the supplies shutting down… but with a little more research I found that by isolating the ground I could avoid the second supply from seeing a short when both were plugged into the same AC source.

I believe the power supplies likely include bonding the DC output ground terminal to the AC ground.  This means that when the two supplies are plugged into a common outlet and are sharing the same AC ground they are also sharing a common DC ground.  The result is that when the positive lead of supply A is plugged into the negative side of supply B… it is essentially creating a dead short.  Luckily, these supplies are very sophisticated and include the ability to clamp down the output in a case such as this so no damage was done.

Once the grounds were isolated from one another the supplies powered up and supplied a nice steady 25VDC.  I created a carrying case from a Styrofoam cooler and built a power panel in order to have a single 24V output as well as the availability of either 12VDC output if desired.  It is well protected in the cooler (which opens up when in use for better cooling) both from the elements as well as vibration and “bumping” around in the trailer.  I’ll update this post with a picture or two in the next couple days.

This whole rig worked great on my bench, so I took it to the field and after 3 flights on the CZ Cub decided to do a nice 1 hour parallel charge.  I fired up my low cost 900W generator, plugged in my new power supplies and… nothing!!  Further testing back at the shop confirmed that the whole rig worked but just not with my generator.  I’ll go into that in the next post on the subject detailing my search for a new generator.

Packs, Chargers, Power Supplies and more – Chargers

With my LiPo battery needs recently moving up into the 6S 3-5000mah range I quickly came to the conclusion that my charger was not going to be up to the task.  Not that it wouldn’t work.  I’ve already been charging some of the new 6S batteries with my existing multi-channel charger.  It works just fine, it is just very slow.  I don’t like to charge without being in a position to keep an eye and having it take 2 hours to charge 1-4 batteries made that a painful experience.  I also don’t like to have to keep running to my charger and hooking up another battery every time I fly in order to keep battery packs ready to go for the next flight while I’m out at the field.  That can work if you buy enough batteries and keep your charger running, but having to keep track of which channel is at what point in the charge cycle and continuously feeding the charger just takes away from my enjoyment while at the flying field. Finally, I don’t like the idea of just buying a bunch of batteries to avoid charging at the field as I fully expect my expansion into electrics to just continue and they don’t exactly give these big battery packs away!

Purchasing the right charger with the capability to charge these larger cells quickly, especially if I could be charging multiples, would be great.  So ideally, I’m looking for a way to charge 2 or more 5000mah 6S packs in 60 minutes or less… with 30 minutes being the target.  Let’s look at what it will take to do that.

First, you need to understand that chargers often advertise that they can charge up to a (for instance) 6S LiPo at rates up to 8A per channel.  Unfortunately they often tend to hide somewhere further down in the fine print that each individual charging channel is only capable of charging at a maximum rate of up to 50W.  Those specifications are not mutually exclusive.  The charger can in fact charge at a rate of up to 8A and can handle 6S LiPo cells… just not a 6S LiPo at 8A… What does that mean for you?  It’s really quite simple.  A 6S pack tops out at about 25V.  Since Watts equal Volts times Amps, that means that 2A is about the maximum charge rate you can expect to charge a 6S pack at with this 50W charger… 2Ax25V=50W…  In order to charge at the advertised rate of 8A, the battery being charged would have to max out at just over 6V… 8Ax6V=48W.  So with a charge rate around 2A, for the 5000mah pack the best I can hope for is a charge time of 2.5 hours.  Just to get to a 1C rate of 5A for a 6S 5000mah LiPo would require a 125W capable charger.  For my desired 2C/10A charge rate I would need a 250W charger.  To do two at once I’d need a 2 channel charger with 250W per channel.

So with those numbers in mind I want a charger with at least 250W per channel and I wouldn’t be upset if I could charge at a 4C rate which would require 500W of power!  Occasionally, I’d like to be able to get a pack ready to fly in short order if I happen to have just flown my last battery and need arises.  I don’t recommend doing it often, but most of the packs I am buying these days allow for charging at up to 5C rates!  Another “nice to have” would be the ability to measure the batteries internal resistance and I wouldn’t cry if I had a way to record the relevant details during a charge or discharge cycle.  After reading many reviews and picking through specifications I decided to purchase the FMA Powerlab PL6.  This is a single channel charger that can supply over 1000W of charge power, has a reasonably priced PC control program with nice graphing capabilities and measures internal resistance as part of the charging process.  I was going to spend $175-$225 all in including the charger, control cable and a balancing board but the folks who own these seem to rave about them and with 1000W of power, I don’t expect to be worrying about more power anytime soon.  Here’s a link to the charger itself.

While this is a single channel charger, I have discovered that a lot of folks have taken to parallel charging packs on these high power chargers.  I have actually charged as many as 5 3300-4000 6S packs at a time at 1C rates, so 5 packs done in a single hour!  To do that you’ll need a parallel charging adapter like this.

There are many version of this depending on the type of connector your batteries use.  Since I’ve been using EC-3 in all my larger aircraft, that is the version I show here.

I’ve also pushed to 2C charge rates at the field to get a couple packs back to full quickly.  This means that while it isn’t exactly a multi-channel charger as I envisioned, I have been able to do practically everything I wanted with this new setup.  I’ve also started to work with the PC interface and explored the graphing capability as well as recording the IR measurements.  The piece you need for that is the USB Adapter.


So far, it’s been an excellent charger that I have had almost no complaints about.  That’s not to say that there weren’t some surprises!

First, although clearly documented, I didn’t really pay attention to the fact that the permanently attached wires that are used to supply power to the charger are furnished with an EC5 connector.  This seems odd as most  chargers terminate onto bandanna plugs which are easily plugged into most power supplies.  Not a huge issue.  The first thing I did was to create an adapter which I now wish I had made a bit longer.  The 9 inches or so I did create is just a bit short in many instances.  A couple feet would have been better.  I’d also warn that you want to use at least 10 gauge wire as you may be drawing close to 40A for extended periods from the supply and you don’t want to heat up the wires to much.  I would recommend 2 feet or so as a nice compromise between to long which tends to always be in the way, and to short which causes issues with physical location of the batteries under charge, the charger itself and the power supply it is attached to.

Finally, you should take note that whatever charger you choose for charging larger LiPo batteries will likely require a fairly hefty power supply to feed it.  That is my next post.

Packs, Chargers, Power Supplies and more – Packs

So with my move to bigger E-powered aircraft I have started buying larger packs (mostly in the 6S 3000-5000 range.  These things can easily cost $100-200 and for that kind of investment I wanted to get something that would both perform well and would have a minimum cost in terms of how long the packs would continue to work.  This lead me to a lot of reading and research on internal resistance, C ratings, and care and feeding of batteries… there’s plenty to discuss about all that but for now I will just cut to my understanding.

First and foremost, C ratings on batteries are almost pure marketing.  What most people understand that number to mean… that you can safely draw this number multiplied by the pack capacity until the pack is drained without damage to the battery pack … is apparently NOT what most of the sellers understand.  To be charitable, I would assume they are expressing a number that can only be reached by testing to destruction (in some cases, a very quick and fiery destruction).  In my more pessimistic language, I would say the C ratings advertised are pure bullshit.  Not only will many of these packs not sustain that level of current draw for the amount of time it would take to discharge the pack, but some of them are so ridiculously labeled that the wires would simply melt, the connector would disintegrate and then whatever was in proximity of the pack would likely burst into flames from the heat generated in the pack if you tried.  The consensus among those who have done independent testing seems to be that no LiPo available to us should be labeled above 35-40C continuous.  70C is a cruel prank… 150C is pure snake oil.  I can and probably will write a whole other post or two on this but for now that is all I will say about the C ratings in this post.

Internal resistance (IR) is a much less understood but much more important and useful rating but it is not typically a published specification for most hobby grade batteries.  It is temperature and capacity dependent but is still a very useful tool in comparing batteries and could easily be published as a number of milli-ohms at a certain temperature.  Some folks have suggested a calculated value called FOM or figure of merit which would take into account both the IR at some standardized temperature as well as factor in the battery capacity.  It isn’t perfect, but it would be a much more useful specification than the C ratings published now.  Of course it could be “exaggerated” just like C ratings are but measuring the internal resistance of a battery can easily be done with a few available tools and the FOM can thus be calculated so it would be much easier for hobbyists to spot these exaggerations and react accordingly.  Hopefully the market could then sort it out… but I digress.  The reason IR is so much more useful is simple.  IR is directly related to the current allowed to flow from the battery pack and the amount of heat generated from the battery supplying the current.  Though IR is not the only factor that affects a batteries overall health and ability to provide power to the attached circuit (primarily your motor!) it is probably the most easily understood and has the most direct correlation with these things.  I will likely post more on this later but for now what follows are the basics.

Generally speaking, lower IR is better.  Keep in mind that if you measure IR, you must do so at a constant temperature to be useful for comparison and also keep in mind that only like capacity batteries can be compared.  The relationship between cell size and IR is not linear so no simple way to compare between two different capacity packs is available.  The total IR of a series pack is the sum of the IR of each cell.  This total number is indicative of the current that the Battery can produce overall because the battery IR will cause a voltage drop as the current flows out of the battery.  A battery with a higher overall IR will supply less voltage under load (the loss being “used” to heat the battery).  This results in less power from the battery reaching the motor, which is the real purpose of the whole exercise!  While overall pack IR is important, having each cell in a pack with a similar measurement is equally important.  Having all the cells in a pack with a similar IR indicates a pack that is well balanced and matched and will therefore likely have a longer life.  The reasoning is that every cell will heat up in direct relationship to the IR of that cell and since excessive heat is typically the cause of battery failure, the cell with the highest IR will be first in line to be damaged from the heat thus produced.  The overheating will likely cause the cell to develop an even higher IR over time which will just add to the issue until the cell IR reaches such a high value as to render the pack useless due to the large voltage drop in this weak link or the cell simply fails from the heat.  There are tools available to make this measurement both for the pack as well as each cell and published values and calculations available as a guideline to what is considered to be “good” and how much current you can really expect to draw without damaging the battery so you don’t have to totally re-invent the wheel here either.  If you want to learn more, do some web searches or check in for my further posts on the subject.  If you don’t care that much and just want to know what to buy I will give you some guidance based on my experience a bit later in this post.  If you’d like to measure IR in your packs for yourself so you can start to recognize the good from the bad and become a more informed consumer one of the best tools I have found to do so is available here:

With this device you can measure and compare the IR of each of your LiPo packs.  It will help identify which packs are best used for high current draw versus more routine use and with this an a little math determine how much current is safe to draw from this pack (there is even a webpage that you can enter the result into and get a calculated max draw).  There are several different models so make sure you pick the correct one for your needs.  There are some chargers available that can give you a similar reading but do some research to see if the charger you are considering gives a useful reading.  My research indicates this meter is better than any of the chargers but there are a few chargers that may be good enough for your purposes.

One thing you can do immediately and without spending much/any money is to learn to care for you LiPo batteries correctly.  Care and feeding of LiPos is actually pretty simple.  Avoid physical abuse (punctures or compression may cause a fire).  Always balance charge your packs with a charger that is made for the task at an appropriate rate (1C when possible for longer life, even if the battery says you can go faster).  Don’t discharge them to fast or to far if you can help it (85% discharge is a nice goal).  Store your packs at a 40-50% charge level and in a cool/dry place (the fridge is almost perfect but you will need to watch out for condensation and allow them to warm before use) whenever you can.  Avoid extreme heat and extreme cold pretty much always.

Other than the physical abuse and charging rules you can violate just about any of the other rules with the understanding that you are taking a bite out of the life of your battery and sooner or later you will pay for it!

For now suffice it to say that I own a single E-Flite 6S 3200mah 30C pack that I bought with my Carbon Cub…, a G-Force 6S 3700mah 45C pack, and 4 Glacier brand 6S packs in 30C rating.  2 each of the 3300mah and 4000mah variety.  Here are my feelings on each based only on my personal experience.

The E-Flite is a mediocre pack that I believe would be destroyed if asked to deliver the 96 amps it advertises for any length of time.  It does fine in the Carbon Cub which only draws a max of 70A on occasion and for very brief intervals, but I wouldn’t try to pull more than about 60A from it for a sustained period.  (Just in case you’re wondering, that means the battery is about a 20 C pack or at bit less if you subscribe to my definition of C ratings as expressed earlier).  The cells do not seem to be exceptionally well balanced (IR varies quite a bit between cells in the same pack).  In short this pack simply doesn’t measure up.  I don’t consider it a terrible battery, just not a good value.  There are many packs out there that are as good or better for at least 30% less… I will say the folks at Horizon (who sell this pack) have great customer support so I would be confident that they would take care of me if a quick failure occurred.

The G-Force pack is somewhat similar in that it is more than adequate for the Cub but it’s ability to deliver current I would estimate to be far below (half or so?) the C rating posted on the label.  The difference is that the G-Force is significantly less expensive so it is a little easier to swallow the limitations.  It is also quite a bit better balanced from cell to cell than the E-Flite pack.  I have flown it in both the Carbon Z and my Aeroworks Extra 260 powered with an E-Flite power 60 motor and found it adequate in both.  I don’t know what kind of warranty service I would get from the manufacturer/reseller, so it is hard to give a solid final opinion.  Overall I wouldn’t rush out to buy more at this point but at least it is more reasonably priced and compared to the E-Flite is a better value.

The 4 Glaciers are my favorites so far as they are some of the cheaper packs I have purchased and yet outperform (provide all the needed current and barely get warm!) my other packs and purportedly are as good as the best out there.  They certainly test out as excellent when I use my own internal resistance meter and according to my calculations they are the only batteries I have any personal experience with that might actually be able to sustain the rate that is implied by the label.  In addition the balance (measured IR) between cells is very close.  All this and they are in the same price range if not cheaper than the G-Force packs mentioned above.

Here’s a link to the web page where you can find these packs… Buddy RC

I have also had some limited exposure to Admiral and Thunder Power Packs in this range and the Admirals seem to to be on a par with most of the other packs out there and are in that same average price range.  The Thunder Powers I have experience with have been disappointing so far.  I am withholding final judgement as I have not had a chance to test a new TP pack in this range but the used ones I have played with have not measured up.   The price on them is premium and while I have always heard good performance reviews, my measurements and experience with some slightly used 70C (hah) 4400s gives me the impression that the 30C Glaciers are just as good if not better.  I do know from second hand reports that the TP folks will take care of their customers but that excellent service comes at a very steep price.  I’d love to say it’s worth it… If I have the opportunity to test some new packs I’ll be happy to report back but right now they won’t be getting any money from me.

On to some other concerns that I think are worth noting.  Firstly, you obviously want to make sure whatever you buy will physically fit and isn’t so heavy as to cause an issue.  In smaller planes, weight can be critical, so take this into account but for what I fly I haven’t seen a huge or at least unexpected difference.  Sure the Carbon Z Cub doesn’t have quite the straight up pull with a standard 4000mah pack as it does with a 3200… you do give up something for that weight.  But it’s still pretty spritely and it can fly for 15 minutes on the 4000 versus about 10 on the 3200.  One thing the C rating is good for is it seems that higher C rated cells tend to be heavier, so keep that in mind.

Second, take a good look at the gauge and type of wire being used to build these battery packs before you purchase.  I can tell you that if the balance leads are not very flexible, they are likely to break off at some point and now you have a potentially dangerous (to your personal property as well as your health) problem.  That loose wire can contact another terminal of the battery and cause a short or simply cause the charging of that cell to fail.  Next stop is a forced landing in a bad place or worse.  At a minimum you will be trying to repair that connection very soon and that means some fairly demanding dis-assembly and re-assembly of the pack.  It is not a task I would recommend to anyone who isn’t both knowledgeable of pack construction and fairly experienced with a soldering iron.  The main leads need to be both flexible and heavy enough to handle the current load as well.  The gauge of the wire is usually adequate in my experience but I have run across some that were made from very stiff wire which makes them difficult to connect and position properly in the aircraft.

Lastly, pay attention to the balance and load connectors on any pack you consider purchasing.  Of course it has to work with your charger and speed controller or you will need to adapt it to fit.  I don’t like using adapters on the load connector (in flight) as they just add another voltage drop and possible failure point so can affect both longevity of the model and performance.  I eventually will swap out whatever comes on the battery for whatever I deem appropriate for my use.  I am currently using some JST 2 pin (red) connectors on my smallest aircraft, Deans ultras on my mid size birds and EC-3s almost exclusively on my larger aircraft.

Great-Planes-MM3107-Female-2-Pin-Bec-Connector-22 Pin Red JSTs

Deans Ultra

Image result for ec3 connector

EC-3

The EC-3s are reasonably easy to assemble, make a good secure connection and are rated at 60 amps of continuous current flow.  So far I have only seen 70-75A for very short periods on my larger craft so these seem to be quite adequate.  Many folks favor the Deans, but they are only rated at 40A continuous and I find they become difficult to get soldered to 10 gauge wire without melting the housing and just about impossible on anything larger.  They work well for 12 gauge and smaller wire and I use them almost exclusively on my 3S powered craft where smaller wire and ~30A draws are more the rule.

On the balance connector pretty much everything I own uses the XH style connector.  It’s not my favorite in the world but it is almost universal these days which is a nice change.  I think Thunder Power is one of the few holdouts on this which I really don’t understand.  At this point they need to just concede the point and move to the XH with everyone else.

Big Electrics need big power… Packs, Chargers, Power Supplies and more

Recently, I’ve been spending more quality time with my electrics… especially my newer/larger electrics like the Carbon Z Cub and the AW Extra 260.  Both of these planes are a blast to fly and the AW is, if anything, even better since its conversion to electric.  I’ve almost gotten to my goal of only flying either electric power or gas (no glow fuel for me).  I recommend the AW Extra for a nice mid-size electric acrobat and the Carbon Z has a wide flight envelope combined with the ability to fly off floats, tow gliders and fly anywhere from wild to mild.  Both are great.

The only drawback to this whole scenario is that these bigger electrics need bigger batteries.  Bigger batteries need a bigger charger to charge them up and bigger chargers have bigger power needs…  In short a whole new series of challenges arise when you get into large electrics.  I’m working my way through all of them and have done a bunch of research and some experimentation of my own that I’d like to share.

First, let’s try to put some parameters around the size of the issue…  In my case, I started out in what I would call “large” electrics with the Carbon Z Cub.  This airplane uses 6S LiPo power with a recommended capacity of 3200mah.  Many folks fly larger capacity batteries in the cub to get some longer flight times with sizes up to 5000mah being common.  Two other conversions currently underway will use similar size power systems.  To charge a single 6S pack at a 1C rate takes a considerable amount of power.  For instance a 5000mah 6S pack means charging at 5A and ~25V.  Since power (expressed in watts) is equal to current in amps times volts that means about 125 Watts of power are required to charge just one of these batteries at a standard 1C rate which takes about an hour.  You can charge slower or faster of course.  If you don’t mind a 2 hour charge you only need 62.5 Watts… if you want a 30 minute charge than you need 250 Watts of charging power.

I was hoping to be able to charge 2-4 such batteries at once which means drawing as much as 500 Watts from my charger and power supply system for a 1 hour charge and up to 1000 if you want to get it done in 30 minutes!  Keep those numbers in mind.

My mainstay charger to this point was the Hitec X4.  This charger has 4 separate channels (independent charging outputs) which can each charge at a 50W rate.  For my previous usage where I would sometimes charge as many as 4 of the 3S 2200mah packs, this was not a problem.  At around 12V, the 2.2 A charge rate only required ~27 Watts….  No problem.  Four batteries charged in an hour with only a little over 100W of input power was easy to take care of.  Even pushing all four to double the charge rate (or nearly so) was within reach at the max 200W combined output of this charger.  A small 12V supply capable of 20amps or so was more than enough to supply the needed power and the 200W load was easily supported by my existing 900W cheap-o generator.  Unfortunately this is clearly inadequate for these 6S packs.  At the maximum output of a single channel of the Hitec, the maximum charge rate into the 6S pack is about 2A.  A 5000mah pack is going to take 2.5 hours to charge.  That’s a long way from the performance I’m looking for.  For smaller jobs, the Hitec is still a great charger that I expect to continue to use and highly recommend.  If 3 or 4 cell 3000mah or smaller packs is all you need… it is a fine choice.  The one I have linked to here is a slightly newer and higher power version of what I have and would work reasonably well for up to 4 cell 5000mah packs or even 6 cell 3000mah packs at 1C charge rates.

Since I already know I want to run 6S 5000mah (max for now) batteries and I want to charge 2-4 packs in 30 minutes, I can start shopping for a charger, power supply and generator (if needed) and of course a few extra flight packs!  I’ll try to do a few posts in the near future outlining the buying decisions I made in each case and how they affected each other.  Let the fun begin.