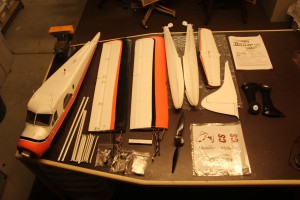
Started unpacking and inspecting the Flyzone Beaver.
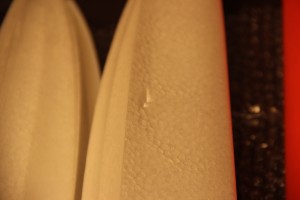
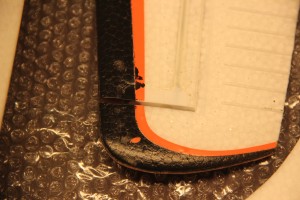
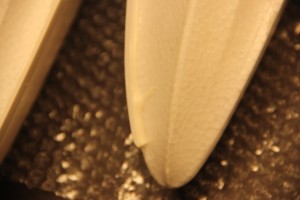
Pulled all the parts out of the box, removed all the bubble wrap and scanned for damage. Worst ding is in one of the floats – took a picture or two as I went.
I guess my hopes were pretty high after reading 185 pages (not finished yet) of the discussion thread on one of the popular RC sites. So far I’m not overly impressed.
Yes, the flaps and ailerons are actuated in a very scale appearing manner, the overall lines are nice as well and its great to get the nice lighting package already installed. Having the option to run floats or wheels with both included is wonderful too. However…
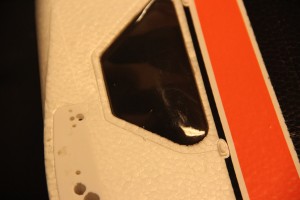
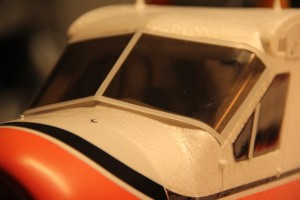
I’m gonna blame the amount of dings/scuffs/scratches etc… on the packing method. Sure most things are wrapped in some micro-bubble wrap and the inboard ends of the wings where all the linkage and joiners stick out were covered in cardboard… but somehow things managed to vibrate/rub and bang into each other on their way here. In addition to the ding in one float, the landing gear “fairing” where it meets the body of the plane on one corner is slightly crushed and almost broken off. The bottom of one wing has a groove in it where something rubbed or pushed up against it and there are a few others similar spots. Most notably the side windows which bubble out nicely (very cool looking) are both scuffed/scraped up (very not cool looking).
None of this damage is really bad but it seems to me that if Flyzone had gone one extra step and after bubble wrapping everything simply taped all the pieces to the box (like others do) the chances of damage of this type would have been significantly decreased. I’ll get over it but when you buy something new it would be nice if it looked new!
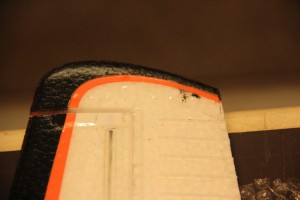
In addition there are lots of other small things that add up to my overall feeling of disappointment. Many places the orange decals were applied to the foam with what appears to be sand grains under it forming small but noticeable protrusions. The bottom of the horizontal stab has some nasty smears where it appears the black ink/paint ran over the orange and one spot where it looks like the orange dripped on the black. Luckily its on the bottom so I guess most folks won’t ever see it. Hard to spot at 50 feet and 50 mph!
Oh, and the whole front windscreen is loose. Doesn’t look like it was ever glued in properly and I guarantee the airflow around it would certainly have it coming loose in flight in the first 5 minutes if I don’t re-glue it. Lucky I’m a modeler! Speaking of glue, whatever they use it is apparently difficult to get in the right place. There are many places where glue has been… let’s say “generously applied”, resulting in some sloppy looking glue joints and then others like the windscreen where glue appears to be sadly lacking. Not sure yet what I’m going to do with the over application areas… trim back… leave alone. We’ll see.
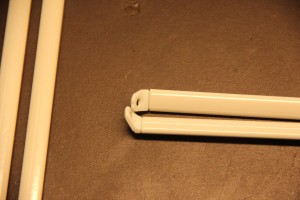
Just looking over the plane and realizing that its going to be a job to hook up and route all the wires away where they won’t be obvious and getting the servos to hook up and adjust things through that small top hatch is likely to be a challenge but that wouldn’t be so bad if they had found a better way to attach the wings. Why not put a servo in each wing for the flaps so we could avoid all that routing of the wire push rods while simultaneously having to get all three (yep, three!) wing joiner tubes to line up correctly? Seriously, 3 rods?? Countless other wings use 1 wing joiner tube. Oh, and the struts are apparently held on with screws in plastic so taking them on and off many times seems to me to be problematic at best. How many times is that going to work before I strip the holes, the screw heads or lose them altogether? Did I mention the struts appear to be two different lengths? I don’t think that’s right, is it?
The result of all this unnecessarily complicated assembly is that taking the wings on and off is going to be a royal PITA which I likely will just forgo. Luckily I have an SUV and a trailer to haul my airplanes as I can’t see taking these wings on and off on a regular basis. Oh, and changing back and forth from wheels to floats… not sure how easy that is going to be and that is exactly what I’m going to want to do!
I just can’t figure out what this airplane wants to be… With all the build issues, minor damage, etc… it just doesn’t measure up as a scale bird for me. On the other hand, with the limited utility of the wings being essentially fixed and a bit of an upscale price (for a small foamy) it doesn’t seem to fit into the “everyday, keep it in the trunk and just fly it” category either and that is a bit disappointing to me. I was hoping for something a bit “prettier” than my Parkzone T28 that would be as easy to “just go fly”. That doesn’t seem to be the case here.
The Beaver would make a great scale project… strip it down and fix all the issues, re-paint and add details to your hearts content. Maybe that is the real niche for this plane. Unfortunately, I wasn’t really looking for a big project!
I’m just hoping once I get it all done I’ll enjoy the flying qualities and especially the float flying capabilities so much I can overlook the drawbacks. Perhaps as I progress, I will see some more positive attributes, find out things are better than I think and generally learn to love the Beaver. Updates soon.

I just received my FZ Beaver and have several issues you’ve reported (dings, bent corners, paint, and my top light was broken off and smashed into the fuselage). I didn’t even bother building it and have promptly returned it. Who is fine buying a brand new car that has dents in it? Not me.
Was looking foreward to my scale rc plane. Was disappointed by the construction
Problems described by other rc’er. Especially the stupid way the wings attach the
Fuseledge. Not to mention the problem getting to the elevator and ruddet
Servoes to make adjustments. Hope you have small hands or alot of good
Long nosed needle nosed plyers. Now for the maiden flight. The beaver took off
Like a typical high wing ttrainer. Ailerons provided a adiquate turning ability
And was genetally a nice experience. Was setting up for a landing. This was my first experience with a flap equipped plane and forgot about drploying them on landing.
Did not use them for take off eather. To make a long story short, i came in a little
Hot. Flaired for landing. As a result both landing gear tore out of the fuseledge.
Big chunnks of foam tore out at the landing gear attachment points.
I attempted to repair with epoxy and glass cloth which held up for a few flights
But eventually. Broke loose again. It resulted in my purchasing a new fuseledge.
While reassembling the plane ( major PITA reinstaaing the elevator and rudder
Servoes. In that tiny access space) . and rerouting servo wires.).
I discovered another pvroblem. The carbon ffiber single rod on the right wing was cracked right at the wing root. After much strong language and throughing a
General temper tantrum was ready to stomp the little beaver into obliviun.
After calming down a little I came up with a solution. I found a hard wooden dowel the same inside diamiter of the carbon rod. I then cut a length from the end of the
Carbon rod to approximately 2 inches inside the wing root. I then applied a liberal amount of 5 minute epoxy to the d owel and slid it inside the carbon rod. Problem solved. The Beaver is now completely reassembled. Only change is instead of the landing gear i have installed the floats. Another PITA but manageable . also the
Pontoon rudder steering system is rather silly but works. Well since i live directly
Across from a good size recreational lake, it seems like a good chance to try my hand
At float flying. Stay tuned.