
It has been a while and my job keeps getting in the way of having fun… but I’ve finally started making progress again on the Telemaster conversion to electric power. Here’s some updated photos…
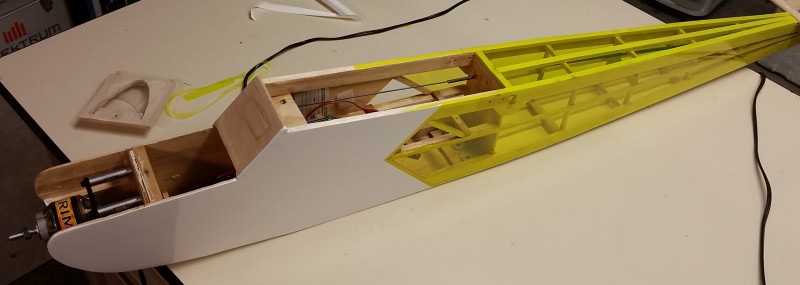
First you can see here the body with the transparent yellow Ultracoat applied to the open areas of the body. Basic white on the areas that are solid balsa/plywood or sheeting. That’s my basic theme with the addition of some white on leading edges and wingtips. Sort of a “visual airplane” so folks can see what is inside… I guess I’ll have to keep it neat inside when I go to install the servos etc…!!
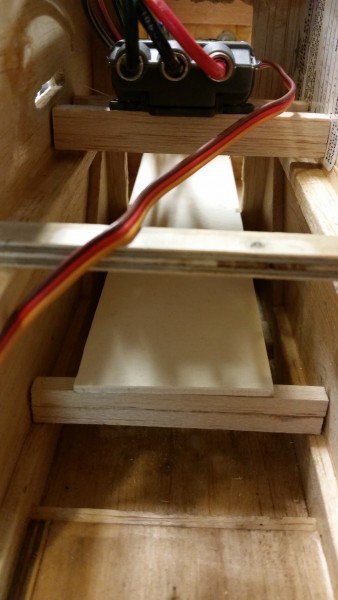
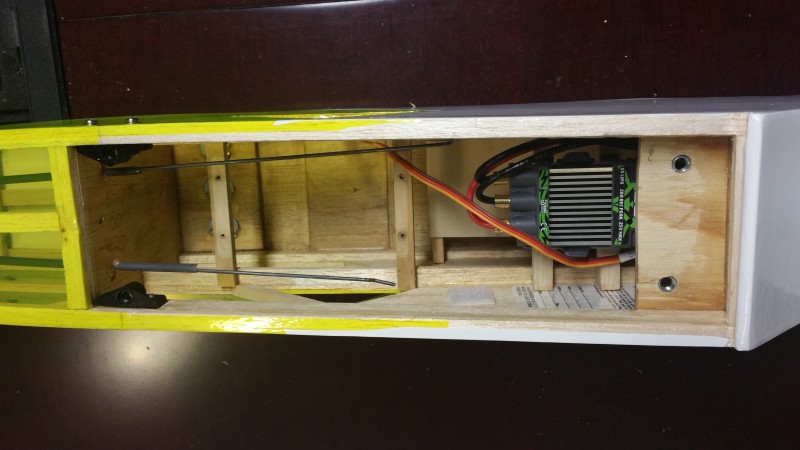
Inside I installed a couple rails to mount the speed controller and a shelf in the bottom to give the battery a secure place to rest. I’ll add some velcro straps later. Here’s a view from the wing saddle area looking forward.
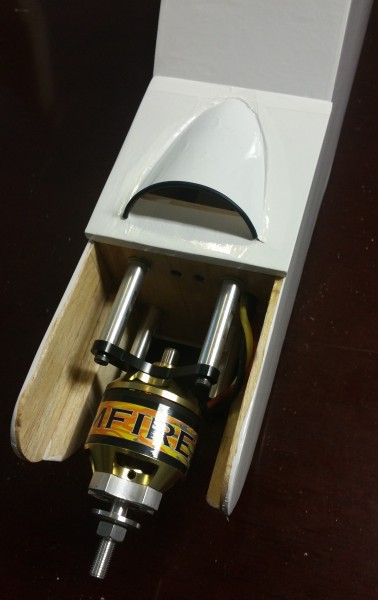
Here’s some closeups of the modifications to the forward hatch. I needed some airflow over the Castle Creations Talon 90 speed controller and the expected 6S battery! If you look closely up above, you can see where I opened up a triangle on each side of the fuse for air to exit the fuse. With this forced air inlet I’m hoping to keep everything cool.
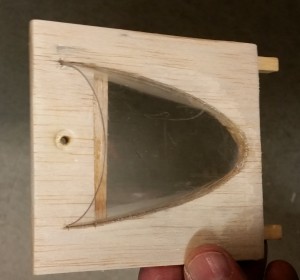
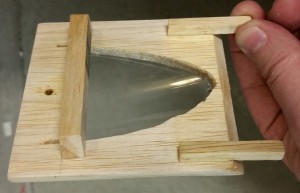
Essentially I just cut a piece out of a plastic soda bottle that looked vaguely “scoop” shaped and then traced around it on the hatch and hacked away the opening with a sharp Xacto. I added the forward brace to keep this all balsa hatch stiff and then used med/thick CA to hold it all in place. Adding some covering and a little rubber “combing” to the front edge later makes it all look pretty good!
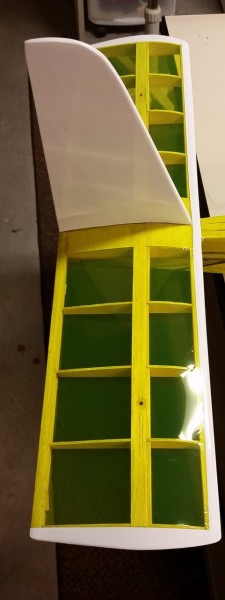
Following the pattern already established I tackled the stabilizer area… solid vertical gets white and horizontal the transparent treatment. White adds a nice touch on the tips and leading edge plus helps seal it all up. That vertical will make a nice place for some added detail later… lettering, stripes, decals or whatever suits my fancy.
I’ve also been working on the wing to make the assembly easier. No more rubber band wing attachment!! Now 4 bolts will hold the wing in place. Less room for error perhaps but so much easier to get ready to fly and no re-trimming due to alignment of the wing variance.
Here is the wing center area.

As you see I cut into the top of the wing just behind the leading edge and installed some beefy plywood to give me a strong and flat surface to bolt to. Its epoxied to ribs on both sides and the bottom sheeting so I don’t think it’s going anywhere. In the back you can see the little wedge shaped hardwood blocks I cut and sanded to size then epoxied to the existing hardwood plate on top of the wing.
Here is the saddle area of the fuselage.
At the right you can see the plywood plate I installed in the forward fuselage area. It sits right under one of the main longerons and epoxy is again used to secure to the front bulkhead, fuselage sides and longerons. In the rear are some commercially made plastic bolt on inserts that have nice tight 1/4-20 threads cut in them. I can’t recall who made them but I had them laying around so I went that way rather than do another plywood insert. Due to the light construction of this aircraft there is no hardwood in the wing saddle area in the original design but since the aircraft is so light, I’m hoping these will hold without any more reinforcement. If I see play developing I may have to reinforce later. I’ll keep a sharp eye on it!
Some of you eagle eyed types may have noticed that my front bolt holes are not exactly “exact”! When I drilled those through the wing and down into these plates my trusty TLAR method (That Looks About Right) allowed for a bit of drill bit wander. I was concentrating on making the holes straight up and down so the bolt heads would sit nice and flat on the plywood and didn’t notice the discrepancy. I don’t think it really matters… the idea is to be secure, right! I’m pretty sure no will notice as it floats by at 20′ altitude and 20 mph.
That about covers the last few months of progress! I expect to get some more significant work done over the holidays… or maybe not as I have two other (or is it 3 or 4 or …) projects laying around I want to get back to as well. Oh, and there are 3 or 4 guys that have some winter projects they want to bring over… Which ever project or projects get some bench time, I’ll try to update here. Looking forward to any suggestions or comments you all might have. Feel free to post below.